AR54.21-P-0006GH Remove/Install All-Activity-Module (AAM) Control Module
Remove/Install All-Activity-Module (AAM) Control Module
Remove, Install
1.1 Read out coding of the All-Activity-Module (AAM)
NOTE: Only when replacing the AAM and if it can still be read out using STAR DIAGNOSIS.
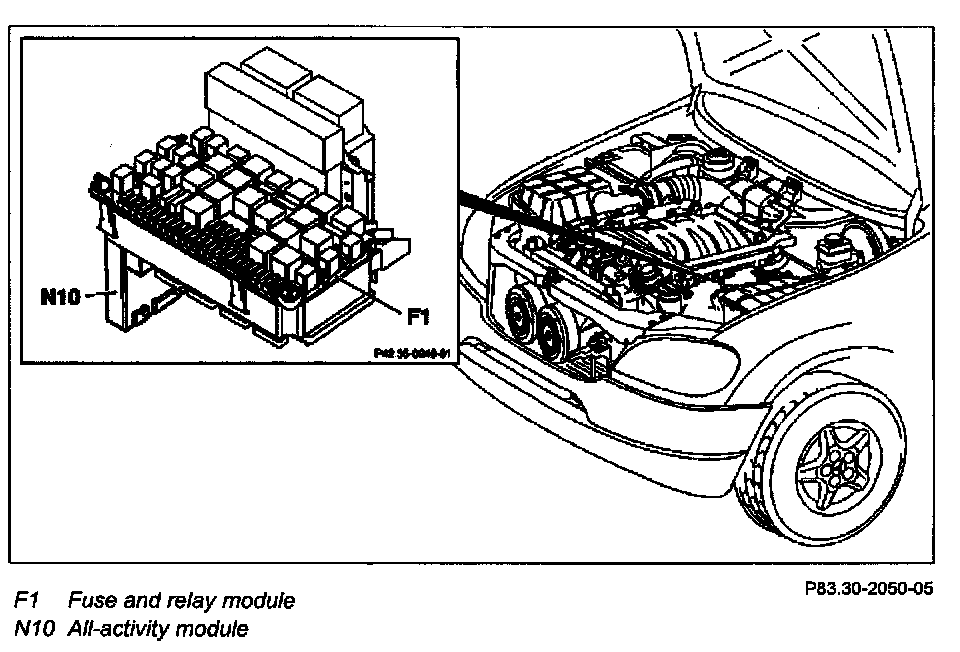
2 Remove covers of fuse and relay module
NOTE: 5 screws.
3 Unscrew and lift up fuse and relay module (F1)
NOTE:
- Do not bring any live lines into contact with ground.
- 2 bolts.
4 4 Carefully disconnect connectors and two-way radio antenna from the All-Activity-Module (AAM) (N10)
5 Remove the AAM by pushing out of the fuse and relay module
NOTE:
- Do not bend the connector pins.
- Exert slight pressure on the connector side of the AAM in order to release the retaining damps. The clamps are located at the top on the flat side and in the center on the connector side of the AAM.
6 Install in the reverse order
7.1 Code AAM
NOTE:
- Only when installing a new AAM.
- Follow the instructions on the screen.