AN82.64-P-0001-02VA Retrofit CD Changer In Stowage Compartment
AN82.64-P-0001-02VA Retrofit CD Changer In Stowage Compartment
Risk of breakage: Do not kink optical waveguide, route over sharp edges or bend in radii smaller than 25 mm. Tensile forces on inserts must not exceed 65 N. Do not squeeze fiber optic cable and do not compress with clamps or cable ties.
1 Remove the two adhesive strips (a).
2 Remove transport fastening (2) at the top of the CD player with changer (in glove compartment) (A2/6).

3 Push in CD-player with changer (in glove compartment) (A2/6) in CD changer bracket (1) and fasten with countersunk head screwsM4X8 (6).
Do not damage electrical line and MOST fiber optic cable.
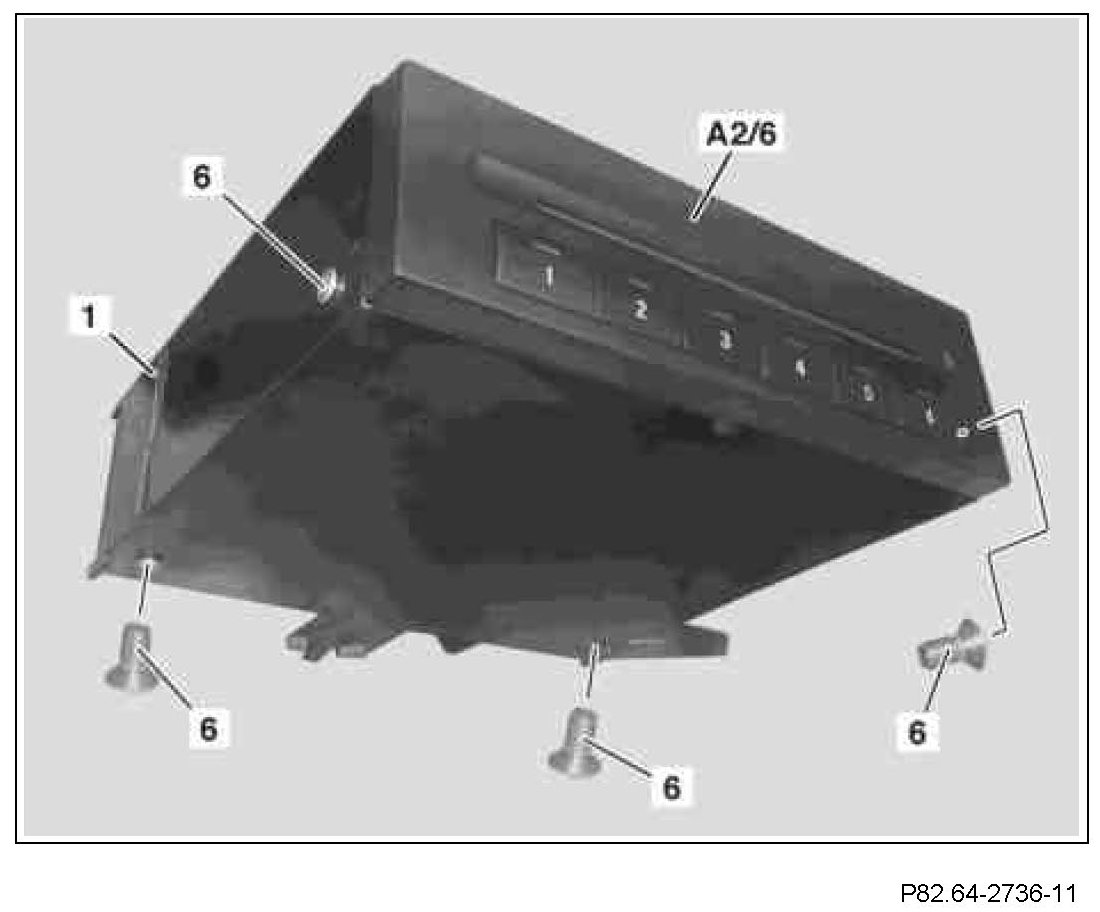
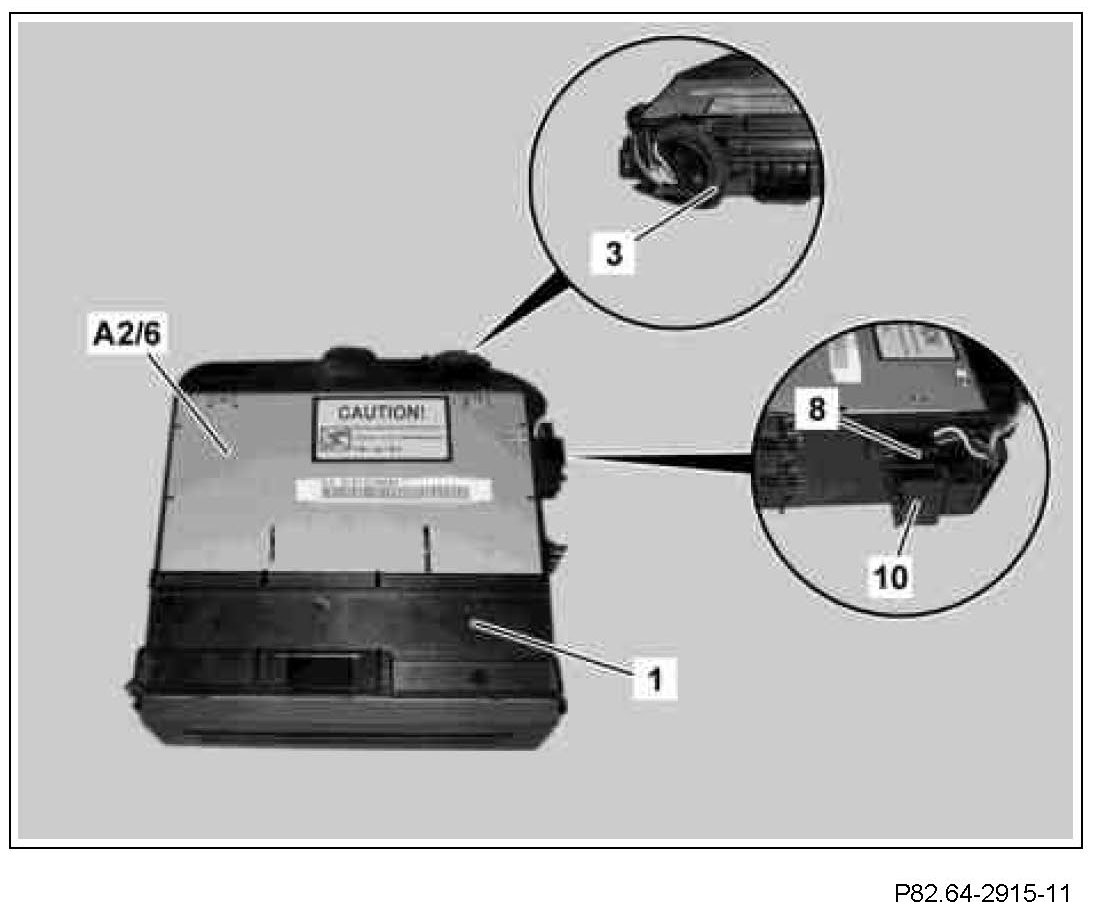
4 Place lines (3) of the CD player with changer (in glove compartment) (A2/6), as per the picture, around the guide on the CD changer bracket (1).
5 Clip the black, 3-pin connector (8) into the CD changer bracket (1).
6 Clip MOST-connector (10) into the CD changer bracket (1).
Do not damage electrical line and MOST fiber optic cable.
7 Expose line branch-off line (24) (CD changer voltage supply) with black, 3-pin plug (7) of the standard wiring harness (23).
Branch-off line (24) is strapped down at standard wiring harness (23) below instrument panel (22) on right with a tie strap. The black, 3-pin plug (7) is fastened to the line branch-off line (24) with adhesive tape.
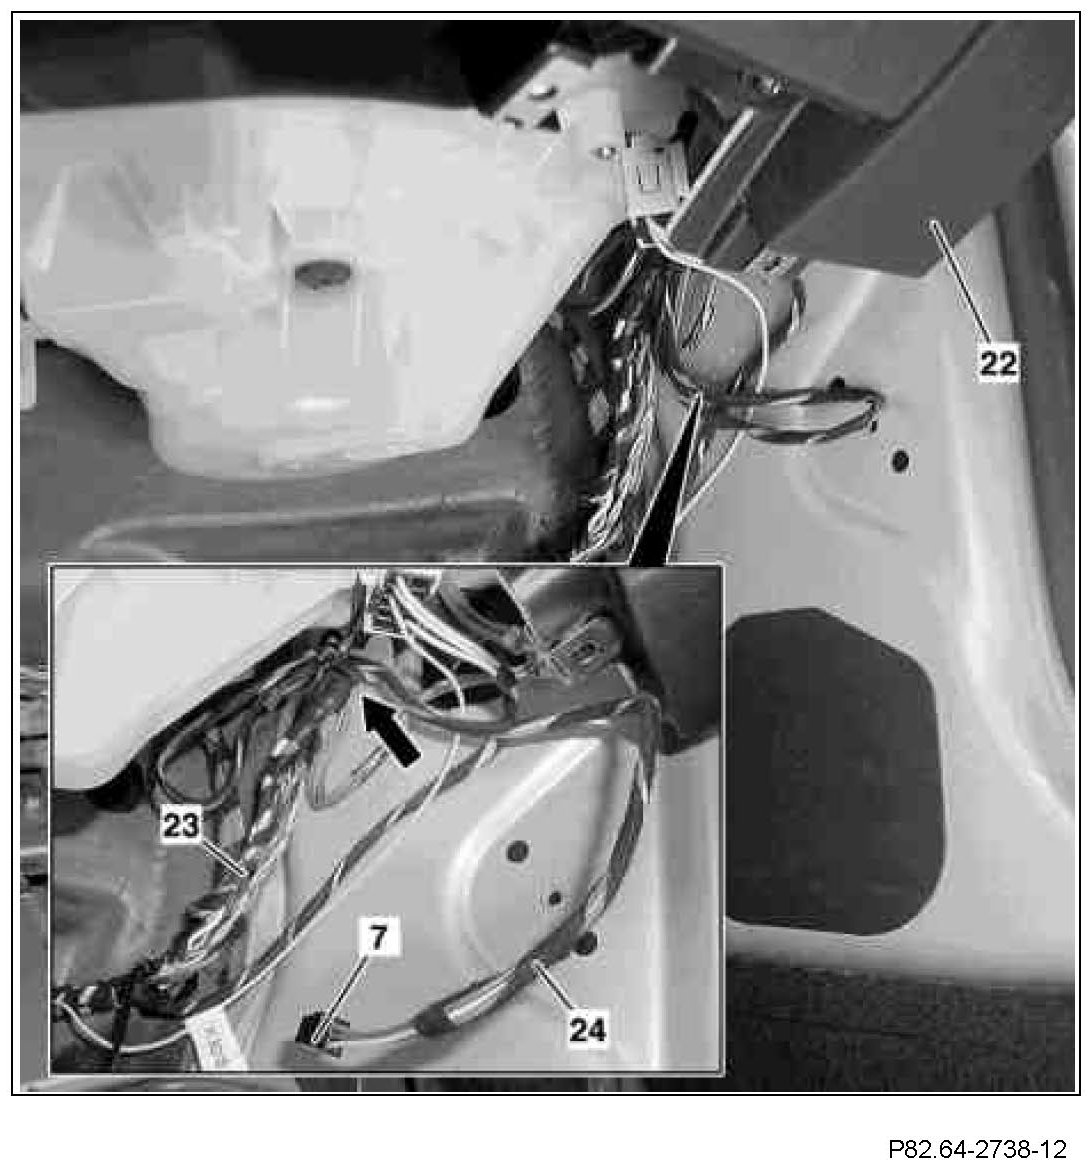
8 Guide the line branch-off line (24) with black, 3-pin plug (7) from the right of the footwell through the recess (see arrow) in the glove compartment.
Component Identification:

9 Remove preperforated surface (5) from the glove compartment.
10 Guide the CD changer bracket (1) in the top of the glove compartment into the cutouts and push forwards into the glove compartment.
Do not damage electrical line and MOST fiber optic cable.
The retainer tab (4) of the CD changer bracket (1) must latch in position in the opening (5) of the glove compartment.

11 Contact the black, 3-pin plug (7) with the black, 3-pin connector (8) on the CD player with changer (in glove compartment) (A2/6).
12 Connect MOST connector housing (11) with MOST connector (10) to CD player with changer (in glove compartment) (A2/6).
Do not damage electrical line and MOST fiber optic cable.

13 Strap down excess length of branch-off line (24) free of tension to standard wiring harness (23).

14 Insert the cover (12) next to the CD changer bracket (1).
Do not damage electrical line and MOST fiber optic cable.
The retaining lug (see arrow) of cover (12) must latch in position in the cutout for the cable duct of the glove compartment

15 Install covering (20) around the CD player with changer (in glove compartment) (A2/6) at the CD changer bracket.
The retainer tabs (21) of the covering (20) must latch in position in CD changer bracket.

Operation steps 16.1 and 17.1 must only be carried out if the CD player with changer (in glove compartment) cannot be put into operation.
16.1 Check whether the fuse 19 (arrow) is plugged into the rear SAM control unit with fuse and relay module (N10/2).
17.1 Plug in a fuse with an ampere rating of 7.5 amps.
