AR54.21-P-1258T Remove/Install Sam With Fuse and Relay Box, Rear
AR54.21-P-1258T Remove/Install Sam With Fuse and Relay Box, Rear
1 Connect STAR DIAGNOSIS and stage basic data from rear SAM control module with fuse and relay module (N10/2) in STAR DIAGNOSIS
NOTE:
- Only when installing new rear SAM control module with fuse and relay module (N10/2)
- Installation: Transfer staged basic data to new rear SAM control module with fuse and relay module (N10/2)
- Diagnosis system STAR DIAGNOSIS
2 Disconnect ground cable of battery
3 Remove left side trunk lining in trunk
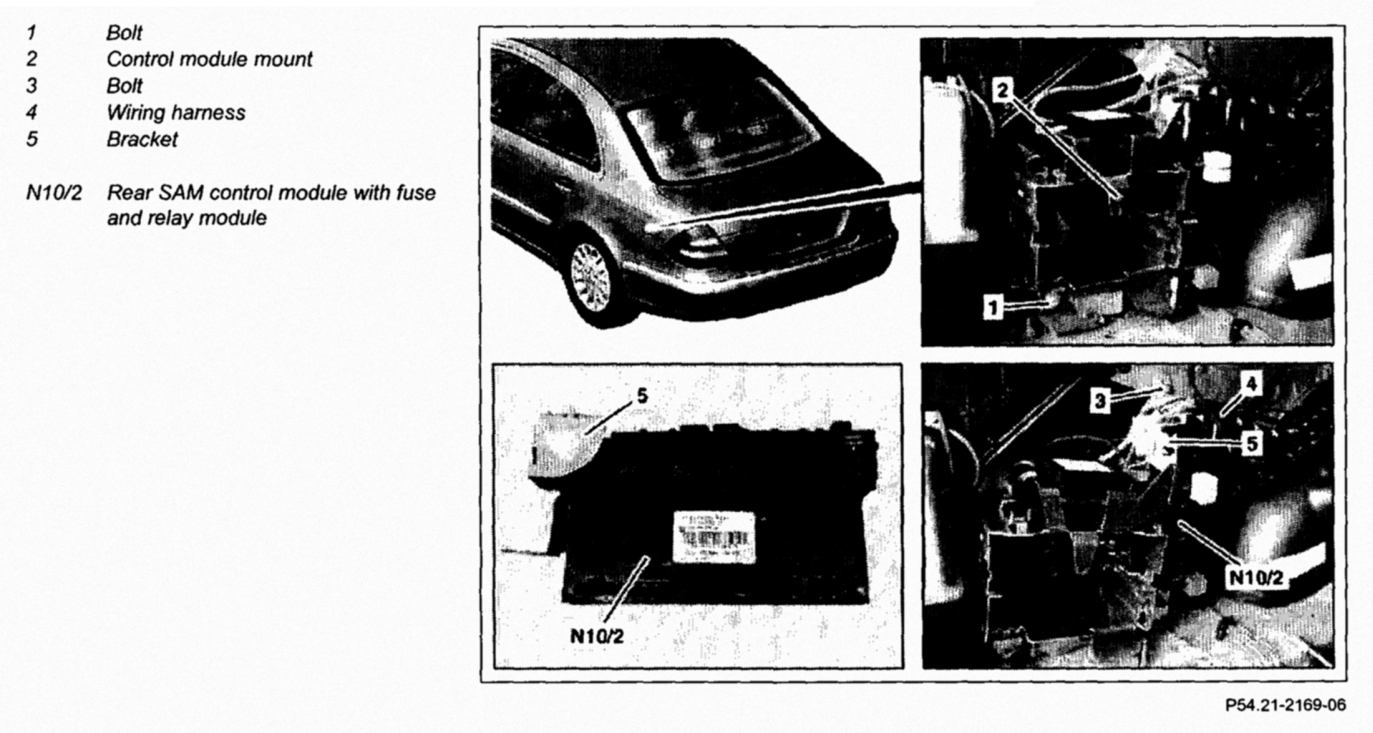
4 Unscrew bolt (1), remove control module mount (2) and place to one side
5 Unscrew screw (3)
6 Remove wiring harness (4) from bracket (5)
NOTE: Installation: Replace tie straps
7 Unplug electrical connectors from rear SAM control module with fuse and relay module (N10/2)
NOTE: Number of electrical connectors depends on vehicle equipment
CAUTION: Installation: Ensure that none of the electrical lines are pinched, pay attention to color coding of electrical connectors Otherwise electrical system could be damaged.
8 Remove rear SAM control module with fuse and relay module (N10/2)
9 Install in the reverse order