Windshield: Service and Repair

SPECIAL SERVICE TOOL(S)
REMOVAL
WARNING: TO PREVENT GLASS SPLINTERS FROM ENTERING THE EYES OR CUTTING HANDS, WEAR GLASSES AND HEAVY GLOVES WHEN CUTTING GLASS FROM THE VEHICLE.
1. Remove the interior rear view mirror. For additional information, refer to Mirrors.
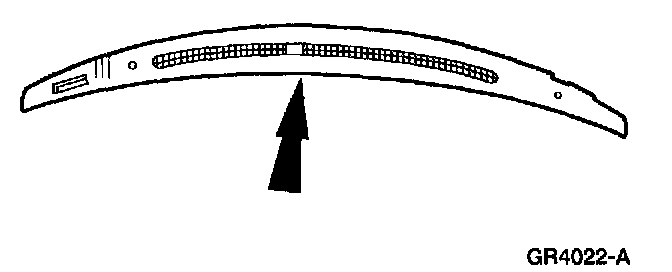
2. Remove the instrument defroster opening grille assembly.
^ If equipped, disconnect the electrical connector.
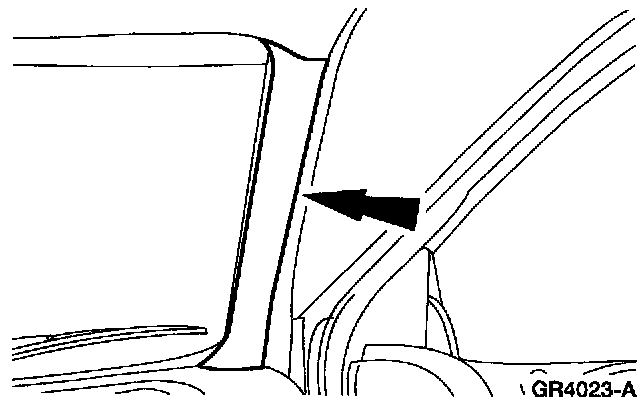
3. Remove the RH and LH windshield side garnish moulding.
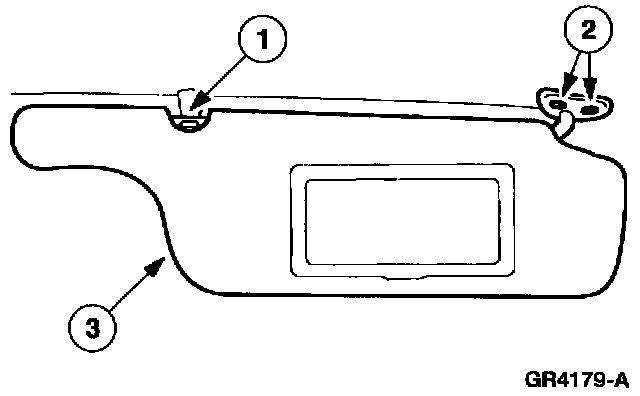
4. Remove the sun visors.
1 Position the sun visors aside.
2 Remove the three screws.
3 Remove the sun visor.
^ If equipped, disconnect the electrical connector(s).
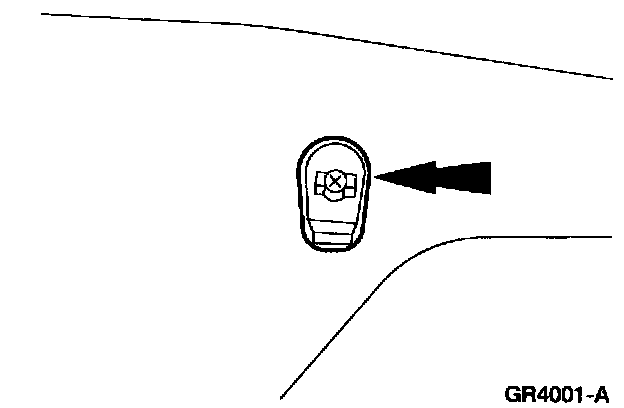
5. Remove the sun visor clips.
^ Remove the screws.
6. If equipped, remove the overhead console. For additional information, refer to Console.
7. Lower the front portion of the headliner.
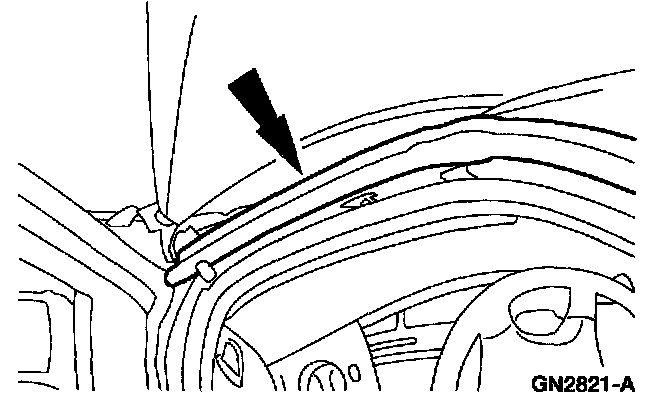
8. Position the door opening upper weatherstrips aside.
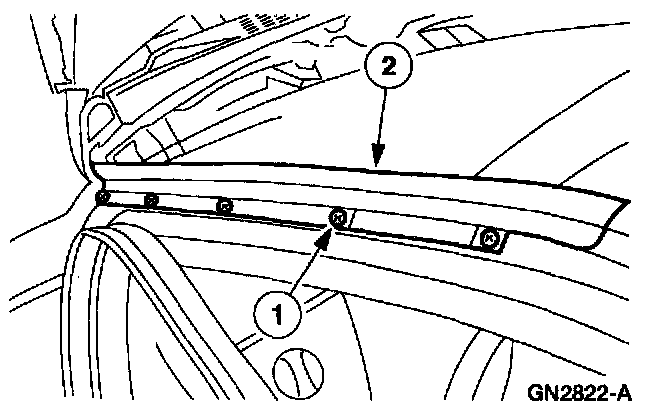
9. Remove the exterior A-pillar trim panel.
1 Remove the screws.
2 Remove the exterior A-pillar trim panel.
10. Remove the windshield exterior moulding.
11. Remove the cowl grille.
12. Using a soft brush or vacuum, remove any dirt or foreign materials from the pinch weld.

13. Using the special tool, start at the top center of the windshield and cut the urethane sealant away from the glass working down the sides.
CAUTION: Care must be taken to avoid scratching the pinch weld.
NOTE: Lubricate the existing urethane sealant with water to aid the special tool while cutting.

14. Using the special tool, distance the windshield from the body.
15. Using the special tool, cut the remaining urethane sealant and remove the windshield glass.
16. Using a soft brush or vacuum, remove any dirt or foreign materials from the pinch weld.
INSTALLATION
CAUTION: After installing the urethane-installed glass, the vehicle should not be driven until the urethane sealant has cured. The curing times at temperatures above 13°C (55°F) and relative humidity above 50% are 12-24 hours(decreasing at higher temperatures and lower humidities). Inadequate curing of the urethane sealant may adversely affect the strength of the urethane sealant bond.
1. Dry-fit the windshield glass by centering it side-to-side and by adjusting the setting blocks (if equipped) to get the correct position top-to-bottom. Make alignment marks with tape or non-staining grease pencil on both the glass and the vehicle body.
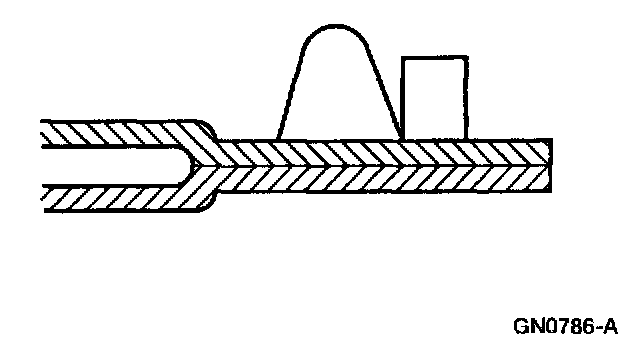
2. Trim the remaining urethane sealant on the pinch weld using only the full-cut method, leaving a level bead around the entire pinch weld.
CAUTION: Care must be taken to avoid scratching the pinch weld.
3. Use the wool applicator to apply Urethane Metal Primer Essex U-413 meeting Ford specification WSB-M2G234-C to any exposed metal on the pinch weld. Allow six to ten minutes to dry.

4. Install Norton Foam Sealant 565 Black Foam Tape meeting Ford specification WSB-M3G77A to the pinch weld.
5. If reinstalling original windshield glass, remove the excess urethane sealant from the windshield glass.
6. If installing a new windshield glass, clean the inside of the glass surface with an alcohol-free cleaner to make sure the ceramic-coated area is clean.
7. Apply Urethane Glass Prep Essex U-401 meeting Ford specification WSB-M2G314-B twice around the glass surface to be prepped.
CAUTION: Wipe off the urethane glass prep immediately after each application because it flash dries. Apply deliberate strokes, making sure not to overlap the applied area.
8. Apply Urethane Glass Primer Essex U-402 meeting Ford specification WSB-M5B280-C to the same area that was prepped in the previous step. Allow five minutes to dry.

9. Cut the urethane sealant applicator tip to specification.

10. Apply a bead of Urethane Sealant Essex 400-HV or Essex U-216 meeting Ford specification WSB-M2G316-B to the pinch weld just outside the foam tape dam.
CAUTION: If the vehicle is to be driven within 24 hours of urethane sealant application, Urethane Sealant Essex U-216 meeting Ford specification WSB-M2G316-B must be applied due to its one-hour cure time.
11. Using the alignment marks, install the windshield glass.
CAUTION: Open the windows to prevent the windshield glass from being pushed out by air pressure if a door is closed.
12. After the glass is set, check for water leaks and add urethane sealant where needed.
13. Install the cowl grille.
14. Install the windshield exterior moulding.
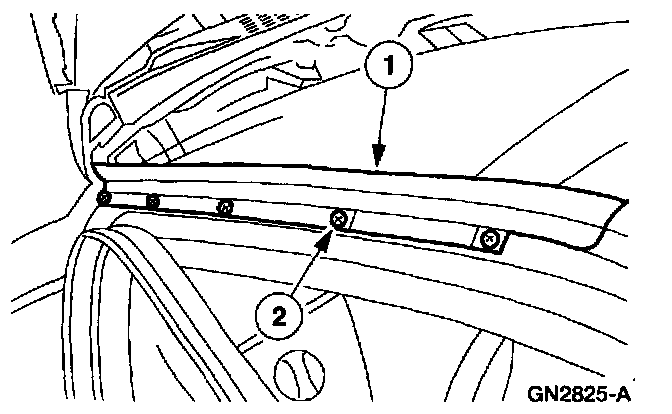
15. Install the exterior A-pillar trim panels.
1 Position the trim panel.
2 Install the screws.
16. Install the upper door opening weatherstrips.
17. Install the front portion of the headliner.
18. If equipped, install the overhead console. For additional information, refer to Console.
19. Install the LH and RH windshield side garnish mouldings.
20. Install the instrument defroster opening grille assembly.
^ If equipped, connect the electrical connector.
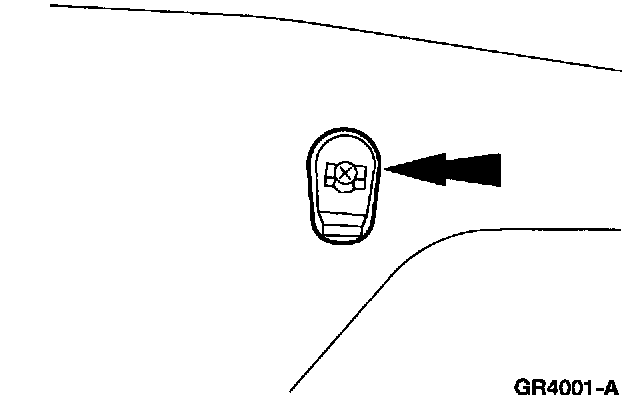
21. Install the sun visor clips.
^ Install the screws.
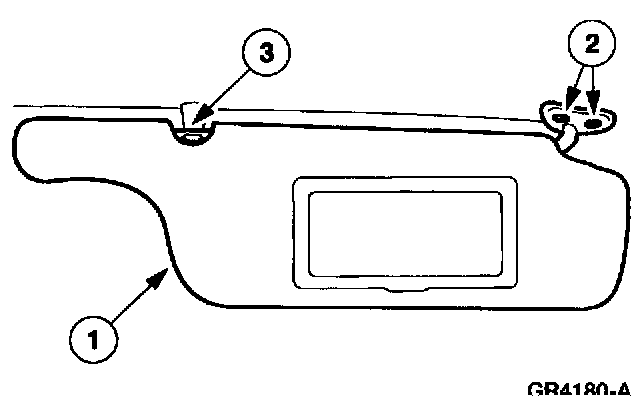
22. Install the sun visors.
^ If equipped, connect the electrical connector(s).
1 Position the sun visors.
2 Install the screws.
3 Position the sun visors into the sun visor clips.
23. Install the interior rear view mirror. For additional information, refer to Mirrors.