Removal
Fig. 29 Exploded View:

1. Remove the radiator fan shroud. Fig. 29.
2. Remove the fan and fan clutch. Fig. 29.
Fig. 30 Timing Marks:
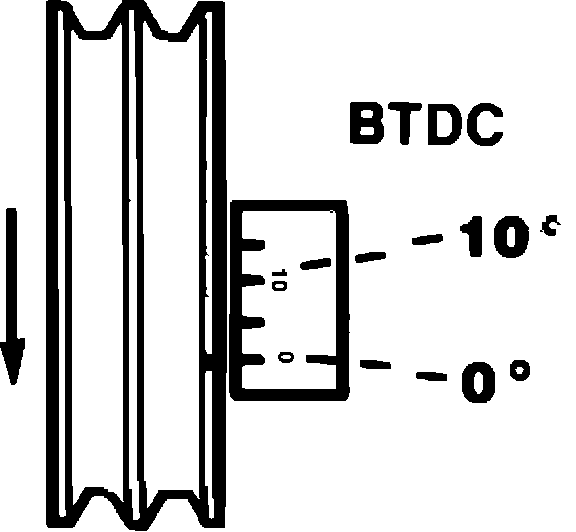
3. Turn the engine clockwise and align the timing marks so that the engine is on TDC #1 cylinder. Fig. 30
CAUTION: The engine must only be turned in the clockwise direction.
4. Remove the power steering belt and tensioner. Fig. 29.
5. Remove the A/C belt and tensioner (if equipped). Fig. 29.
6. Remove the alternator belt. Fig. 29.
7. Remove the water pump drive pulley (and P/S pulley if equipped). Fig. 29.
8. Remove the lower damper pulley and adapter (if equipped). Fig. 29.
9. Remove the crankshaft pulley. Fig. 29.
10. Remove the upper timing belt cover and gasket. Fig. 29.
11. Remove the lower timing belt cover and gasket. Fig. 29.
12. Remove the crankshaft sprocket bolt and thrust washer (do not remove the sprocket). Fig. 29.
Fig. 2 Timing Marks:

13. Check the mark on the camshaft sprocket in relation to the mark on rear timing cover. Fig. 2.
Fig. 3 Timing Belt "A" Rotation:
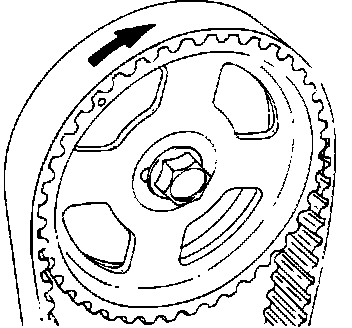
14. Mark the timing belt as to what direction it rotates if it is to be re-used. Fig. 3.
Fig. 4 Timing Belt "A" Tensioner Bolts:
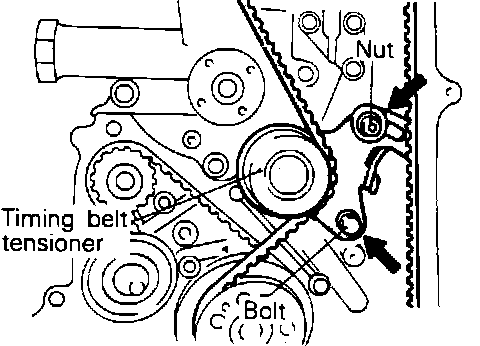
15. Loosen the timing belt "A" tensioner bolts. Fig. 4.
Fig. 5 Releasing Timing Belt "A" Tension:
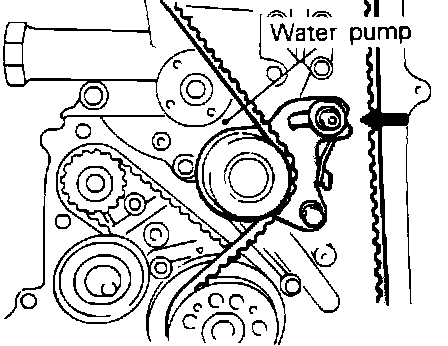
16. Push the tensioner towards the water pump and snug the top bolt to hold the tensioner in position and remove the timing belt. Fig. 5.
NOTE: If the belt is to be re-used, it must not be contaminated by coolant, oil or other chemicals.
Fig. 6 Access Plug For Left Silent Shaft:
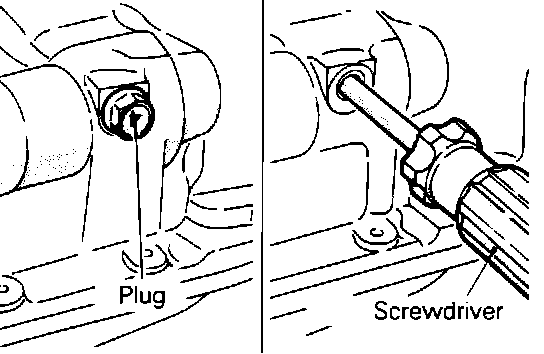
17. From under the vehicle, remove the plug/bolt at the rear of the left silent shaft. Fig. 6.
18. Insert a Phillips head screwdriver (shaft diameter .31 in./8 mm) to prevent the silent shaft from turning. Fig. 6.
NOTE: Do not use a hardened tool (punch). It is more prone to breakage than a softer tool (screwdriver).
Fig. 7 Timing Belt "B" Rotation:
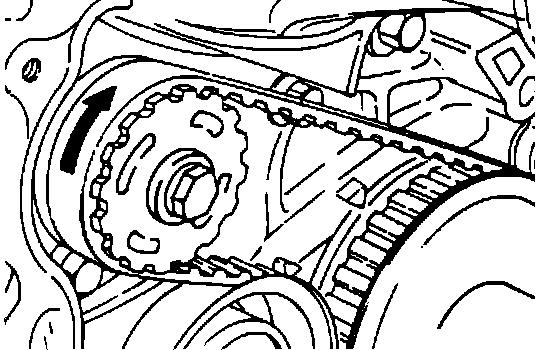
19. Mark the timing belt as to what direction it rotates if it is to be re-used. Fig. 7.
Fig. 14 Releasing Timing Belt "B" Tension:
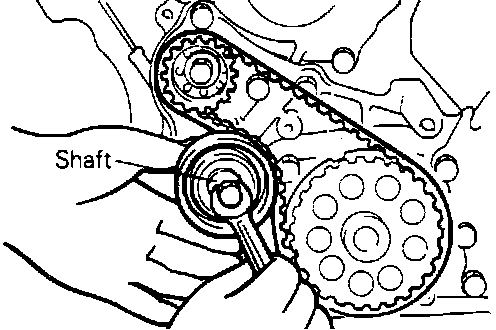
20. Loosen the timing belt "B" tensioner and rotate the tensioner counterclockwise. This will release the tension on the belt. Fig. 14.
21. Tighten the bolt to hold the tensioner in place. Fig. 14.
22. Remove the outer crankshaft sprocket.
23. Remove the "B" timing belt. Fig. 29.
Fig. 8 Timing Belt Inspection:
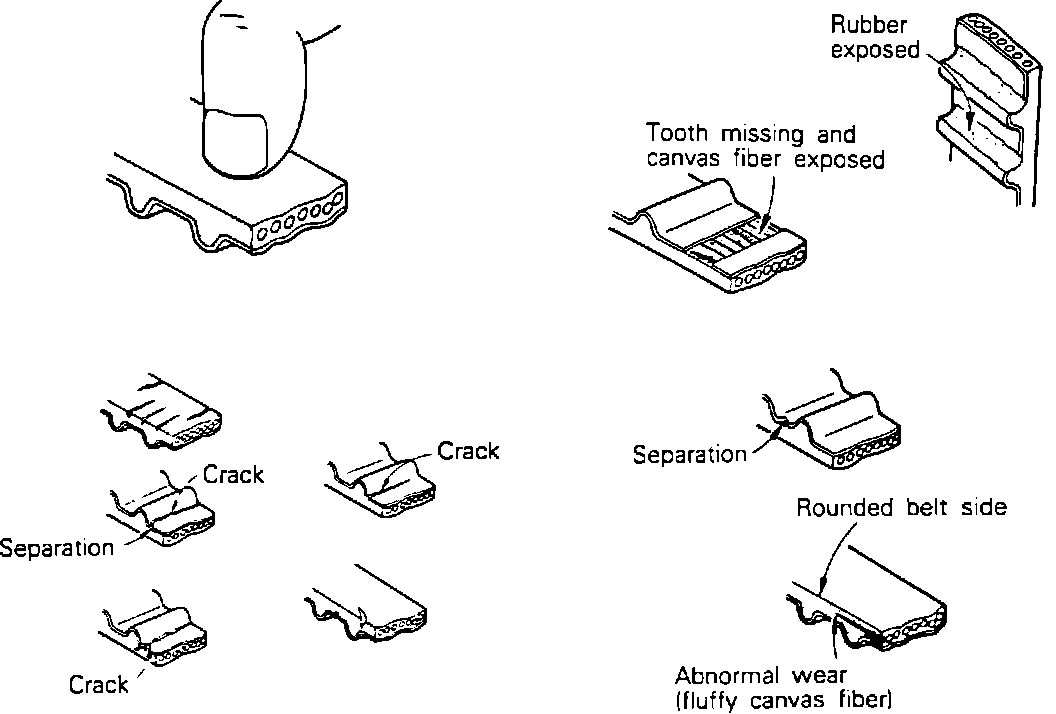
24. Visually check the belt for the following and replace if any defects are found: Fig. 8
- Hardened back surface rubber.
- Glossy, non-elastic back surface rubber.
- Cracked back surface rubber.
- Cracked or separated canvas.
- Cracked tooth bottom.
- Cracked sides.
- Abnormal wear on sides.
- Missing or worn teeth.
NOTE: A normal belt will be very elastic and the sides will very sharp, as if cut with a knife.
Fig. 9 Tensioner Inspection:
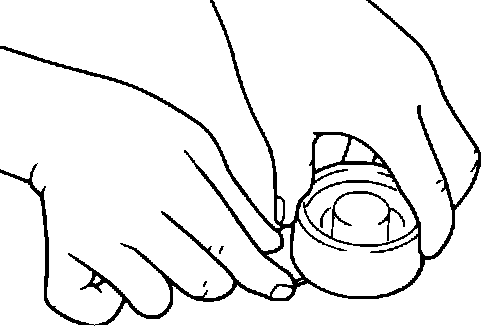
25. Check the tensioner pulleys for the following and replace and replace if any defects are found: Fig. 9
- Noise.
- Binding.
- Excessive play.
- Overly easy turning effort.
- Bent or damaged pulleys.