Exhaust Gas Recirculation: Testing and Inspection
EGR System Inspection:

EGR SYSTEM INSPECTION
1. Disconnect the green striped vacuum hose from the EGR valve and connect a hand vacuum pump using a vacuum "Tee".
2. While the engine is cold (coolant temperature less than 20 degrees C or 68 degrees F) race the engine suddenly and verify that no vacuum is present.
3. Allow the engine to warm up (coolant temperature greater than 70 degrees C or 158 degrees F) and race the engine. Verify that vacuum momentarilly rises to 150 mm Hg or 5.9 in. Hg or more.
EGR Valve Inspection:

4. Disconnect the vacuum "Tee" and connect the vacuum pump directly to the EGR valve.
5. Apply 240 mm Hg or 9.4 in. Hg of vacuum and verify that idle becomes unstable.
EGR Control Vacuum Inspection:
EGR VALVE CONTROL VACUUM INSPECTION
1. Warm up the engine (coolant temperature greater than 85 degrees C or 185 degrees F).
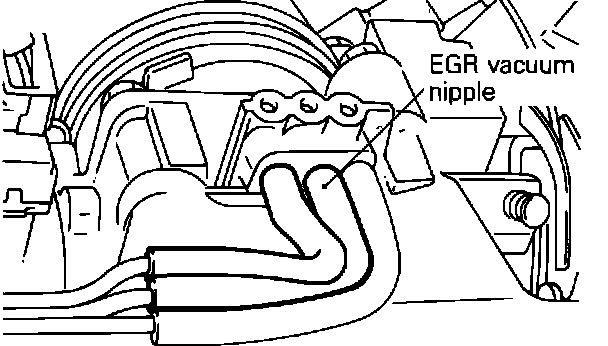
2. Disconnect the vacuum hose from the throttle body EGR vacuum nipple and connect a hand vacuum pump to the nipple the hose was removed from.
EGR Control Vacuum vs Engine RPM:
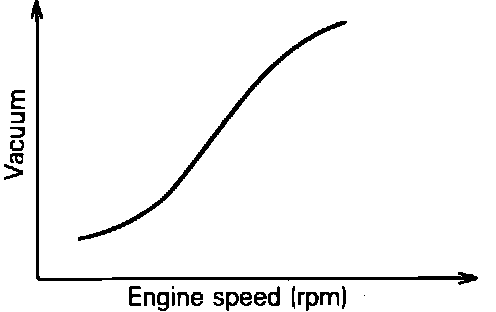
3. Race the engine and note that EGR valve control vacuum rises with engine speed.
EGR Valve Inspection:
EGR VALVE INSPECTION
1. Remove the EGR valve and inspect it for sticking or carbon deposits and clean if necessary.
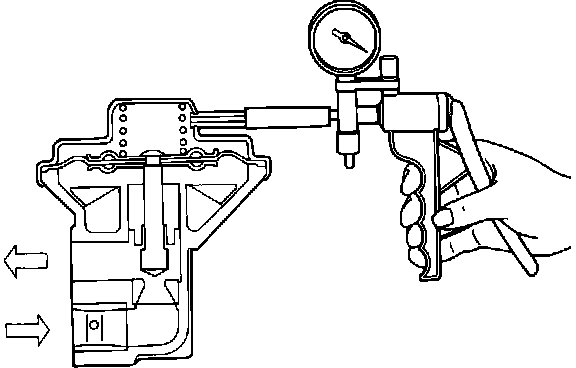
2. Connect a hand vacuum pump to the EGR valve.
3. Apply 250 mm Hg or 9.7 in. Hg and verify that the diaphragm chamber is leak tight.
4. Reduce vacuum to 30 mm Hg. or 1.2 in. Hg or less and verify that vacuum will not pass through the EGR valve.
5. Increase vacuum to 240 mm Hg. or 9.4 in.
6. After testing torque the EGR valve mounting bolts to 17 - 26 Nm or 12 - 18 ft. lbs.
EGR Temperature Sensor Inspection:
EGR TEMPERATURE SENSOR INSPECTION (CALIFORNIA VEHICLES ONLY)
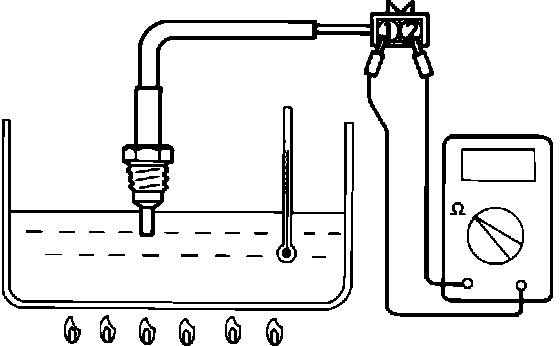
1. Remove the EGR temperature sensor from the vehicle.
2. Place the EGR temperature sensor in water and measure the resistance of the sensor while elevating the temperature of the water.
3. Verify that when the EGR temperature sensor reaches 50 degrees C or 122 degrees F its resistance is between 60k and 83k ohms.
4. Increase the temperature further until the EGR temperature reaches 100 degrees C or 212 degrees F and verify that its resistance is between 11k and 14k ohms.
EGR Control Solenoid Valve Inspection:
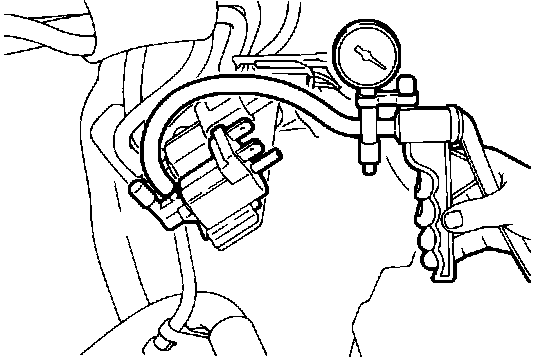
EGR CONTROL SOLENOID VALVE INSPECTION
1. Disconnect the yellow and green striped hoses from the EGR control solenoid valve.
2. Disconnect the harness connector.
3. Connect a hand vacuum pump to the nipple the green striped hose was removed from.
4. Apply vacuum and verify that vacuum leaks.
EGR Control Solenoid Valve Inspection:
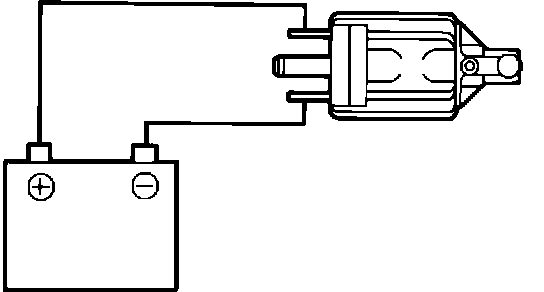
5. Apply 12vdc to the solenoid valve, apply vacuum, and verify that vacuum holds.
EGR Control Solenoid Valve Inspection:
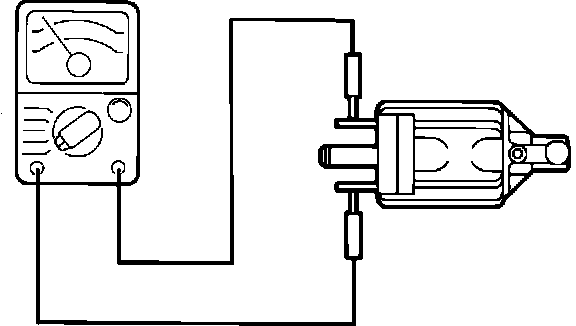
6. Measure the resistance of the solenoid valve coil and verify that it is between 36 - 44 ohms at 20 degrees C or 68 degrees F.