Timing Belt: Service and Repair
Part 1 Of 2:

Part 2 Of 2:

REMOVAL AND INSTALLATION
Removal Service Points
[A] Compressor A/C/Oil Pump (Power Steering) Removal
Remove the oil pump and air conditioning compressor (with the hose attached).
NOTE: Suspend the removed oil pump (by using wire or similar material) at a place where no damage will be caused during removal/installation of the engine assembly.
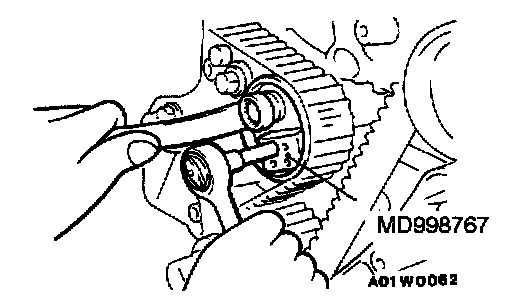
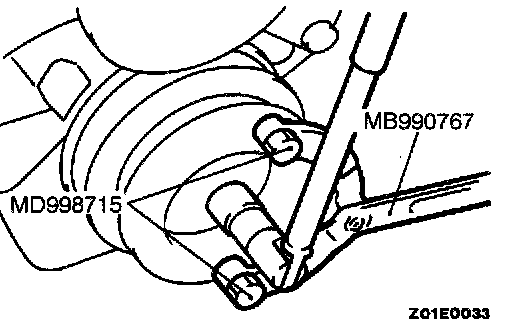
[B] Crankshaft Pulley Removal
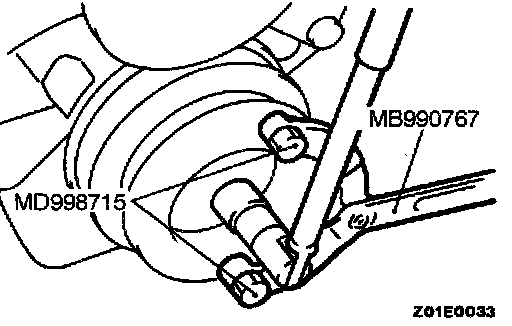
Using special tools, remove the crankshaft pulley from the crankshaft
CAUTION: Use only the specified special tools, or a damaged pulley damper could result.
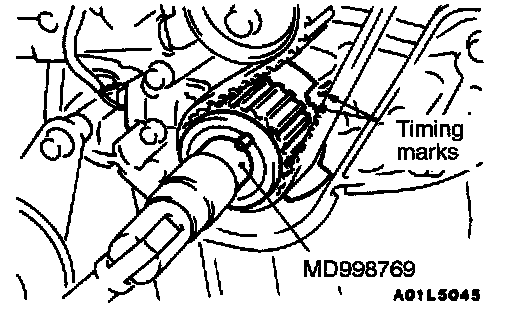
[C] Timing Belt Removal

1. Align the timing marks
2. Loosen the center bolt on the tension pulley to remove the timing belt
CAUTION: Make a mark on the back of the timing belt, indicating the direction of rotation, so it may be reassembled in the same direction, if it is to be reused.
Installation Service Points
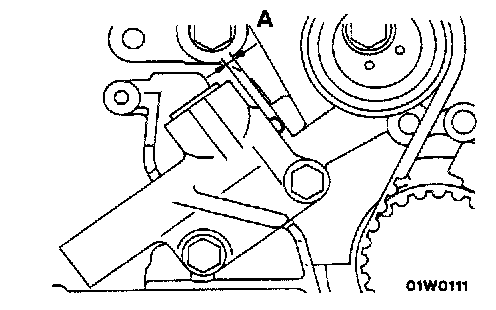
]A[ Auto Tensioner Installation
1. If the auto tensioner rod is in its fully extended position, reset it as follows
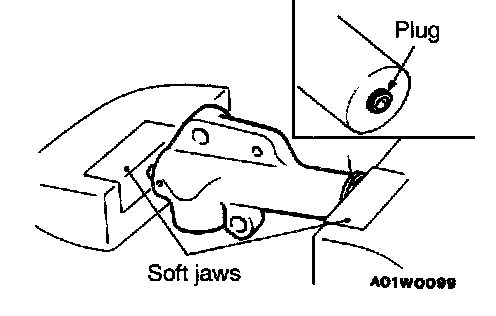
1. Keep the auto tensioner level and, in that position, clamp it in the vise with soft jaws
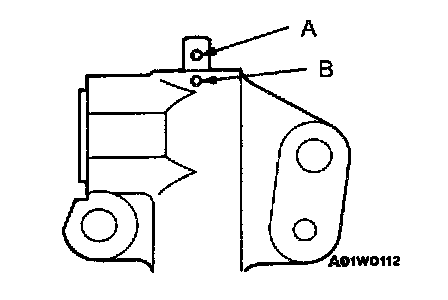
2. Push in the rod little by little with the vise until the set hole A in the rod is aligned with that B in the cylinder
CAUTION:
1. The auto tensioner must be placed at a right angle to the pressing surface of press or vise.
2. Push in the rod slowly to prevent the push rod from being damaged.
3. Insert a wire [1.4 mm (0.055 inch) in diameter] into the set holes.
NOTE: The wire should be as stiff as possible (such as piano wire, etc.), and should be bent into the shape of an "L".
4. Unclamp the auto tensioner from the vise.
2. Install the auto tensioner.
CAUTION: Leave the wire installed in the auto tensioner.
]B[ Timing Belt Installation
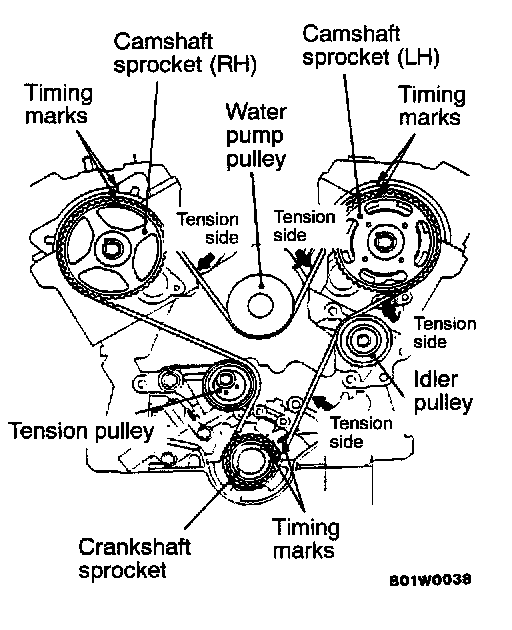
1. Align the timing marks of the camshaft sprockets and crankshaft sprocket.
2. Install the timing belt by the following procedure so that there is no defection in the timing belt between each sprocket and pulley.
1. Crankshaft sprocket
2. Idler pulley
3. Camshaft sprocket (left side)
4. Water pump pulley
5. Camshaft sprocket (right side)
6. Tension pulley
CAUTION: The camshaft sprocket (right side) can turn easily due to the spring force applied, so be careful not to get your fingers caught.
3. Turn the camshaft sprocket (right side) counterclockwise until the tension side of the timing belt is firmly stretched, and then check again that all timing marks are aligned.
4. Use the special tool to push the tension pulley into the timing belt, and then temporarily tighten the center bolt.
5. Use the special tool to turn the crankshaft 1/4 of a turn counterclockwise and then turn it again clockwise until the timing marks are aligned.
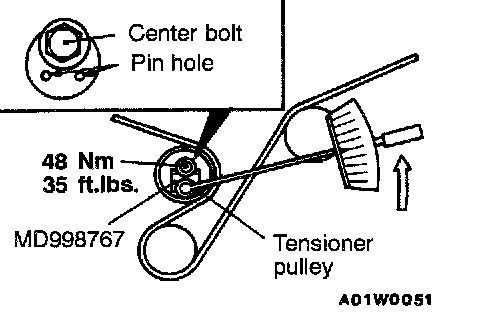
6. Loosen the center bolt on the tensioner pulley. Using the special tool and torque wrench, apply tensioning torque to the timing belt and, at the same time, tighten the center bolt to specification.
Reference value: 4.4 Nm (3.3 ft. lbs.) (Timing belt tensioning torque)
CAUTION: When tightening the center bolt, make sure that the tensioner pulley is not rotated together.
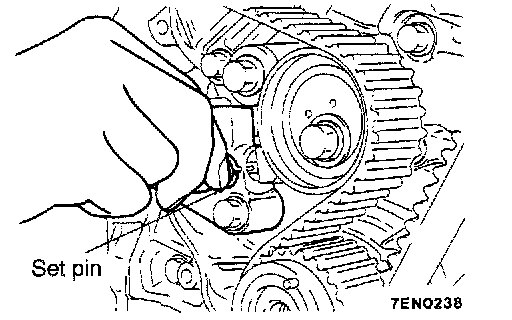
7. Remove the setting pin that has been inserted into the auto tensioner.
8. Turn the crankshaft two turns clockwise to align the timing marks.
9. Leave everything in this condition for five minutes or more, and then check that the protrusion of the auto tensioner push rod is within the range of the standard value.
Standard value (A): 3.8 - 5.0 mm (0.150 - 0.196 inch)
10. If the protrusion is out of specification, repeat steps 5 to 9.
11. Check again that timing marks on all sprockets are aligned properly.
]C[ Crankshaft Pulley Installation
Using the special tool, attach the crankshaft pulley to the crankshaft.
CAUTION: Use only the specified special tools, otherwise a damaged pulley damper could result.
INSPECTION
AUTO TENSIONER
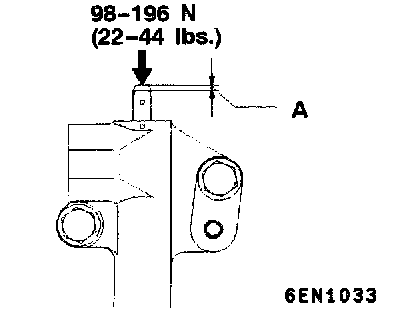
1. Hold the auto tensioner by hand and measure contraction (A) when pressing the tip of the rod on a steel (cylinder block; etc.) with a force of 98 - 196 N (22 - 44 lbs.).
Standard value (A): 1 mm (0.04 inch) or less
2. If not within the standard value, replace the auto tensioner.