Disassembly and Reassembly
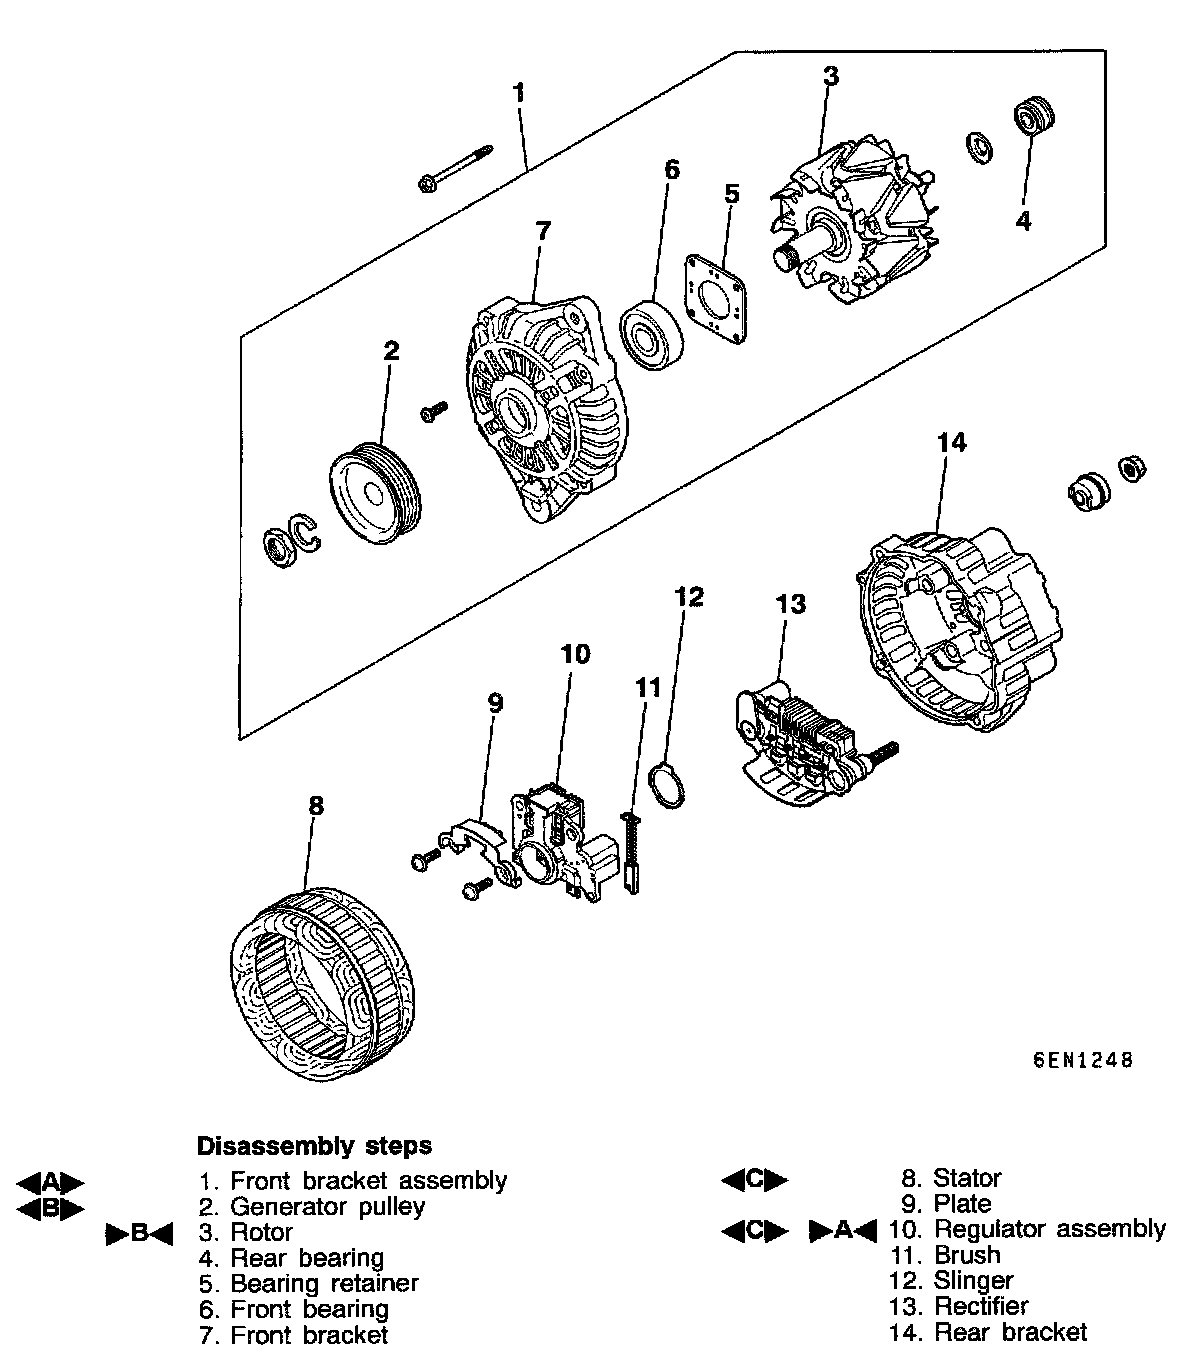
DISASSEMBLY AND REASSEMBLY
DISASSEMBLY SERVICE POINTS

FRONT BRACKET ASSEMBLY REMOVAL
Insert a flat tip screwdriver, etc., in the clearance between the front bracket assembly and stator core, to pry open and separate the stator and front bracket.
CAUTION: The stator coil could be damaged so do not insert the screwdriver too far.
Generator Pulley Removal:

PULLEY REMOVAL
Face the pulley side upward, fix the rotor with a work bench and remove the pulley.
CAUTION: Use care so that the rotor is not damaged.
Stator/Regulator And Brush Holder Removal:

1. Use a soldering iron (180 to 250 W) to desolder the stator. This work should complete within approximately four seconds to prevent heat from transferring to the diode.
2. When removing the rectifier from the regulator assembly remove the soldered sections of the rectifier.
CAUTION:
1. Use care to make sure that the heat of the soldering iron is not transmitted to the diodes for a long period.
2. Use care that no undue force is exerted to the lead wires of the diode.
REASSEMBLY SERVICE POINTS

>A< REGULATOR ASSEMBLY INSTALLATION
After installing the regulator assembly, insert a wire into the hole provided on the rear bracket while pressing in the brush to fix the brush.
NOTE: The brush is fixed when a wire is inserted, making rotor installation easier.
Rotor Assembly Installation:

>B< ROTOR INSTALLATION
After installing the rotor, remove the wire used to fix the brush.