Drive Belt: Testing and Inspection
DRIVE BELT (FOR GENERATOR, WATER PUMP, POWER STEERING PUMP) (CHECK CONDITION)Generator, Water Pump, Power Steering Pump Drive Belt Tension Check and Adjustment
CAUTION: Perform the check after rotating the engine in the normal direction (one revolution or more).
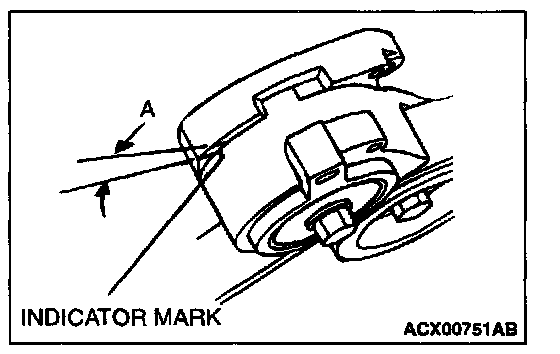
1. Check that the indicator mark of the auto-tensioner is located between the marks shown as "A" on the tensioner bracket.
2. If the mark is located out of the space "A," replace the drive belt.
NOTE: Since the auto-tensioner is used, it is not necessary to adjust the tension of the belt.
Check of auto-tensioner
1. Run the engine at idling speed and then stop it to check whether the drive belt is centered on the auto-tensioner pulley.
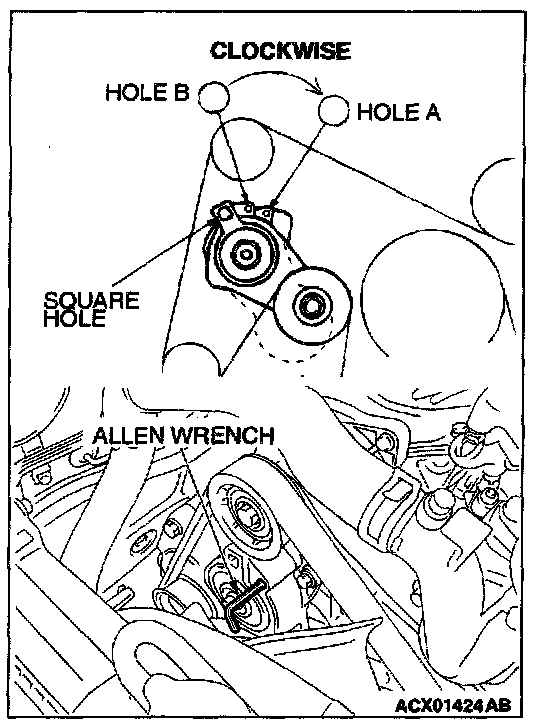
2. Insert a 1/2 inch breaker bar into the square hole on the drive belt auto tensioner, and rotate it clockwise until the tensioner touches the stopper.
3. Align hole B with hole A, and insert a 5.0 mm (0.20 inch) Allen wrench to hold the tensioner. Then loosen the drive belt, and then remove the drive belt auto tensioner.
4. Move the auto-tensioner right and left by using a 1/2 inch breaker bar or similar tool to verify that it moves smoothly.
5. If some abnormality is found during the above mentioned check (1) and (3), replace the auto-tensioner.
6. Install the drive belt auto tensioner with Allen wrench inserted.
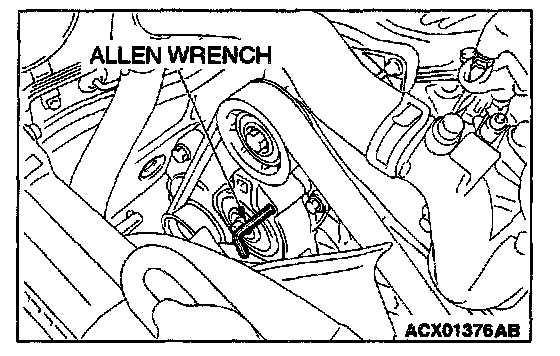
7. After the drive belt has been installed, remove the Allen wrench while holding the drive belt auto tensioner with a socket wrench drive. Then release the drive belt auto tensioner slowly.
8. Check for proper tension.