Drive Belt: Testing and Inspection
7. DRIVE BELTS (FOR GENERATOR, POWER STEERING OIL PUMP AND AIR CONDITIONING) CHECK)GENERATOR DRIVE BELT TENSION CHECK
Required Special Tools:
^ MB991958: Scan Tool (MUT-III Sub Assembly) [MB991824: Vehicle Communication Interface (V.C.I.)]
^ MB991668: Belt Tension Meter Set
CAUTION: To prevent damage to scan tool MB991958,always turn the ignition switch to the "LOCK" (OFF) position before connecting or disconnecting scan tool MB991958.
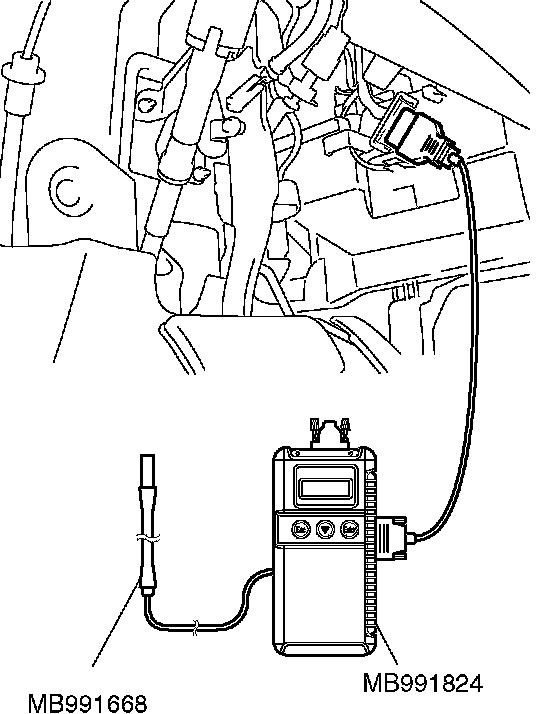
1. Connect special tool MB991668 to scan tool MB991958.
2. Connect scan tool MB991958 to the data link connector.
3. Turn the ignition switch to the "ON" and select scan tool MB991958 "Belt Tension Measurement" from the menu screen.
CAUTION:
^ The temperature of the surface of the belt should be as close as possible to underhood temperature.
^ Do not let any contaminants such as water or oil get onto the microphone.
^ If strong gusts of wind blow against the microphone or if there are any loud sources of noise nearby, the values measured by the microphone may not correspond to actual values.
^ If the microphone is touching the belt while the measurement is being made, the values measured by the microphone may not correspond to actual values.
^ Do not take the measurement while the vehicle's engine is running.
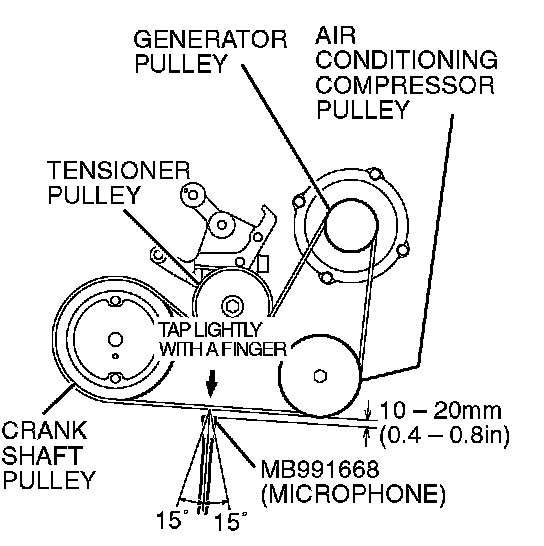
4. Hold special tool MB991668 (microphone) to the middle of the drive belt between the pulleys (at the place indicated by the arrow), about 10 - 20 mm (0.4 - 0.8 in.) away from the rear surface of the belt and so that it is perpendicular to the belt (within an angle of 15 degree angle).
5. Gently tap the middle of the belt between the pulleys (the place indicated by the arrow) with your finger as shown in the illustration, and check that the vibration frequency of the belt is within the standard value.
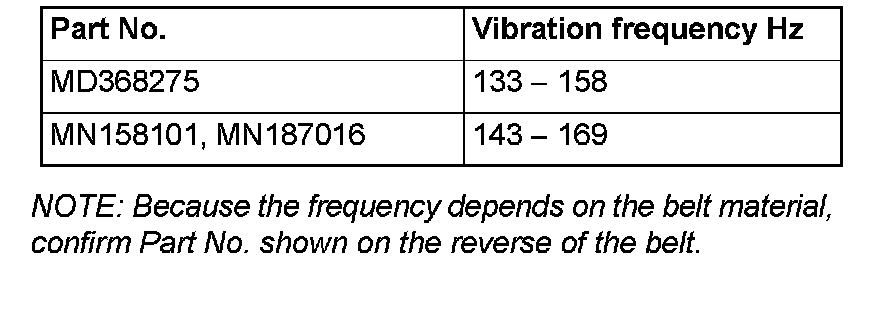
Standard value
NOTE: Because the frequency depends on the belt material, confirm Part No. shown on the reverse of the belt.
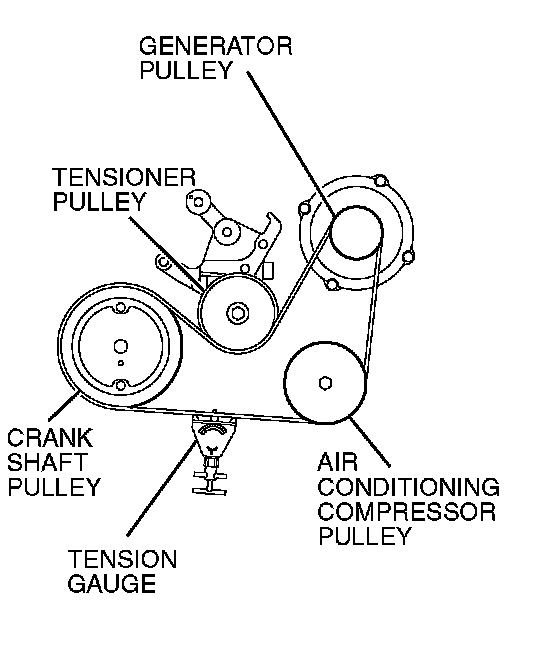
Use a belt tension gauge to check that the belt tension is within the standard value.
Standard value: 490 - 686 N (110 - 154 lbs.)
BELT DEFLECTION CHECKS
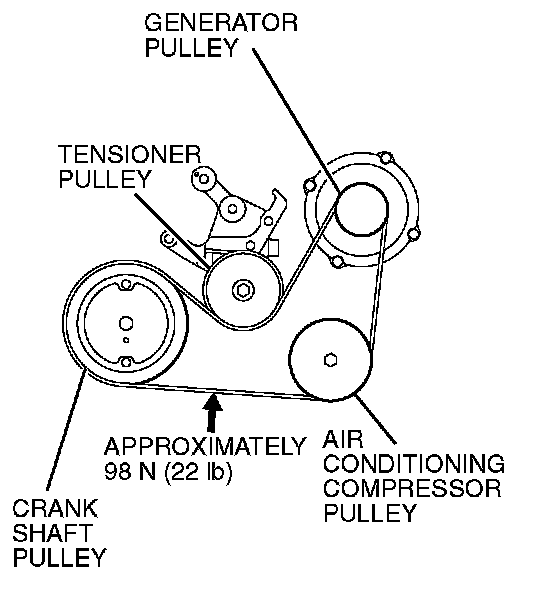
Apply approximately 98 N (22 lb) of force to the middle of the drive belt between the pulleys (at the place indicated by the arrow) and check that the amount of deflection in within the standard value.
Standard value: 8.4 - 10.7 mm (0.33 - 0.42 in.)
GENERATOR DRIVE BELT TENSION ADJUSTMENT
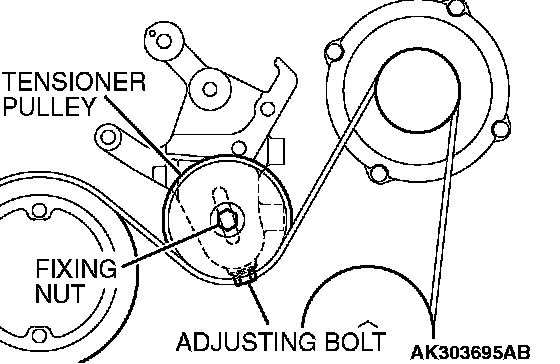
1. Loosen the tensioner pulley fixing nut.
2. With tensioner pulley fixing nut temporarily tightened to 15 ± 5 Nm (11 ± 4 ft. lbs.), set the belt tension or defection amount to the standard value using the adjusting bolt.
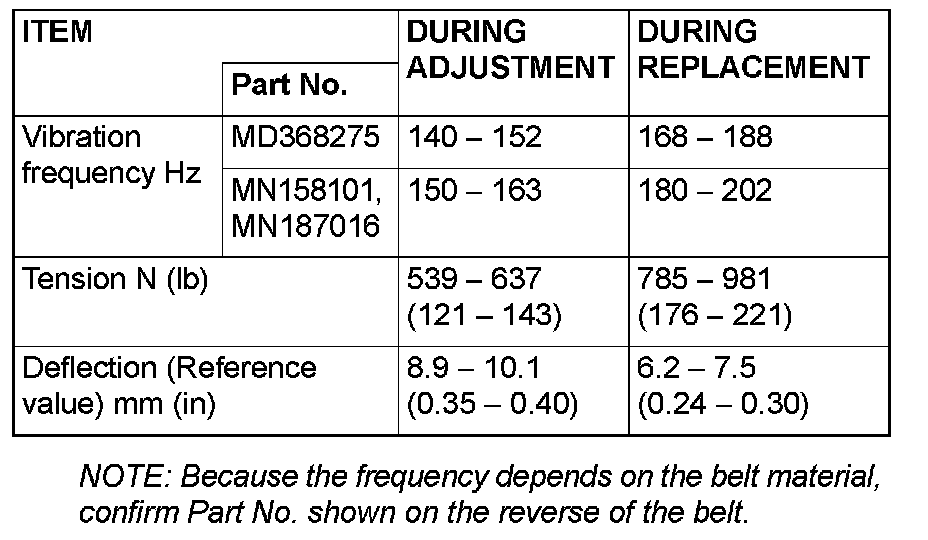
Standard value
NOTE: Because the frequency depends on the belt material, confirm Part No. shown on the reverse of the belt.
3. Tighten the tension pulley fixing nut.
Tightening torque: 49 ± 10 Nm (36 ± 7 ft. lbs.)
POWER STEERING DRIVE BELT TENSION CHECK
Check the drive belt tension by the procedure.
Required Special Tools:
^ MB991958: Scan Tool (MUT-III Sub Assembly) [MB991824: Vehicle Communication Interface (V.C.I.)]
^ MB991668: Belt Tension Meter Set
CAUTION: To prevent damage to special tool MB991824, always turn the ignition switch to the "LOCK" (OFF) position before connecting or disconnecting special tool MB991824.
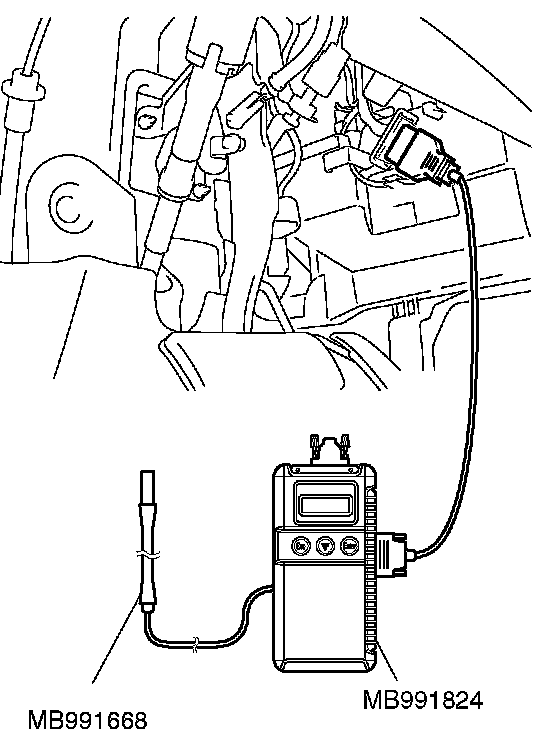
1. Connect special tool MB991824 to special tool MB991668.
2. Connect special tool MB991824 to the data link connector.
3. Turn the ignition switch to the "ON" position and select "Belt Tension Measurement" from the special tool MB991824 screen menu.
CAUTION:
^ The temperature of the surface of the belt should be as close as possible to normal temperature.
^ Do not let any contaminants such as water or oil get onto the microphone.
^ If strong gusts of wind blow against the microphone or if there is loud noise nearby, the values measured by the microphone may not correspond to actual values.
^ If the microphone is touching the belt while the measurement is being made, the values measured by the microphone may not correspond to actual values.
^ Do not take the measurement while the vehicle's engine is running.
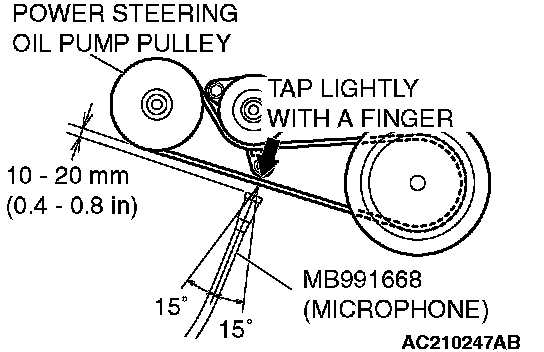
4. Hold special tool MB991668 (microphone) near the center of the drive belt between the pulleys (at the place indicated by the arrow), about 10 - 20 mm (0.4 - 0.8 in.) away from the rear surface of the belt and perpendicular to the belt (within ± 15 degree angle).
5. Gently tap the middle of the belt between the pulleys (the place indicated by the arrow) with your finger as shown in the illustration, and check that the vibration frequency of the belt is within the standard value.
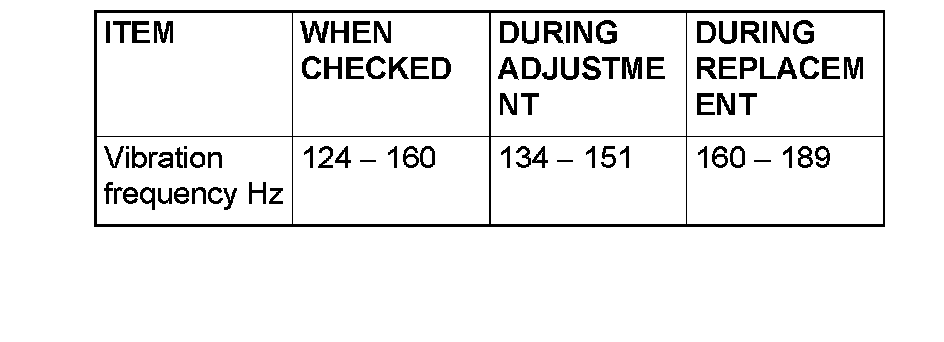
Standard value
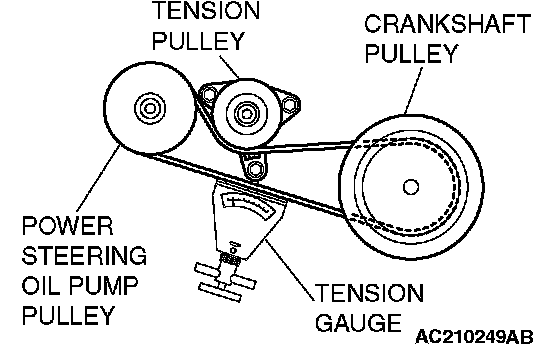
Use a belt tension gauge to check that the belt tension is within the standard value.
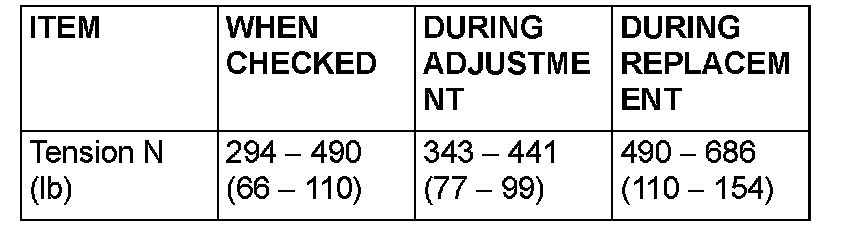
Standard value
BELT DEFLECTION CHECKS
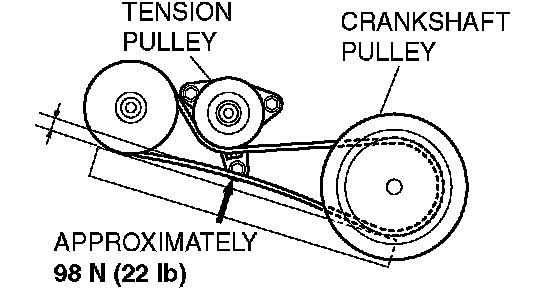
Apply approximately 98 N (22 lb) of force to the middle of the drive belt between the pulleys (at the place indicated by the arrow) and check that the amount of deflection is within the standard value.
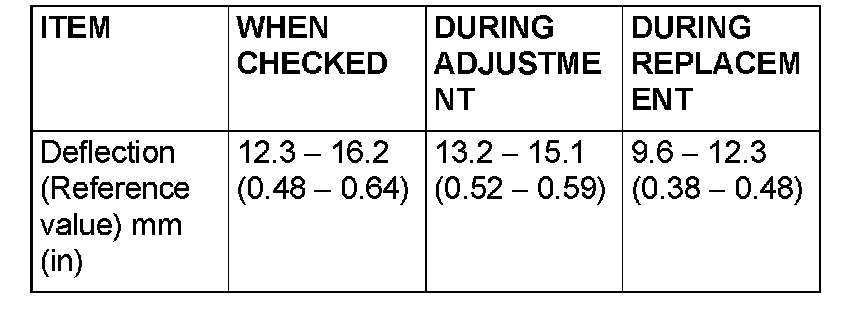
Standard value
if the tension or deflection is outside the standard value, adjust by the procedure.
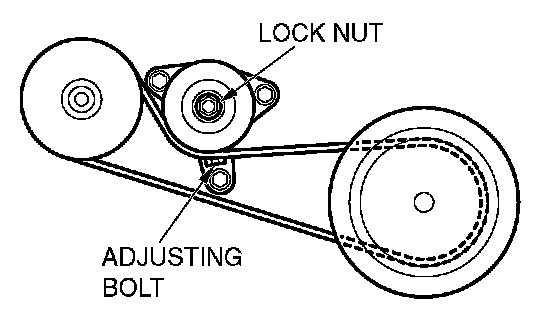
1. Loosen the tensioner pulley lock nut.
2. Adjust the belt tension to the standard value by turning the adjusting bolt. The tension will increase when turning the adjusting bolt clockwise, and decrease when turning counterclockwise.
3. Tighten the lock nut to the specified torque.
Tightening torque: 49 ± 9 Nm (36 ± 7 ft. lbs.)
4. Tighten the adjusting bolt.
Tightening torque: 5.0 ± 1.0 Nm (44 ± 9 in. lbs.)
CAUTION: Check after turning the crankshaft one or more rotations clockwise.
5. Check the belt deflection amount and tension, and readjust if necessary.