Recall - Seat Anchor Defect: Overview
No. SR-04-006DATE: July, 2004
MODEL:
2004 Endeavor
SUBJECT:
DRIVER'S SEAT RISER - SAFETY RECALL CAMPAIGN
PURPOSE
The foot of the driver's seat riser may develop a crack, resulting in reduced strength of the seat anchorage. Dealers must inspect the driver's seat riser bar code number to determine whether it is included in this campaign. Check for the bar code on the list included in Attachment A of this bulletin. For vehicles within the affected production date range, if the bar code is on the list, or it there is no bar code, replace the driver's seat riser with the new, improved part listed in the PARTS INFORMATION section of this bulletin.
AFFECTED VEHICLES
2004 Endeavor vehicles produced between 3/11/04 and 4/15/04
IMPORTANT
Affected new or used inventory vehicles must be inspected/repaired before the vehicle is sold.
CUSTOMER NOTIFICATION
A letter will be sent to all owners of affected vehicles, asking them to bring their vehicle to their Mitsubishi dealer to have the driver's seat inspected for possible driver's seat riser replacement.
A copy of the customer notification letter is shown in this bulletin.
REQUIRED OPERATIONS
Before starting this campaign procedure, CHECK ON THE WARRANTY SUPER SCREEN to verify that the vehicle is an affected VIN for this campaign and that this campaign procedure has not already been completed.
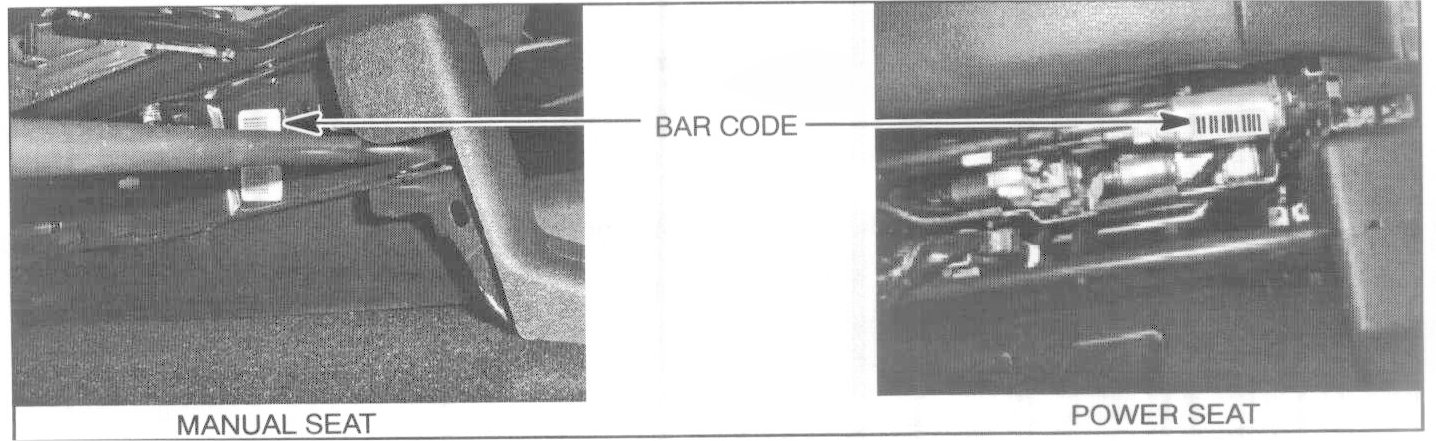
1. Under the driver's seat, note the bar code number. On power seat models, the bar code is located on the front of the motor housing. On manual seat models, the bar code is located on the inside of the anchor bracket. Check for the bar code number on the list in Attachment A.
a. If the bar code number does NOT appear on the list in Attachment A. STOP. This campaign procedure is complete.
b. If the bar code number is on the list in Attachment A, or if there is no bar code label on the bracket, continue with Step 2 for driver's seat riser replacement procedures. Note the bar code number on the repair order. It must be entered on the related recall claim. If the bar code label is missing enter "no bar code number" on the repair order and on the recall claim.
CAUTION
ON MANUAL SEATS, BOTH TRACKS MUST REMAIN LOCKED WHEN REMOVING THE SEAT FROM THE VEHICLE. DO NOT UNLOCK THE TRACKS DURING THIS PROCEDURE. IF THE TRACKS ARE ACCIDENTALLY UNLOCKED, MOVE THE TRACKS TO THE EXTREME FORWARD OR REARWARD POSITION, AND BE SURE BOTH TRACKS LOCK.
2. Remove the driver's seat from the vehicle. Refer to Group 52A in the service manual.
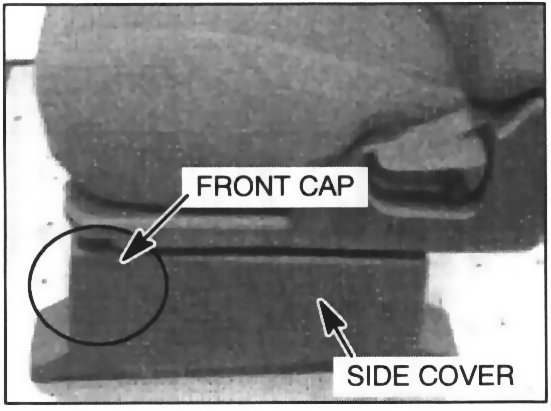
3. Remove the front cap from the seat.
4. Remove the side cover from the seat as follows:
a. Pull forward and up on the front portion of the side cover.
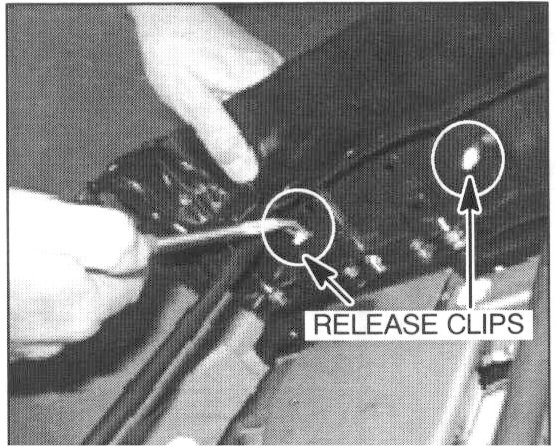
b. Use pliers to release the two white side clips securing the side cover to the anchor bracket. Then remove the side cover by pushing it rearward.
5. Remove the rear cover from the seat as follows:
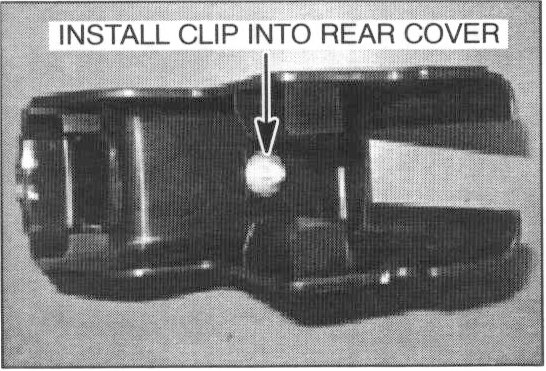
a. Unhook the cover from the foot. Push the cover toward the seat bottom and remove it.
b. Remove the white clip from the adjuster.
c. Reinstall the white clip into the rear cover.
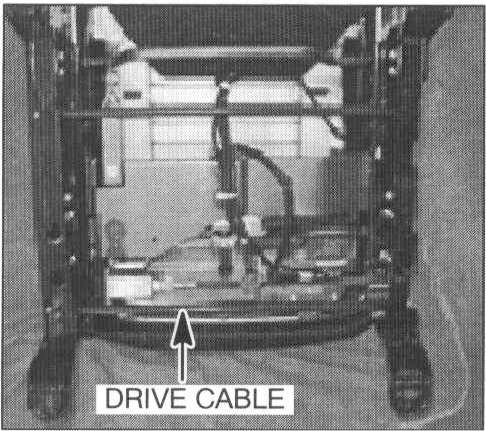
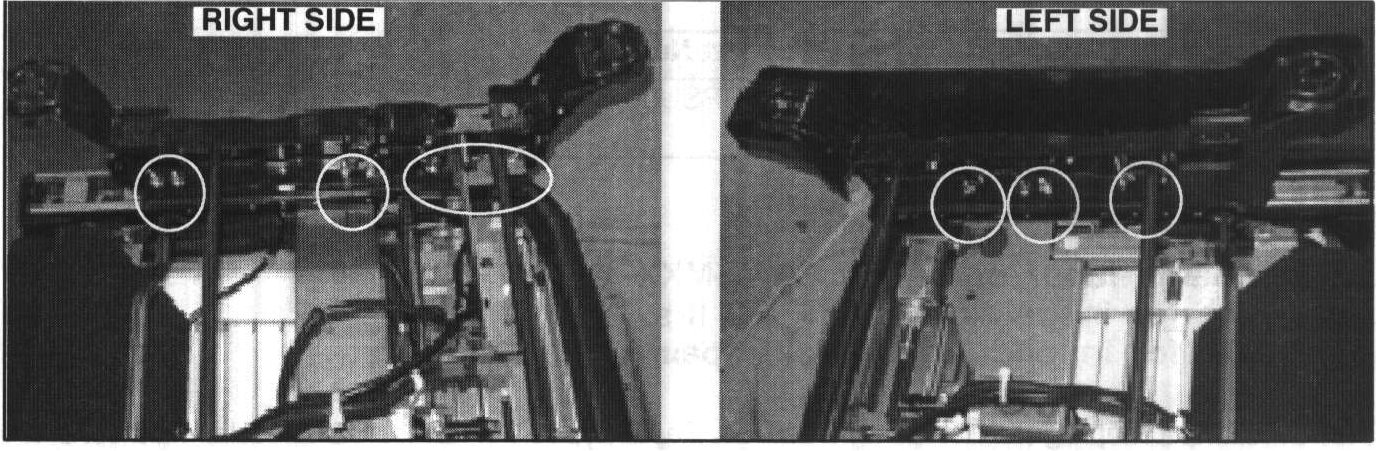
6. Remove the wiring connector clips from the harness bracket. Note the location of each clip for reassembly. On power seal models, use care to avoid bending the drive cable.
7. Remove the eight nuts securing the riser to the adjuster.
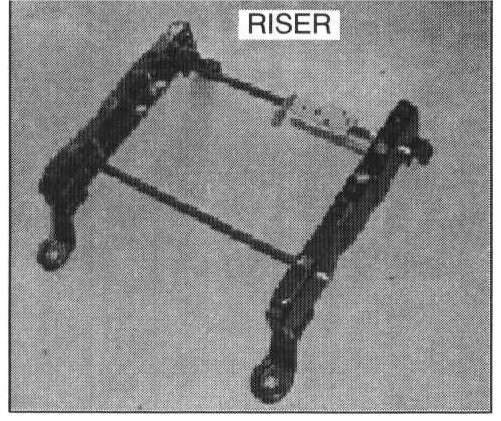
8. Replace the riser with the new, improved riser listed in the PARTS INFORMATION section of this bulletin.
a. Secure the new riser to the seat adjuster, using the new nuts provided in the repair kit. Torque Specification: 8.8 +/- 1 Nm (6.5 + 1 ft/lb)
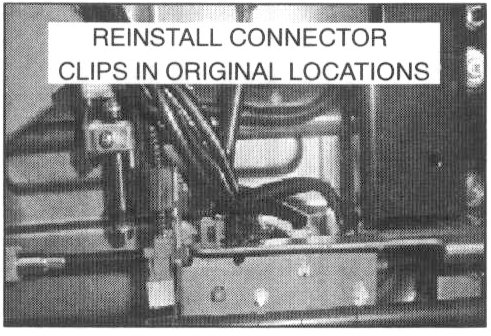
9. Reinstall the wiring connector clips.
CAUTION
On power seat models, be sure the harness is properly routed and re-connected in its original position. Incorrect harness routing can result in harness damage during operation.
10. Reinstall the seat rear cover, side cover, and front cap.
11. Reinstall the seat into the vehicle.
12. Verify proper seat operation by moving the seat forward and rearward several times.
a. On power seat models, be sure the seal moves smoothly in both directions without any unusual noise.
b. CAUTION
On manual seat models, be sure the inboard and outboard tracks lock simultaneously If the tracks do not lock simultaneously, loosen the nuts, lock both tracks in the extreme forward or rearward position, then retighten the nuts to 8.8 +/- 1 Nm (6.5 + 1 ft/lb)
PARTS INFORMATION

Use the Genuine Mitsubishi Parts
WARRANTY INFORMATION
Use campaign labor operation C0405MXX
Labor time for inspection only = 0.3 hrs.
Labor time for inspect and install repair kit = 0.6 hrs.
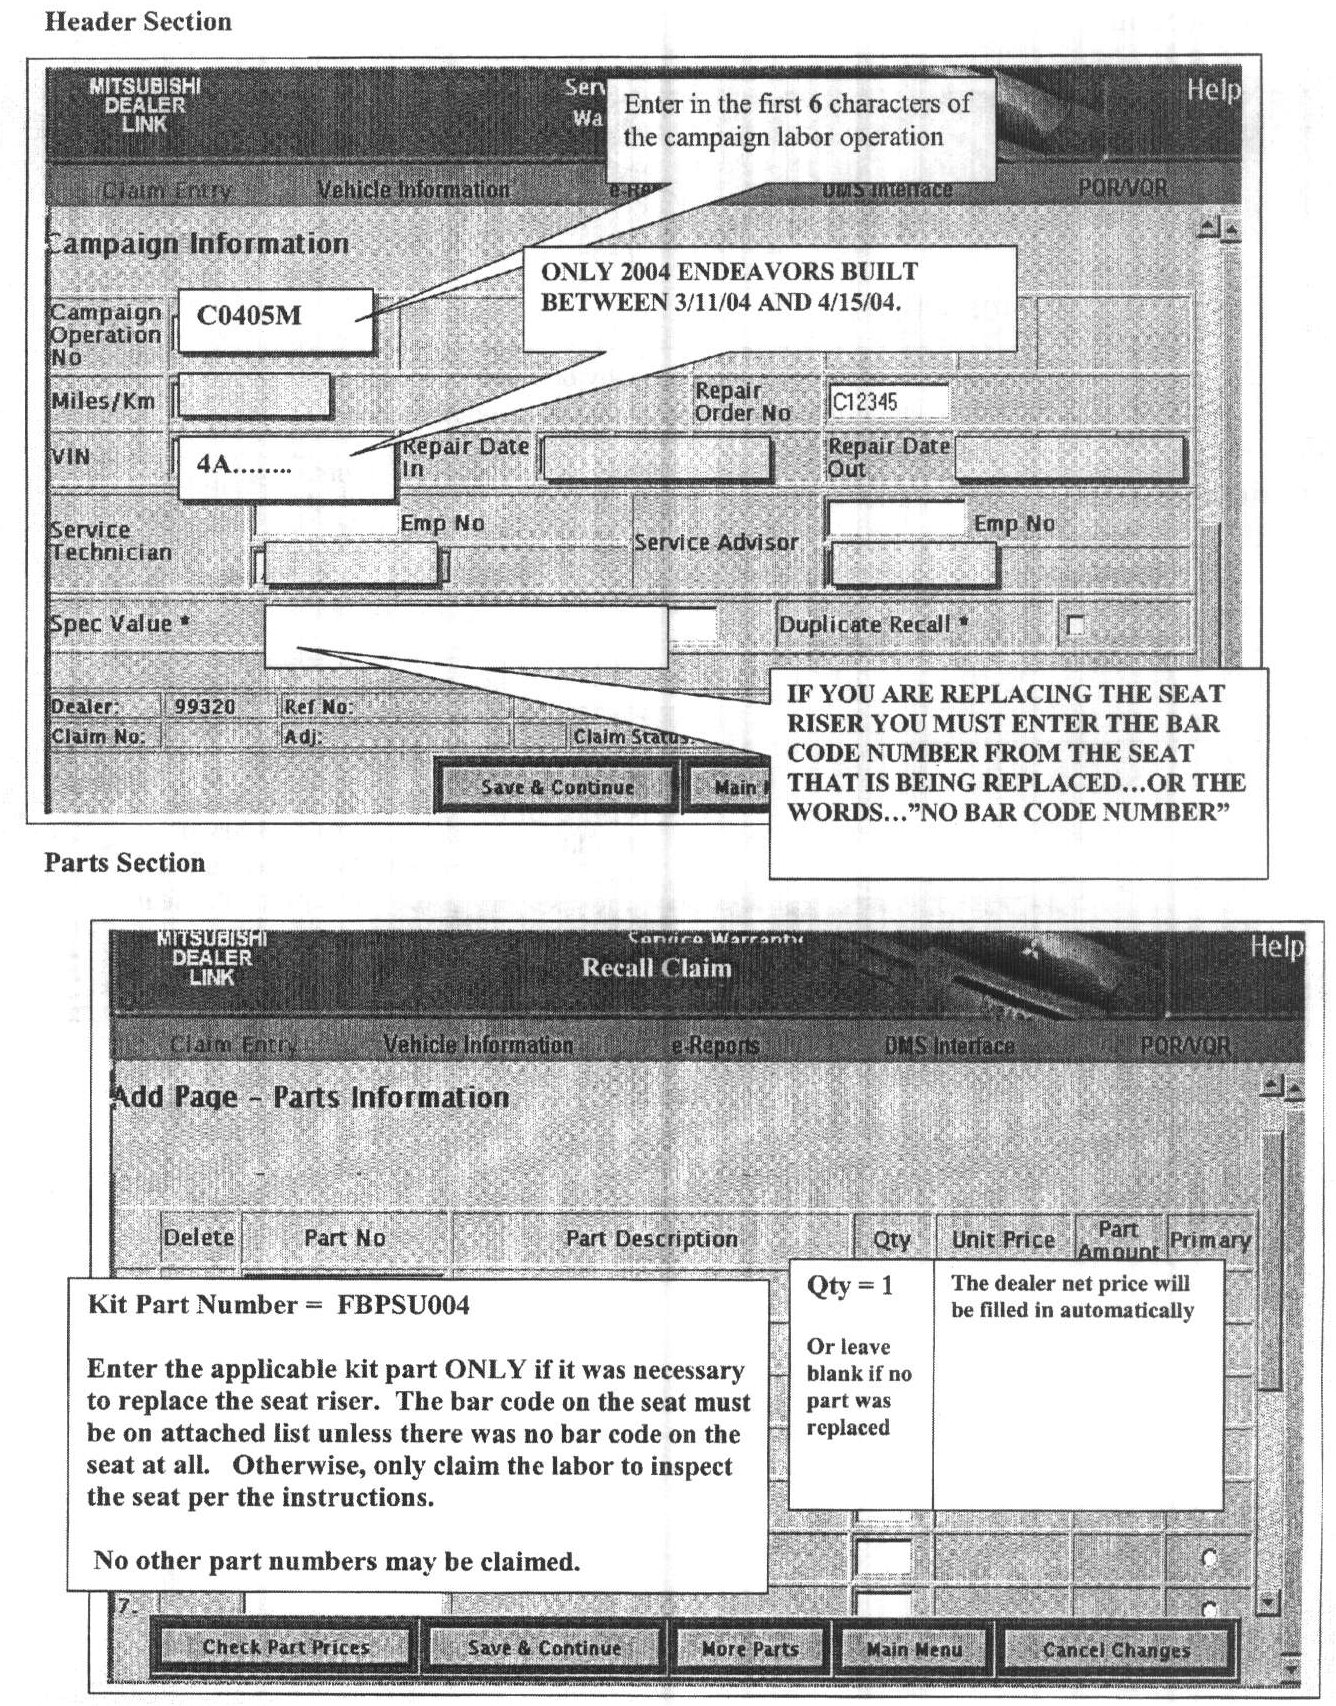
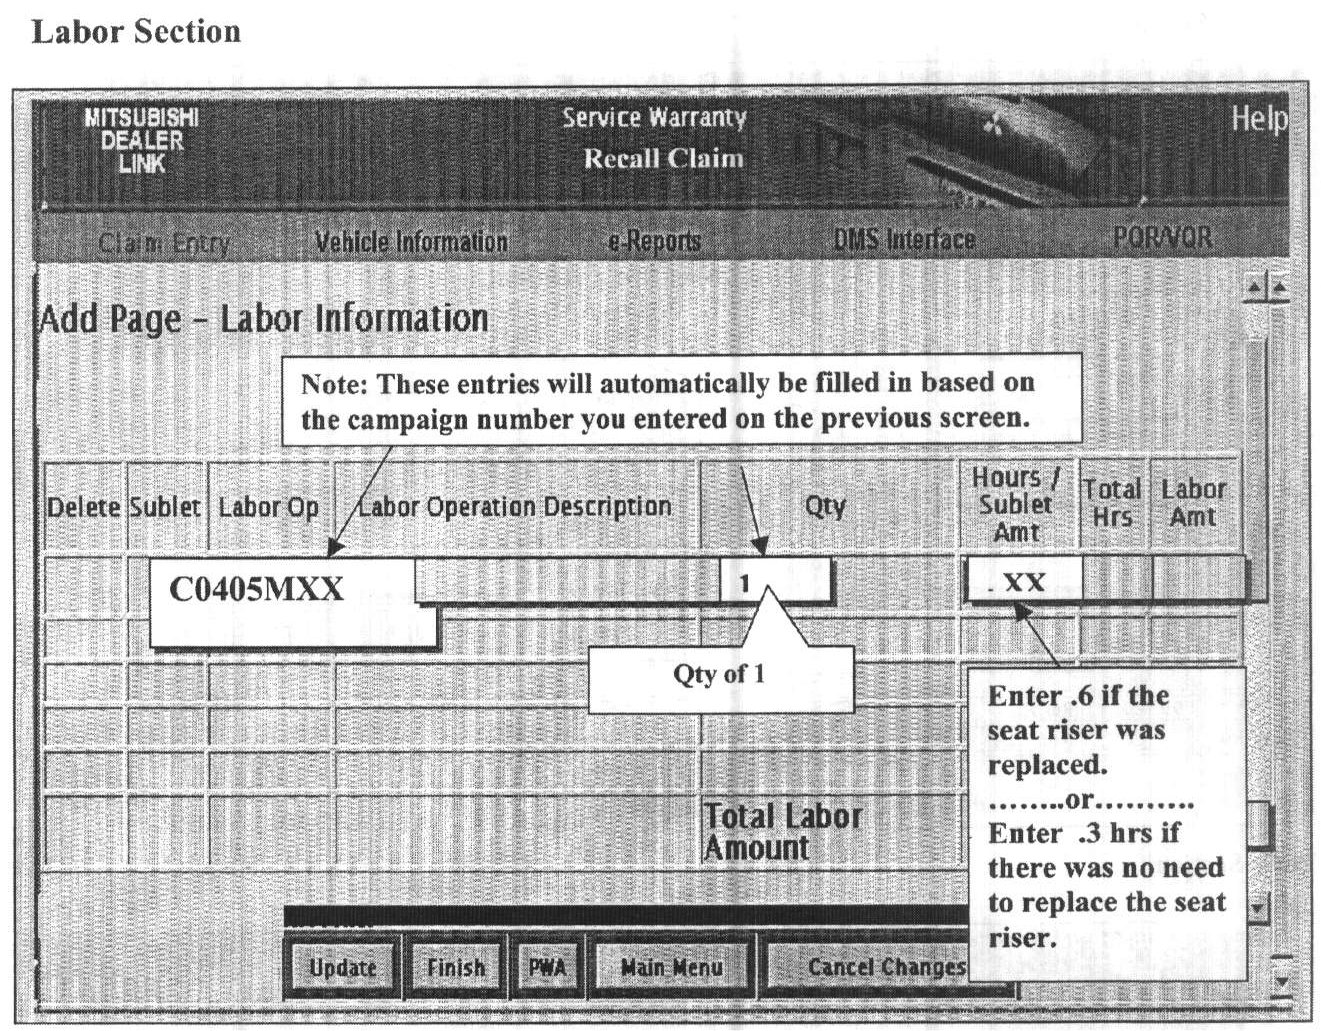
Claims for this campaign must be entered as Recall type "C" claims. Sample claim screens are shown.