Disassembly and Assembly
COMPRESSOR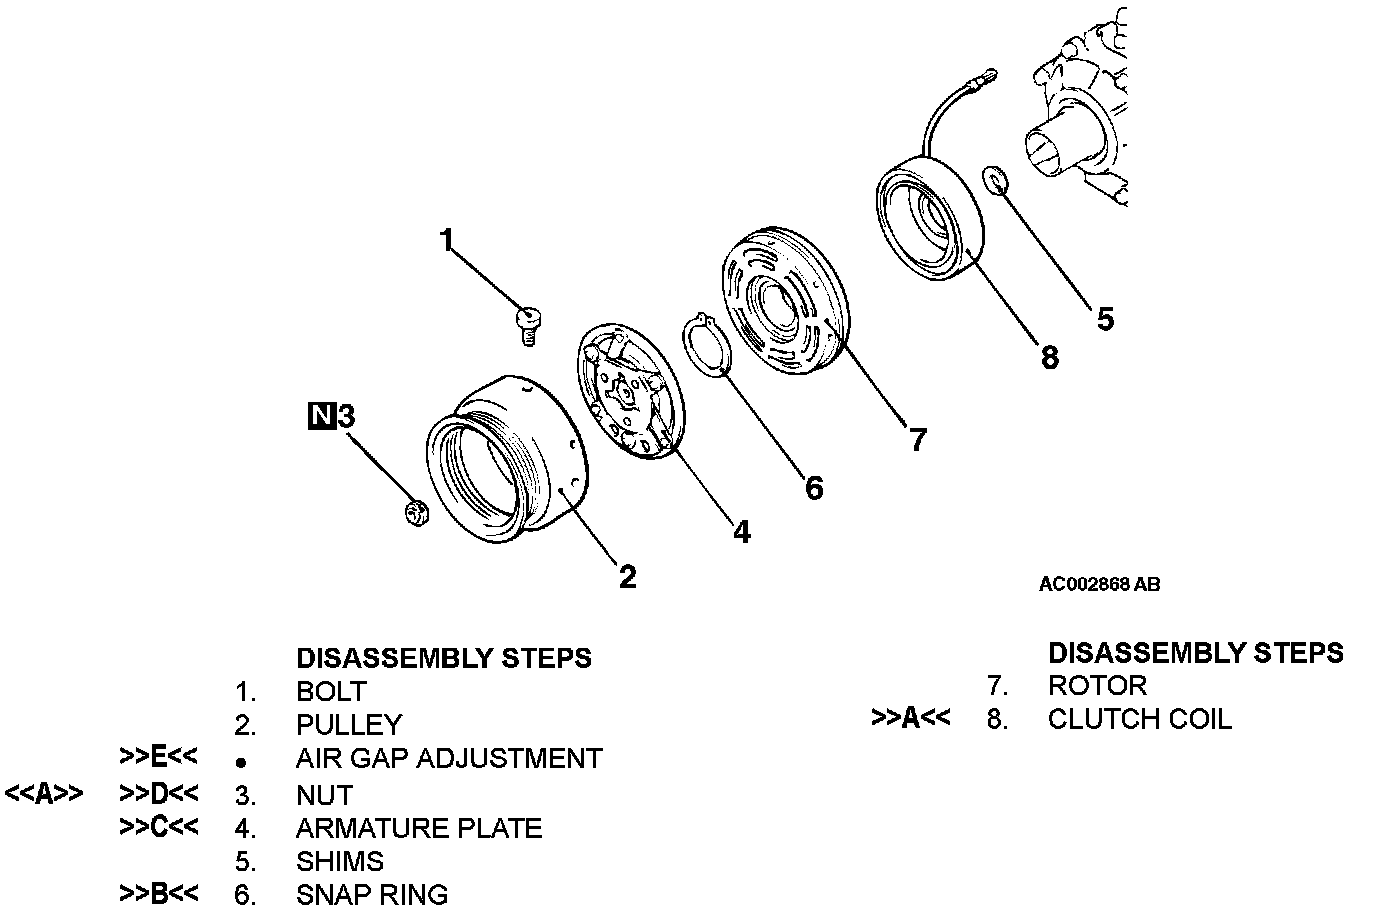
DISASSEMBLY SERVICE POINT
<> NUT REMOVAL
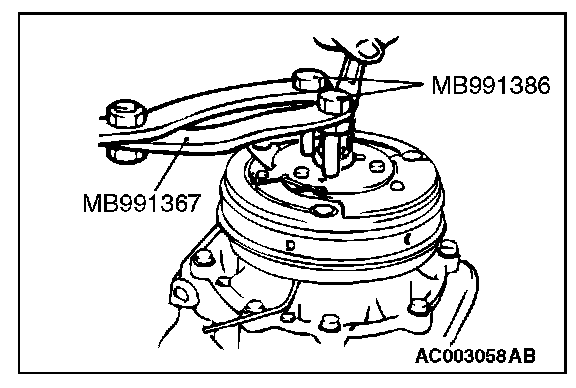
Use special tools MB991367 and MB991386 to hold the A/C compressor clutch, and remove the nut.
ASSEMBLY SERVICE POINTS
>>A<< CLUTCH COIL INSTALLATION
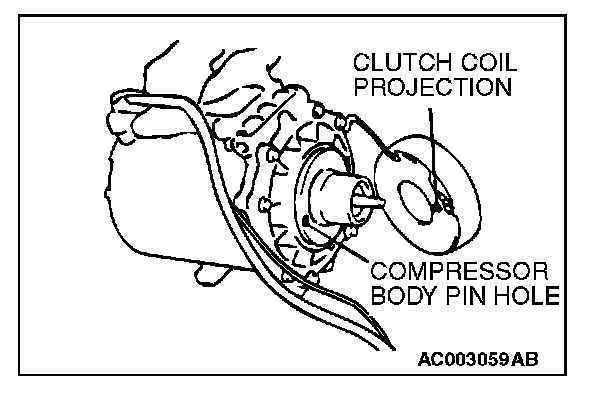
When installing the clutch coil to the A/C compressor boy, install so that the pin hole of the A/C compressor body and the clutch coil projection are aligned.
>>B<< SNAP RING INSTALLATION
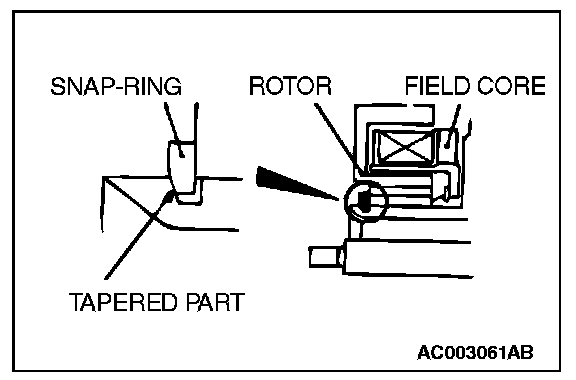
Install the snap ring so that the tapered surface is to the outside.
>>C<< ARMATURE PLATE INSTALLATION
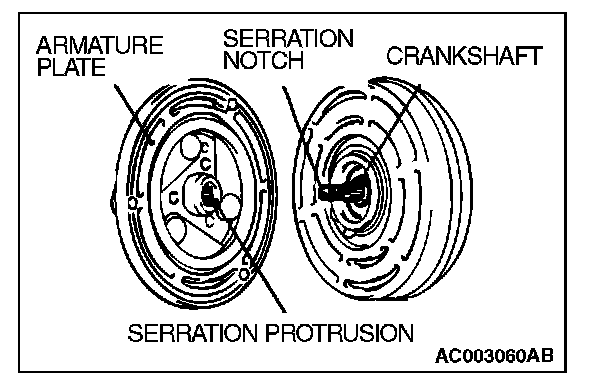
Align the serration protrusion on the crankshaft with the notch on the armature and install.
>>D<< NUT INSTALLATION
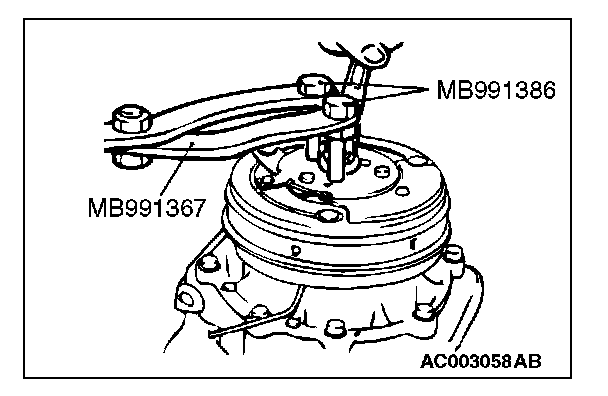
Use special tools MB991367 and MB991386 to hold the A/C compressor clutch, and tighten the nut in the same manner as for removal.
>>E<< AIR GAP ADJUSTMENT
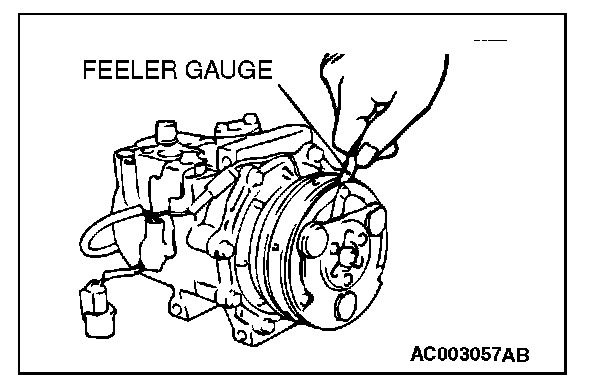
Check whether or not the air gap of the clutch is within the standard value.
Standard value: 0.3 - 0.5 mm (0.01 - 0.02 inch)
NOTE: If there is a deviation of the air gap from the standard value, make the necessary adjustment by adjusting the number of shims.