Emissions - PCV Problems Or Drivability When Cold
No. TSB-08-17-002Date: May, 2008
Model:
2006 Raider 3.7L
SUBJECT:
POSITIVE CRANKCASE VENTILATION (PCV) SYSTEM FREEZES IN EXTREME COLD WEATHER
PURPOSE
Some customers of affected vehicles may complain of difficulties related to the PCV system (oil in the intake or air filter causing drivability concerns, etc.) when the vehicle is operated in extreme cold weather (below 0°F - 18°C). This may be caused by moisture collecting in the PCV system where it freezes and prevents the PCV system from functioning properly.
If a customer indicates that they are experiencing any engine crankcase venting or drivability symptoms during extreme cold weather, perform the repair procedure and install a PCV kit and additional parts to change the routing of the PCV hoses.
AFFECTED VEHICLE(S)
2006 Raider equipped with 3.7L V6 Engine.
REPAIR PROCEDURE
1. Disconnect the crankcase vent hose at the air cleaner box.
2. Remove the top of the air cleaner box. Do not disconnect the intake hose to the plenum.
3. Disconnect the Intake Air Temperature sensor located at the left (driver's side) rear of the plenum. Pull the plenum slightly towards the front of the truck and lift it up. Set the entire assembly aside.
4. Remove the crankcase vent hoses at the rear of BOTH cylinder heads. Separate the Crankcase Vent Hose Assembly to make it easier to remove.
5. Remove the fitting for the crankcase vent hose at the rear of the LEFT (driver's side) cylinder head. Insert an 11 mm Allen hex into the fitting to remove it.
6. Remove the PCV vacuum hose from the intake manifold to the PCV valve (located on the oil filler housing).
7. Using a 36 mm deep socket, install PCV adaptor (p/n 53034065AA) in place of the removed fitting at the rear of the LEFT (driver's side) cylinder head. Torque to 28 Nm (21 ft./lb.).
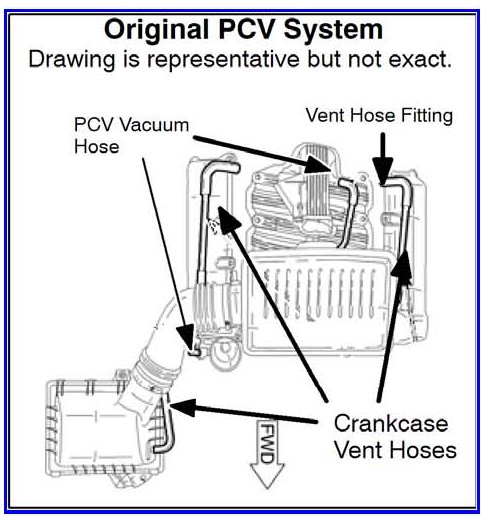
NOTE:
You may find it easier to remove the purge solenoid bracket and loosen the coolant hose retainers to be able to install the PCV adaptor.
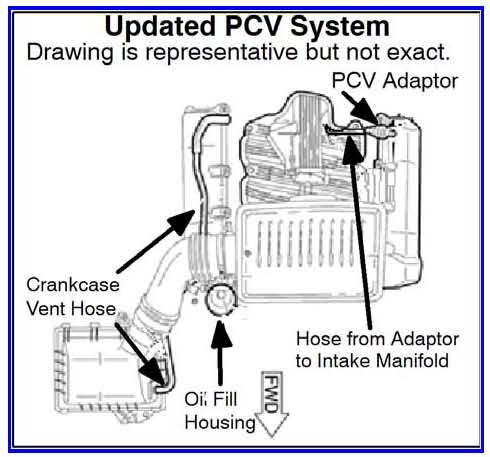
8. Install PCV Hose p/n 68044349AA from the PCV adaptor to the original PCV hose vacuum port on the intake manifold.
9. Replace the oil fill housing with p/n 53020891AE (without PCV valve). Torque bolts to 13 Nm (10 ft/lbs.). Reuse the original filler cap.
10. Install crankcase vent hose (53032090AF) from the port on the rear of the RIGHT (passenger's side) cylinder head to the air cleaner port.
11. Reinstall the intake plenum and the top of the airbox.
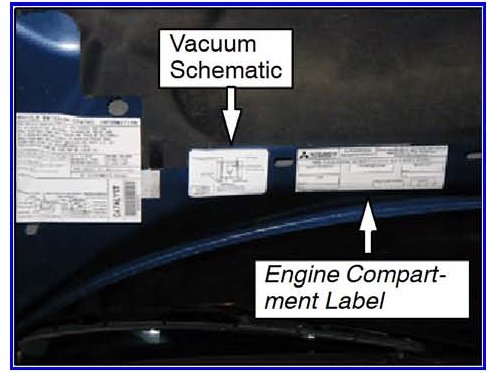
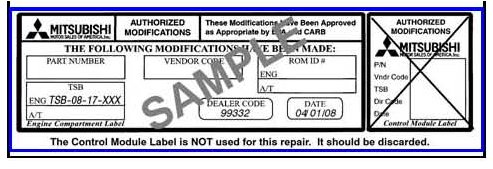
12. Clean the area next to the VECI Label with an appropriate solvent and install the new vacuum schematic, p/n 52014255AA, and the Engine Compartment Label (LH side, below) next to the VECI label.
PARTS INFORMATION
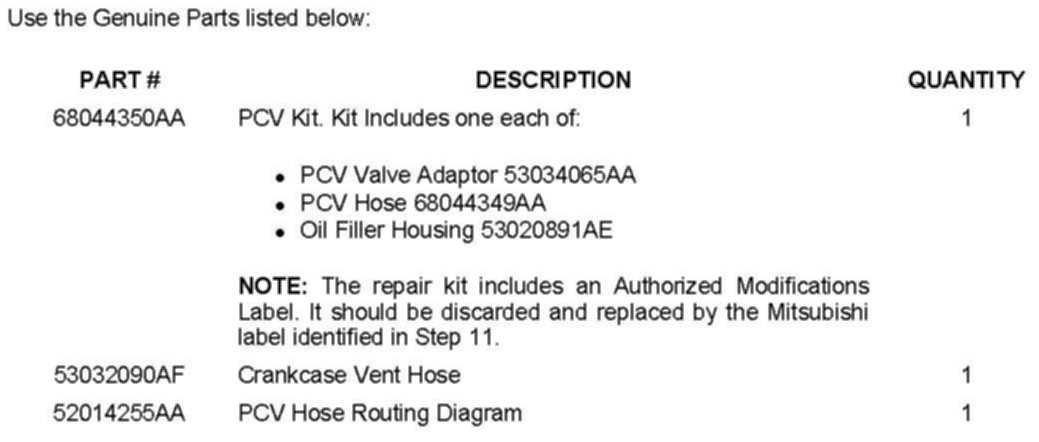
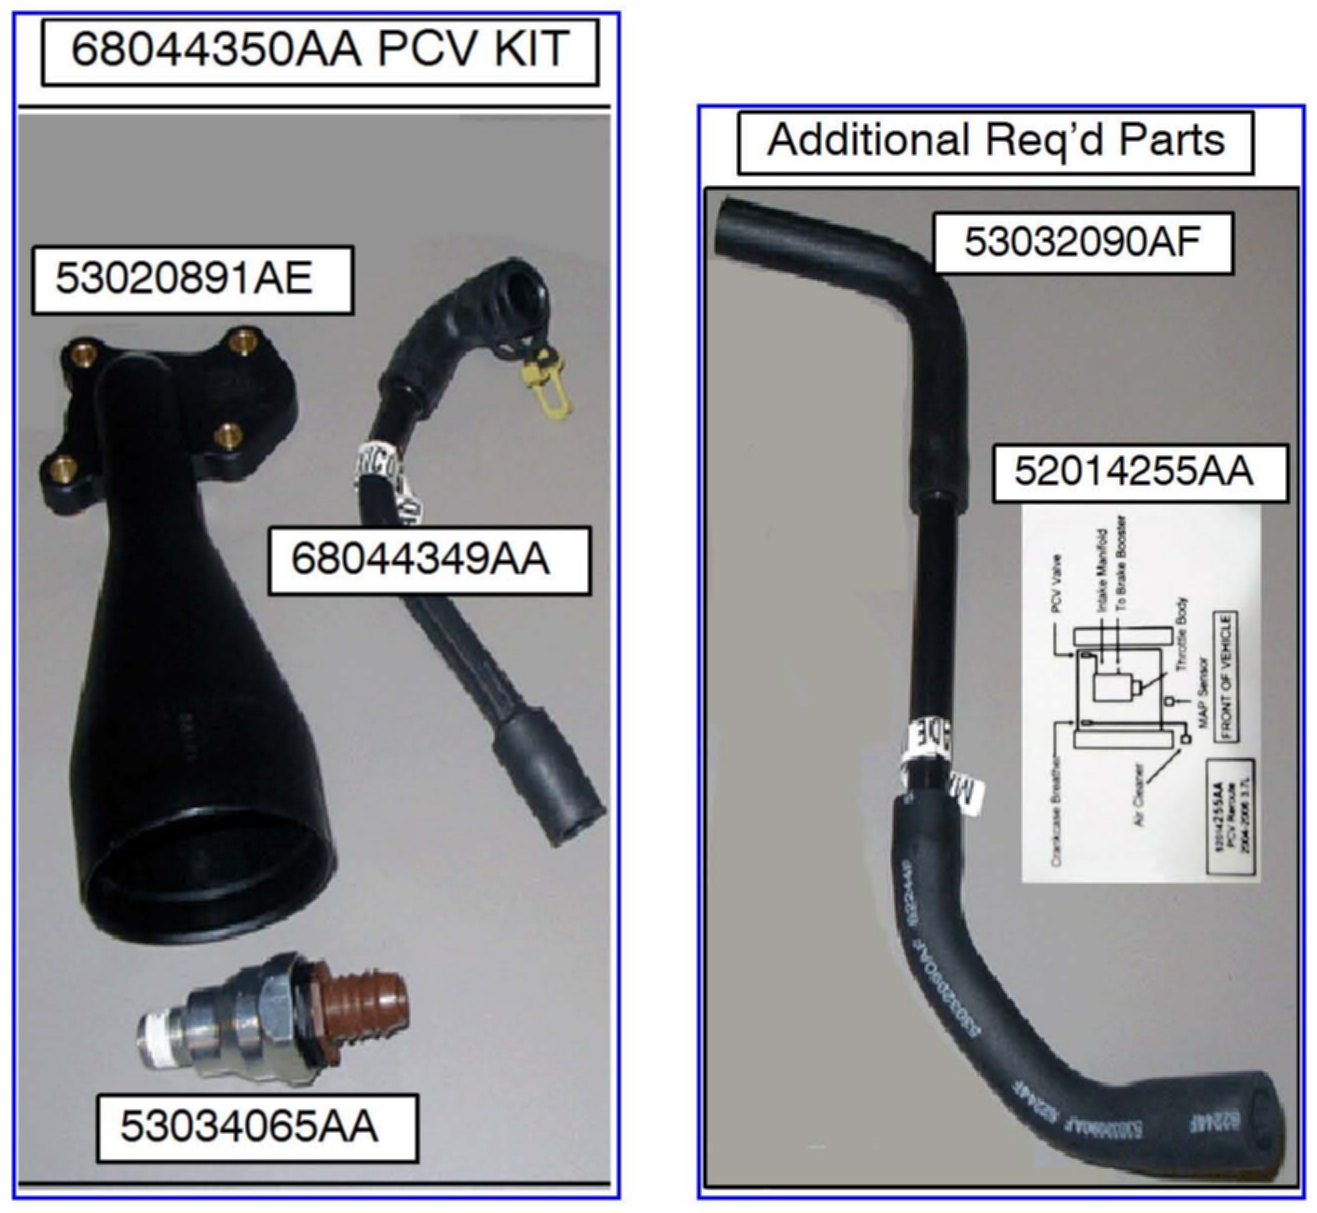
Use the Genuine Parts shown above.
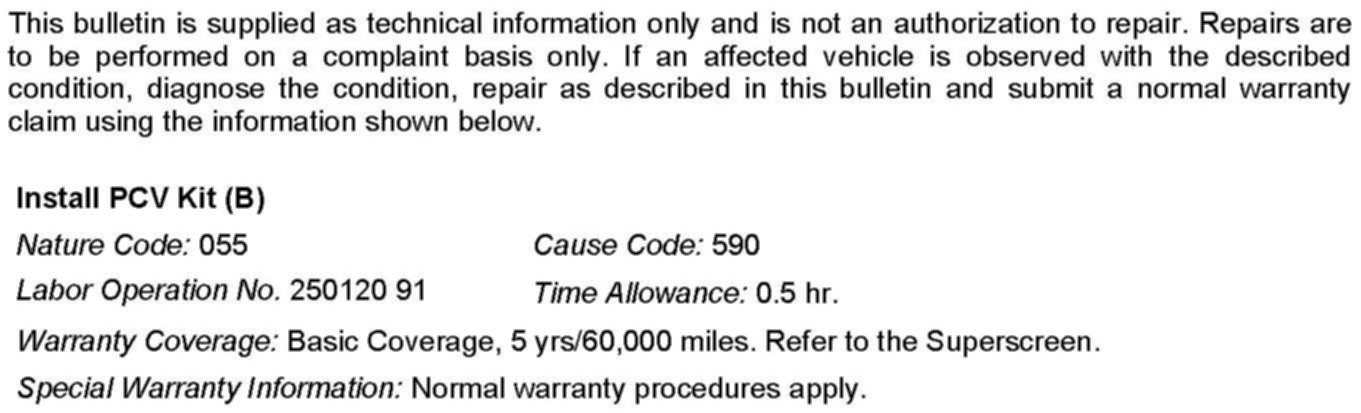
WARRANTY INFORMATION