Leak Detection Pump: Service and Repair
PUMP - NATURAL VAC LEAK DETECTIONREMOVAL
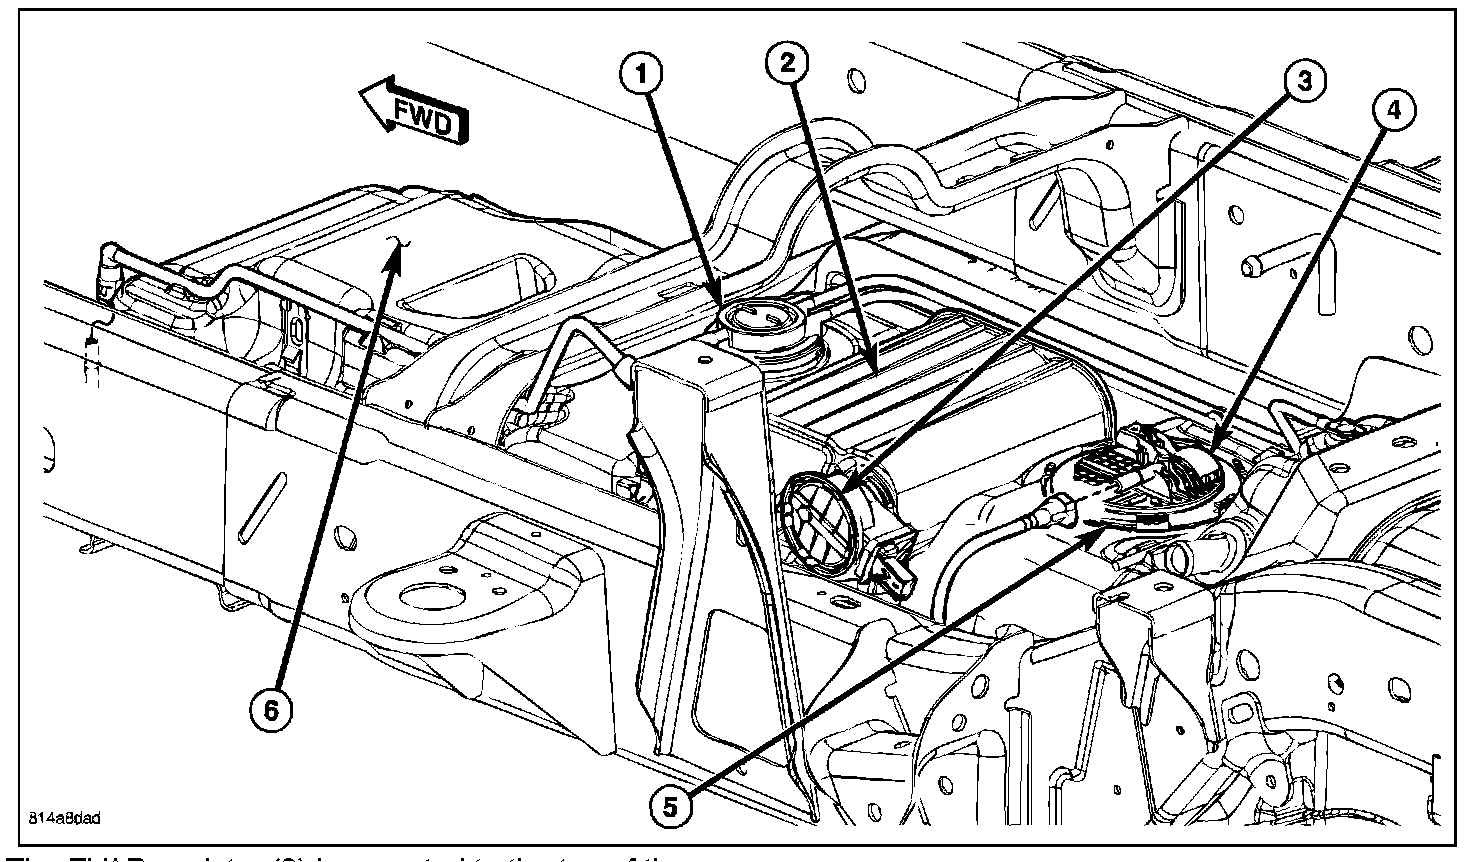
The EVAP canister (2) is mounted to the top of the fuel tank (6). Both the EVAP canister (2) and NVLD pump (3) can be removed without removing the fuel tank.
1. Raise and support vehicle.
2. Remove left-rear tire.
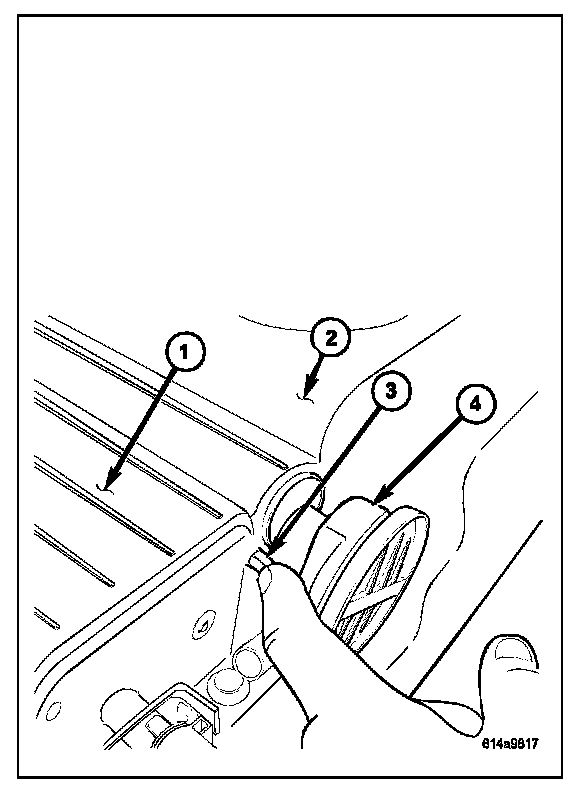
3. Remove plastic shield in front of left-rear tire. Access to both the EVAP canister (2) and NVLD pump (3) from the area in front of the removed tire.
4. Disconnect electrical connector at NVLD pump.
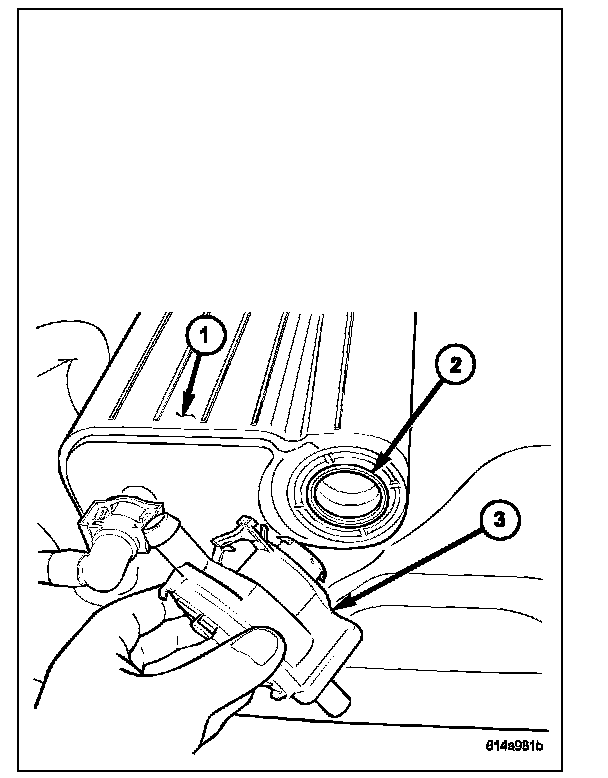
5. Remove vapor line at NVLD pump. Pry outward on tab (3) and rotate pump clock-wise about 70 for removal.
6. Remove NVLD pump O-ring (2) from EVAP canister (1).
INSTALLATION
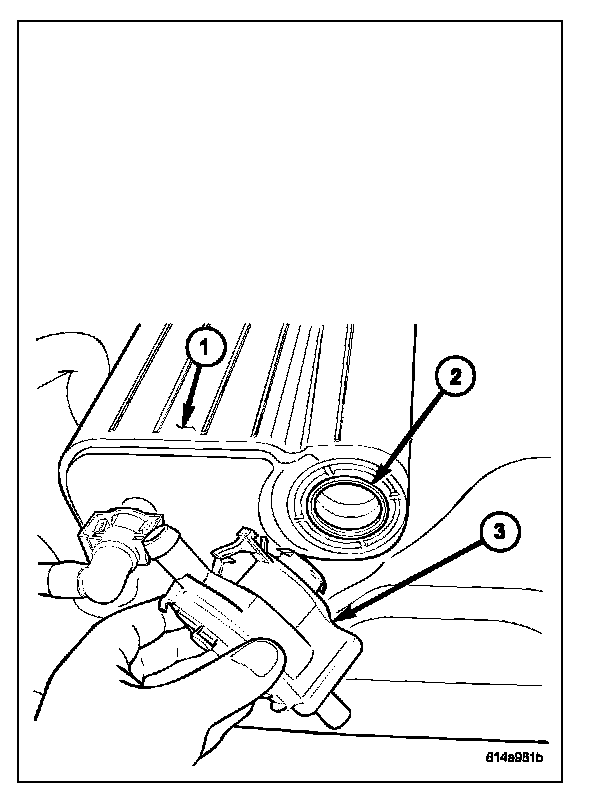
1. Install new NVLD pump O-ring (2) to EVAP canister (1).
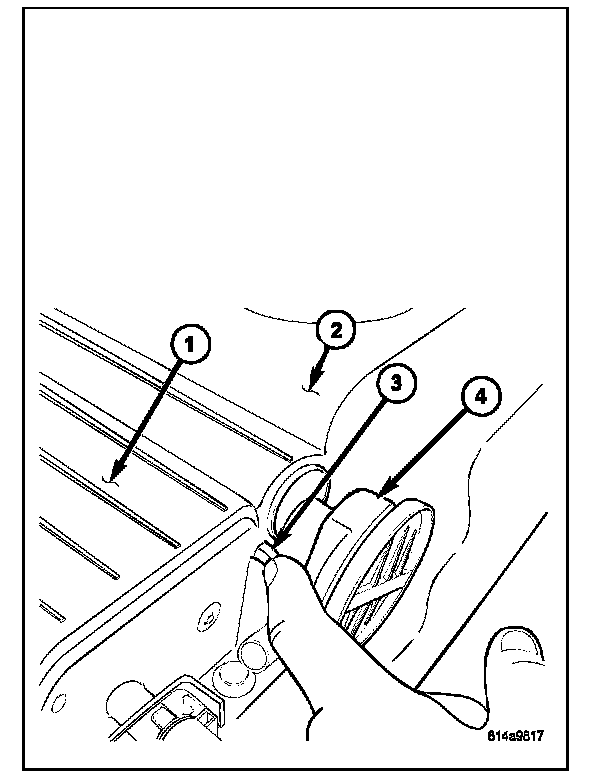
2. Position NVLD pump (4) into EVAP canister (1).
3. Rotate pump (4) until tab (3) aligns with notch in EVAP canister (1).
4. Carefully install vapor/vacuum lines to NVLD pump. The vapor/vacuum lines and hoses must be firmly connected. Check the vapor/vacuum lines at the NVLD pump, filter and EVAP canister purge solenoid for damage or leaks. If a leak is present, a Diagnostic Trouble Code (DTC) may be set.
5. Connect electrical connector to pump.
6. Install plastic shield in front of left-rear tire.
7. Install left-rear tire.