Seat Position Sensor: Service and Repair
SENSOR - SEAT TRACK POSITIONREMOVAL
WARNING: To avoid serious or fatal injury on vehicles equipped with airbags, disable the Supplemental Restraint System (SRS) before attempting any steering wheel, steering column, airbag, seat belt tensioner, impact sensor, or instrument panel component diagnosis or service. Disconnect and isolate the battery negative (ground) cable, then wait two minutes for the system capacitor to discharge before performing further diagnosis or service. This is the only sure way to disable the SRS. Failure to take the proper precautions could result in accidental airbag deployment.
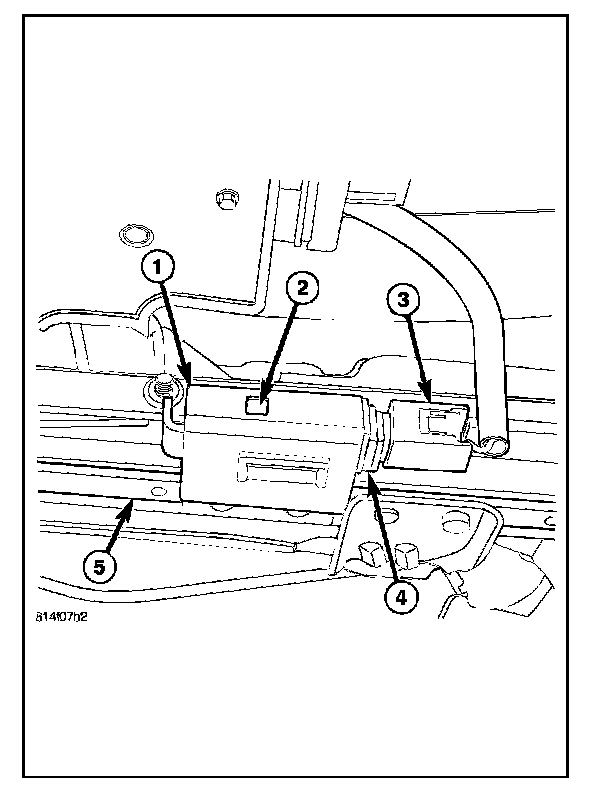
1. Disconnect and isolate the battery negative cable. Wait two minutes for the system capacitor to discharge before further service.
2. Reach under the front seat cushion to access the seat track position sensor (4) in a bracket (1) located on the inboard side of either the inner or outer, driver or passenger seat track (5).
3. Disconnect the seat wire harness connector (3) from the sensor connector receptacle located on the end of the sensor.
4. Using a small screwdriver, depress the snap feature (2) and pull the connector end of the sensor out of the bracket.
5. Remove the sensor from under the front seat.
INSTALLATION
WARNING: To avoid serious or fatal injury on vehicles equipped with airbags, disable the Supplemental Restraint System (SRS) before attempting any steering wheel, steering column, airbag, seat belt tensioner, impact sensor, or instrument panel component diagnosis or service. Disconnect and isolate the battery negative (ground) cable, then wait two minutes for the system capacitor to discharge before performing further diagnosis or service. This is the only sure way to disable the SRS. Failure to take the proper precautions could result in accidental airbag deployment.
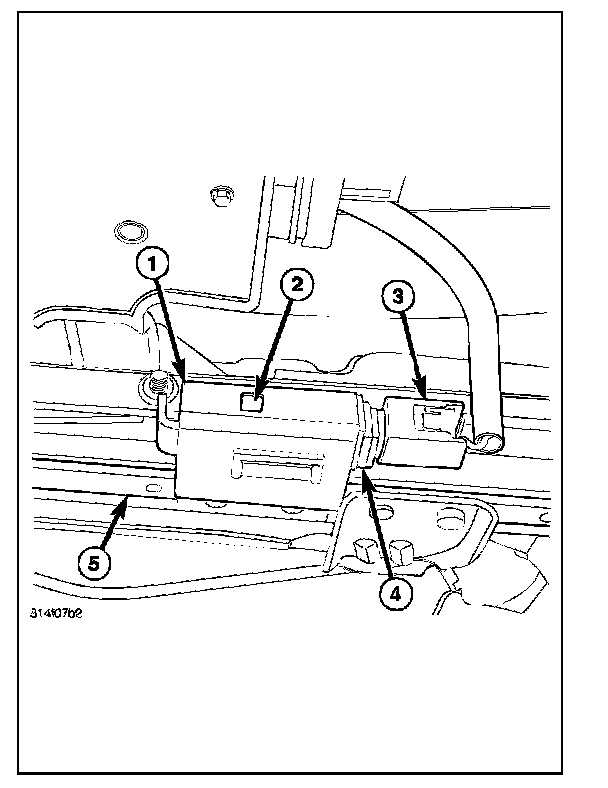
1. Reach under the front seat cushion to position the seat track position sensor (4) to the open end of the bracket (1) located on the inboard side of either the inner or outer, driver or passenger seat track (5).
2. Push the sensor firmly into the bracket until the snap feature (2) locks into place.
3. Reconnect the seat wire harness connector (3) to the sensor connector receptacle located on the end of the sensor. Be certain that the latch on the connector is fully engaged.
4. Do not reconnect the battery negative cable at this time. The Supplemental Restraint System (SRS) verification test procedure should be performed following service of any SRS component.