Upper Control Arm Bushing
UPPER CONTROL ARM BUSHINGREMOVAL
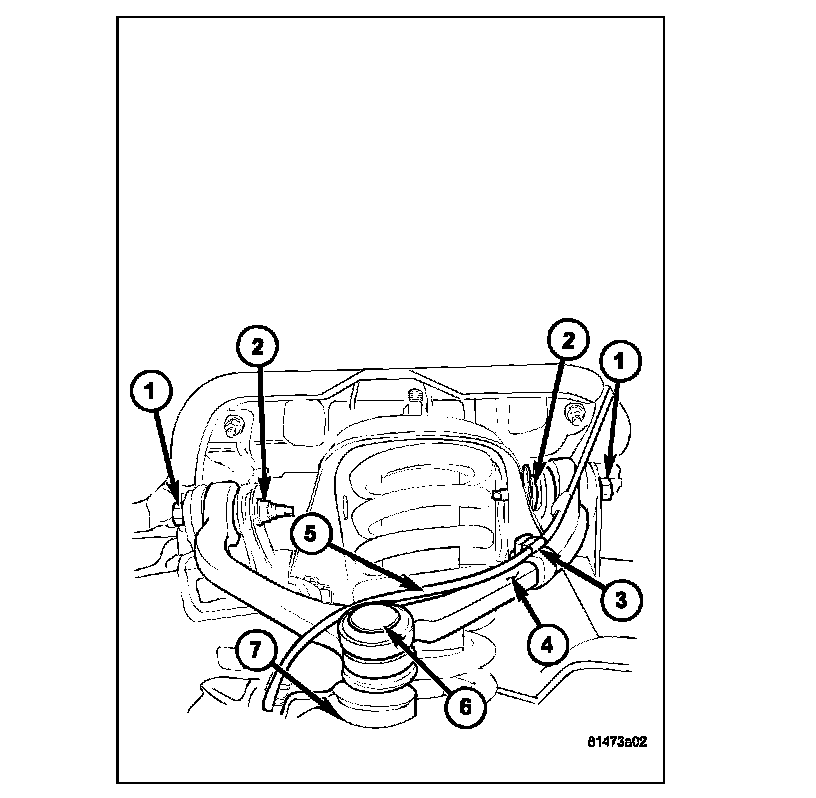
1. Remove the upper control arm (4).
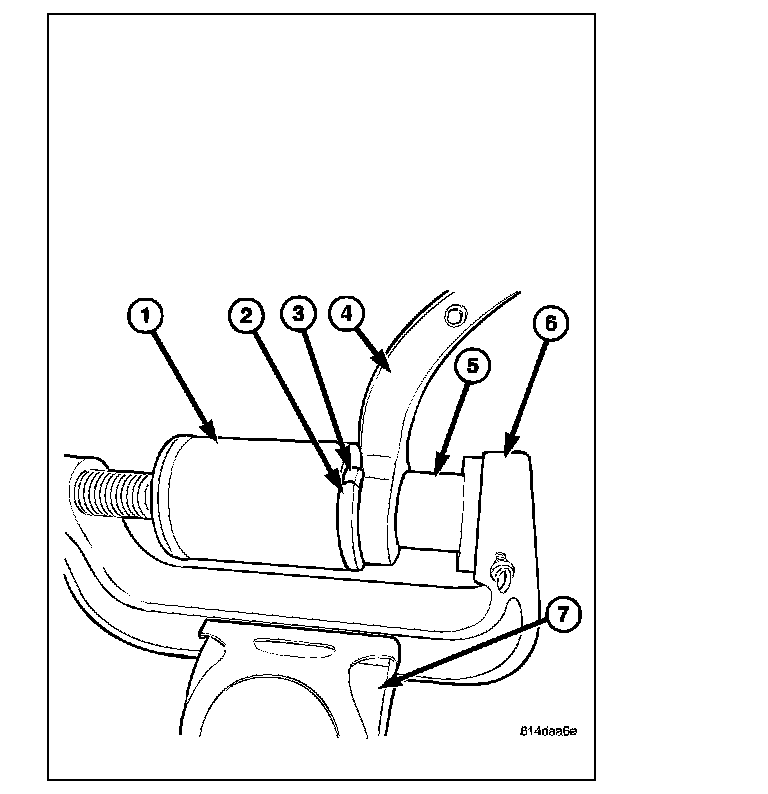
2. Secure the control arm in a vise (7).
NOTE: Extreme pressure lubrication must be used on the threaded portions of the tool. This will increase the longevity of the tool and insure proper operation during the removal and installation process.
3. Install special tools C-4212-F (press) (6), 6761 (Receiver) (1), 9601-2 (Reaction Plate) (2), 9601-1 (Driver) (5) to press the bushing (3) out of the upper control arm (4).
INSTALLATION
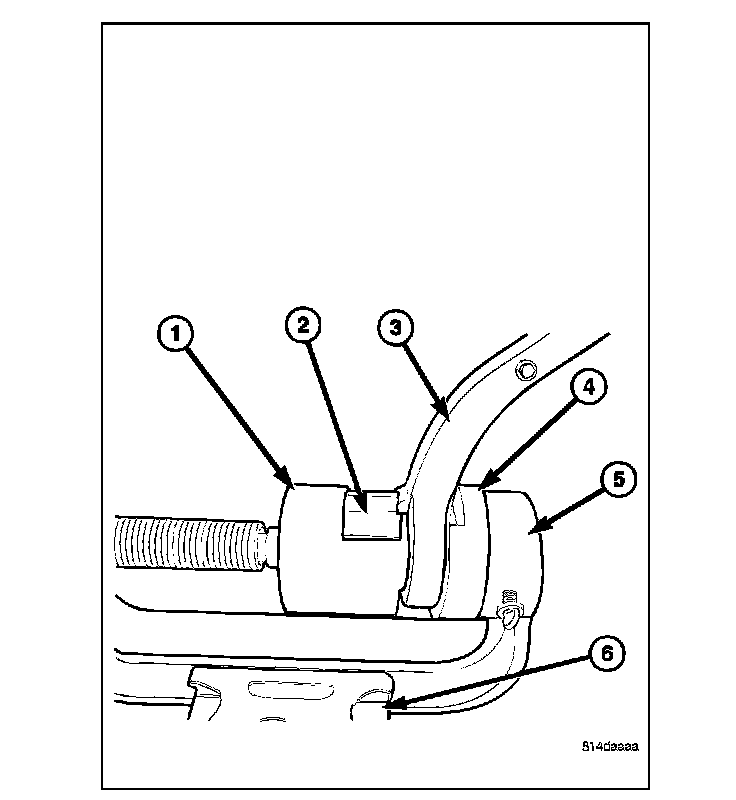
1. Install the new bushing (2) into the lower control (3) arm using tools C-4212-F (Press) (5), 9601-3 (Depth Gauge) (4), 9601-4 (Driver) (1).
2. Remove the control arm from the vise (6).
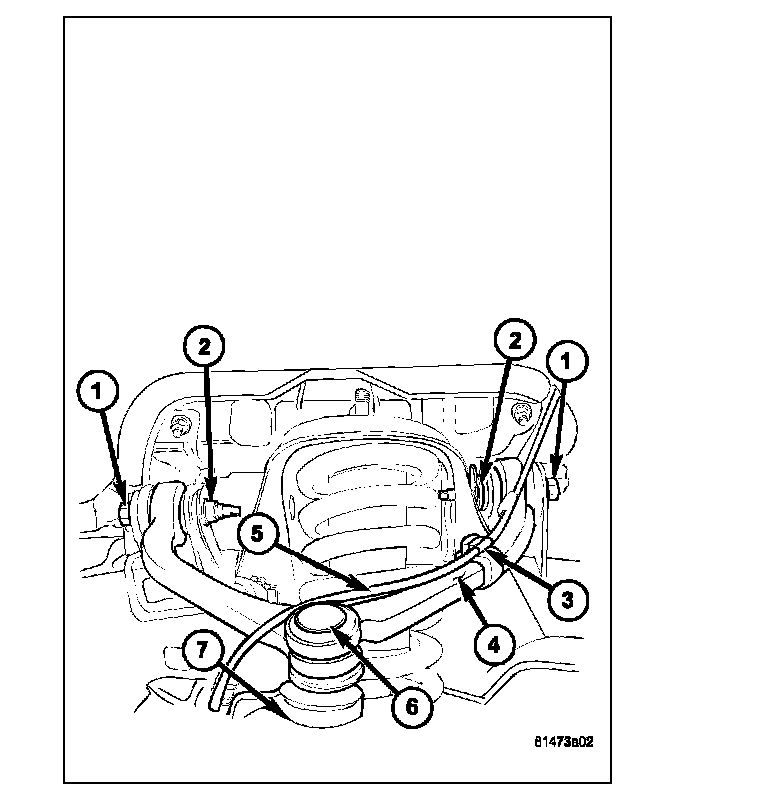
3. Install the upper control arm (4).
4. Reset the vehicle ride height.
5. Perform a wheel alignment.