Liftgate Window Glass: Service and Repair
LIFTGATE WINDOW GLASSREMOVAL AND INSTALLATION
Pro-removal And Post-installation Operation:
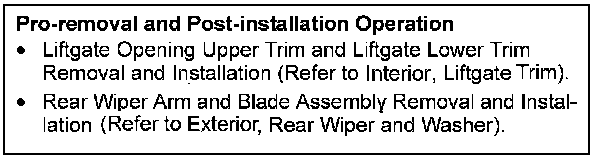
Removal Steps 1-17 (Part 1):
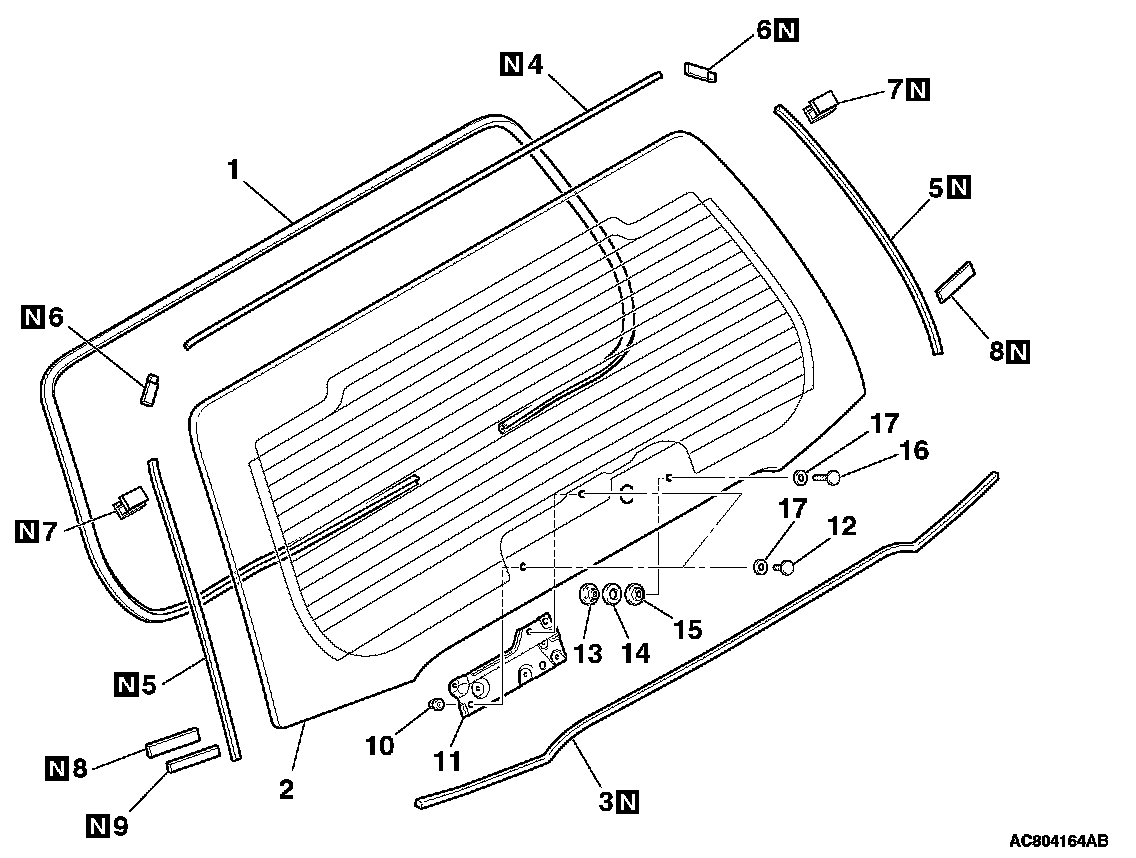
Removal Steps 1-17 (Part 2):
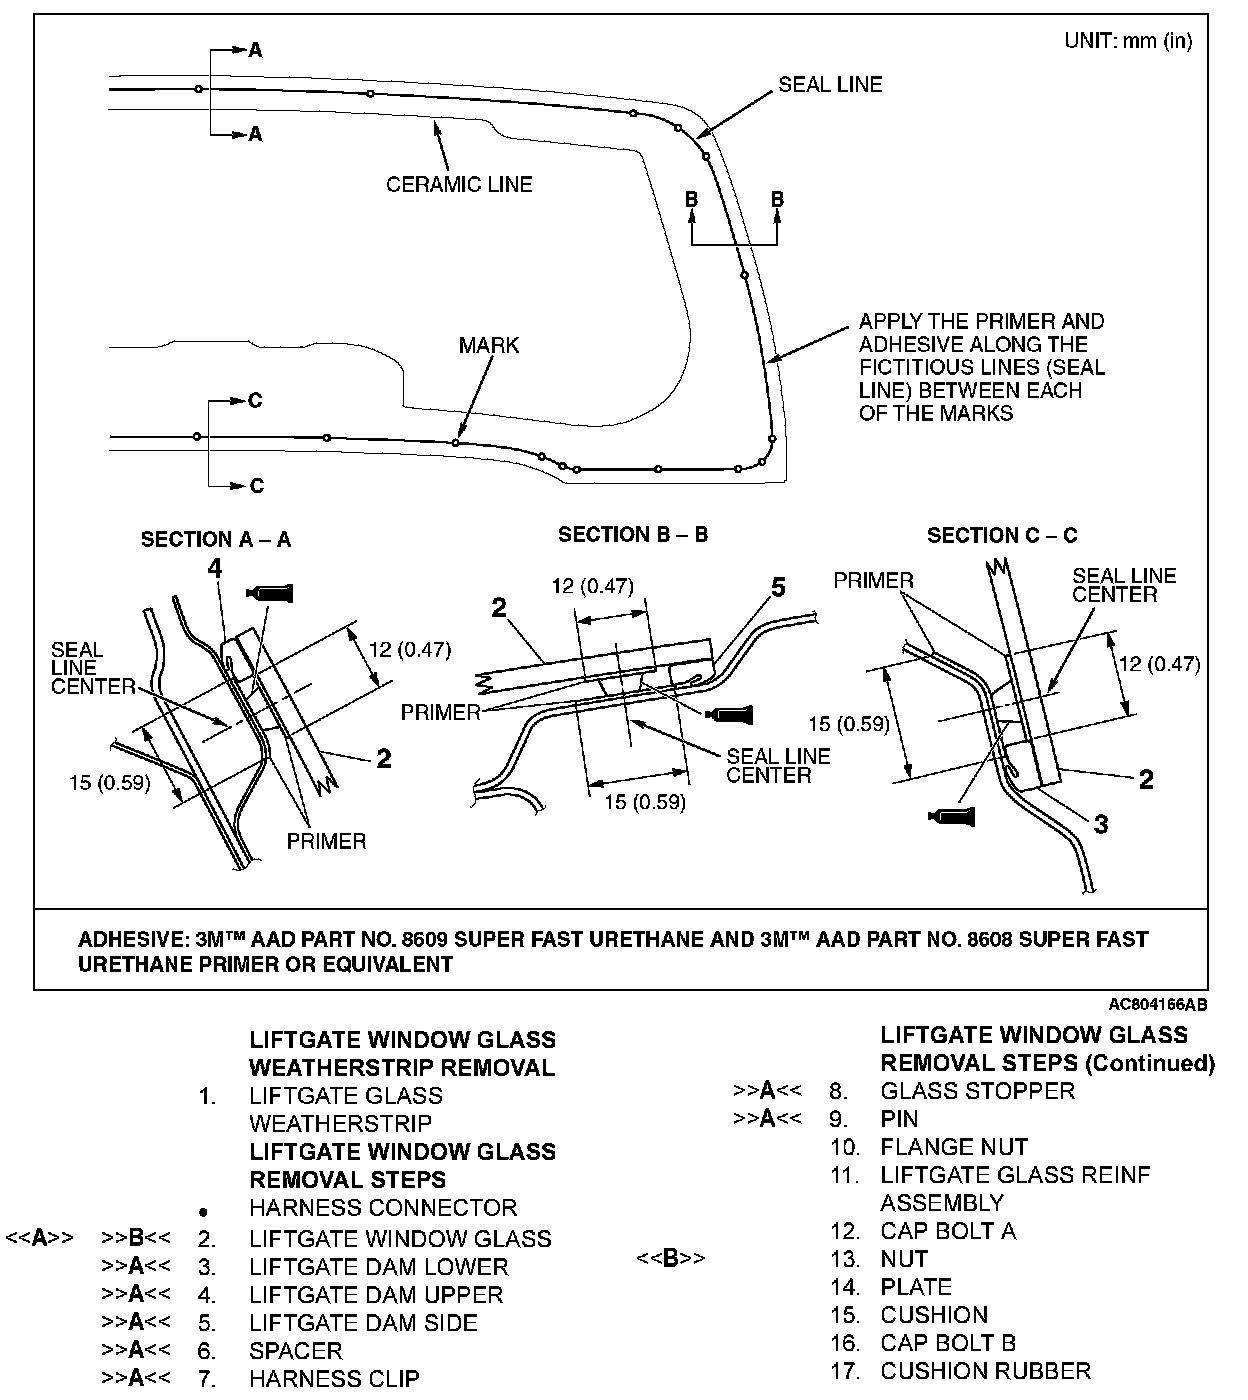
REMOVAL SERVICE POINT
[[A]] LIFTGATE WINDOW GLASS REMOVAL
Remove the liftgate window glass in the same manner as the windshield.
NOTE: Use a piano wire to remove the liftgate window glass.
[[B]] NUT REMOVAL
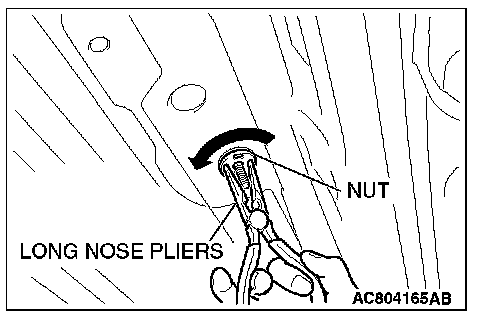
Use a pair of long nose pliers or the like to remove the nut while turning it in the direction shown in the figure.
INSTALLATION SERVICE POINTS
]]A[[ PIN/GLASS STOPPER/HARNESS CLIP/SPACER/LIFTGATE DAM SIDE/LIFTGATE DAM UPPER/LIFTGATE DAM LOWER INSTALLATION
CAUTION: Before the next job, leave the decreased parts for 3 minutes or more to dry. Do not touch the degreased parts.
1. Use 3M (TM) AAD Part number 8880 or equivalent to degrease the inside and outside of the liftgate window glass and the liftgate flanges.
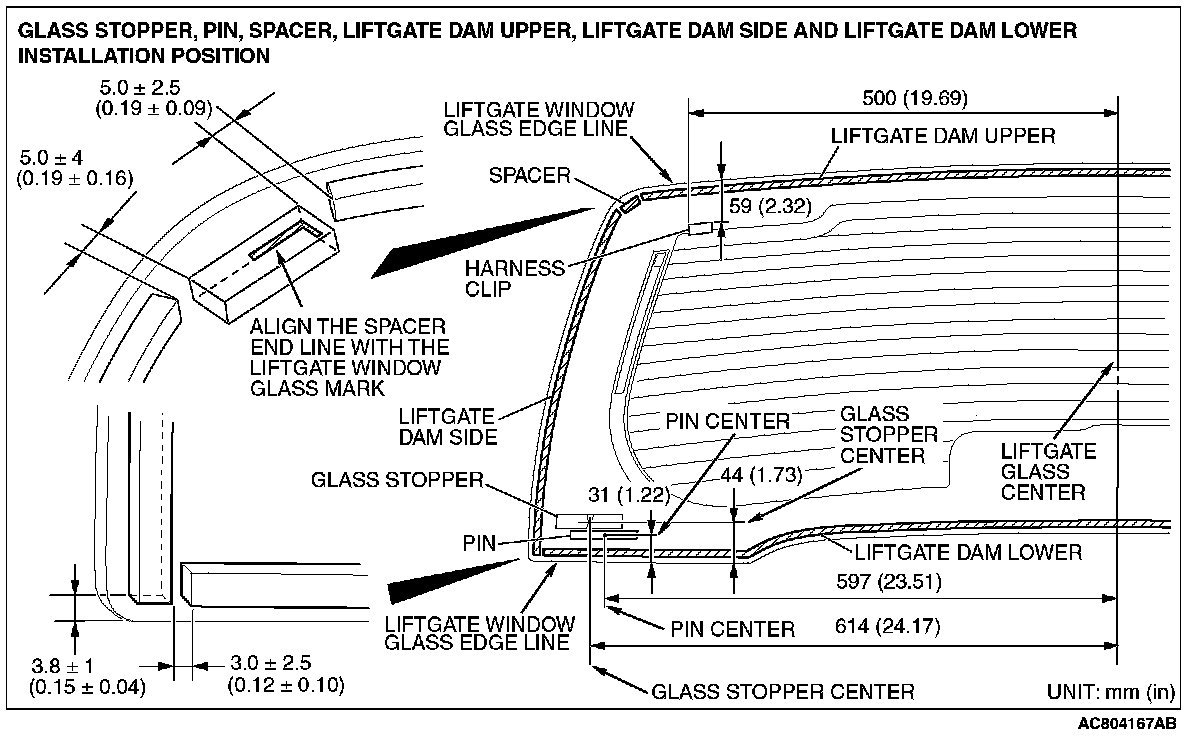
2. Assemble the pin, glass stopper, harness clip, spacer, liftgate dam side, liftgate dam upper and liftgate dam lower to specified positions on the liftgate window glass.
]]B[[ LIFTGATE WINDOW GLASS INSTALLATION
1. Apply the primer and adhesive.
2. Align the pin adhered to the liftgate window glass with the hole of liftgate side, and install the liftgate window glass by the same procedure as for the windshield.