Air Bag Control Module: Service and Repair
SUPPLEMENTAL RESTRAINT SYSTEM (SRS)
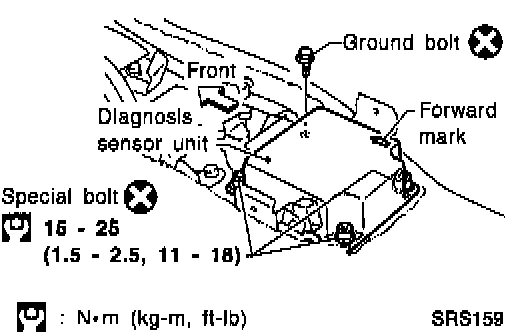
Removal and Installation - Diagnosis Sensor Unit
CAUTION:
- Before servicing SRS, turn the ignition switch off, disconnect both battery cables and wait for at least 10 minutes.
- The special bolts are coated with bonding agent while the other bolt is for ground. Do not use old bolts after removal; replace with new ones.
- Check diagnosis sensor unit for proper installation.
- Check diagnosis sensor unit to ensure it is free of deformities, dents, cracks or rust. If it shows any visible signs of damage, replace it with a new one.
- Check diagnosis sensor unit brackets to ensure they are free of deformities or rust.
- Replace diagnosis sensor unit if it has been dropped or sustained an impact.
REMOVAL OF DIAGNOSIS SENSOR UNIT
1. Disconnect driver and passenger air bag module connectors.
2. Remove console box. Refer to "INSTRUMENT PANEL".
3. Disconnect diagnosis sensor unit connector.
4. Remove bolt and also remove special bolts using the TAMPER RESISTANT TORX (Size T50), from diagnosis sensor unit. Then remove diagnosis sensor unit.
NOTE:
- To install, reverse the removal procedure sequence.
- After replacement, perform self-diagnosis for SRS. Refer to System Diagnosis/Testing and Inspection/Self Diagnostic Procedures.