Cylinder Head Torque Values & Sequence
LOWER TIMING CHAIN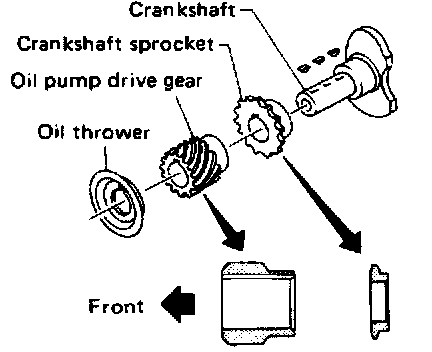
1. Install crankshaft sprocket, oil pump drive gear and oil thrower.
- Make sure that mating marks of crankshaft sprocket face front of engine.
2. Position crankshaft so that No. 1 piston is set at TDC.
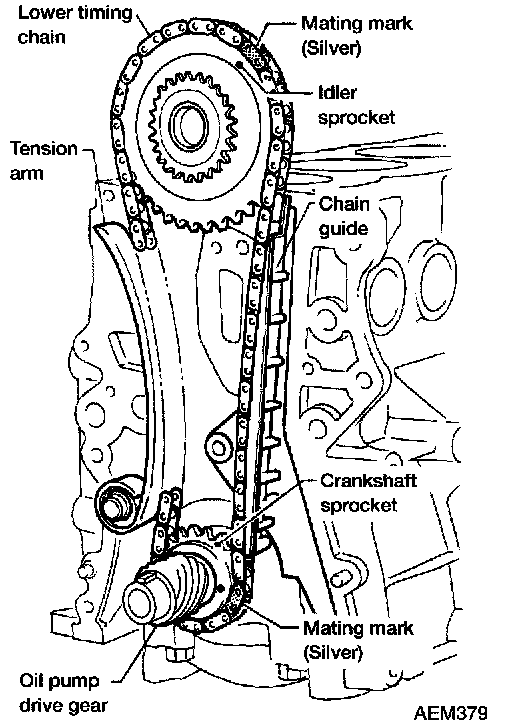
3. Install idler sprocket and lower timing chain.
- Set lower timing chain on the sprockets, aligning mating marks. Be careful not to damage cylinder head gasket when installing lower timing chain.
4. Install chain tension arm and chain guide.
5. Install lower timing chain tensioner.
- When installing, insert a suitable pin into pin hole to stop piston. After installation remove the pin to release piston.

6. Install front cover.
- Use a scraper to remove all traces of liquid gasket from mating surface
- Also remove traces of liquid gasket from mating surface of cylinder block.
- Apply a continuous bead of liquid gasket to front cover.
- Use Genuine RTV Silicone Sealant, Part No. 999 MP-A7007, Three Bond TB1207D or equivalent.
- Be careful not to damage cylinder head gasket.
- Be sure to install new front oil seal.
7. Install the following parts:
- Crankshaft pulley Oil strainer and oil pan.
- Component parts below the engine.
- A/C compressor idler pulley.
- New cylinder head gasket.
- Idler shaft.
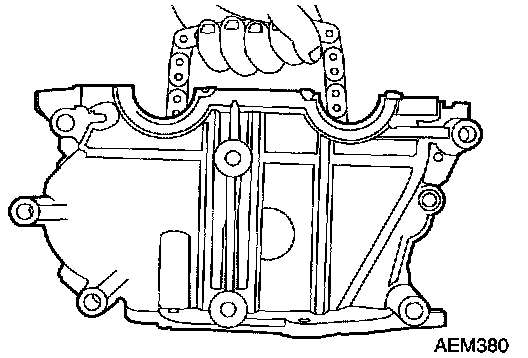
8. Install the oil pump.
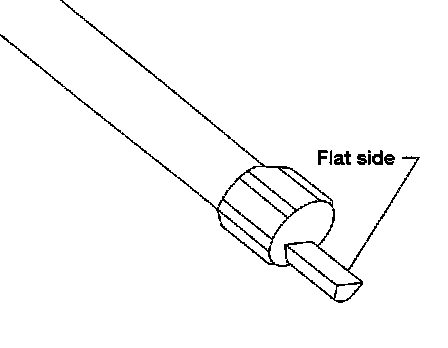
- Make sure the flat side of the distributor drive shaft is facing the engine.

9. Install cylinder head and temporarily tighten cylinder head bolts when installing front cover.
- Apply new engine oil to bolt threads and seat surfaces.
- Temporarily tighten cylinder head bolts. This is necessary to avoid damaging cylinder head gasket.
- Be sure to install washers between bolts and cylinder head.
UPPER TIMING CHAIN

1. Install lower timing chain.

2. Install upper timing chain, chain tensioner.
- Set upper timing chain on the idler sprockets, aligning mating marks.
- When installing chain tensioner, insert a suitable pin into pin hole to stop piston.
- After installation remove the pin to release piston.
3. Install camshaft sprocket cover
- Use a scraper to remove all traces of liquid gasket from mating surface
- Also remove traces of liquid gasket from mating surface of cylinder block
- Apply a continuous bead of liquid gasket to camshaft sprocket cover
- Use Nissan Genuine RTV Silicone Sealant, Part No. 999 MP-A7007, Three Bond TB1207D or equivalent.
- Be careful not to damage cylinder head gasket.
- Be careful upper timing chain does not slip or jump when installing camshaft sprocket cover.


4. Tighten cylinder head bolts in numerical order
- Tightening procedure
a. Tighten all bolts to 29 Nm (3.0 kg-m, 22 ft. lbs.).
b. Tighten all bolts to 79 Nm (8.1 kg-m, 59 ft. lbs.).
c. Loosen all bolts completely
d. Tighten all bolts to 25 to 34 Nm (2.5 to 3.5 kg-m, 18 to 25 ft. lbs.).
e. Turn all bolts 86 +5/-0 degrees clockwise, or if an angle wrench is not available, tighten bolts to 75 to 84 Nm (7.6 to 8.6 kg-m, 55 to 62 ft. lbs.).

5. Install camshafts and camshaft brackets
- Tightening procedure.
a. Tighten all bolts to 2 Nm (0.2 kg-m, 17 inch lbs.).
b. Tighten all bolts to 9.0 to 11.8 Nm (0.92 to 1.2 kg-m, 79.9 - 104.2 inch lbs.).
- Apply new engine oil to bolt threads and seat surfaces.
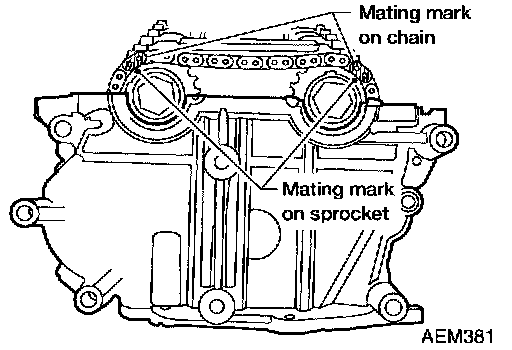
6. Install camshaft sprockets.
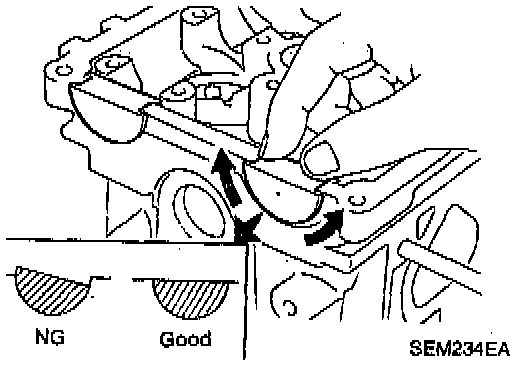
7. Install rubber plugs as follows.
(1) Apply liquid gasket to rubber plugs.
(2) Install rubber plugs, then move them by hand to uniformly spread the gasket on cam sprocket cover surface. Rubber plugs should be installed flush with the cylinder head surface.
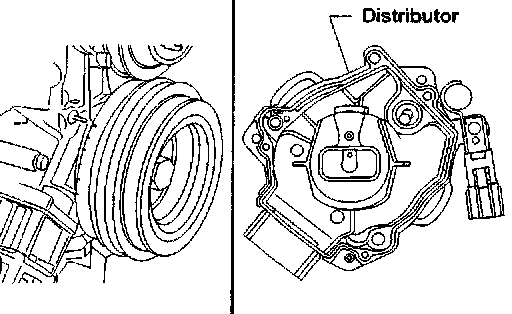
8. Install distributor.
- Make sure that No. 1 piston is set at TDC and that distributor rotor is set at No. 1 cylinder spark position.

9. Install rocker cover.
8 - 11 Nm (0.8 - 1.1 kg-m, 69 - 95 inch lbs.).
10. Install all spark plugs with high-tension cords.
11. Connect injector harness connector and replace injector tube assembly with injectors.
12. Install the following parts.
- Radiator shroud
- Cooling fan with coupling
- Air duct
13. Install vacuum hoses, fuel tubes, wires, harness and connectors and so on.