Compressor Clutch: Service and Repair
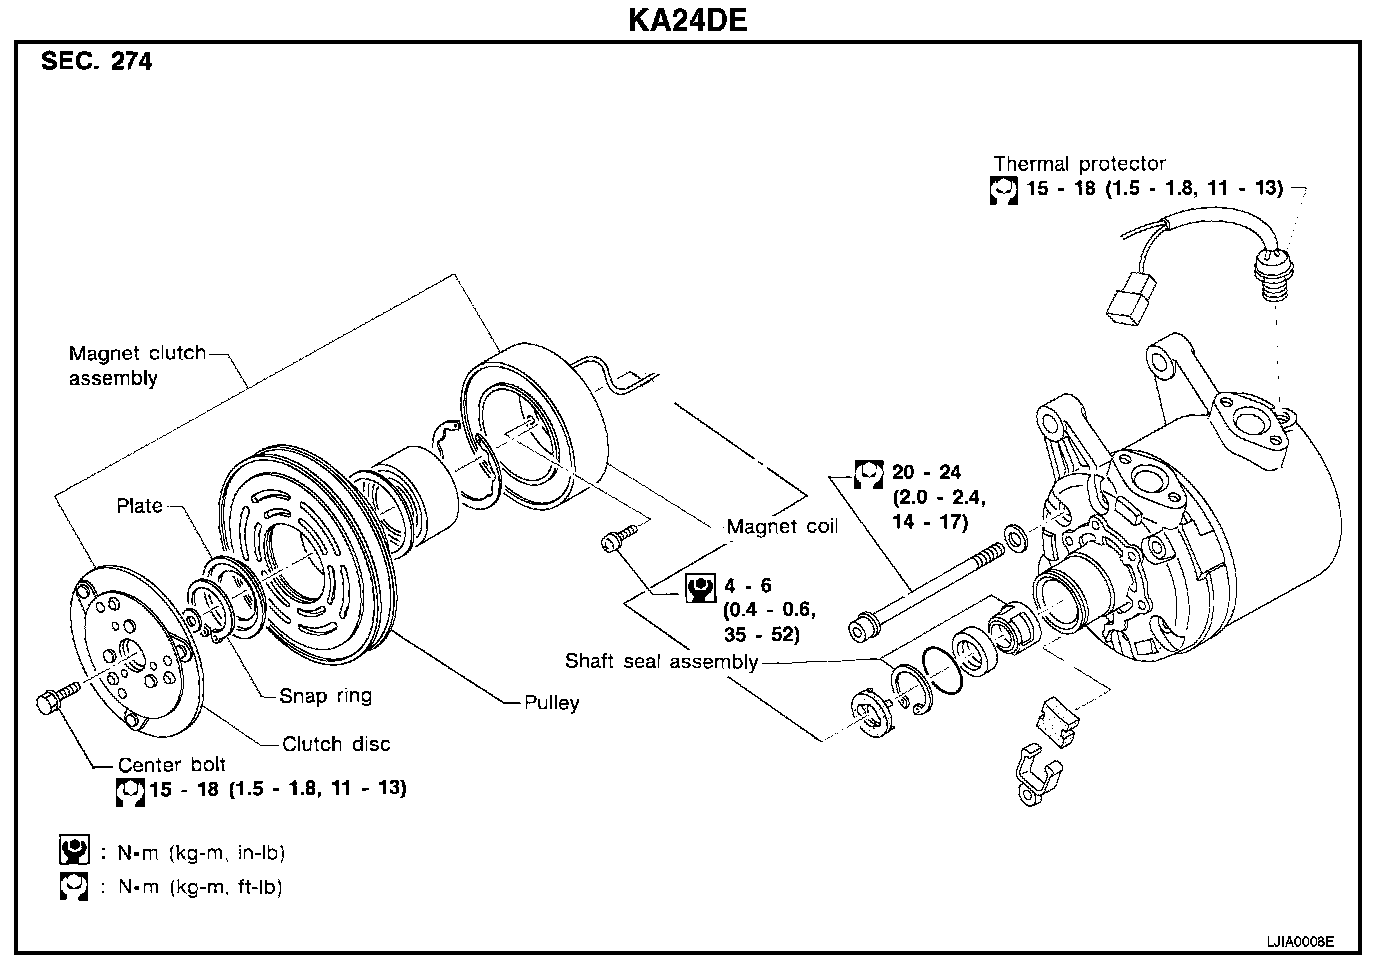
Removal and Installation for Compressor clutch
REMOVAL
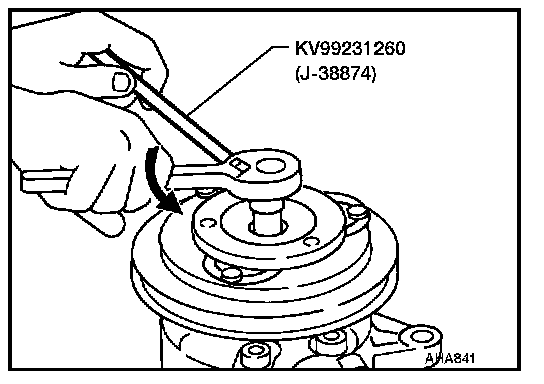
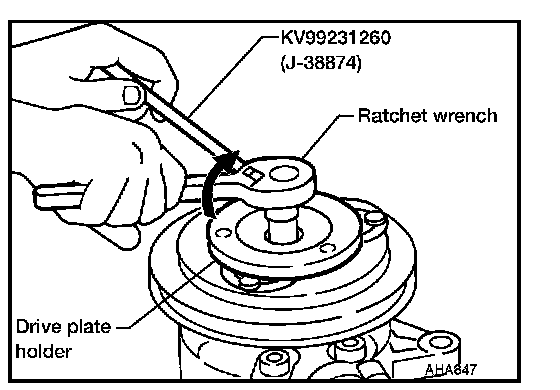
1. Remove the drive plate center bolt, hold clutch disc using Tool.
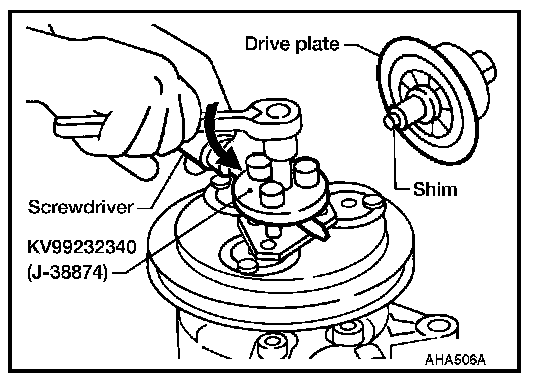
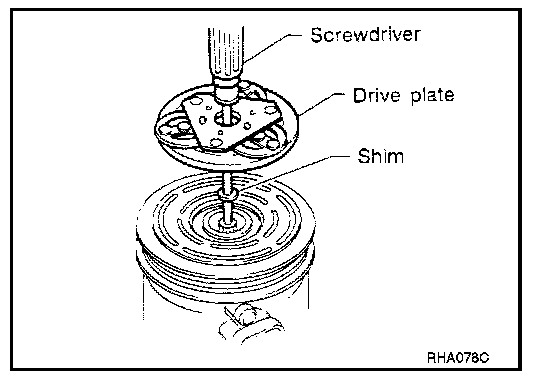
2. Remove the drive plate using Tool.
- Insert Tool's three pins into the drive plate. Rotate the Tool clockwise to hook it onto the plate. Then, tighten the center bolt to remove the drive plate.
- While tightening the center bolt, insert a round bar (such as a suitable screwdriver) between two of the pins (as shown) to prevent drive plate rotation. After removing the drive plate, remove the shims from either the drive shaft or the drive plate.

3. Remove the snap ring using suitable external snap ring pliers as shown.
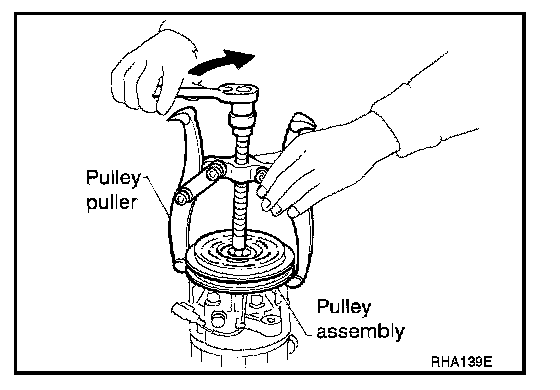
4. Remove the pulley assembly using a suitable pulley puller.
- Position the center of the pulley puller on the end of the drive shaft. Remove the pulley assembly with the puller.
CAUTION:
For pressed pulleys:
To prevent the deformation of the pulley groove, the puller claws should be hooked under (not into) the pulley groove.
5. Remove the field coil harness clip using a suitable screwdriver.
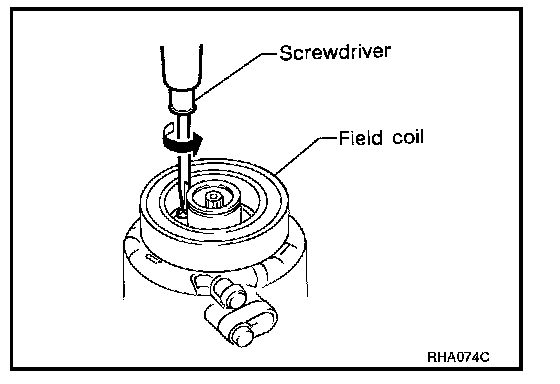
6. Remove the three field coil screws and remove the field coil.
INSTALLATION
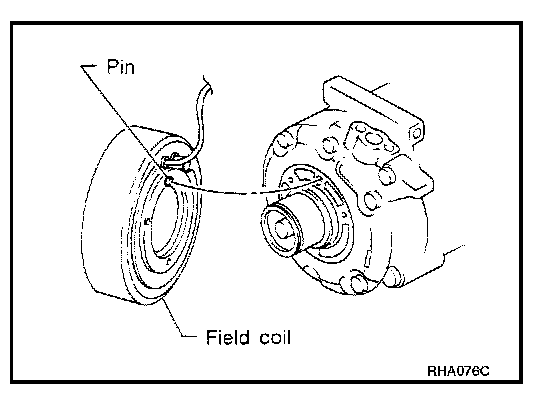
1. Install the field coil.
- Be sure to align the coil's pin with the hole in the compressor's front head as shown.
- Install the field coil harness clip using a suitable screwdriver.
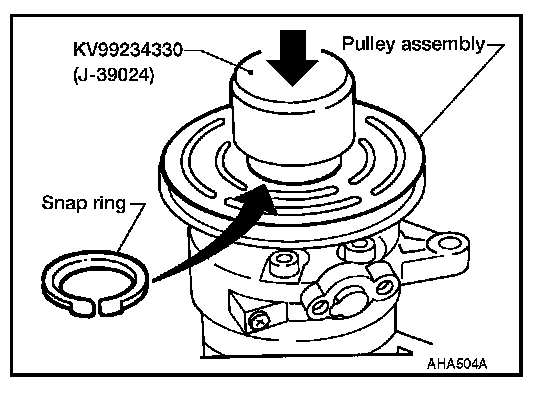
2. Install the pulley assembly using the installer and a hand press, and then install the snap ring using snap ring pliers.
3. Install the drive plate on the drive shaft, together with the original shim(s). Press the drive plate down by hand.
4. Using the holder to prevent drive plate rotation, tighten the bolt to specification.
Drive plate center bolt : 15 - 18 Nm (1.5 - 1.8 kg-m, 11 - 13 ft-lb)
5. After tightening the bolt, check that the pulley rotates smoothly.
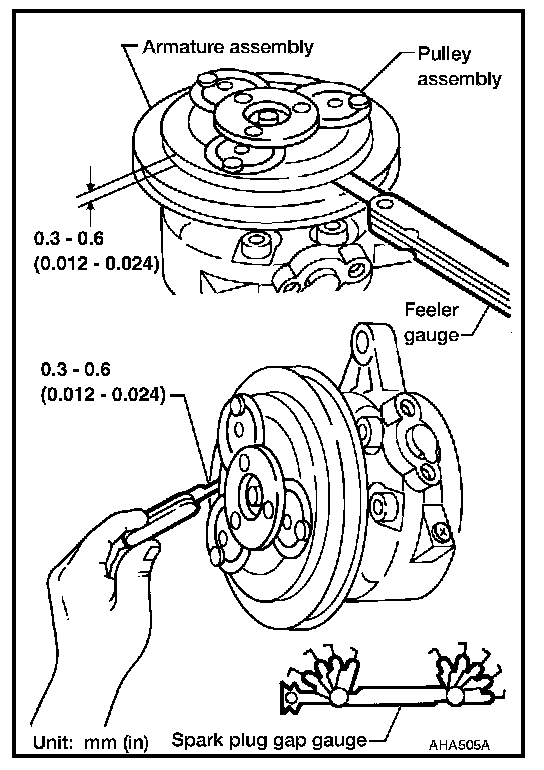
6. Check clearance all the way around the clutch disc.
Disc-to-pulley clearance : 0.3 - 0.6 mm (0.012 - 0.024 in)
If the specified clearance is not obtained, replace adjusting spacer and recheck.
BREAK-IN OPERATION
When replacing magnet clutch assembly, always conduct the break-in operation. This is done by engaging and disengaging the clutch about 30 times. Break-in operation raises the level of transmitted torque.