Compressor HVAC: Service and Repair
Removal and Installation for Compressor
REMOVAL
1. Discharge the refrigerant. Refer to "HFC-134a (R-134a) Service Procedure".
2. Remove the drive belt.
3. Remove the coolant pipe bracket bolt.
4. Remove compressor mounting stud.
5. Disconnect the compressor connector.
6. Remove the high-pressure flexible hose and low-pressure flexible hose.
CAUTION: Cap or wrap the joint of the pipe with suitable material such as vinyl tape to avoid the entry of air.
7. Remove the mounting bolts and nut from compressor using power tools.
INSTALLATION
CAUTION:
- Replace the O-ring of the low-pressure flexible hose and high-pressure flexible hose with a new one, then apply compressor oil to it when installing it.
- When charging refrigerant, check for leaks.
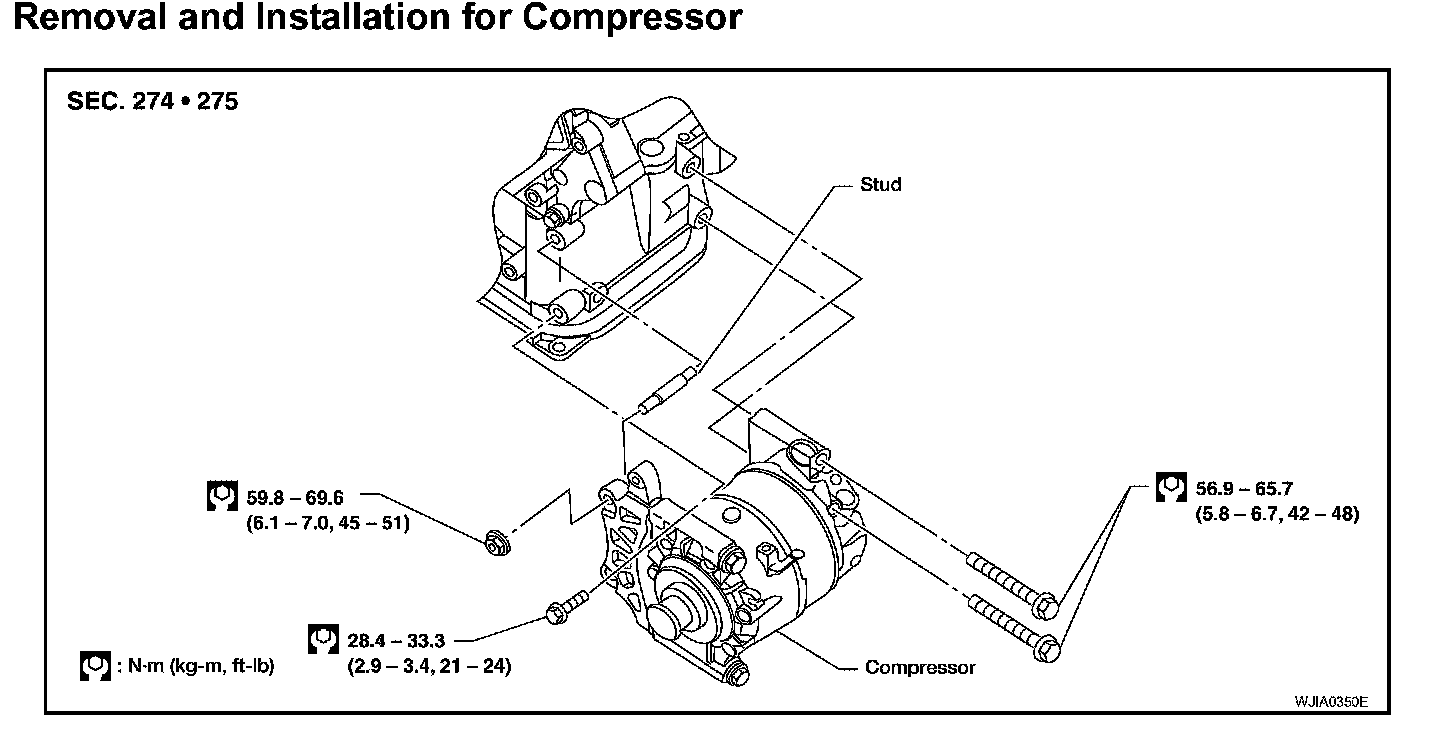
Compressor mounting bolts (rear side)
Tightening torque : 56.9 - 65.7 Nm (5.8 - 6.7 kg-m, 42 - 48 ft-lb)
Bolt mounting the compressor (front side)
Tightening torque : 28.4 - 33.3 Nm (2.9 - 3.4 kg-m, 21 - 24 ft-lb)
Nut mounting the compressor (front side)
Tightening torque : 59.8 - 69.6 Nm (6.1 - 7.0 kg-m, 45 - 51 ft-lb)
Bolt mounting the high- and low-pressure flexible hoses
Tightening torque : 7.8 - 19.6 Nm (0.8 - 1.9 kg-m, 69 - 173 in-lb)