CAN Communication Signal Chart
CAN Communication Signal ChartRefer to "How to Use CAN Communication Signal Chart" for how to use CAN communication signal chart.
Type 1/Type 3:
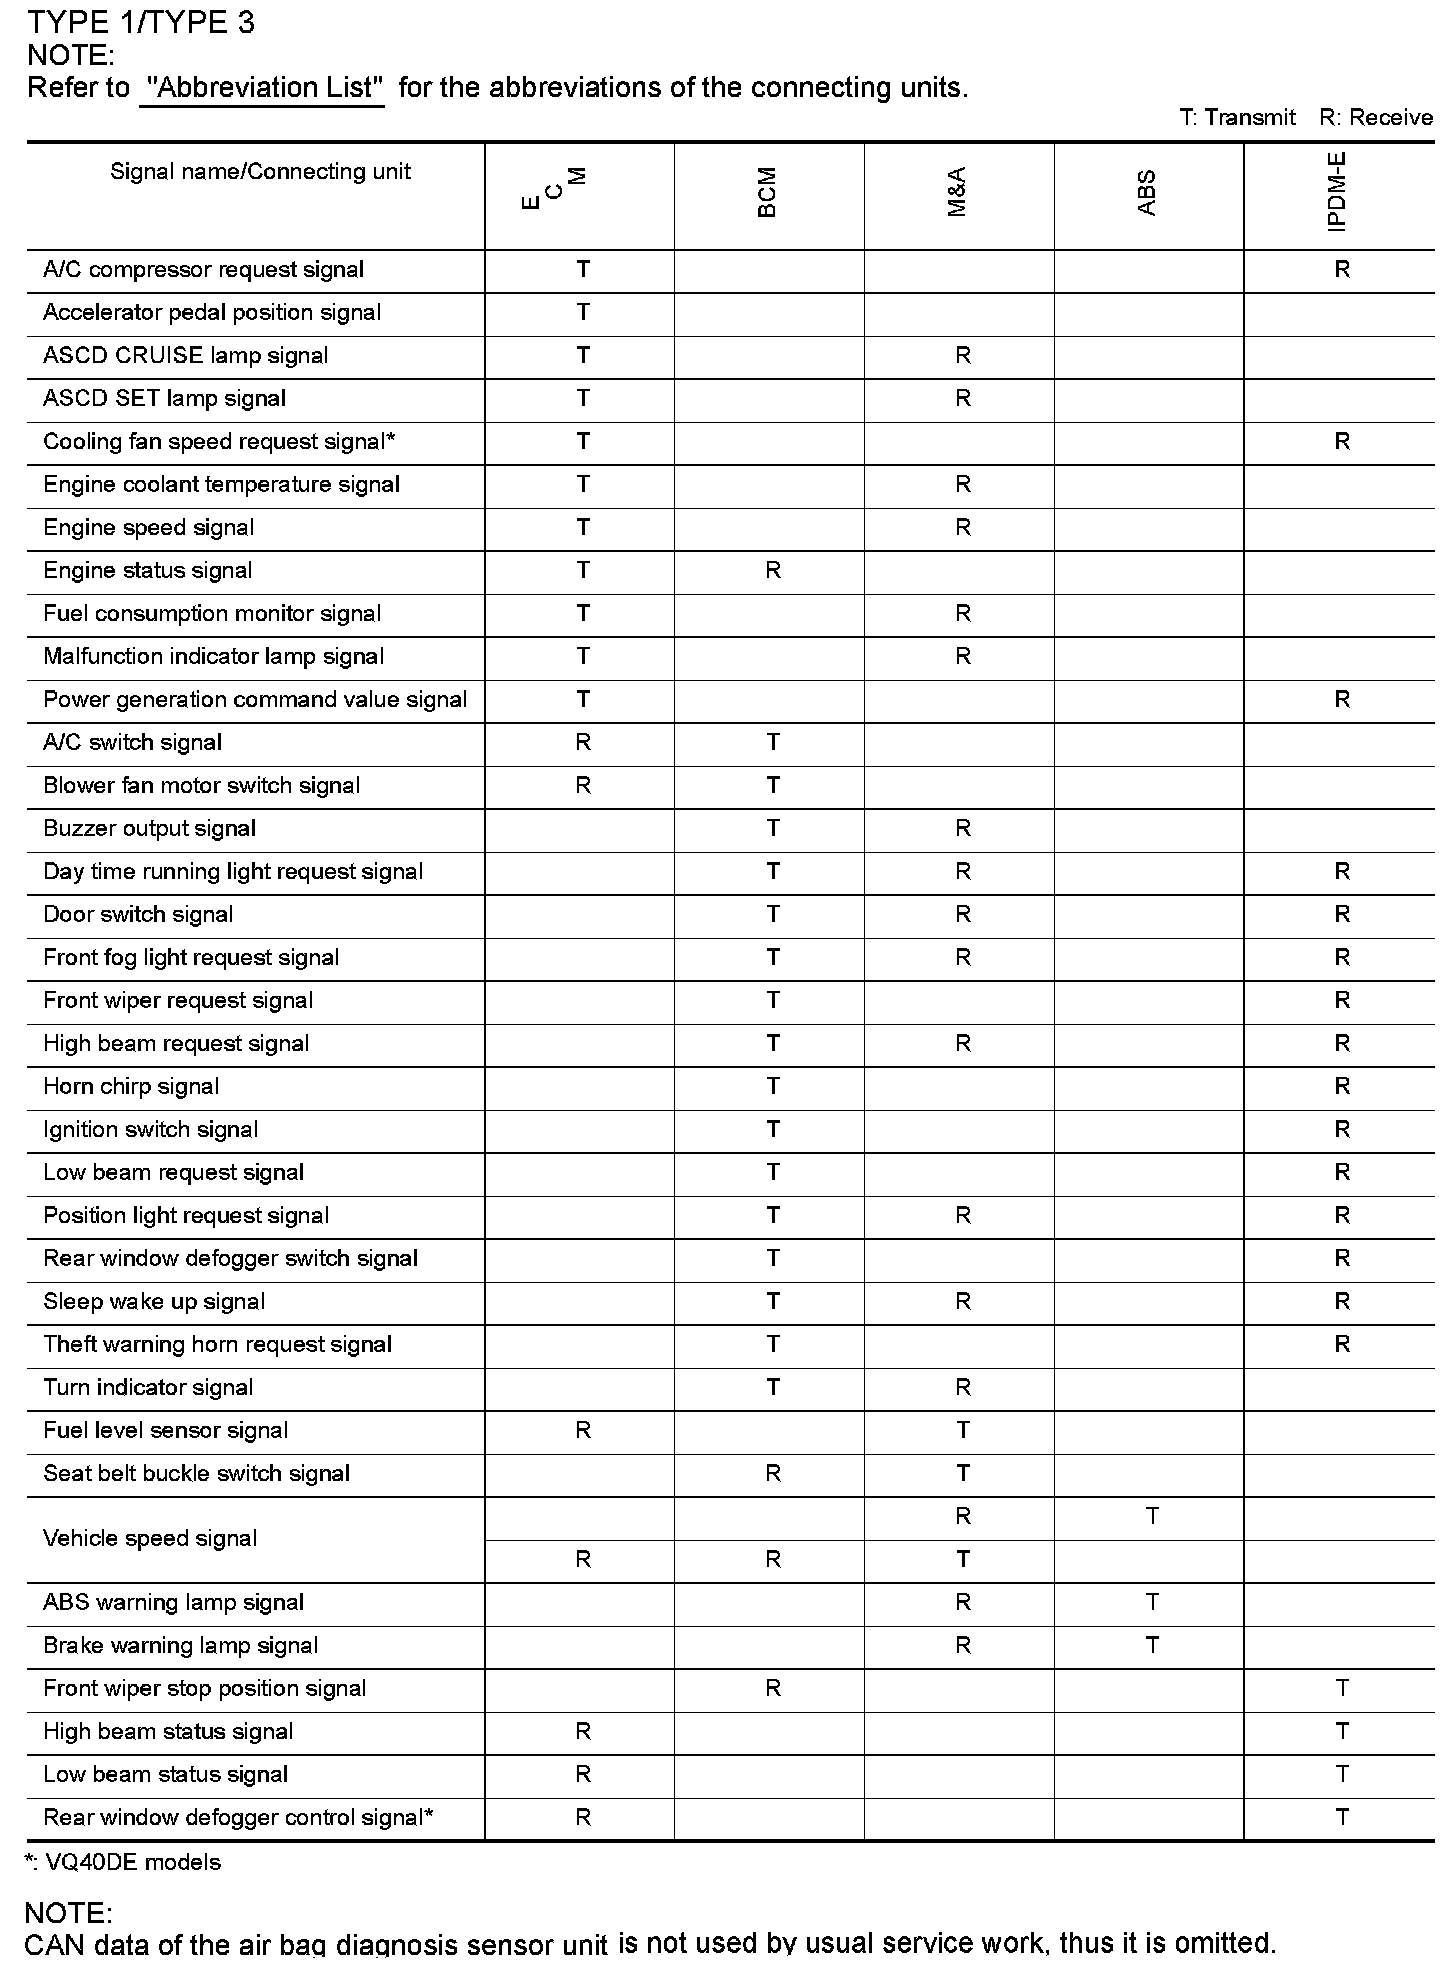
TYPE 1/TYPE 3
Type 2/Type 5 (Part 1):
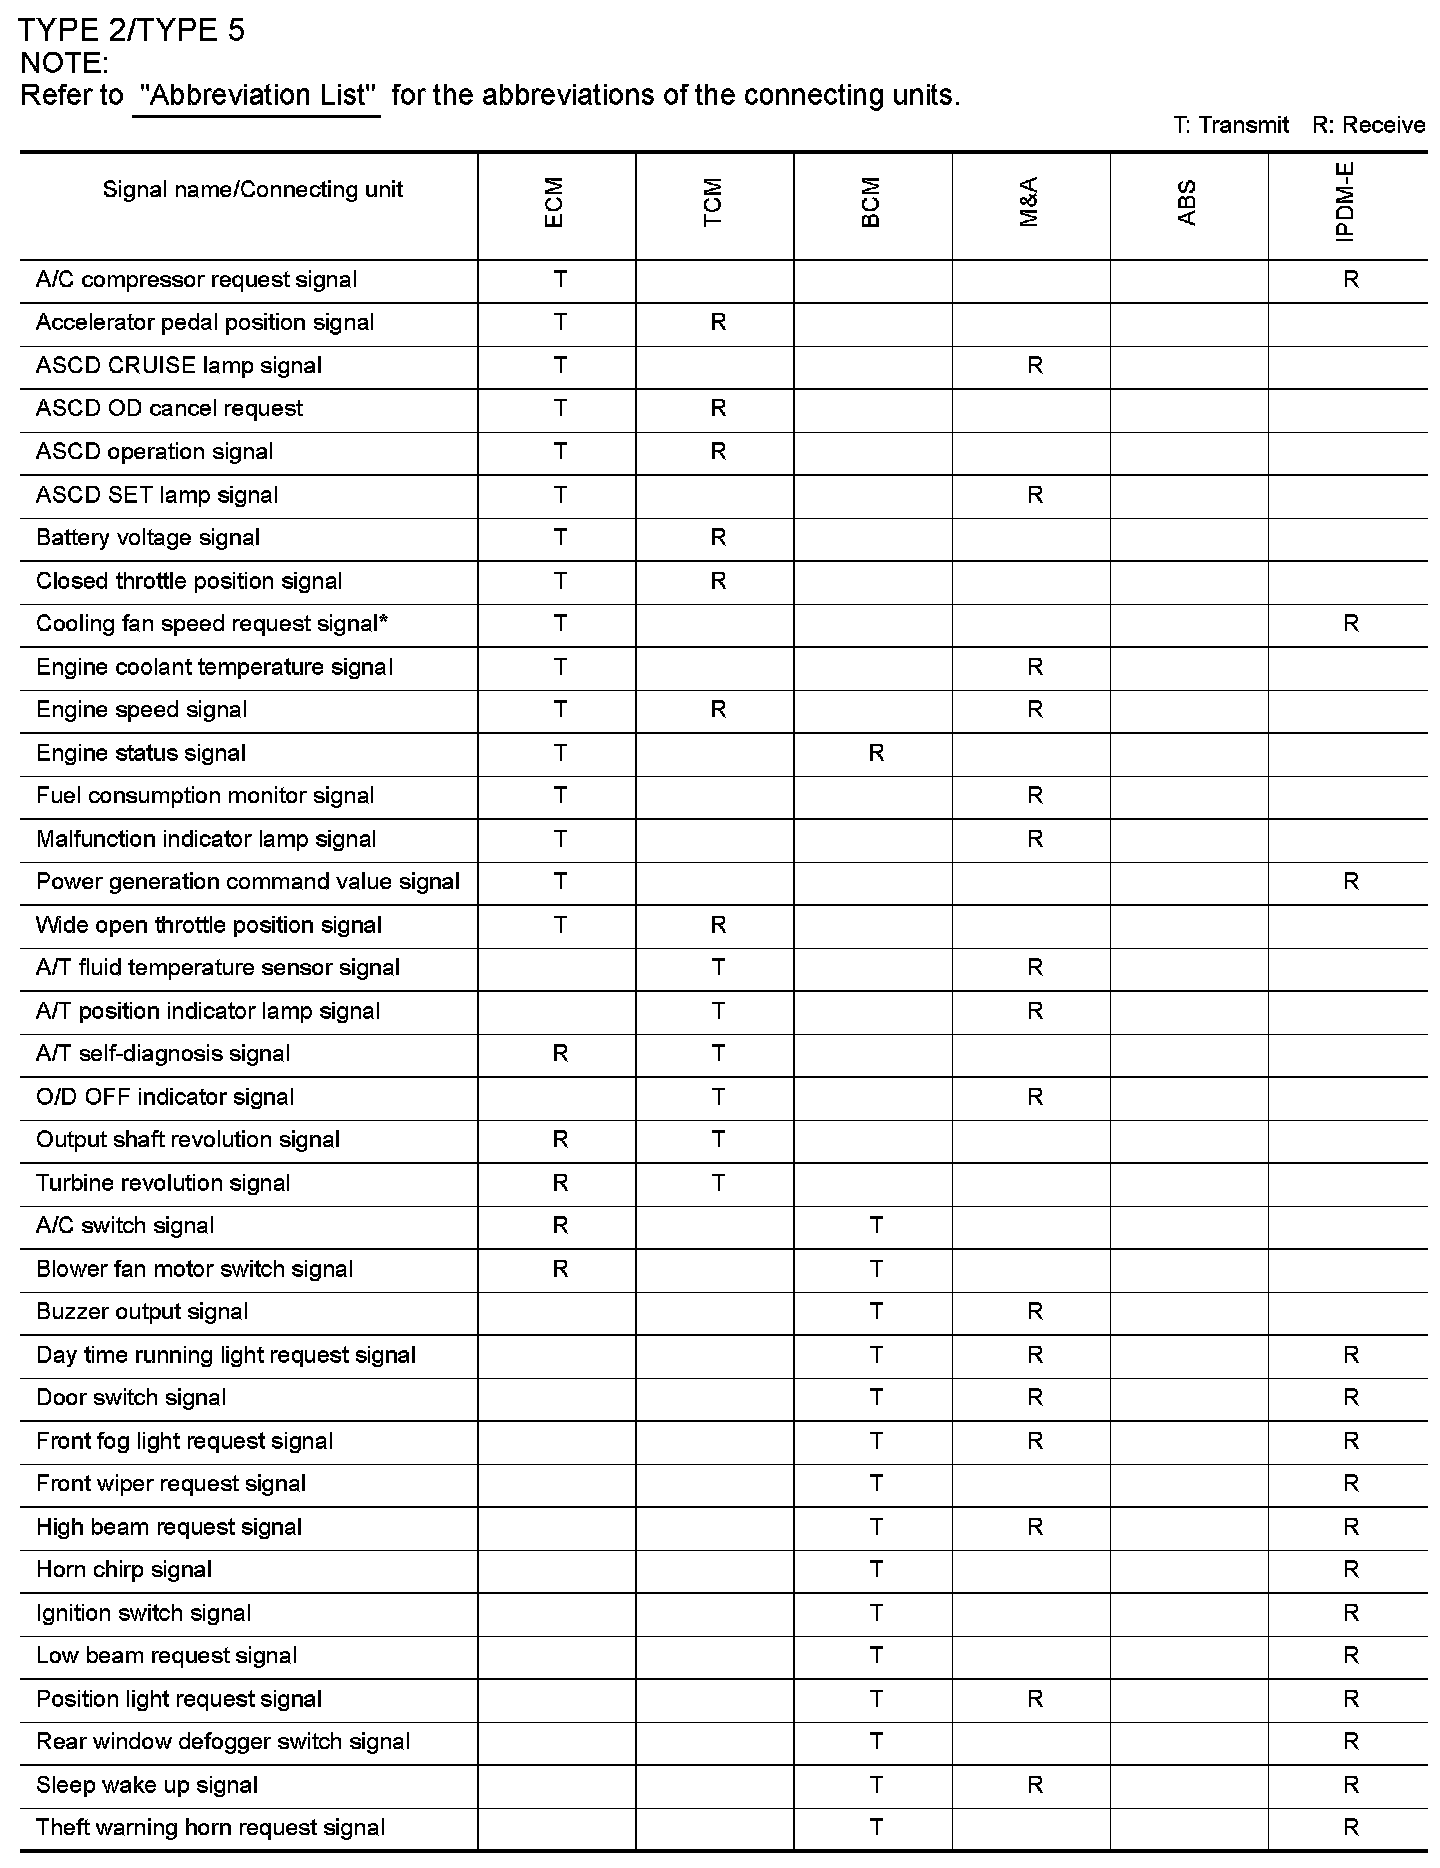
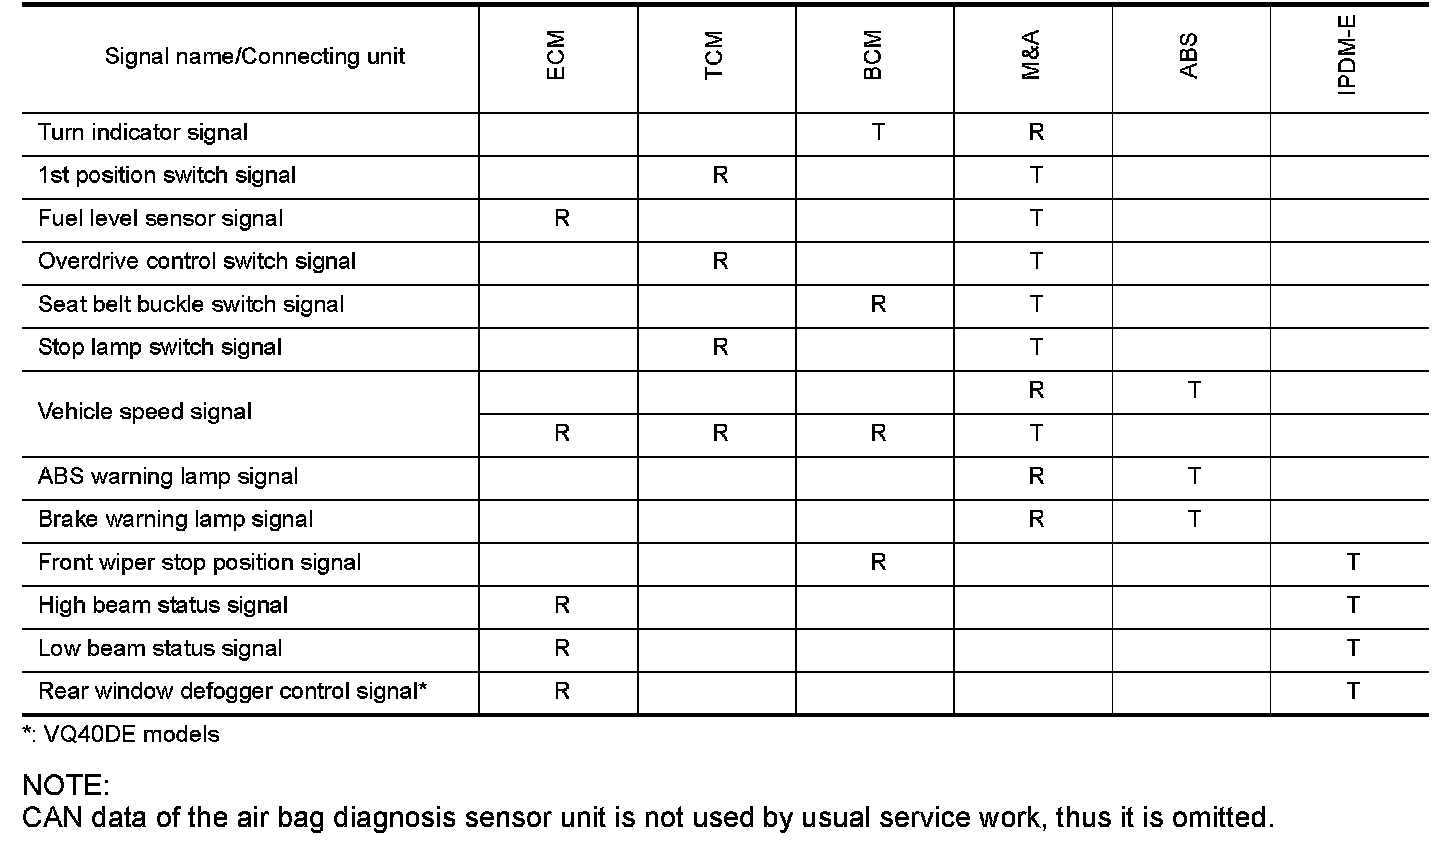
Type 2/Type 5 (Part 2):
TYPE 2/TYPE 5
Type 4 (Part 1):

Type 4 (Part 2):
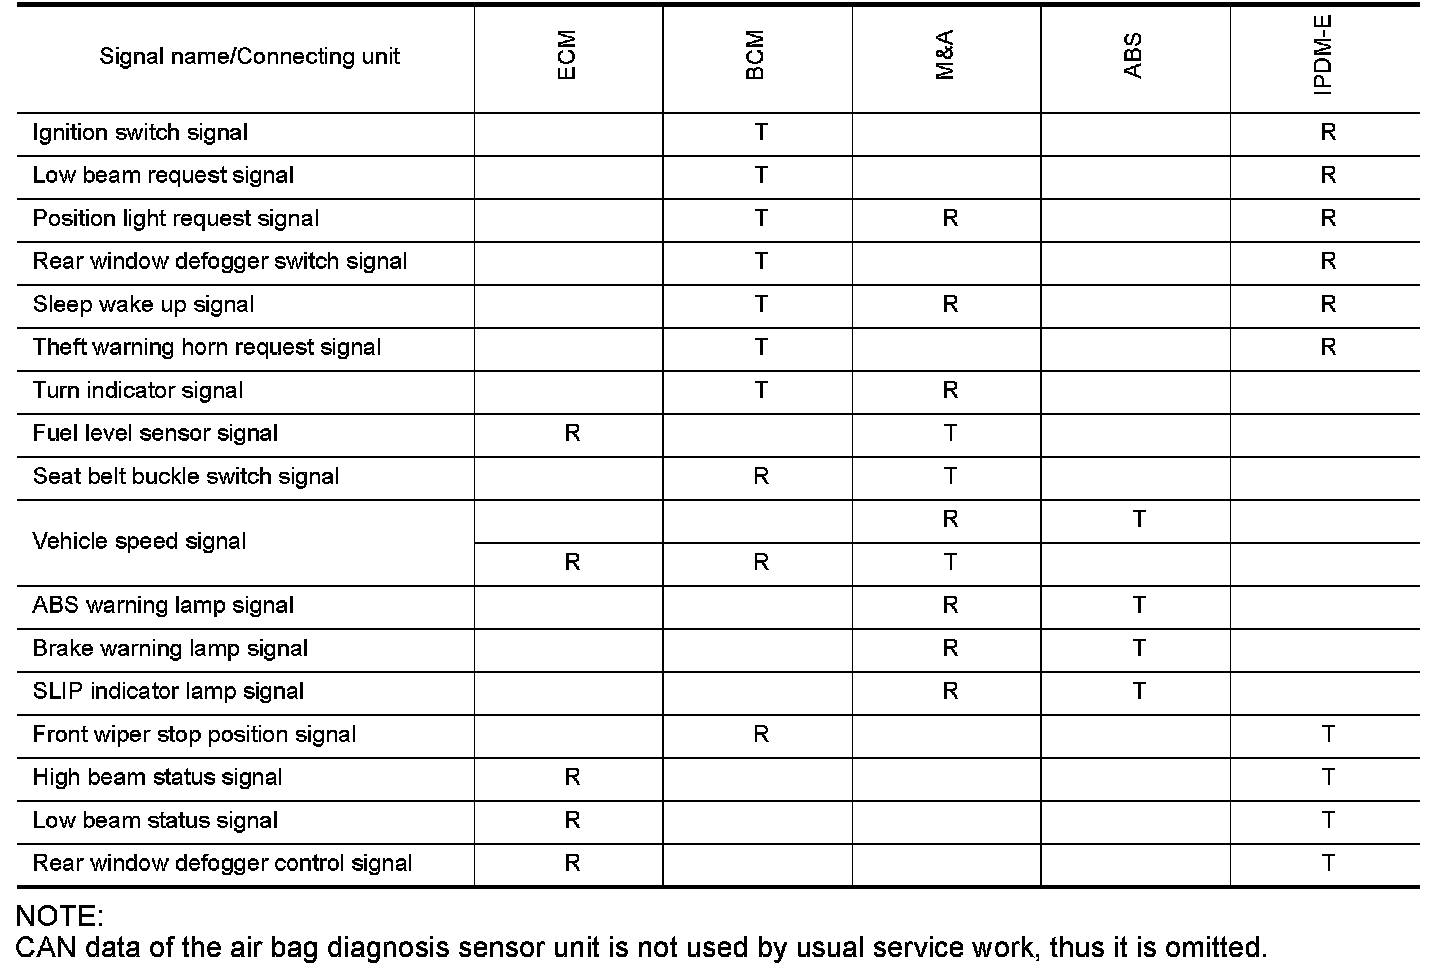
TYPE 4
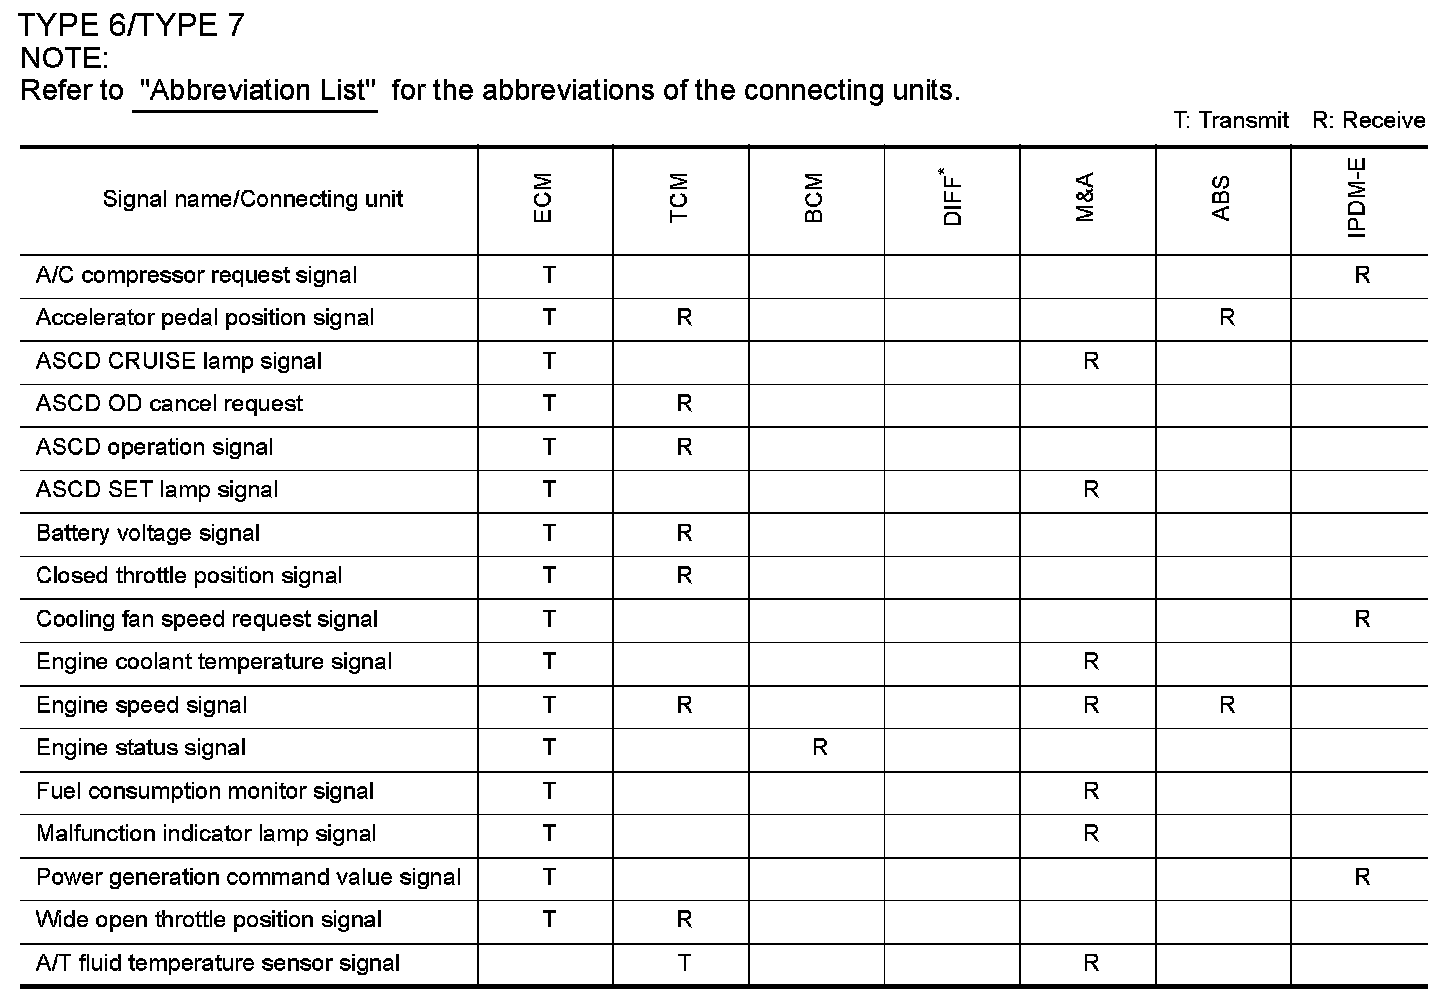
Type 6/Type 7 (Part 1):
Type 6/Type 7 (Part 2):
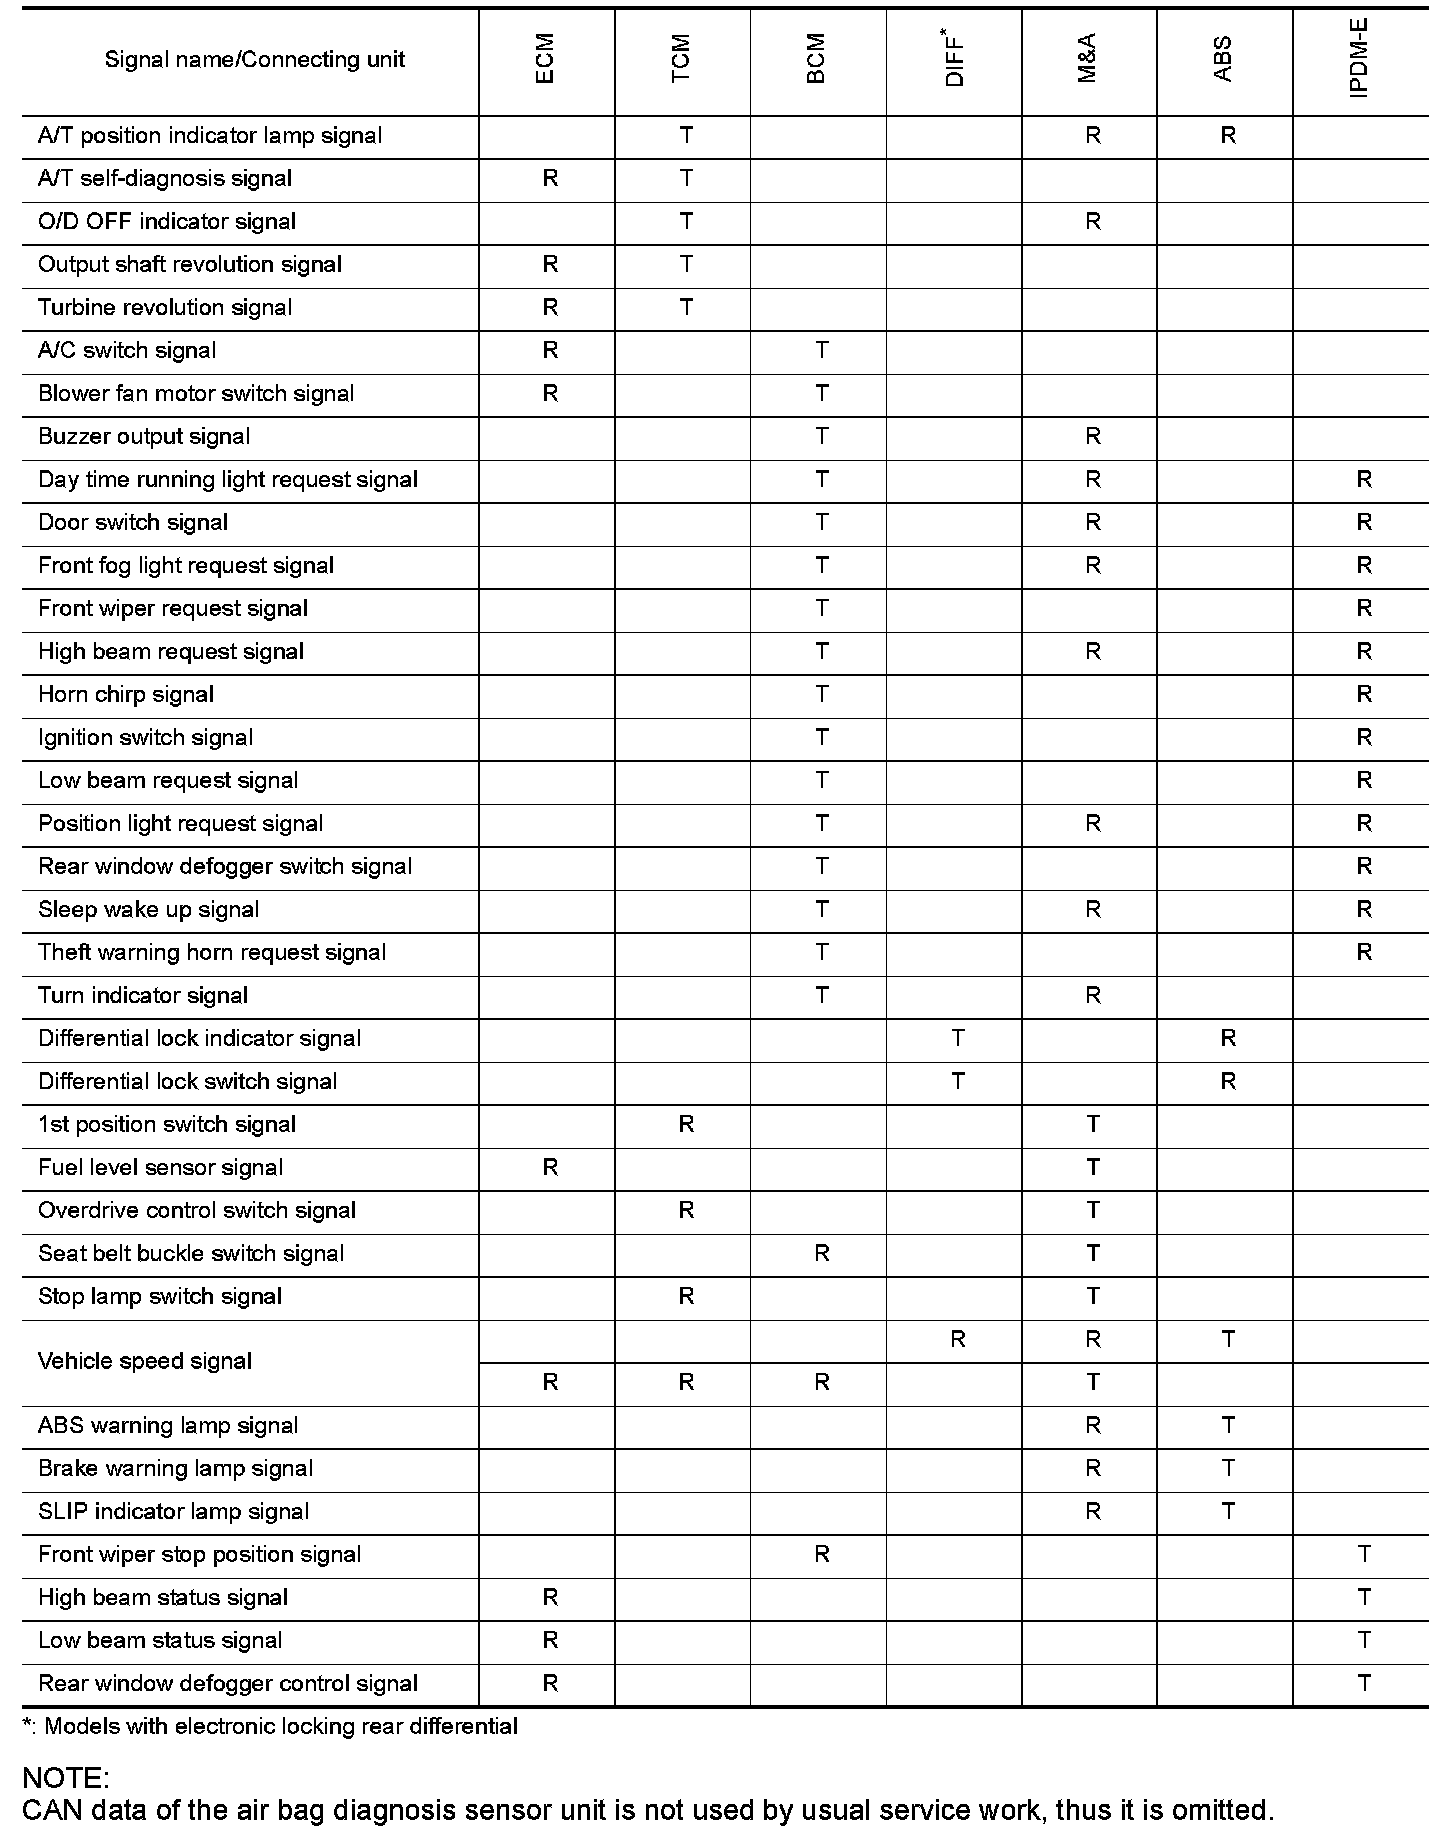
TYPE 6/TYPE 7
Type 8:
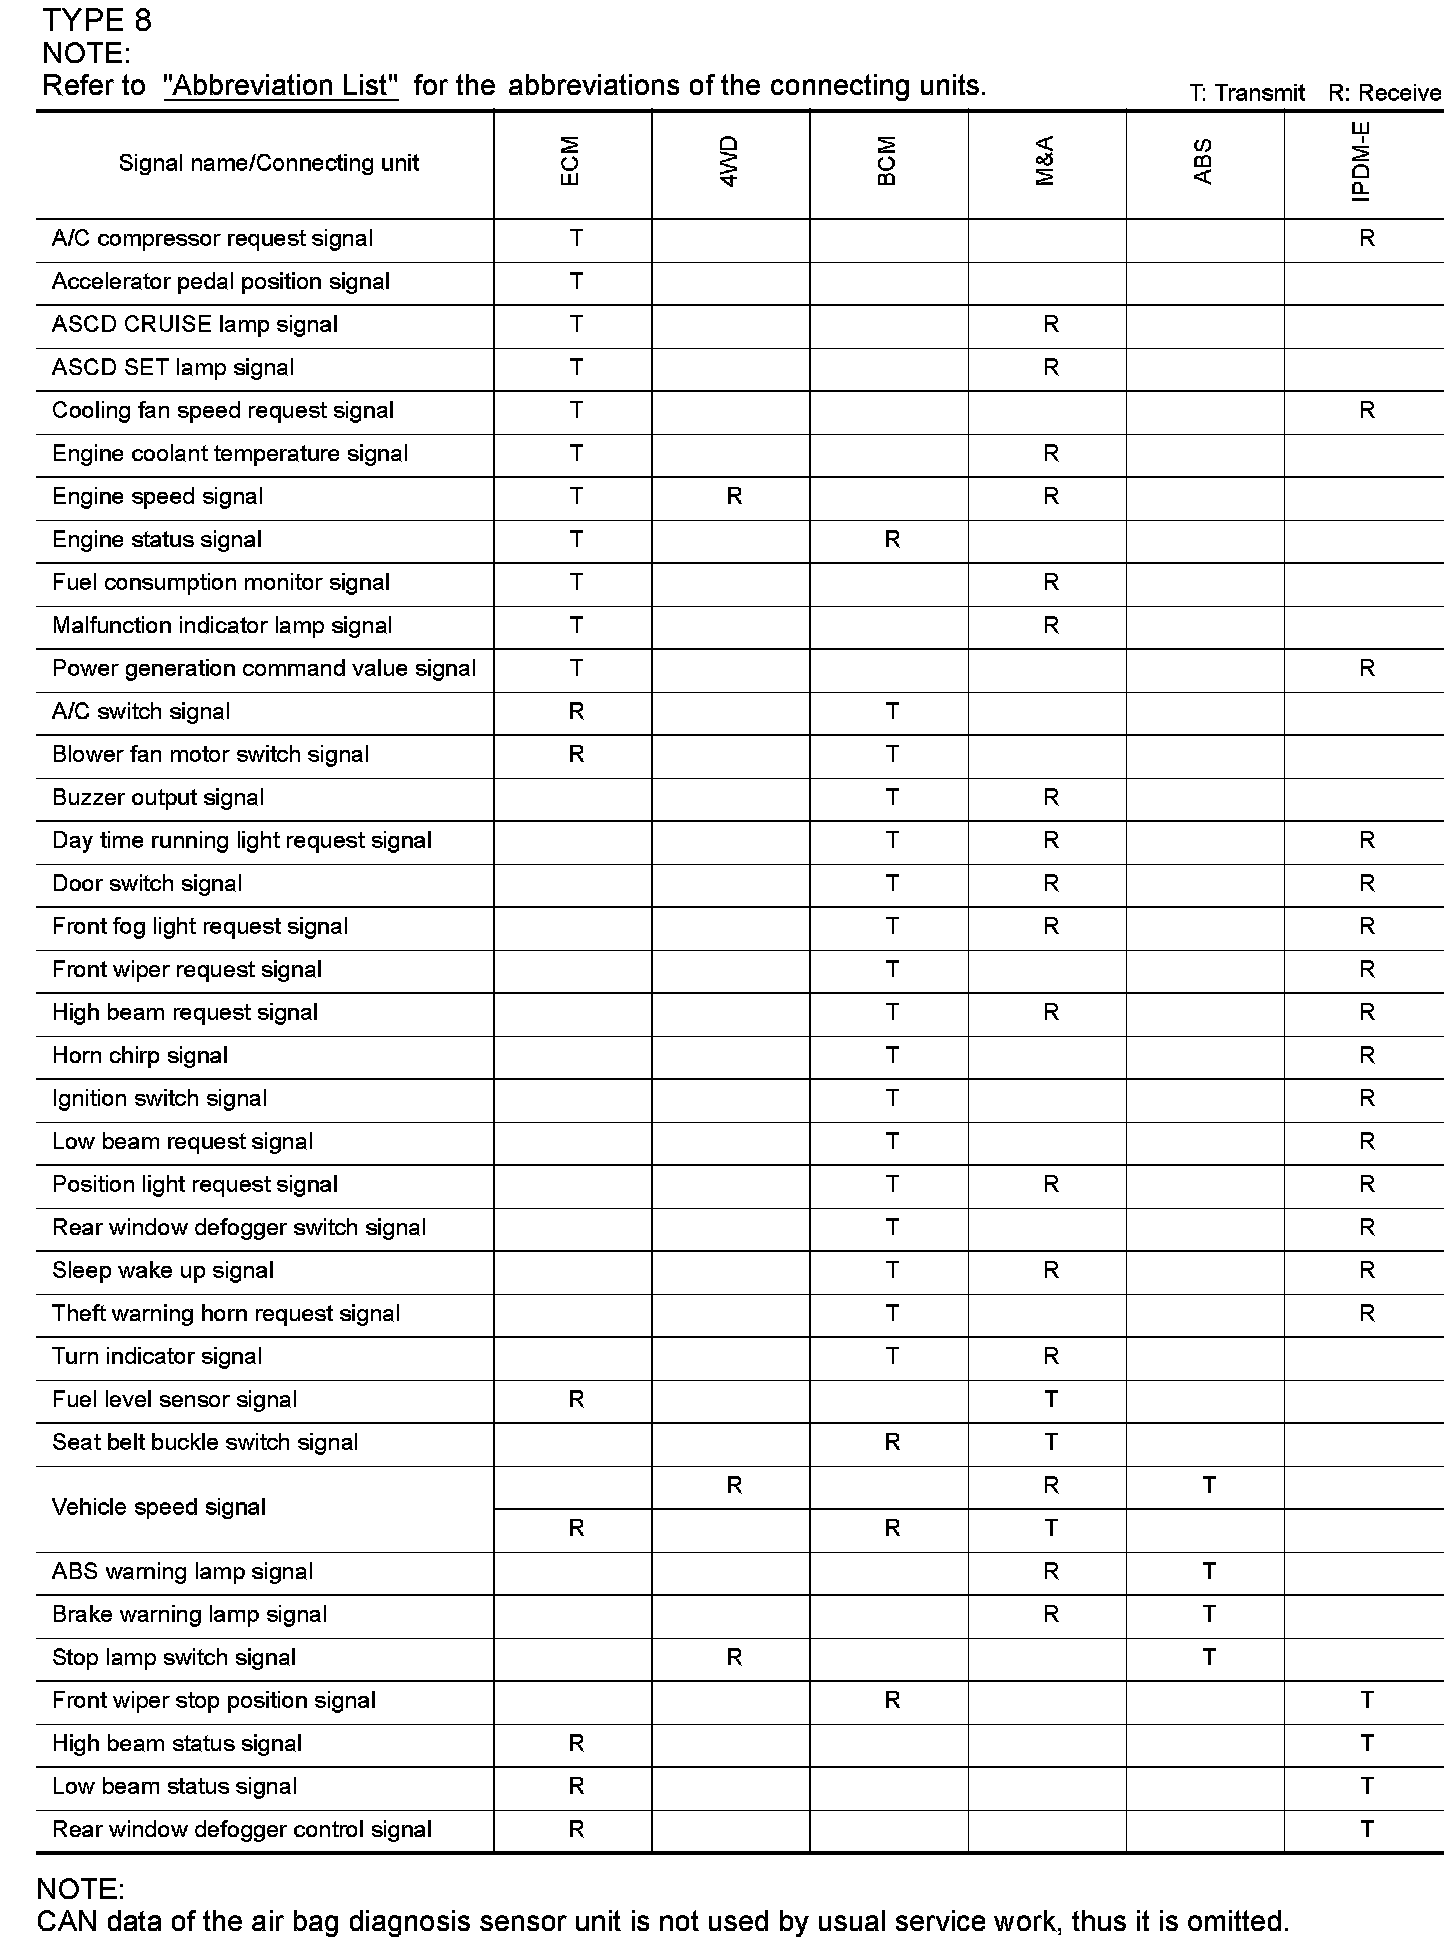
TYPE 8
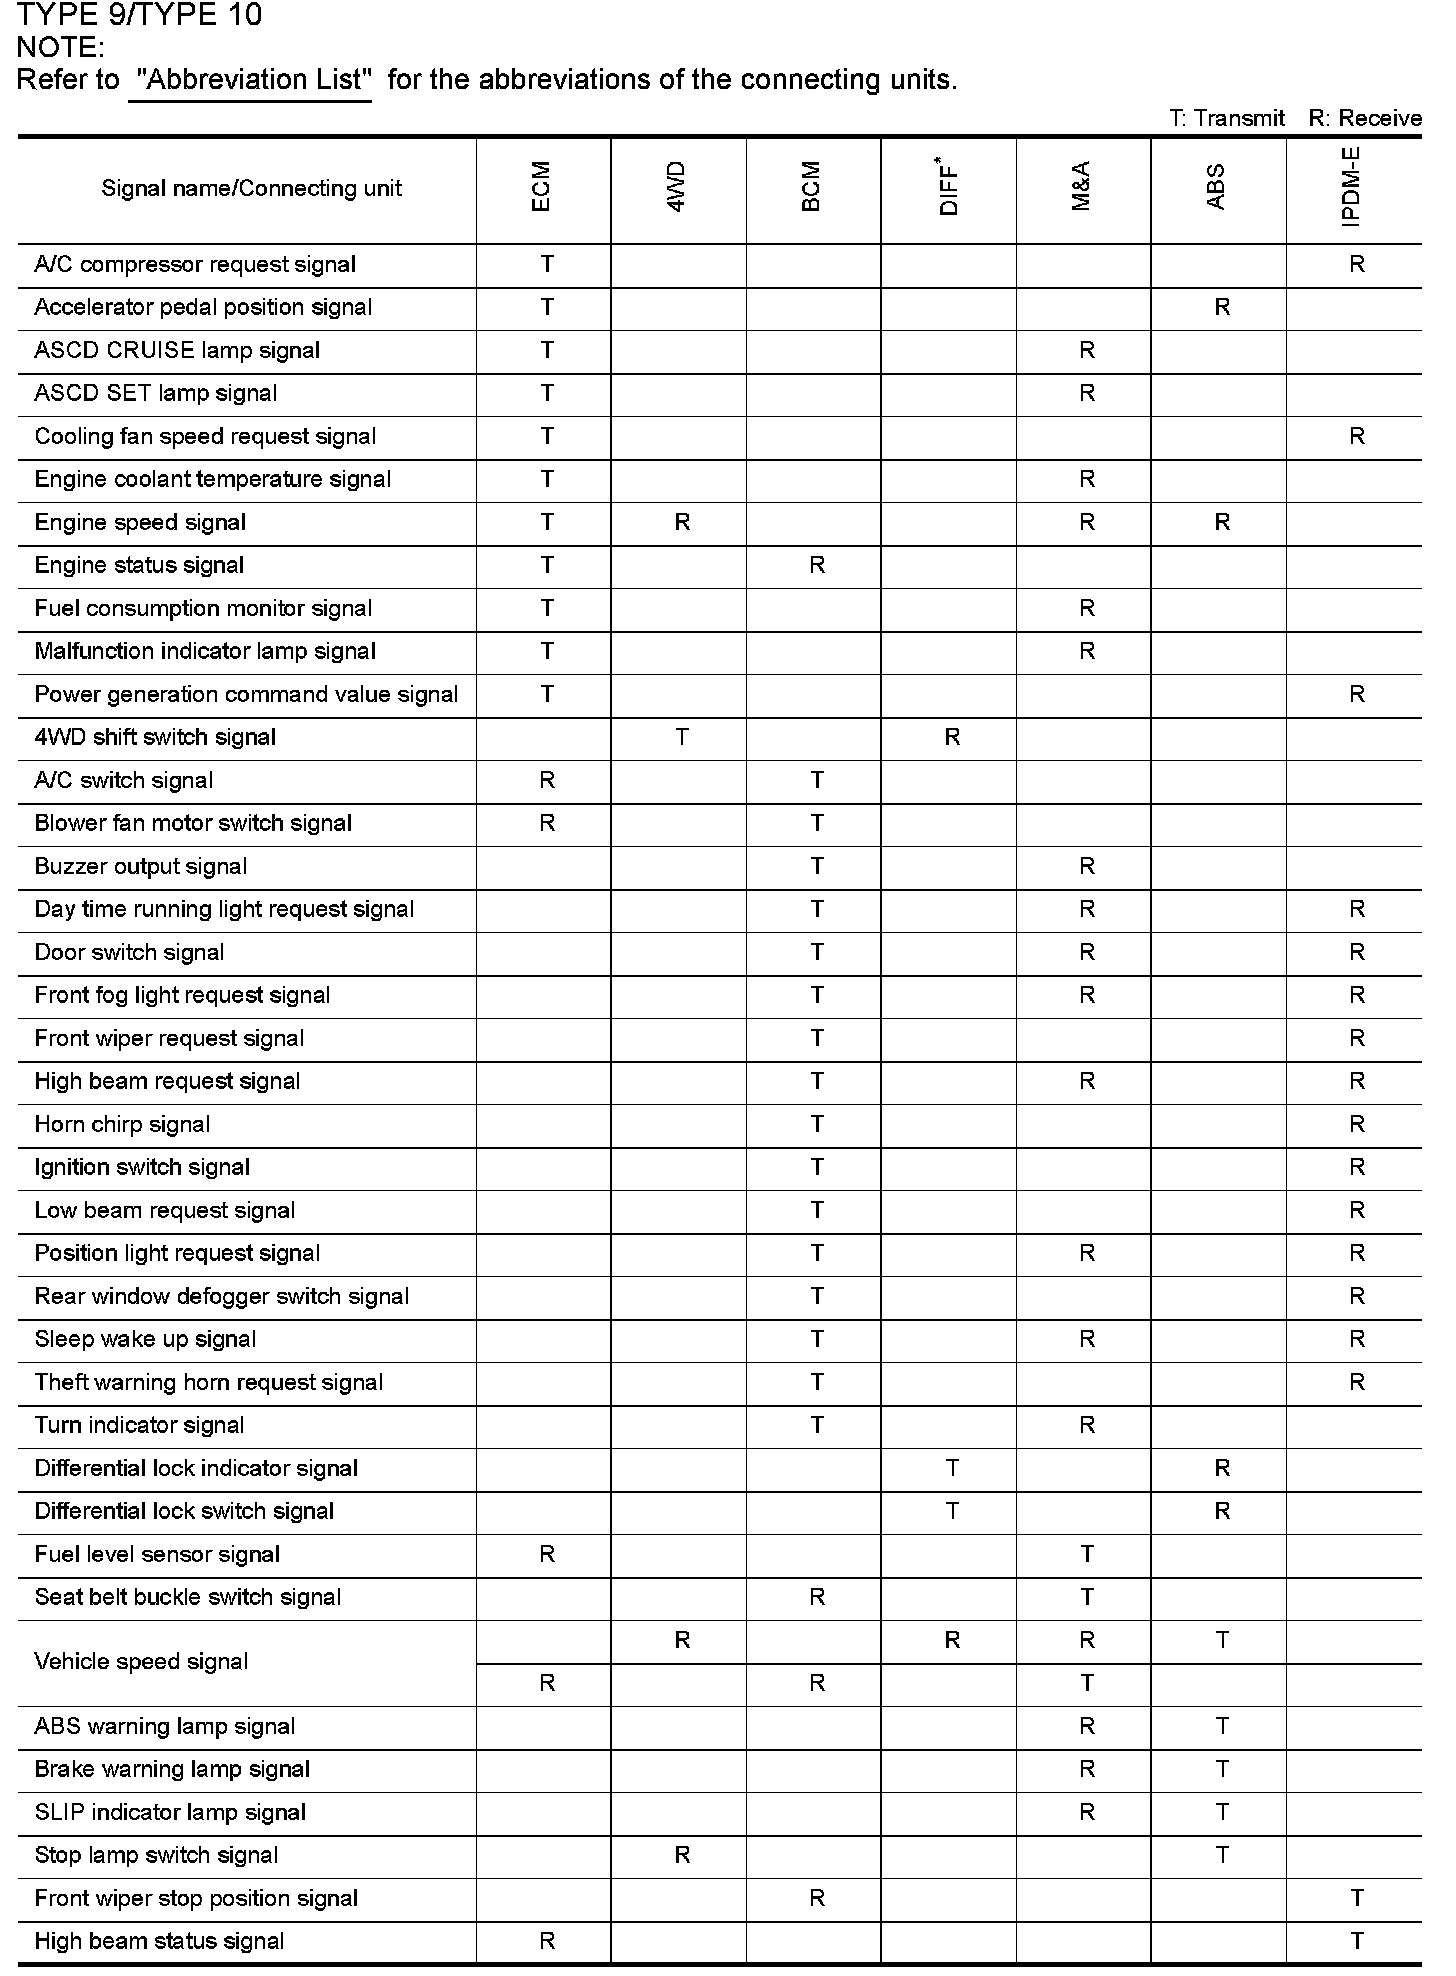
Type 9/Type 10 (Part 2):
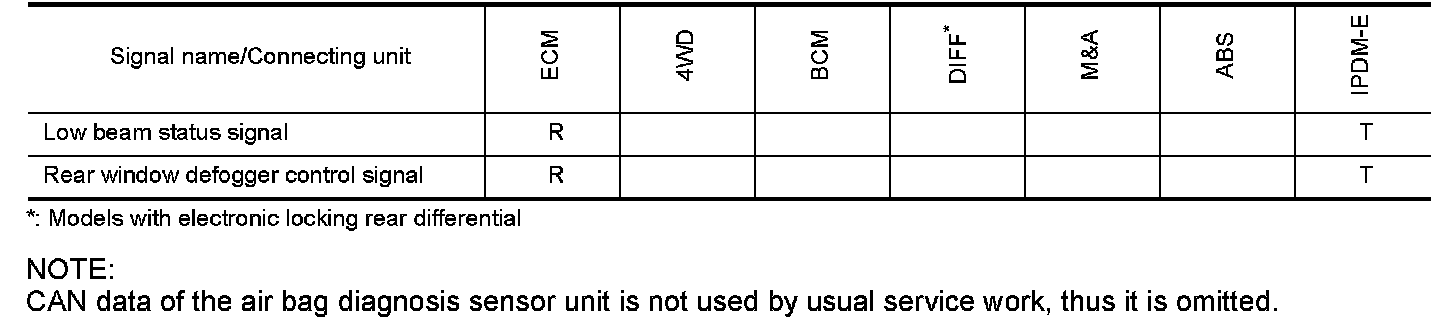
TYPE 9/TYPE 10
Type 11 (Part 1):
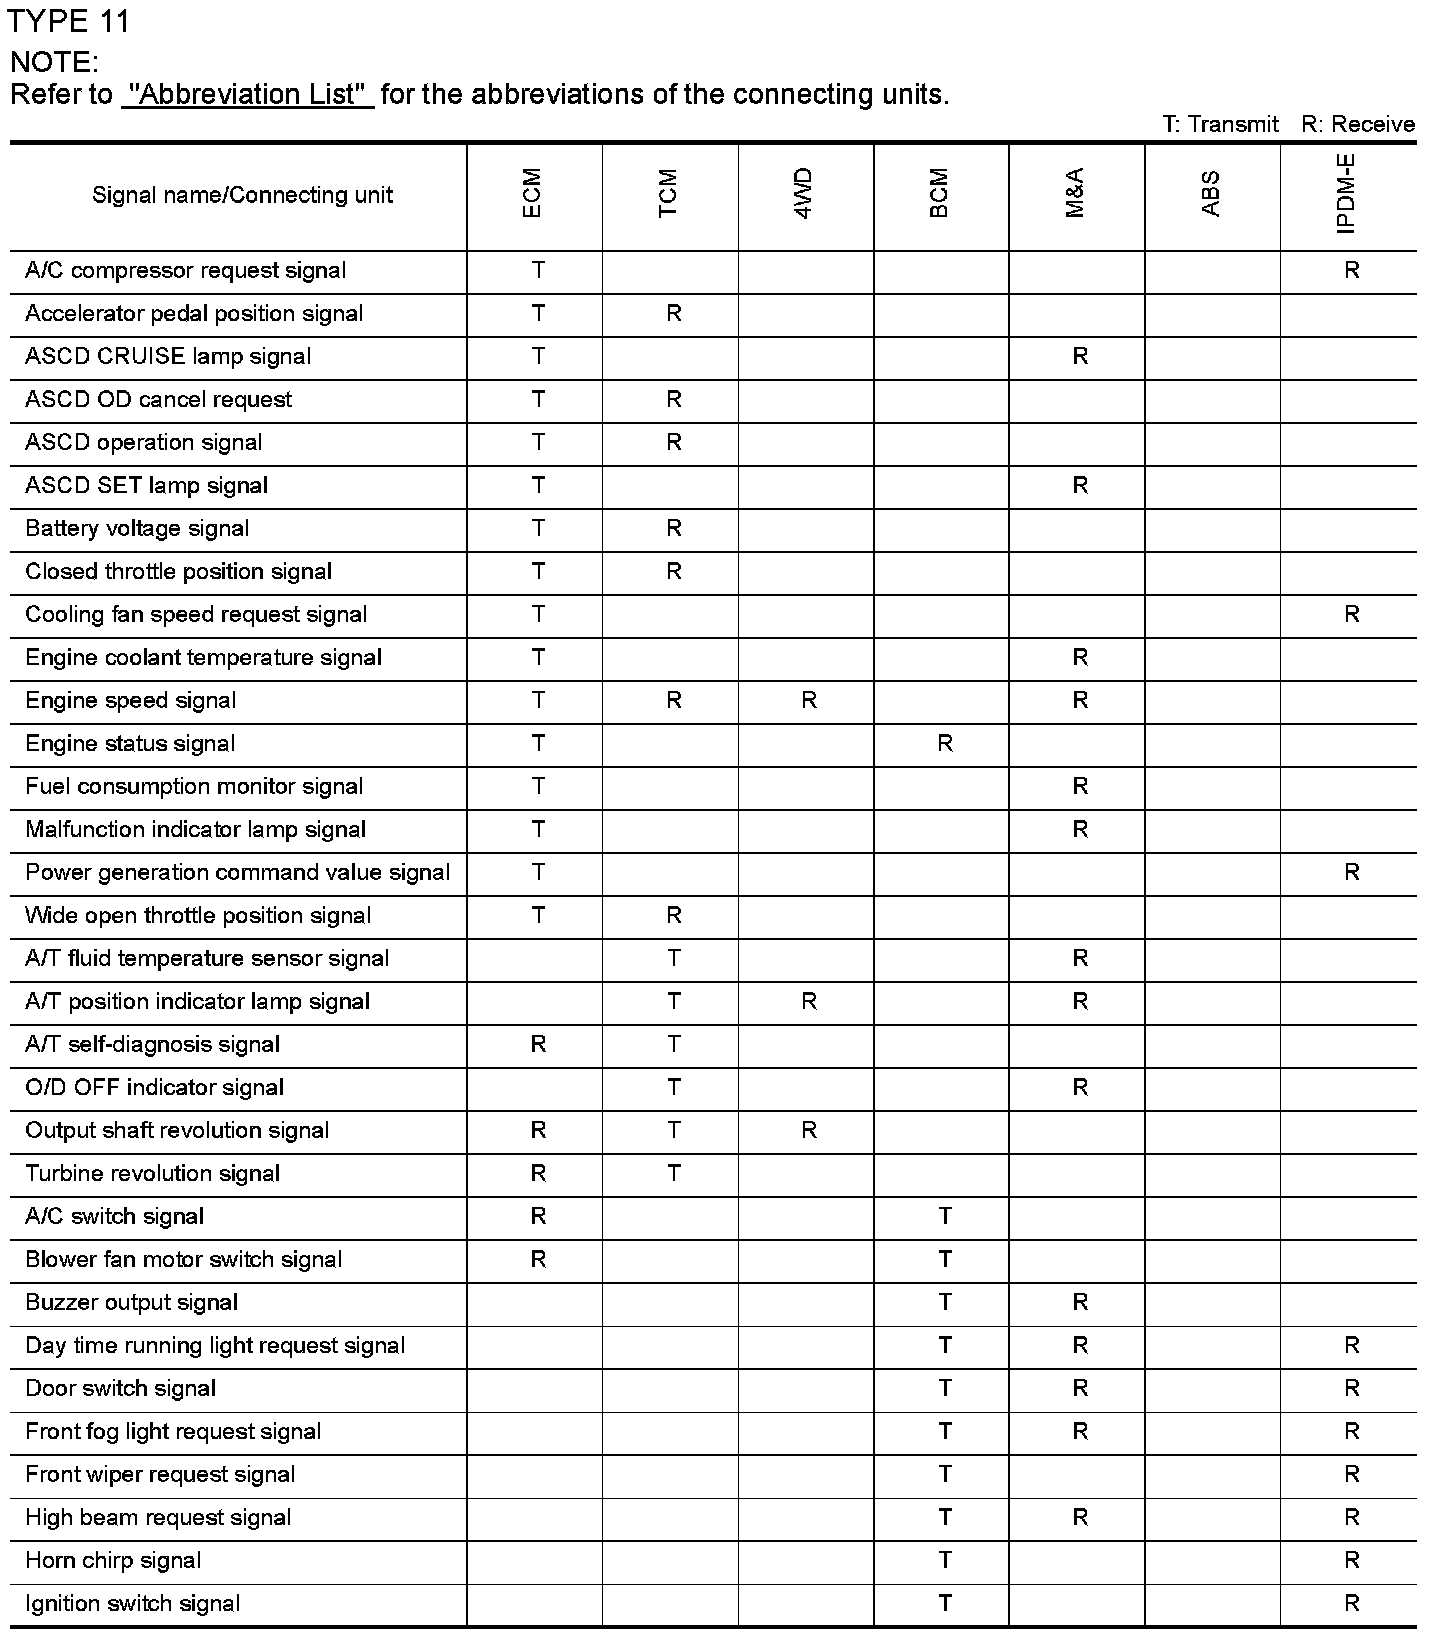
Type 11 (Part 2):
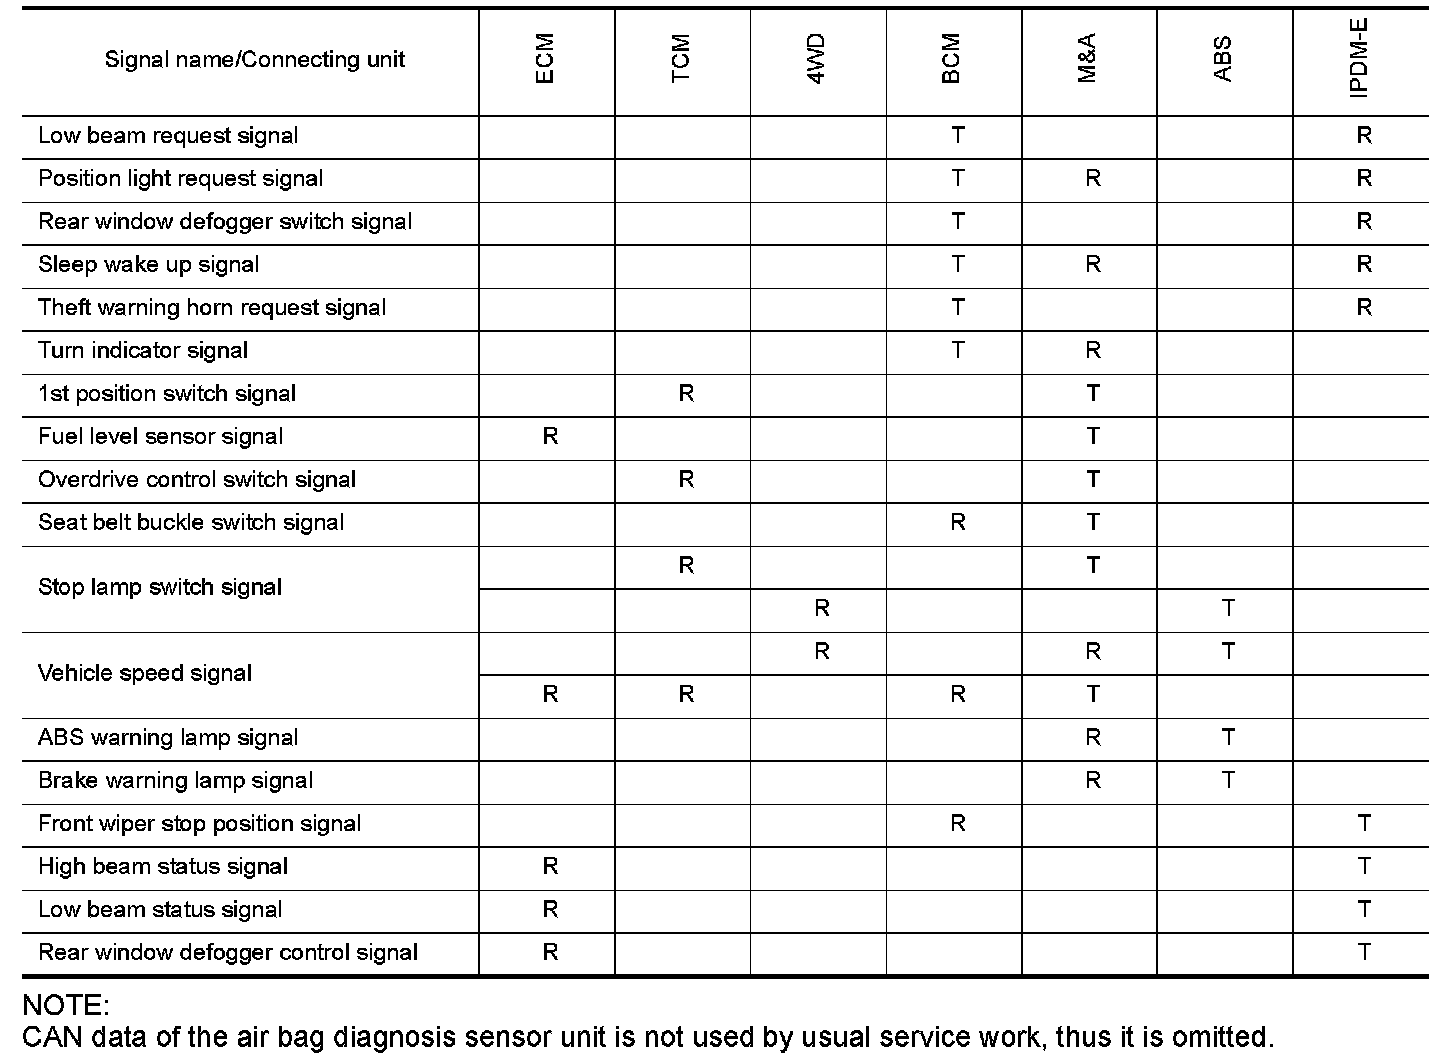
TYPE 11
Type 12/Type 13 (Part 1):
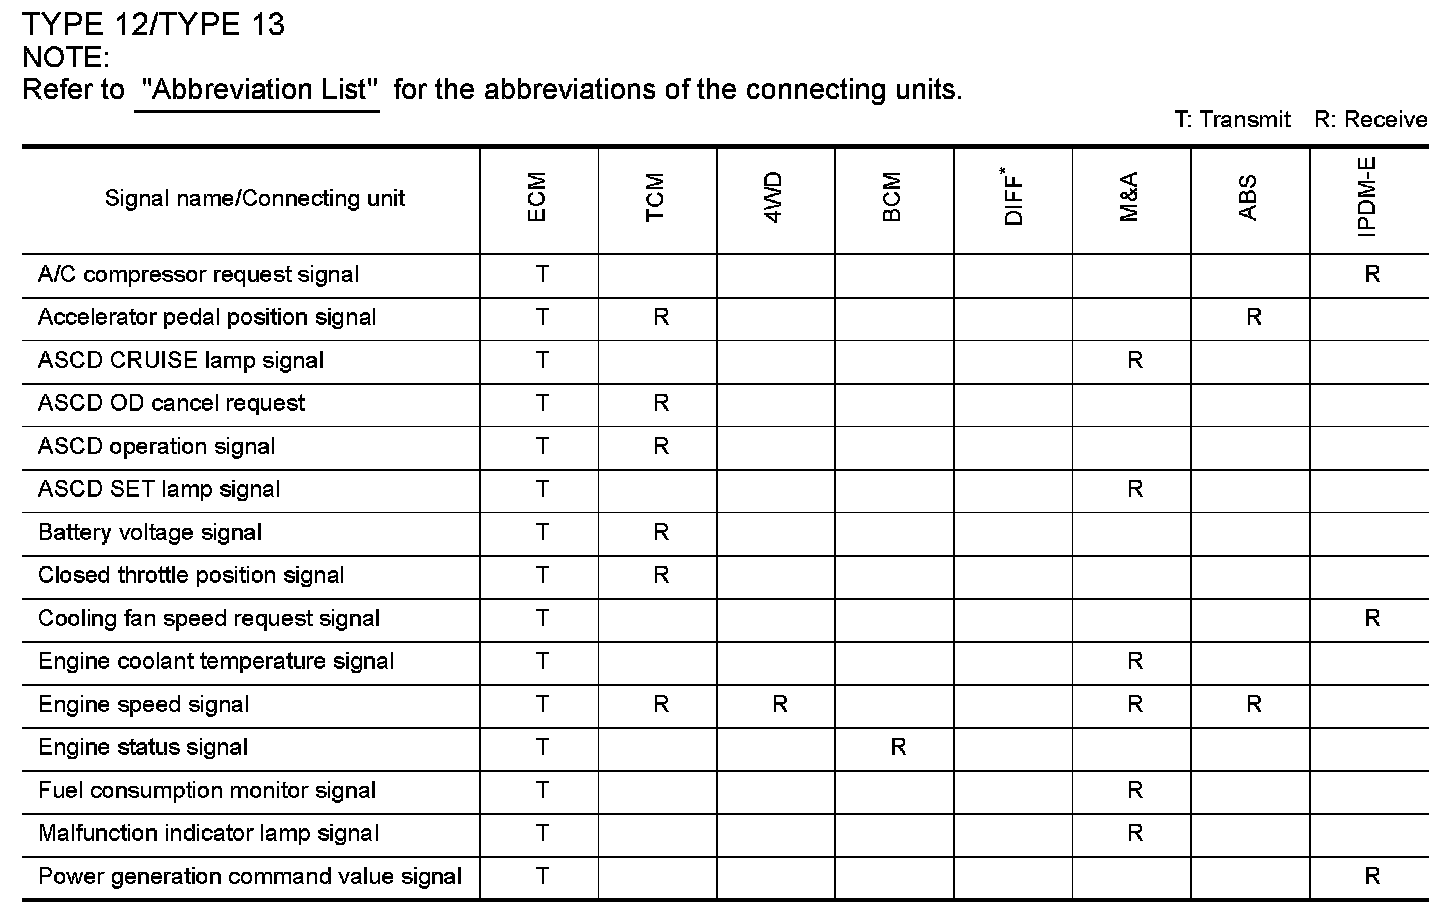
Type 12/Type 13 (Part 2):
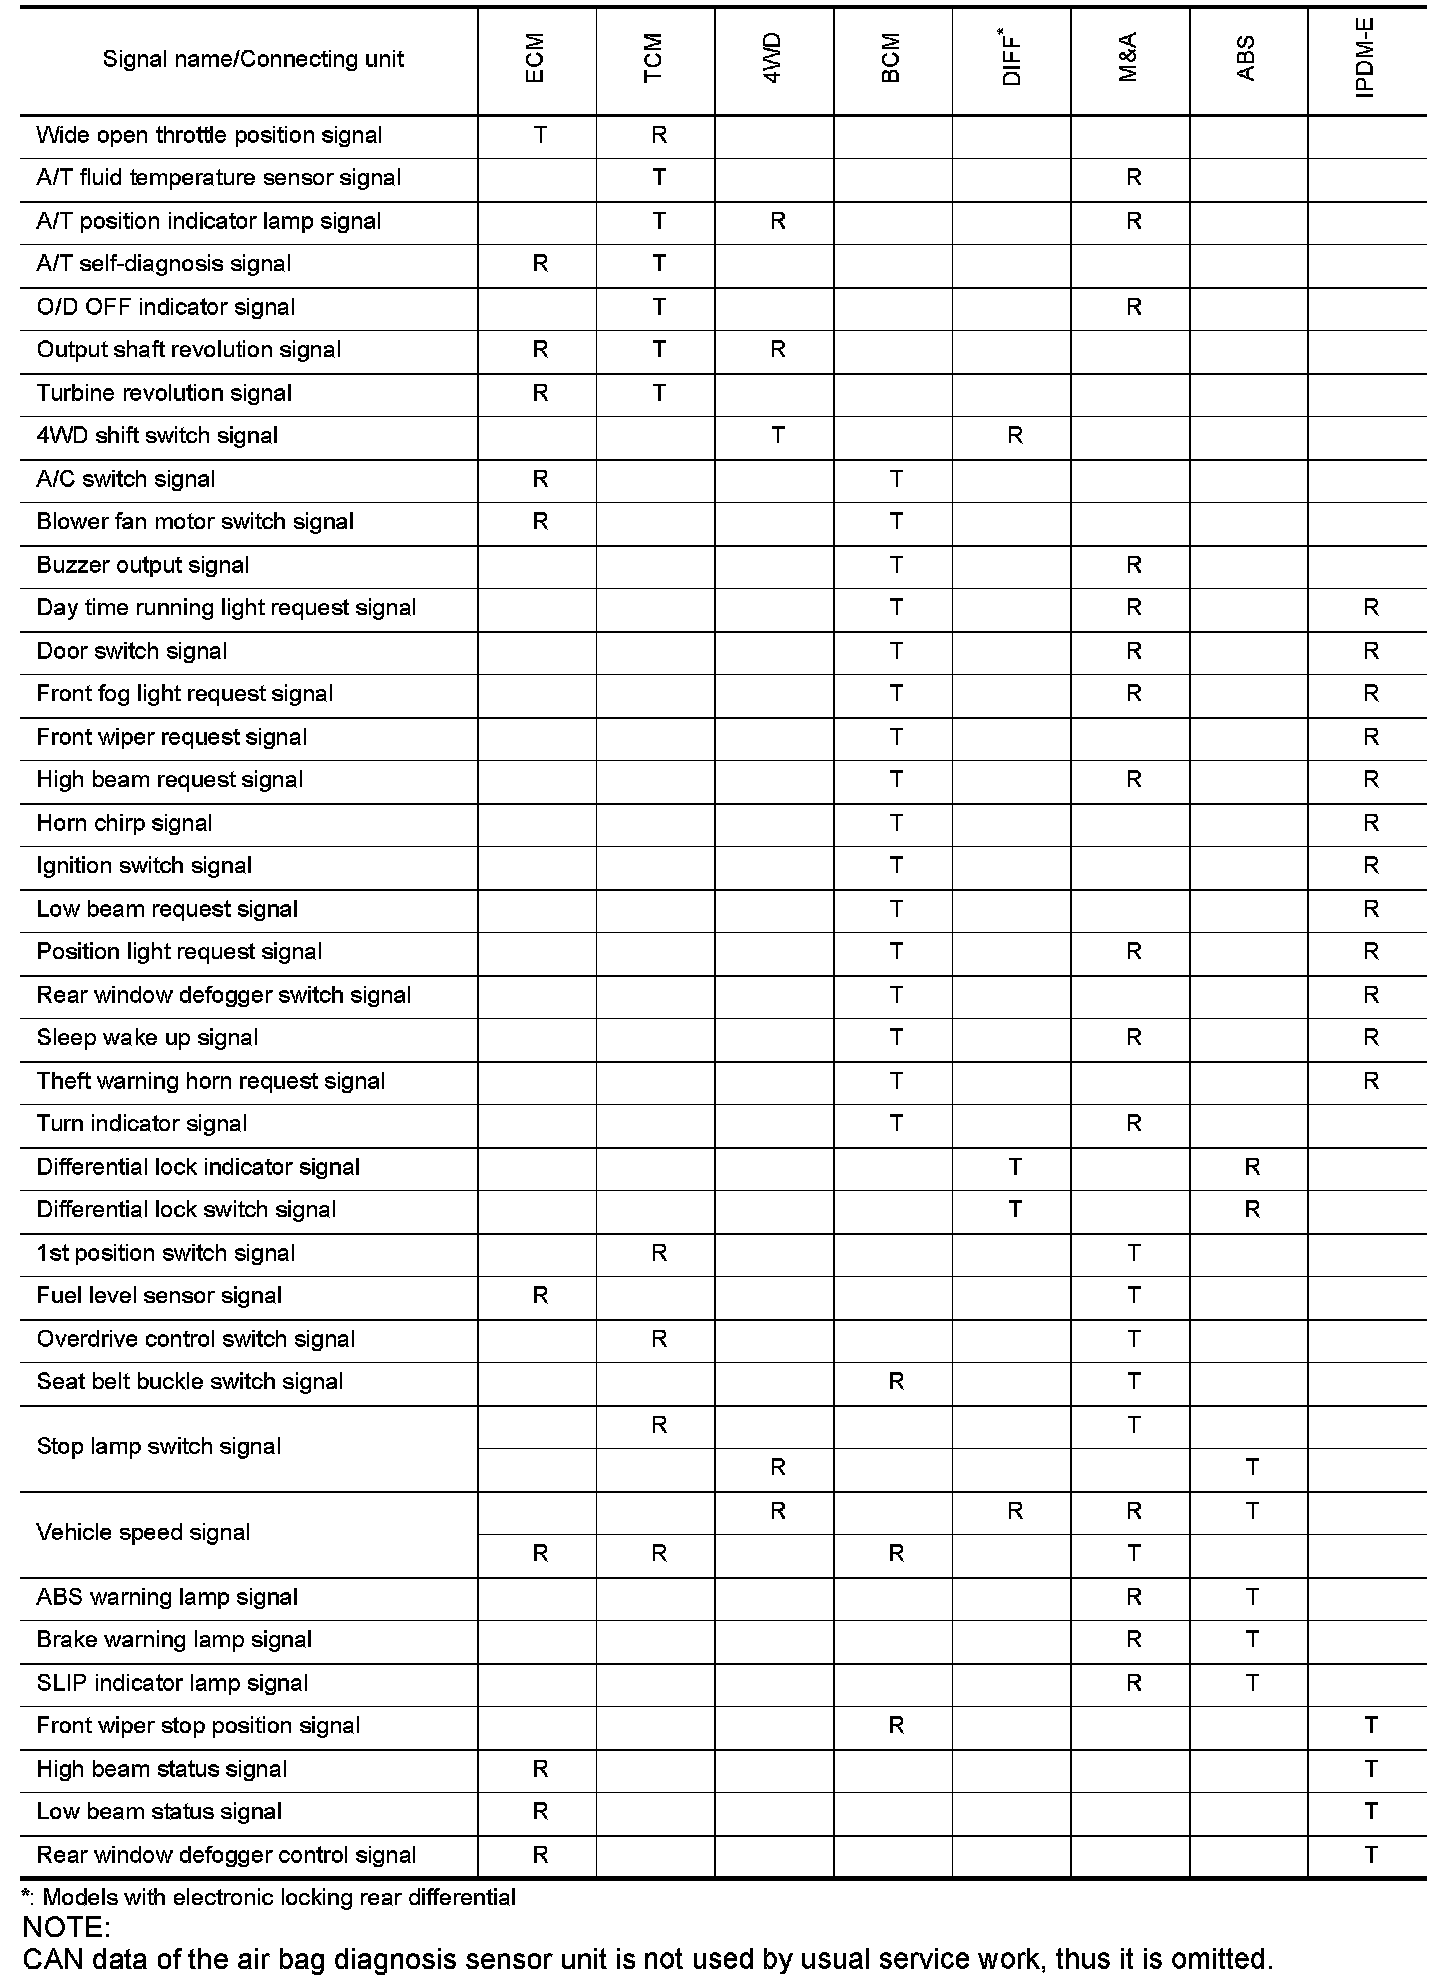
TYPE 12/TYPE 13
Type 14/Type 15 (Part 1):
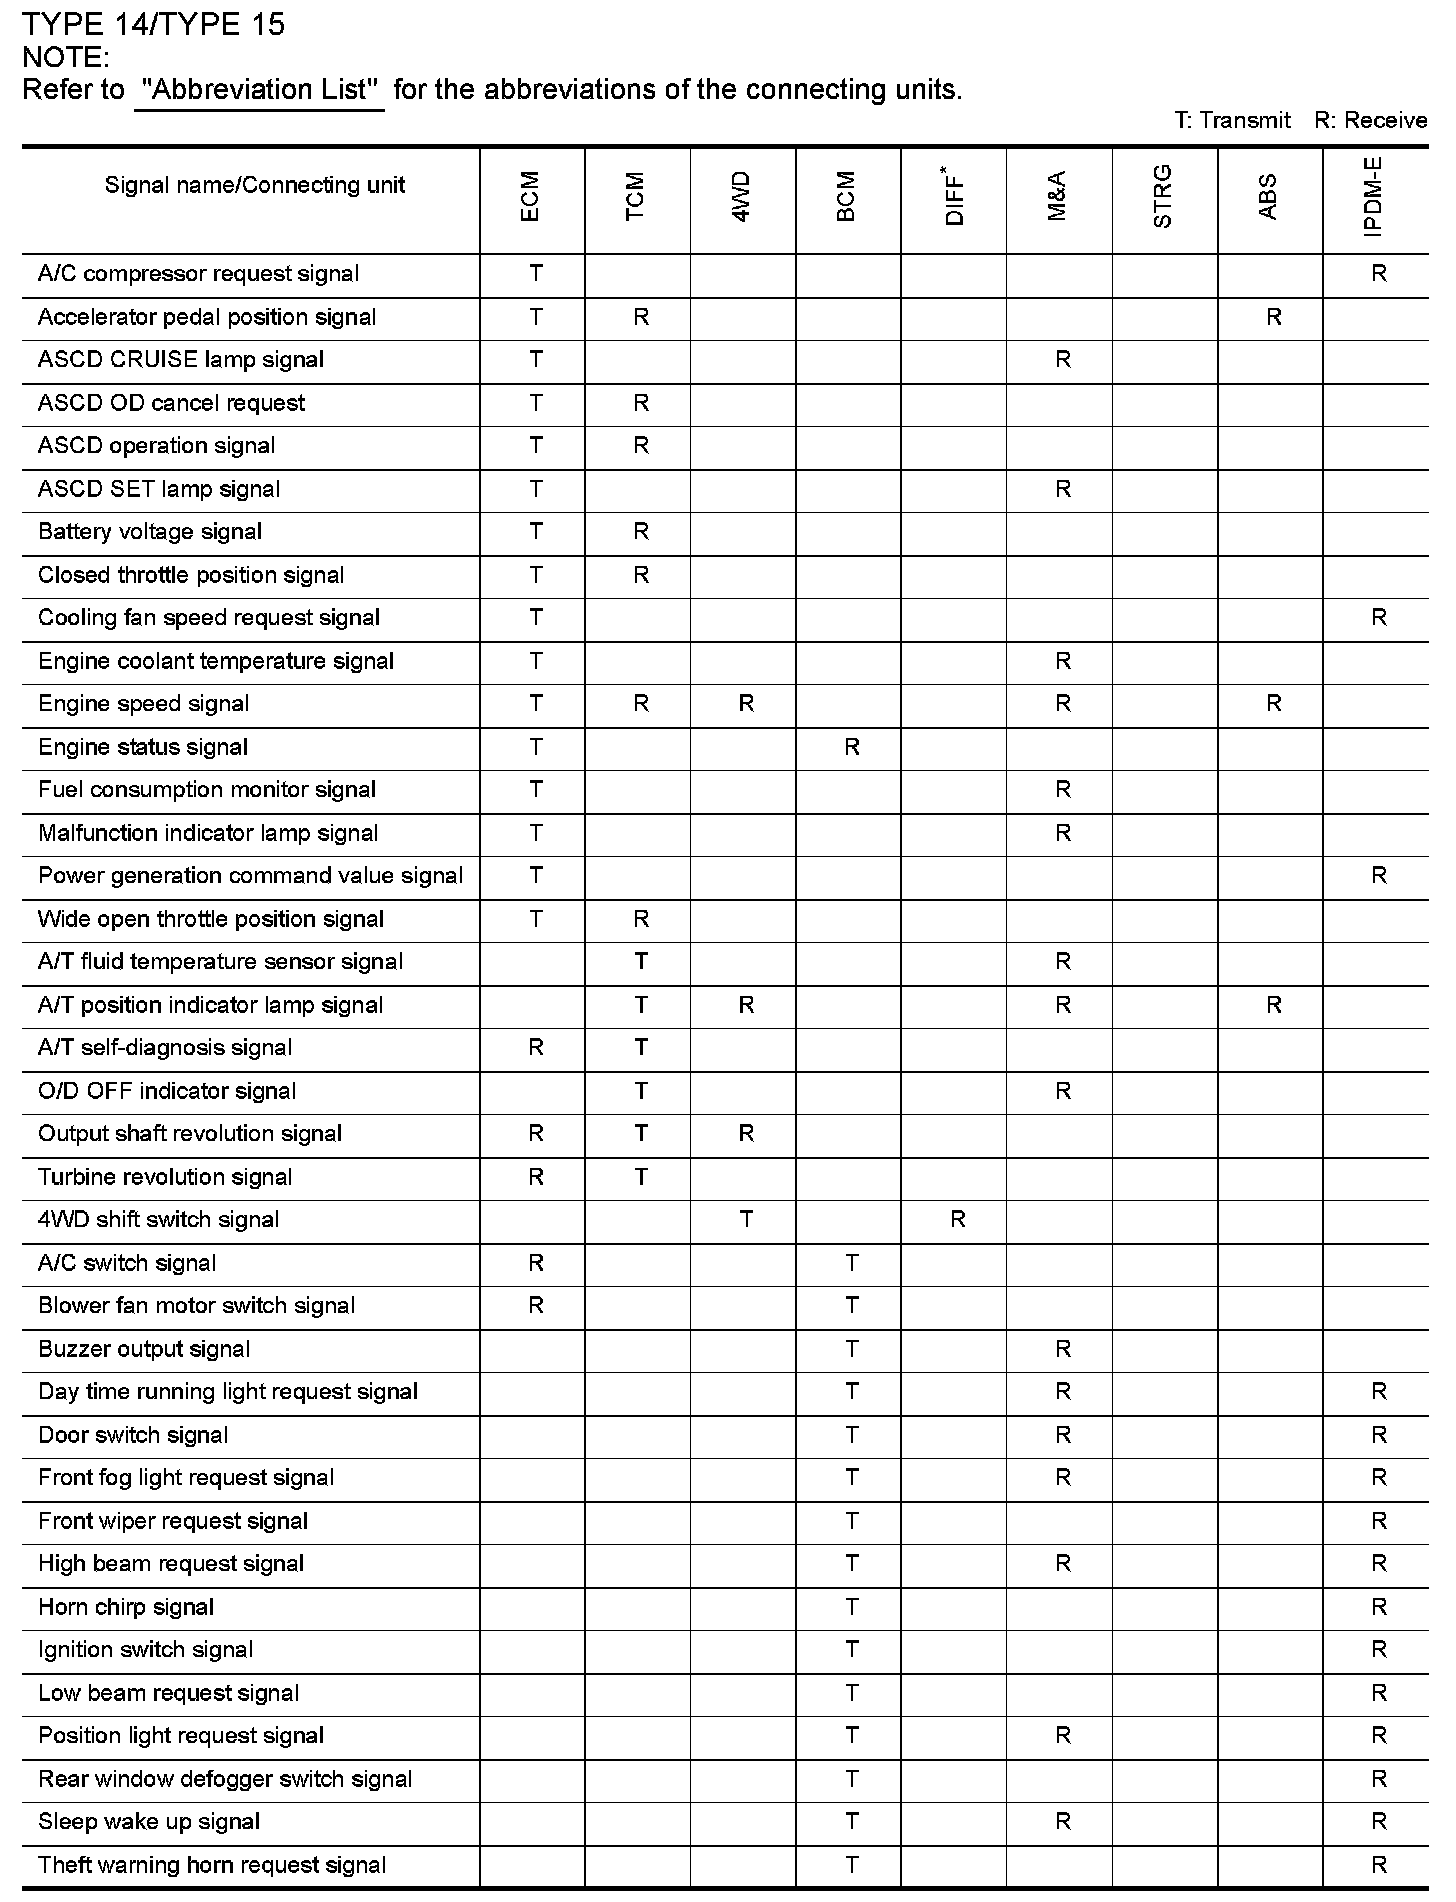
Type 14/Type 15 (Part 2):
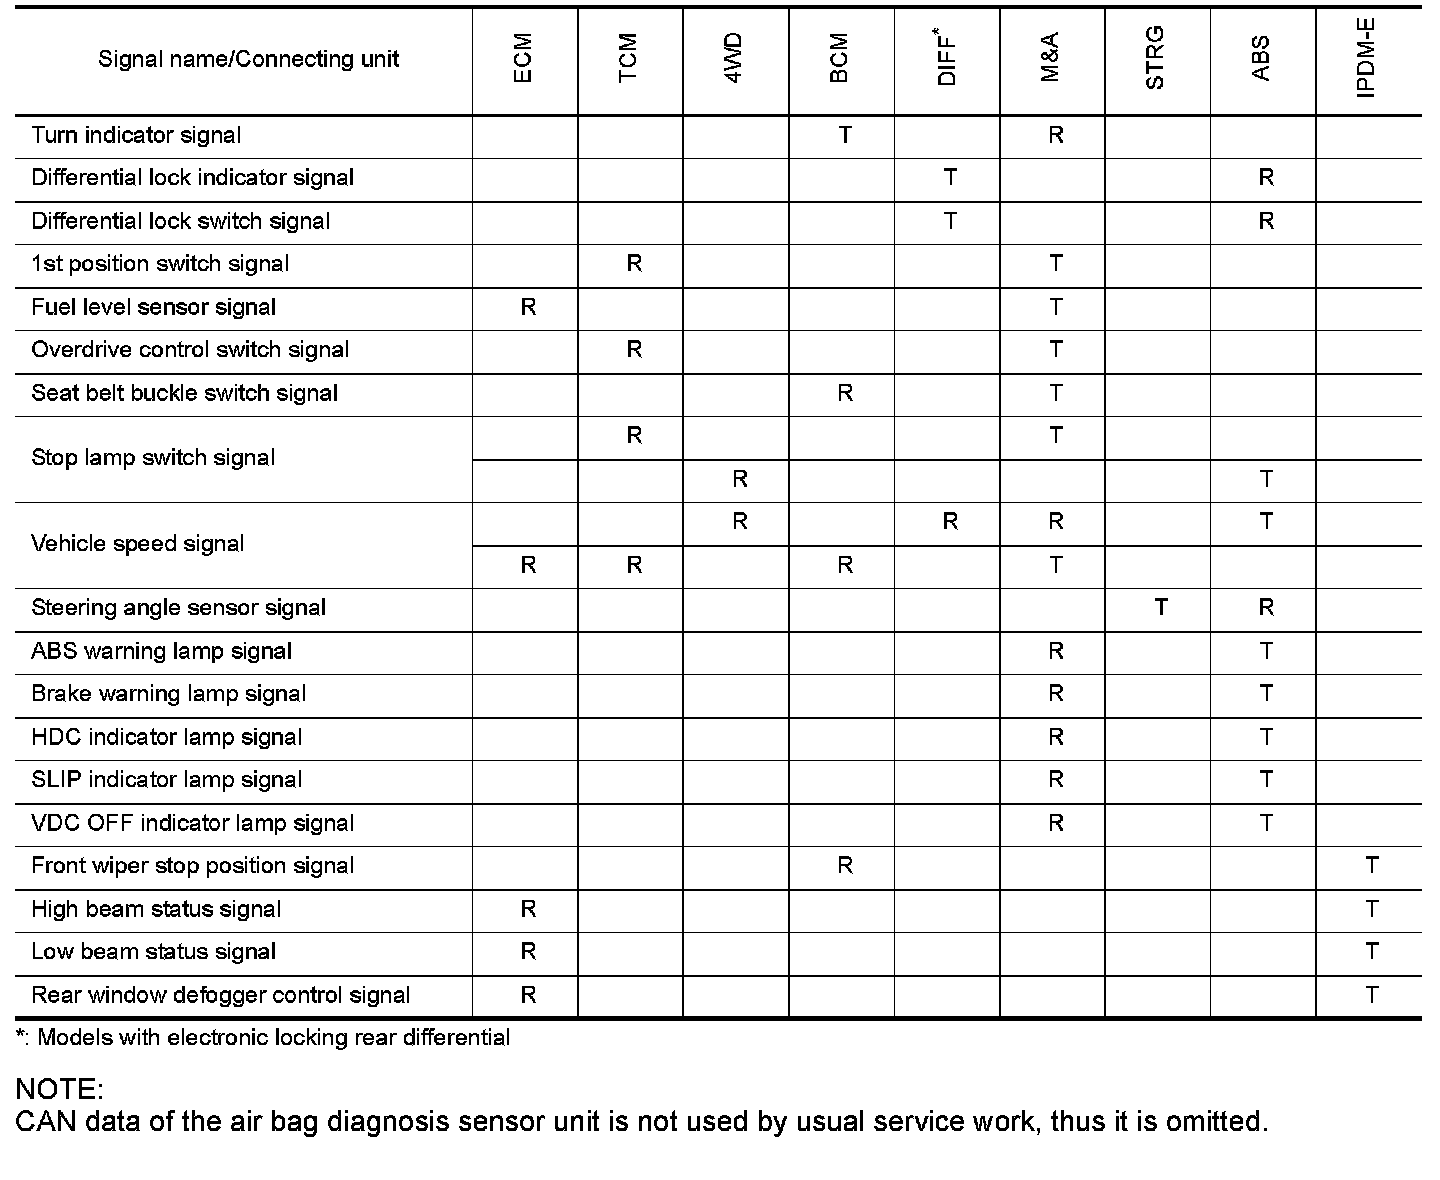
TYPE 14/TYPE 15