Tightening Torques & Sequences
Rod Bearing CapTighten connecting rod bolt with the following procedure:
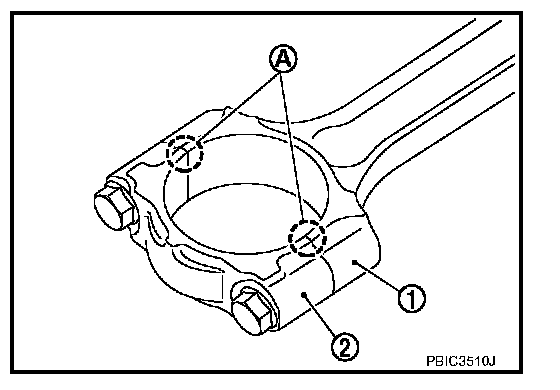
CAUTION:
Make sure that there is no gap in the thrust surface (A) of the joint between connecting rod (1) and connecting rod bearing cap (2) and that these parts are in the correct position. And then, tighten the connecting rod bolts.
If the connecting rod bolts are reused, measure the outer diameter.
Apply new engine oil to the threads and seats of connecting rod bolts.
Tighten bolts in three steps
Step 1 27.4 Nm (2.8 kg-m, 20 ft-lb)
Step 2 0 Nm (0 kg-m, 0 ft-lb)
Step 3 19.6 Nm (2.0 kg-m, 14 ft-lb)
After tightening connecting rod bolt, make sure that crankshaft rotates smoothly.
Check the connecting rod side clearance.
CONNECTING ROD BOLT OUTER DIAMETER
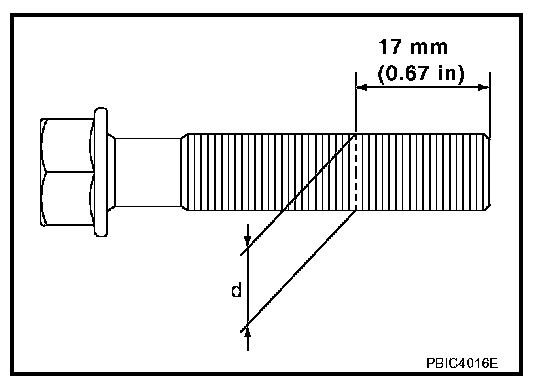
^ Measure the outer diameter "d" at position as shown.
^ If reduction appears in a position other than "d", regard it as "d".
Limit 7.75 mm (0.3051 in)
^ When "d" exceeds the limit (when it becomes thinner), replace connecting rod bolt with a new one.