Electronic Brake Control Module: Service and Repair
ACTUATOR AND ELECTRIC UNIT (ASSEMBLY)
Removal and Installation
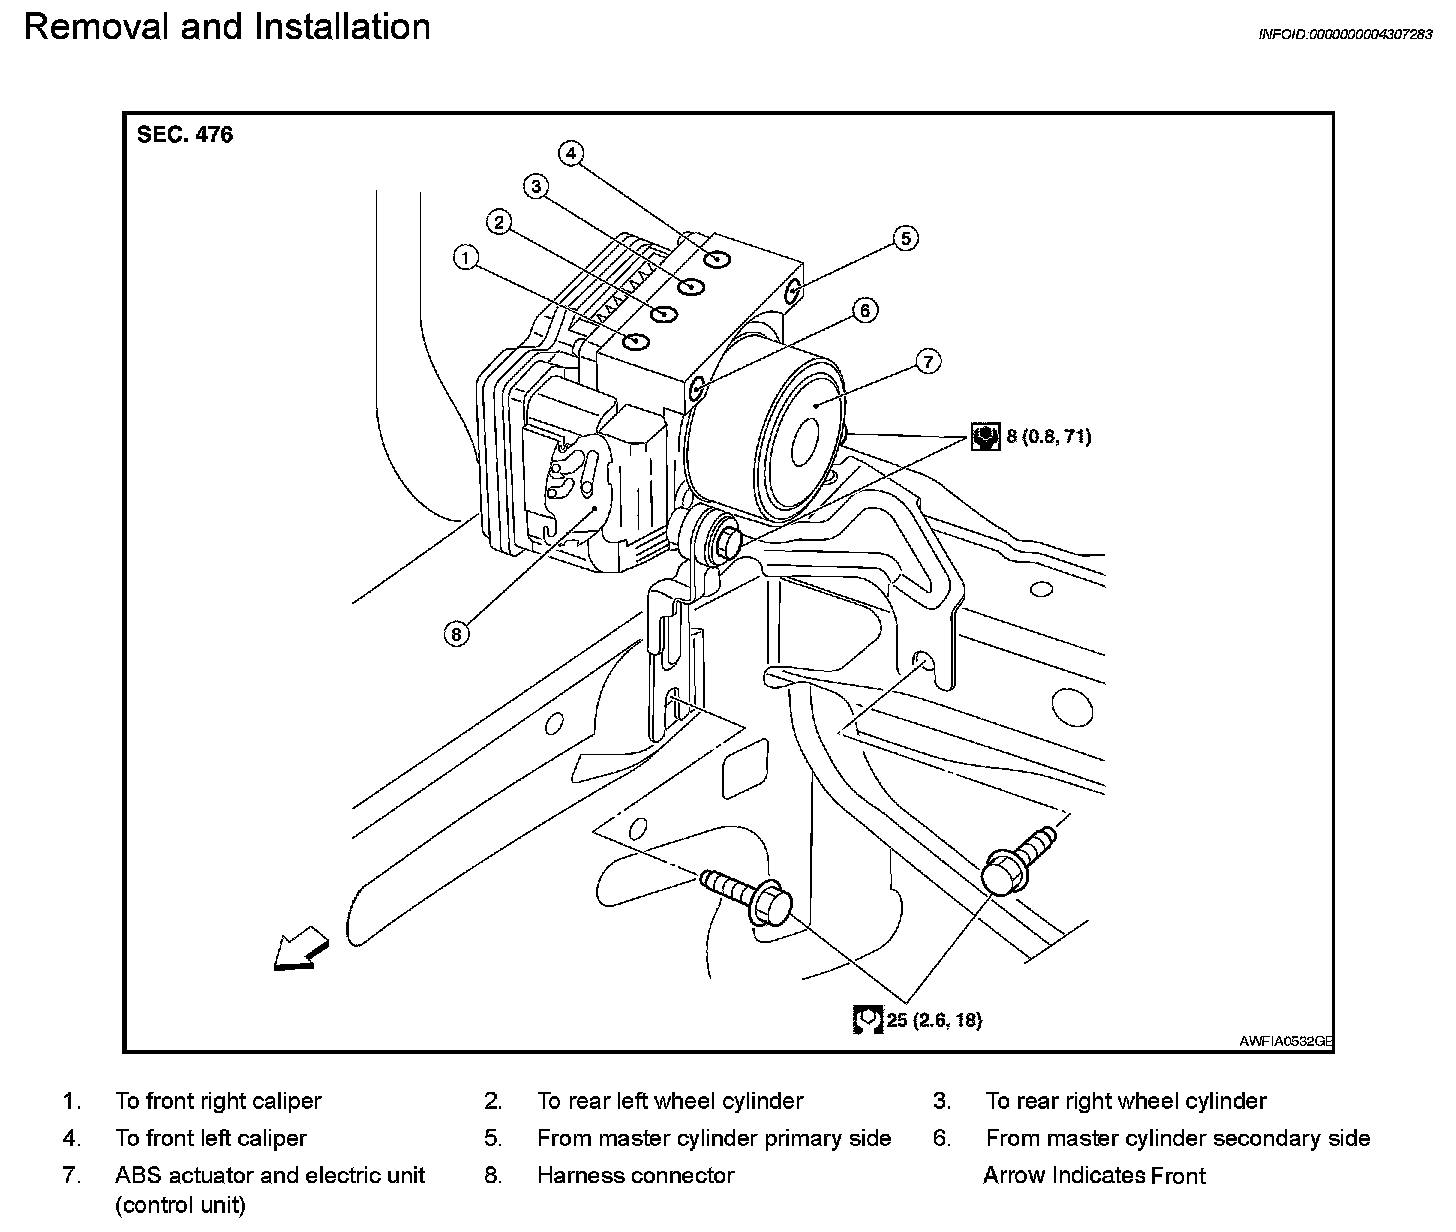
CAUTION:
- Before servicing, disconnect battery negative terminal.
- To remove brake tube, use flare nut wrench to prevent flare nuts and brake tube from being damaged. To install, use flare nut torque wrench, tighten flare nut to the specified torque. Refer to Diagrams.
- Do not apply excessive impact to ABS actuator and electric unit (control unit), such as dropping it.
- Do not remove and install actuator by holding harness.
- After work is completed, bleed the air from the brake hydraulic system. Refer to Service and Repair.
REMOVAL
1. Disconnect the battery negative terminal.
2. Remove the cowl top. Refer to Service and Repair.
3. Disconnect ABS actuator and electric unit (control unit) connector.
4. Loosen brake tube flare nuts, then remove brake tubes from ABS actuator and electric unit (control unit).
5. Remove brake booster hose from engine. Refer to Removal And Installation.
6. Remove ABS actuator and electric unit (control unit) bracket bolts.
7. Remove ABS actuator and electric unit (control unit).
INSTALLATION
Installation is in the reverse order of removal.
- Bleed the brake system. Refer to Service and Repair.
CAUTION:
After installing harness connector in the ABS actuator and electric unit (control unit), make sure the connector is securely locked.