Compressor HVAC: Service and Repair
COMPRESSOR
Removal and Installation for Compressor
COMPONENTS
A/C Compressor Mounting - QR25DE
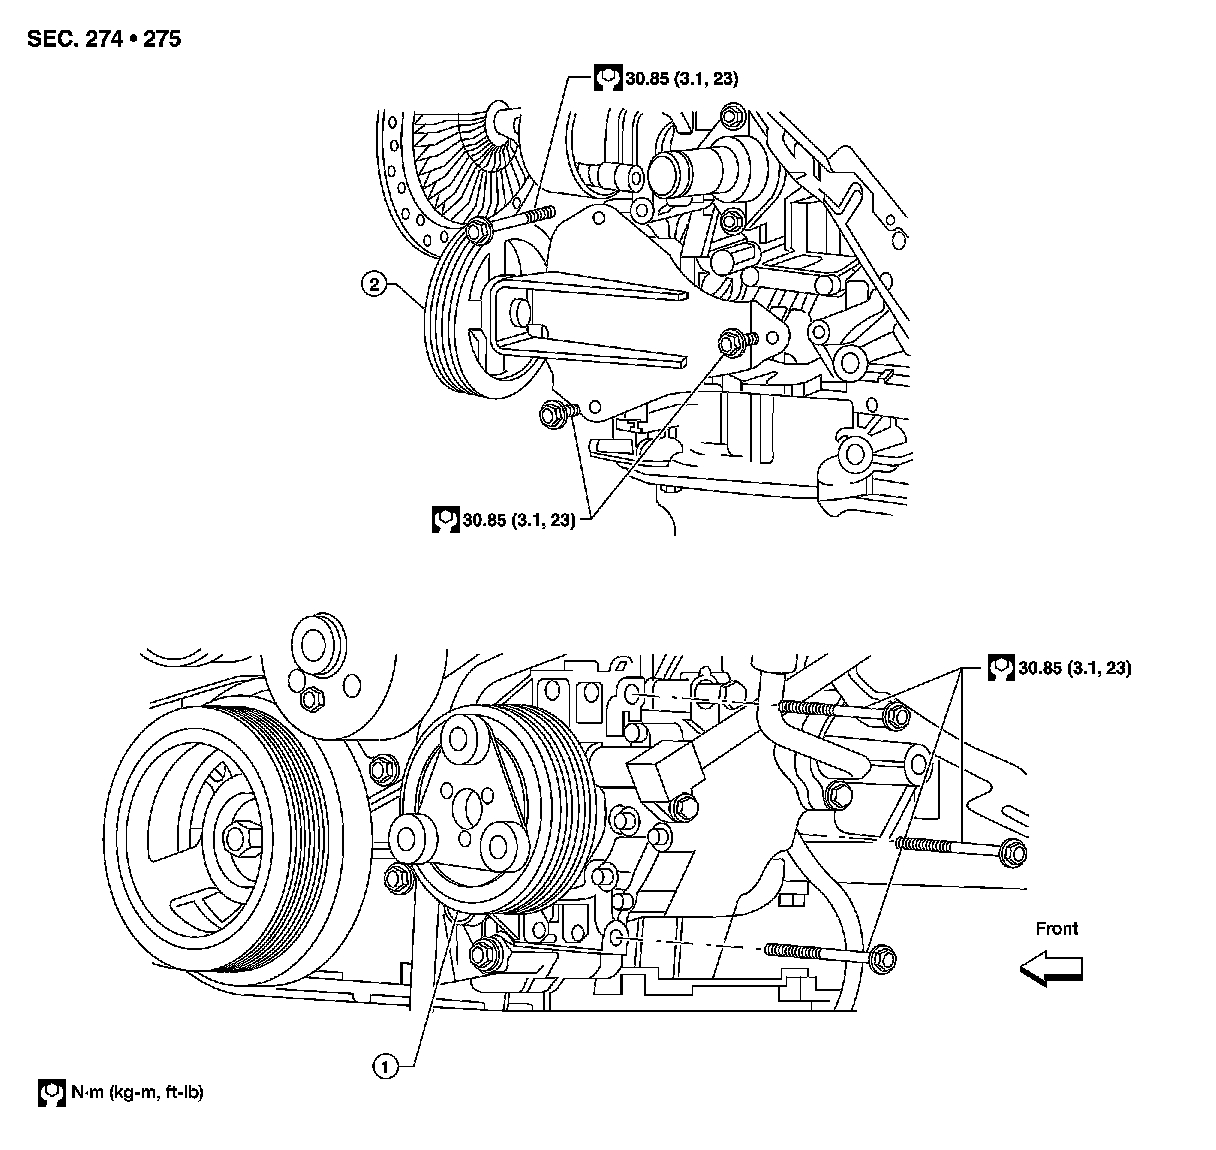

A/C Compressor Mounting - VQ40DE
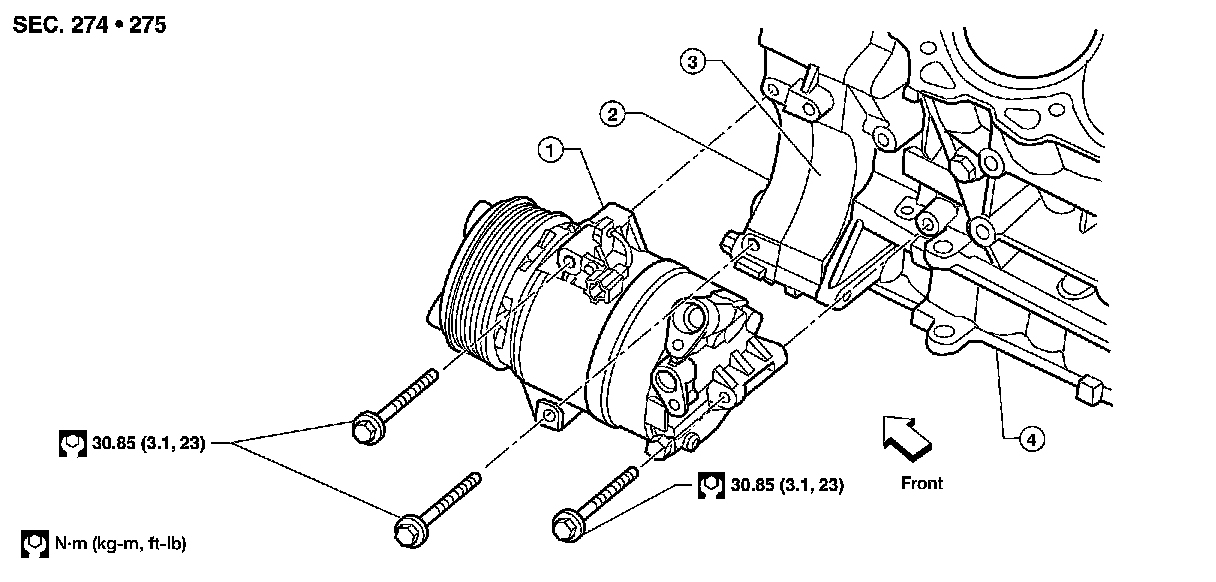

REMOVAL
1. Discharge the A/C refrigerant. HFC-134A (R-134A) Service Procedure.
2. Remove the front left wheel and tire (for VQ40DE only). Wheel Balance Adjustment.
3. Remove the front left mud guard (for VQ40DE only). Service and Repair.
4. Remove the LH front fender protector (for VQ40DE only). Removal And Installation Of Front Fender Protector, "Removal and Installation of
Front Fender Protector".
5. Remove the engine cover (for VQ40DE only). .
6. Remove the engine air cleaner and air ducts (For VQ40DE only). .
7. Remove the drive belt. Removal And Installation (QR25DE), Removal And Installation (VQ40DE).
8. Disconnect the compressor harness connector.
9. Disconnect both the high-pressure flexible A/C hose and low-pressure flexible A/C hose from the compressor.
CAUTION:
Cap or wrap the joint of the pipe with suitable material such as vinyl tape to avoid the entry of air.
10. Remove the A/C compressor bolts using power tools.
NOTE:
For the QR25DE engine, the upper compressor bolt is longer than the other compressor bolts and can only be removed by repositioning the compressor after all the bolts have been loosened.
INSTALLATION
Installation is in the reverse order of removal.
CAUTION:
- Replace the O-ring of the low-pressure flexible A/C hose and high-pressure flexible A/C hose with a new one, apply compressor oil to the O-rings before installation.
- After recharging the A/C system with refrigerant, check for leaks. Checking Of Refrigerant Leaks.
NOTE:
For the QR25DE engine, the upper compressor bolt is longer than the other compressor bolts and must be installed in the compressor before positioning the compressor for installation.