Removal And Installation
CONTROLLER
Removal and Installation
REMOVAL
1. Remove instrument finisher E. Component Parts .
2. Remove instrument finisher D. Component Parts .
3. Remove cluster lid C. Component Parts .
4. Remove intake door lever knob. Controller Disassembly and Assembly .
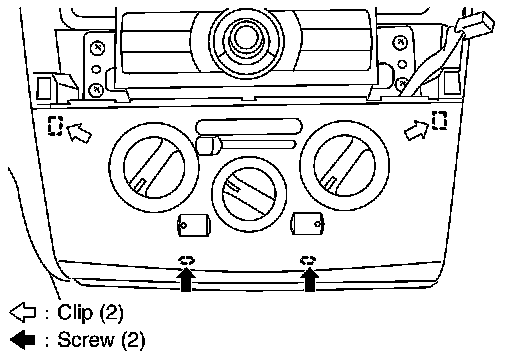
5. Remove controller finisher mounting screws and clips and the controller finisher.
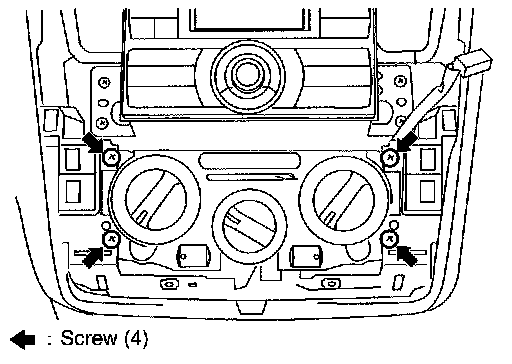
6. Remove controller mounting screws and the controller.
7. Remove instrument panel lower cover. Component Parts .
8. Remove instrument panel side finisher. Component Parts .
9. Remove instrument panel lower finisher. Component Parts .
10. Remove glove box assembly. Component Parts .
11. Remove air mix door cable, mode door cable and intake door cable from A/C unit assembly.
12. Disconnect connector, and then remove controller.
INSTALLATION
Installation is in the reverse order of removal.
CAUTION:
Adjust the door cables during installation. Intake Door Cable Adjustment , Air Mix Door Cable Adjustment .