Removal And Installation Procedure For CVT Unit Connector
PRECAUTIONS
Removal and Installation Procedure for CVT Unit Connector
REMOVAL
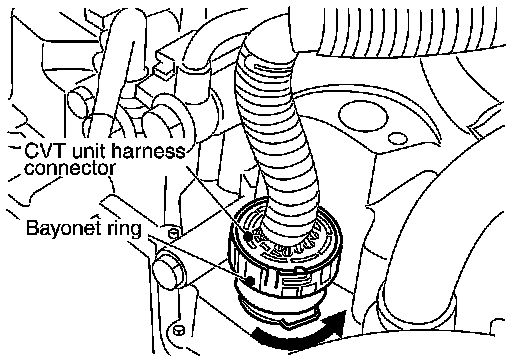
Rotate bayonet ring counterclockwise. Pull out CVT unit harness connector upward and remove it.
INSTALLATION
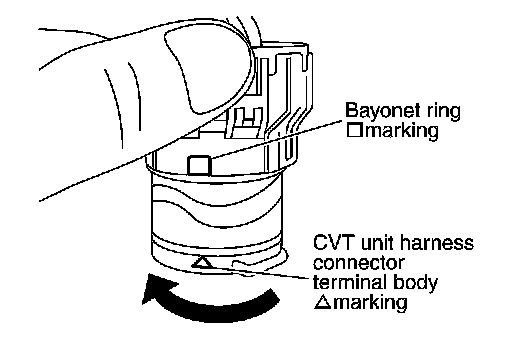
1.Align (Triangle mark) marking on CVT unit harness connector terminal body with (Square mark) marking on bayonet ring. Insert CVT unit harness connector. Then rotate bayonet ring clockwise.
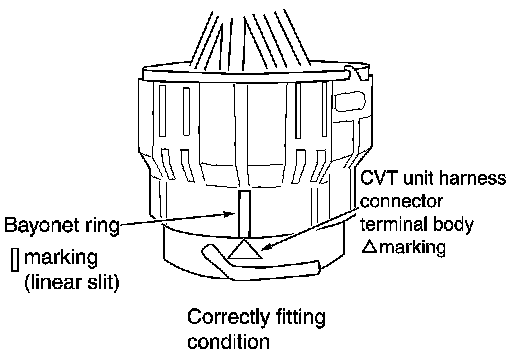
2.Rotate bayonet ring clockwise until (Triangulate mark) marking on CVT unit harness connector terminal body is aligned with the slit on bayonet ring as shown in the figure (correctly fitting condition). Install
CVT unit harness connector to CVT unit harness connector terminal body.
CAUTION:
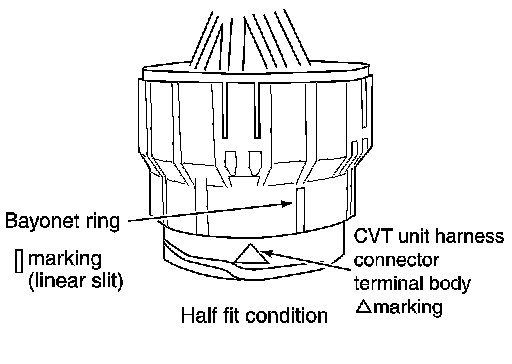
- Securely align (Triangle mark) marking on CVT unit harness connector terminal body with bayonet ring slit. Then, be careful not to make a half fit condition as shown in the figure.
- Never mistake the slit of bayonet ring for other dent portion.