Reprogramming Procedure
Reprogramming Procedure1. With the vehicle parked, the transmission in Park, and the steering wheel in the neutral (straight ahead) position, connect the plus Vehicle Interface (plus VI) to the vehicle.
^ Make sure to use the correct VI for C-III plus (plus VI).

CAUTION
2. Connect the AC Adapter to the CONSULT PC.

CAUTION
3. Connect a battery charger to the vehicle battery:
^ Set the battery charger at a low charge rate.
NOTE:
The GR-8 (Battery and Electrical Diagnostic Station) set to "Power Supply" mode is recommended.

CAUTION
4. Turn off all external Bluetooth devices (e.g., cell phones, printers, etc.) within range of the CONSULT PC and the plus VI.

CAUTION
5. Customer vehicles only: Verify the Extended Storage Switch is engaged (pushed in).
6. In-stock vehicles only: Engage (push in) the Extended Storage Switch.
NOTE:
The Extended Storage Switch will be disengaged (pulled out) at the end of the service procedure.
7. Turn the ignition ON with the engine OFF.
^ The engine must not start or run during the reprogramming procedure.
8. Turn OFF all vehicle electrical loads such as exterior lights, interior lights, HVAC, blower, rear defogger, audio, NAVI, seat heater, steering wheel heater, etc.

IMPORTANT
9. Open / start ASIST on the CONSULT PC.
10. Select / open C-III plus.
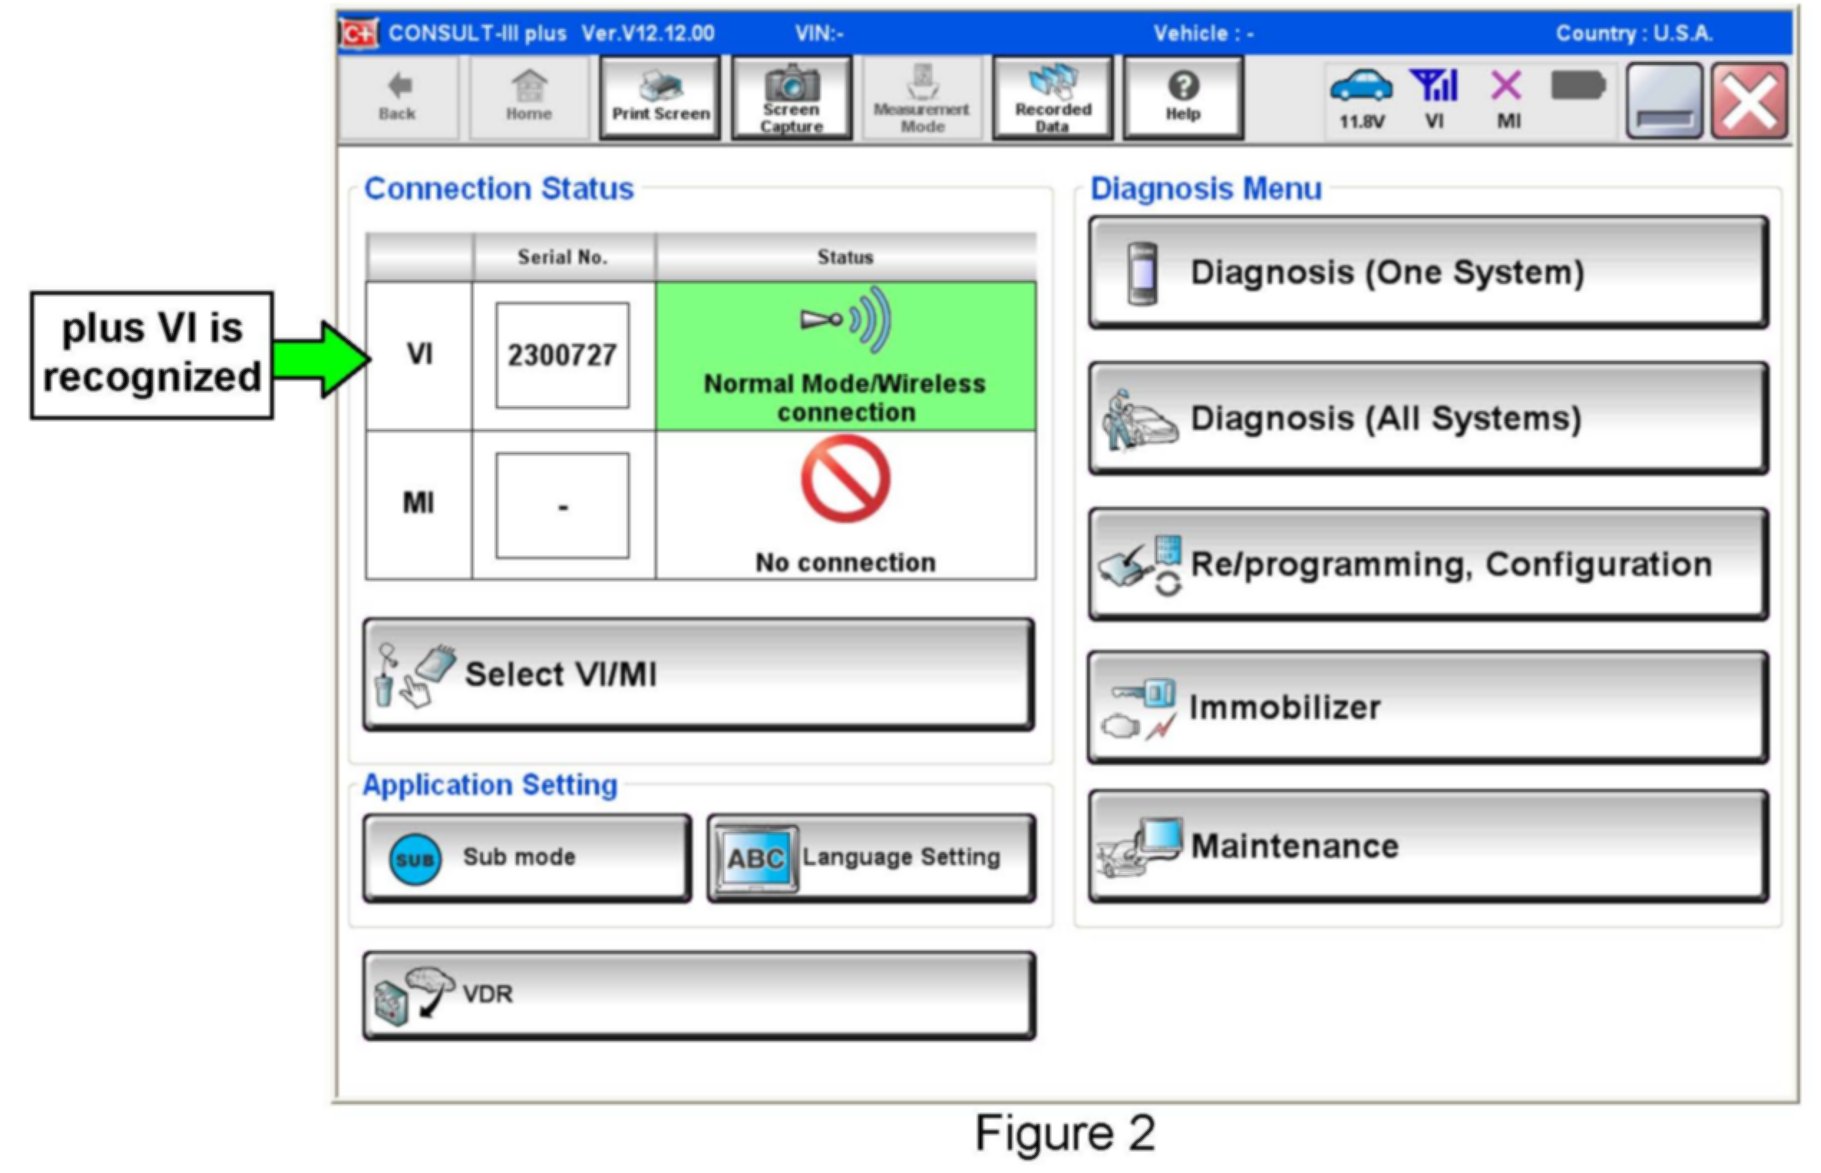
11. Wait for the plus VI to be recognized / connected.
^ The serial number will display when the plus VI is recognized / connected.
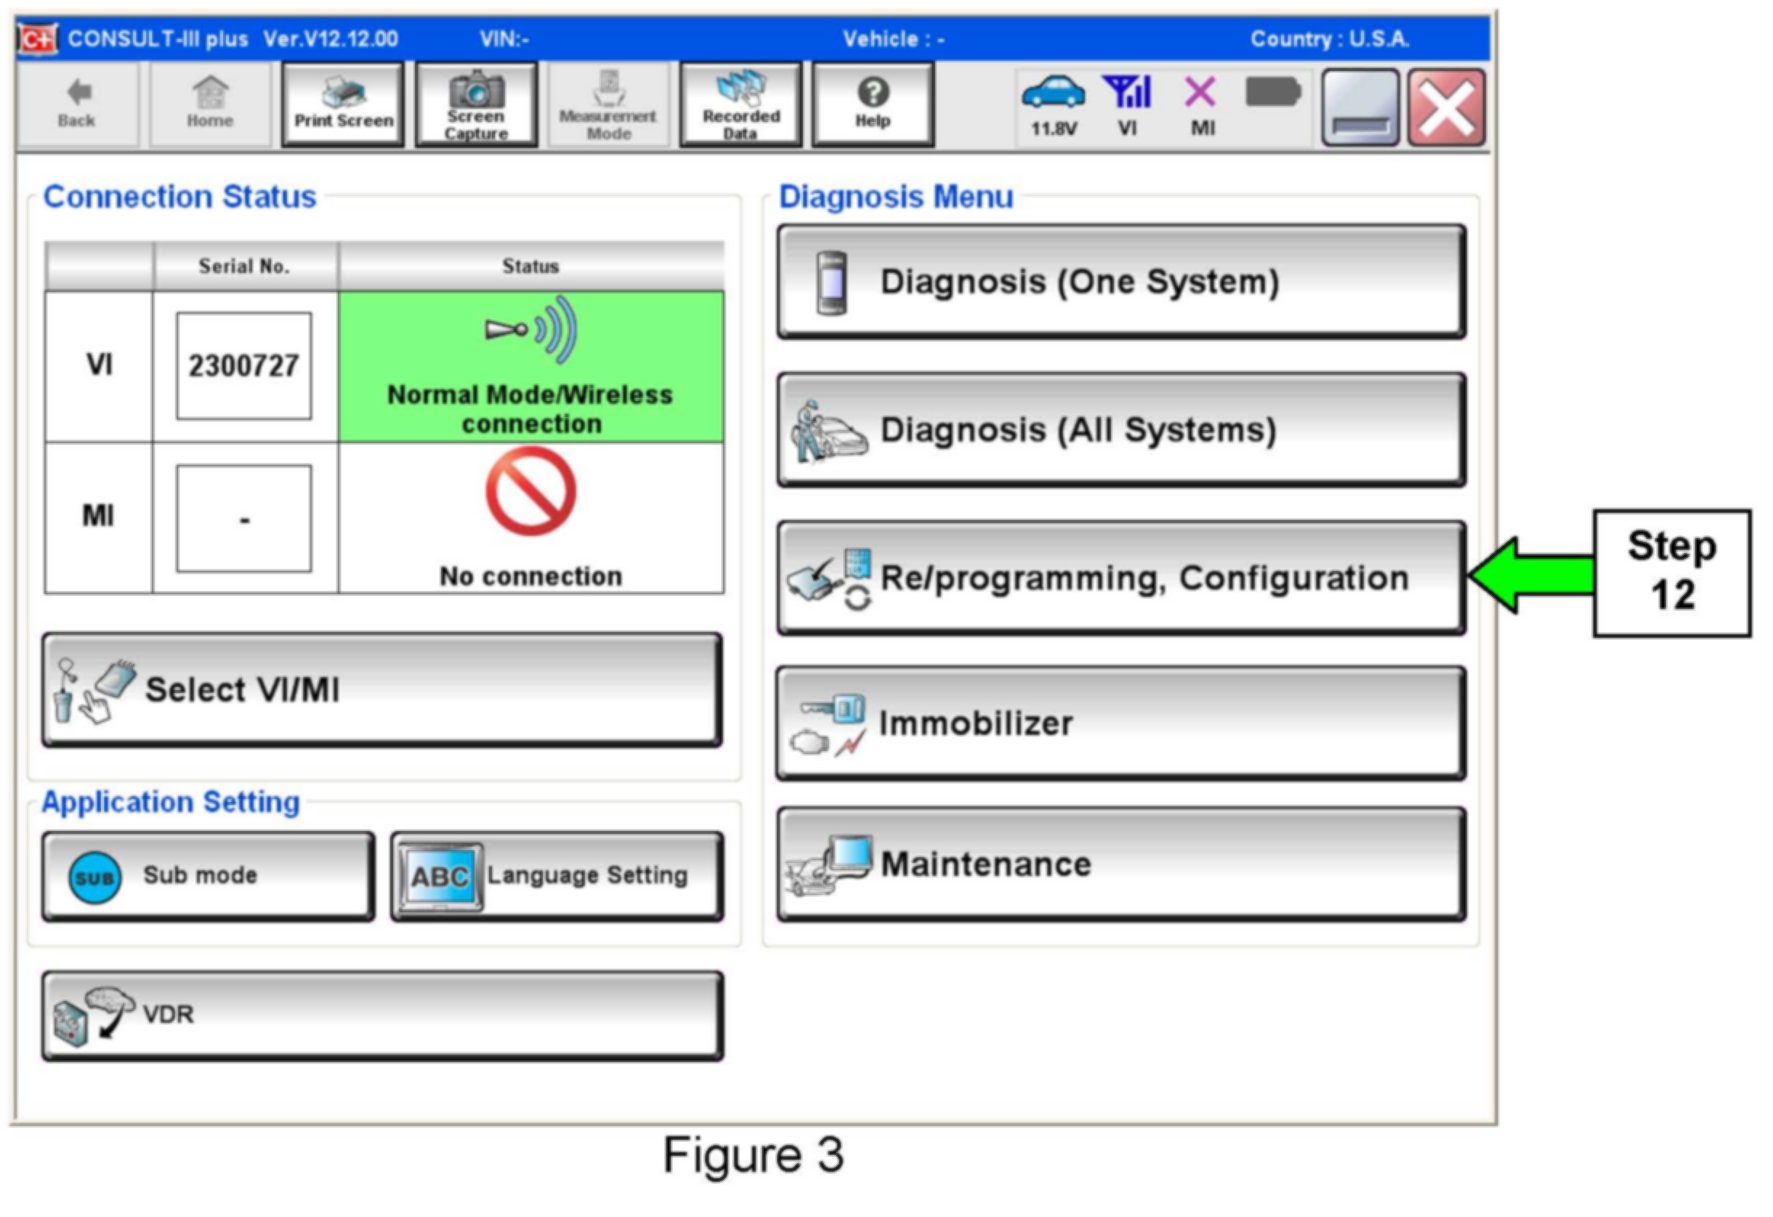
12. Select Re/programming, Configuration.
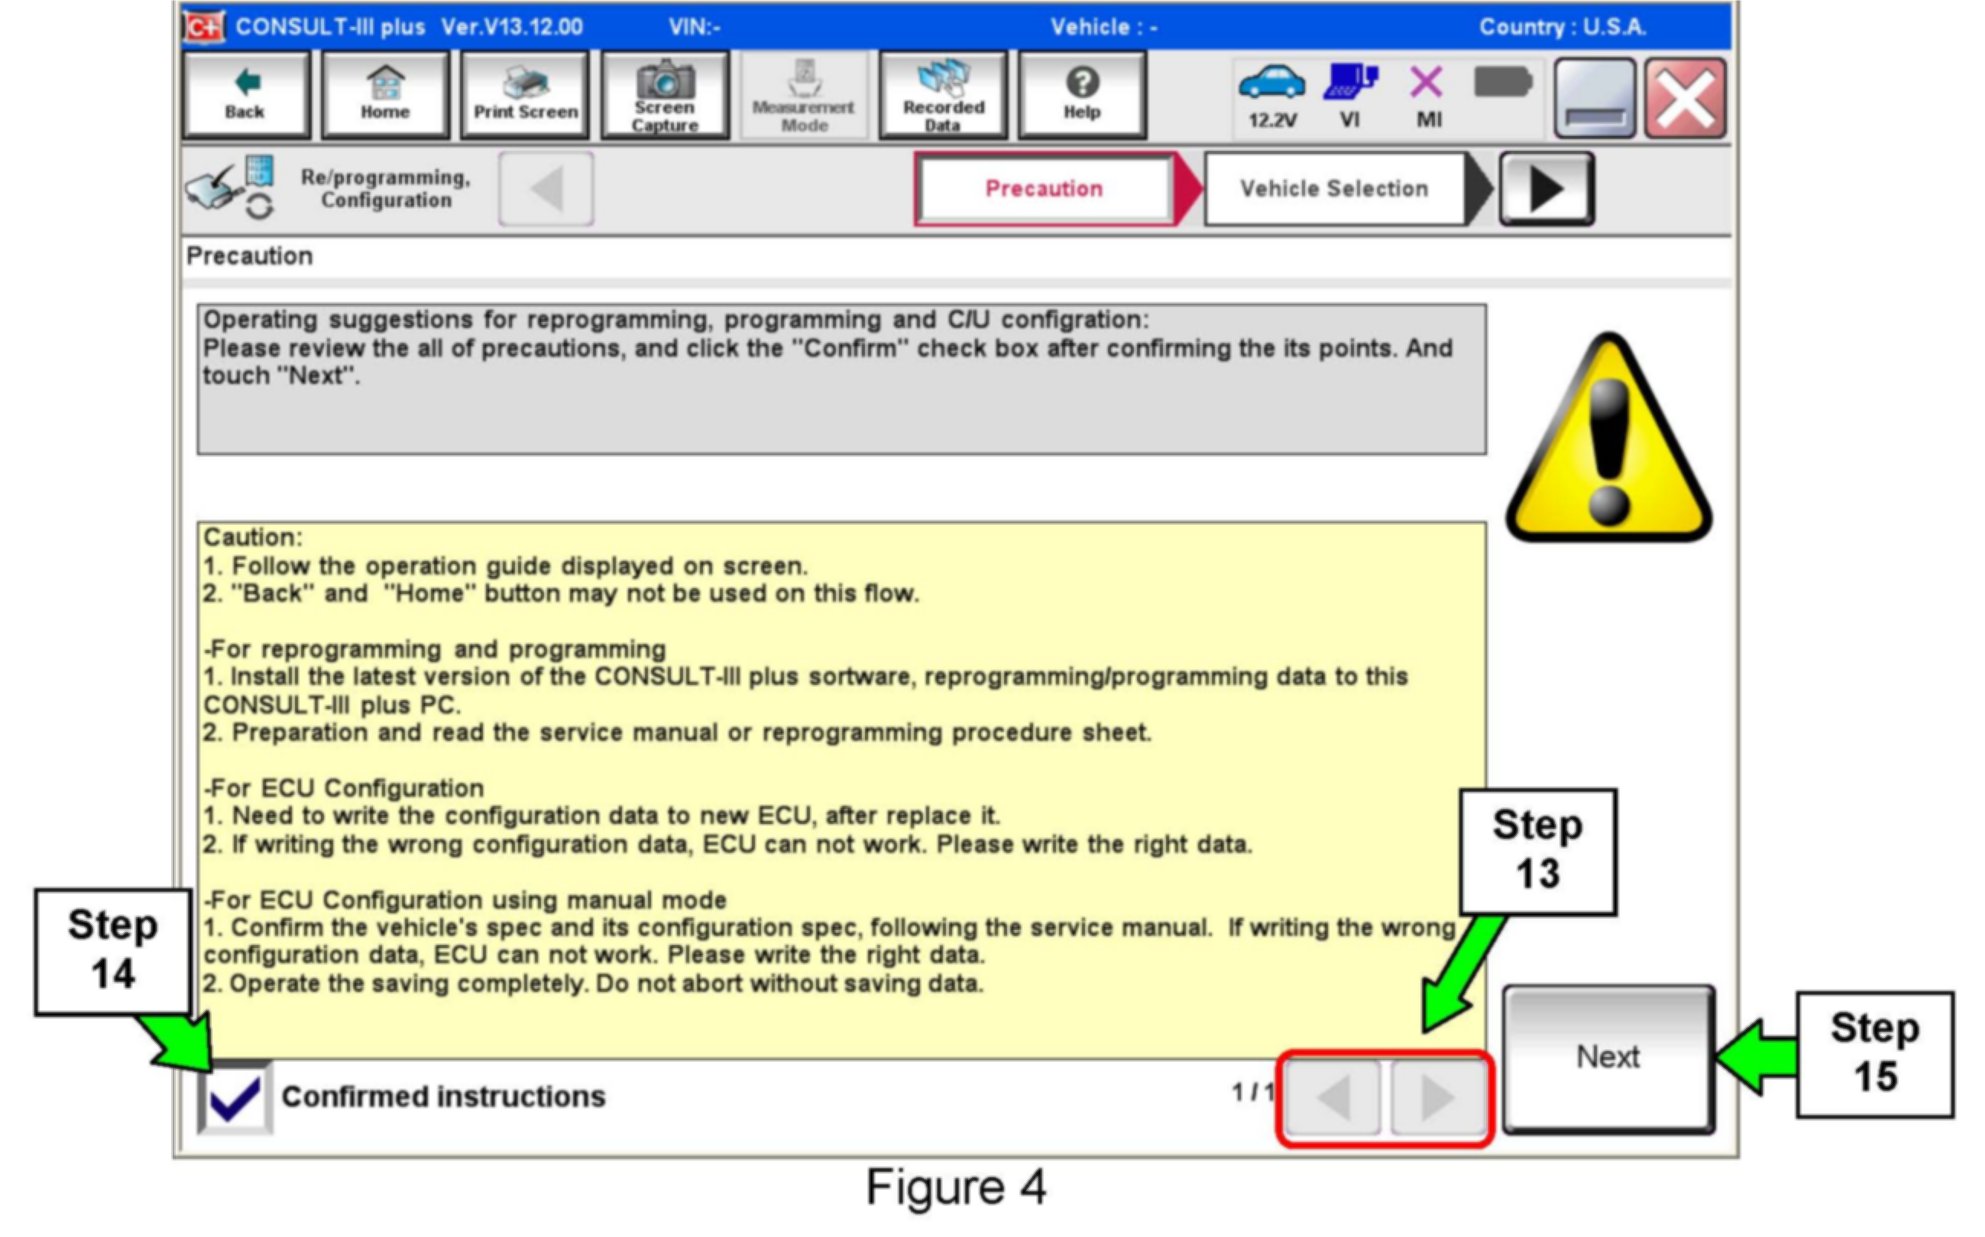
13. Use arrows (if needed) to view and read all precautions.
14. Check the box confirming the precautions have been read.
15. Select Next.
16. Select Nissan, Quest, and then the correct Model Year.

^ If the screen in Figure 5 does not display, skip to step 17.

17. Make sure the VIN or Chassis # matches the vehicles VIN.
18. If the correct VIN is displayed, select Confirm.
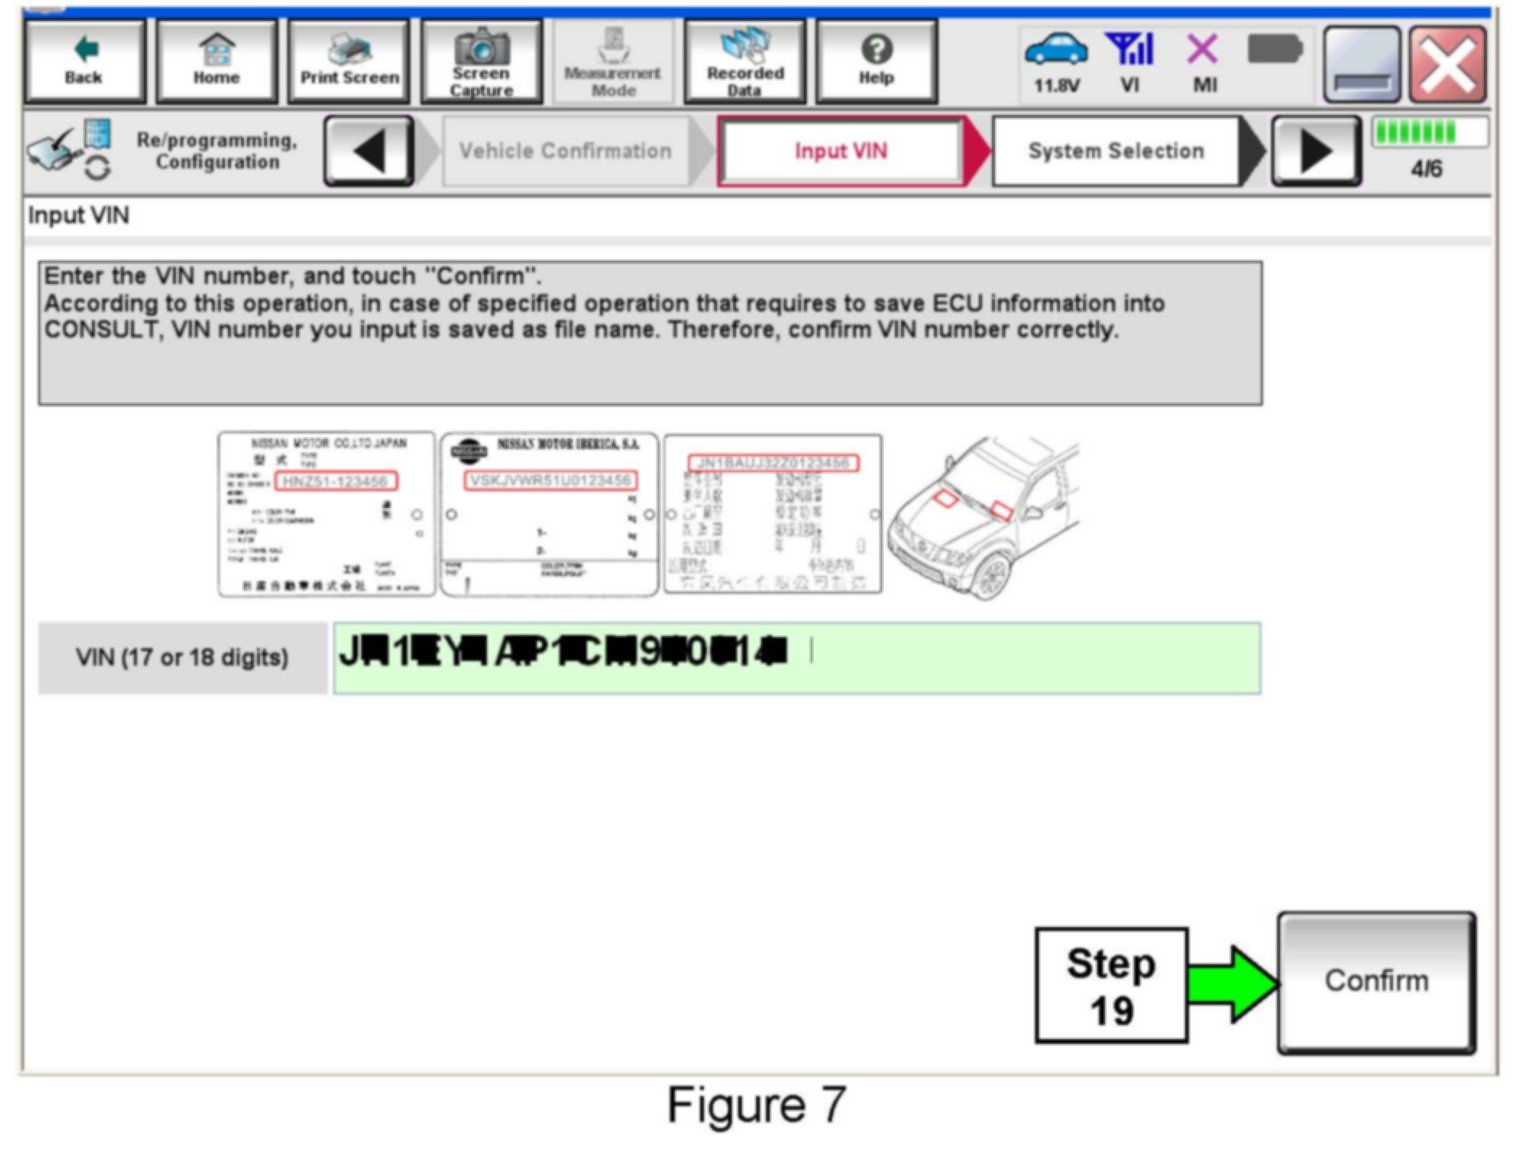
19. If the screen in Figure 7 displays, select Confirm, and then go to step 20.
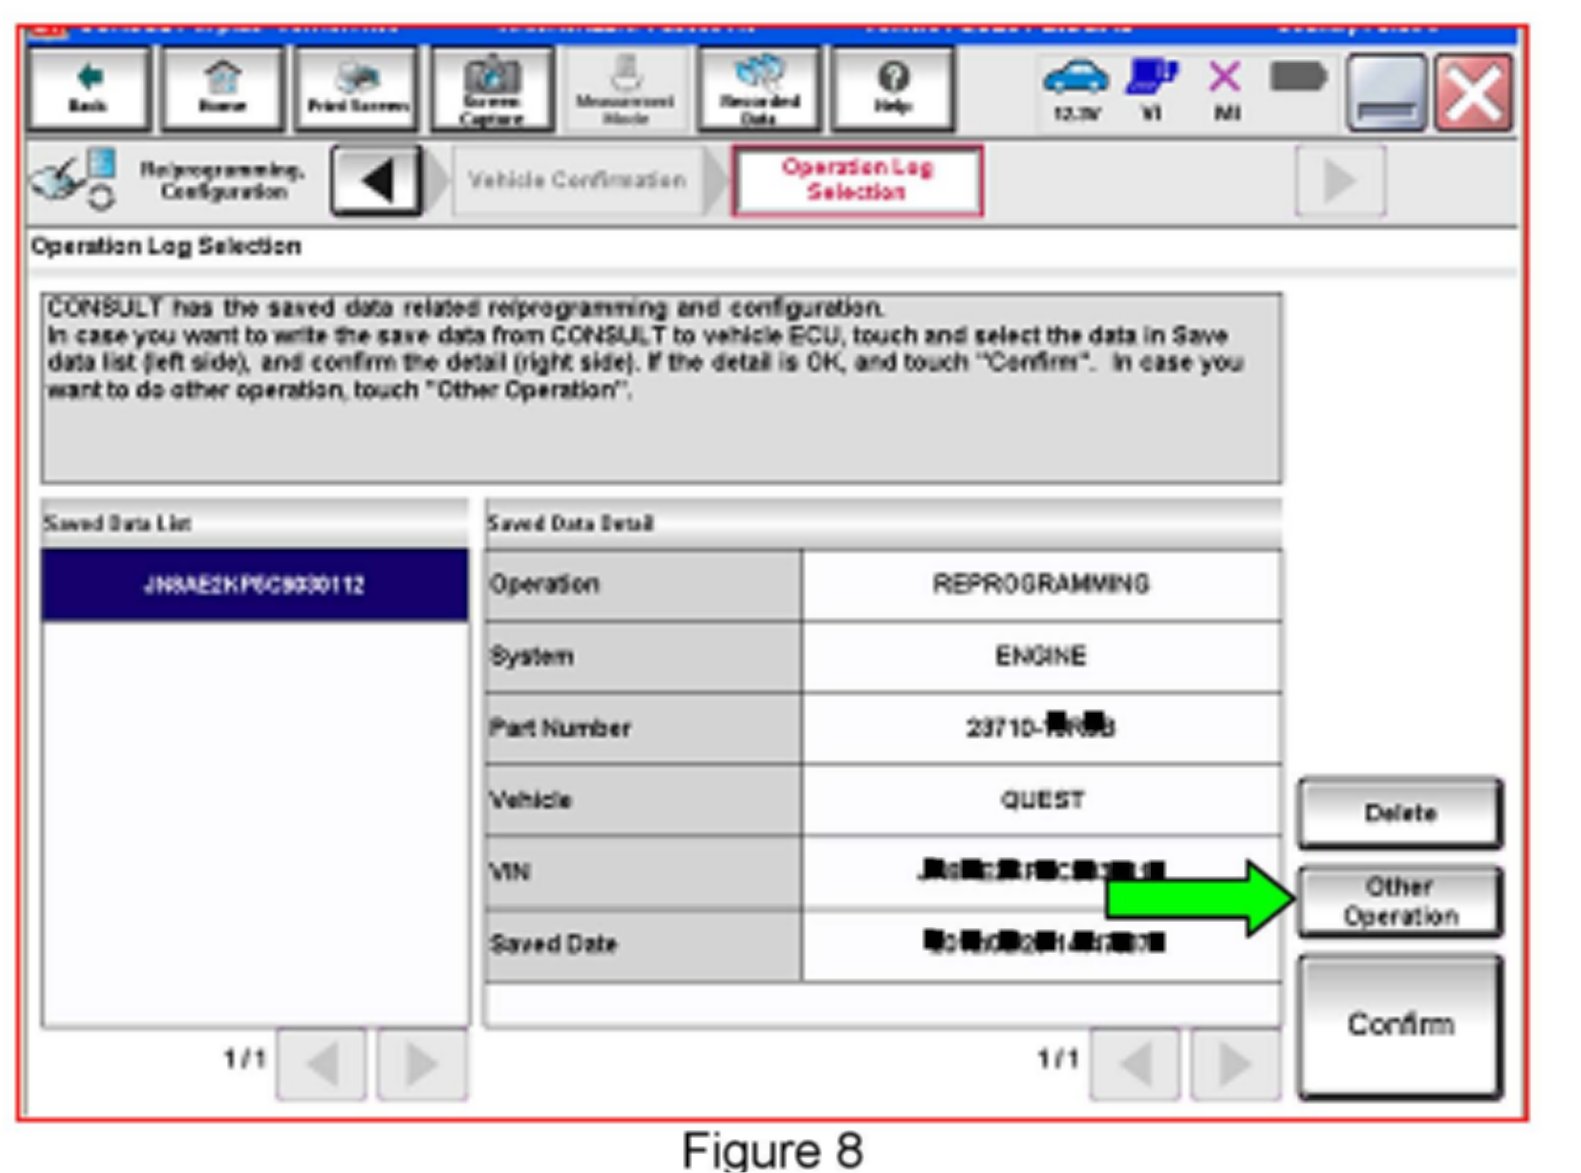
^ If the screen in Figure 8 displays, select Other Operation, and then go to step 20.
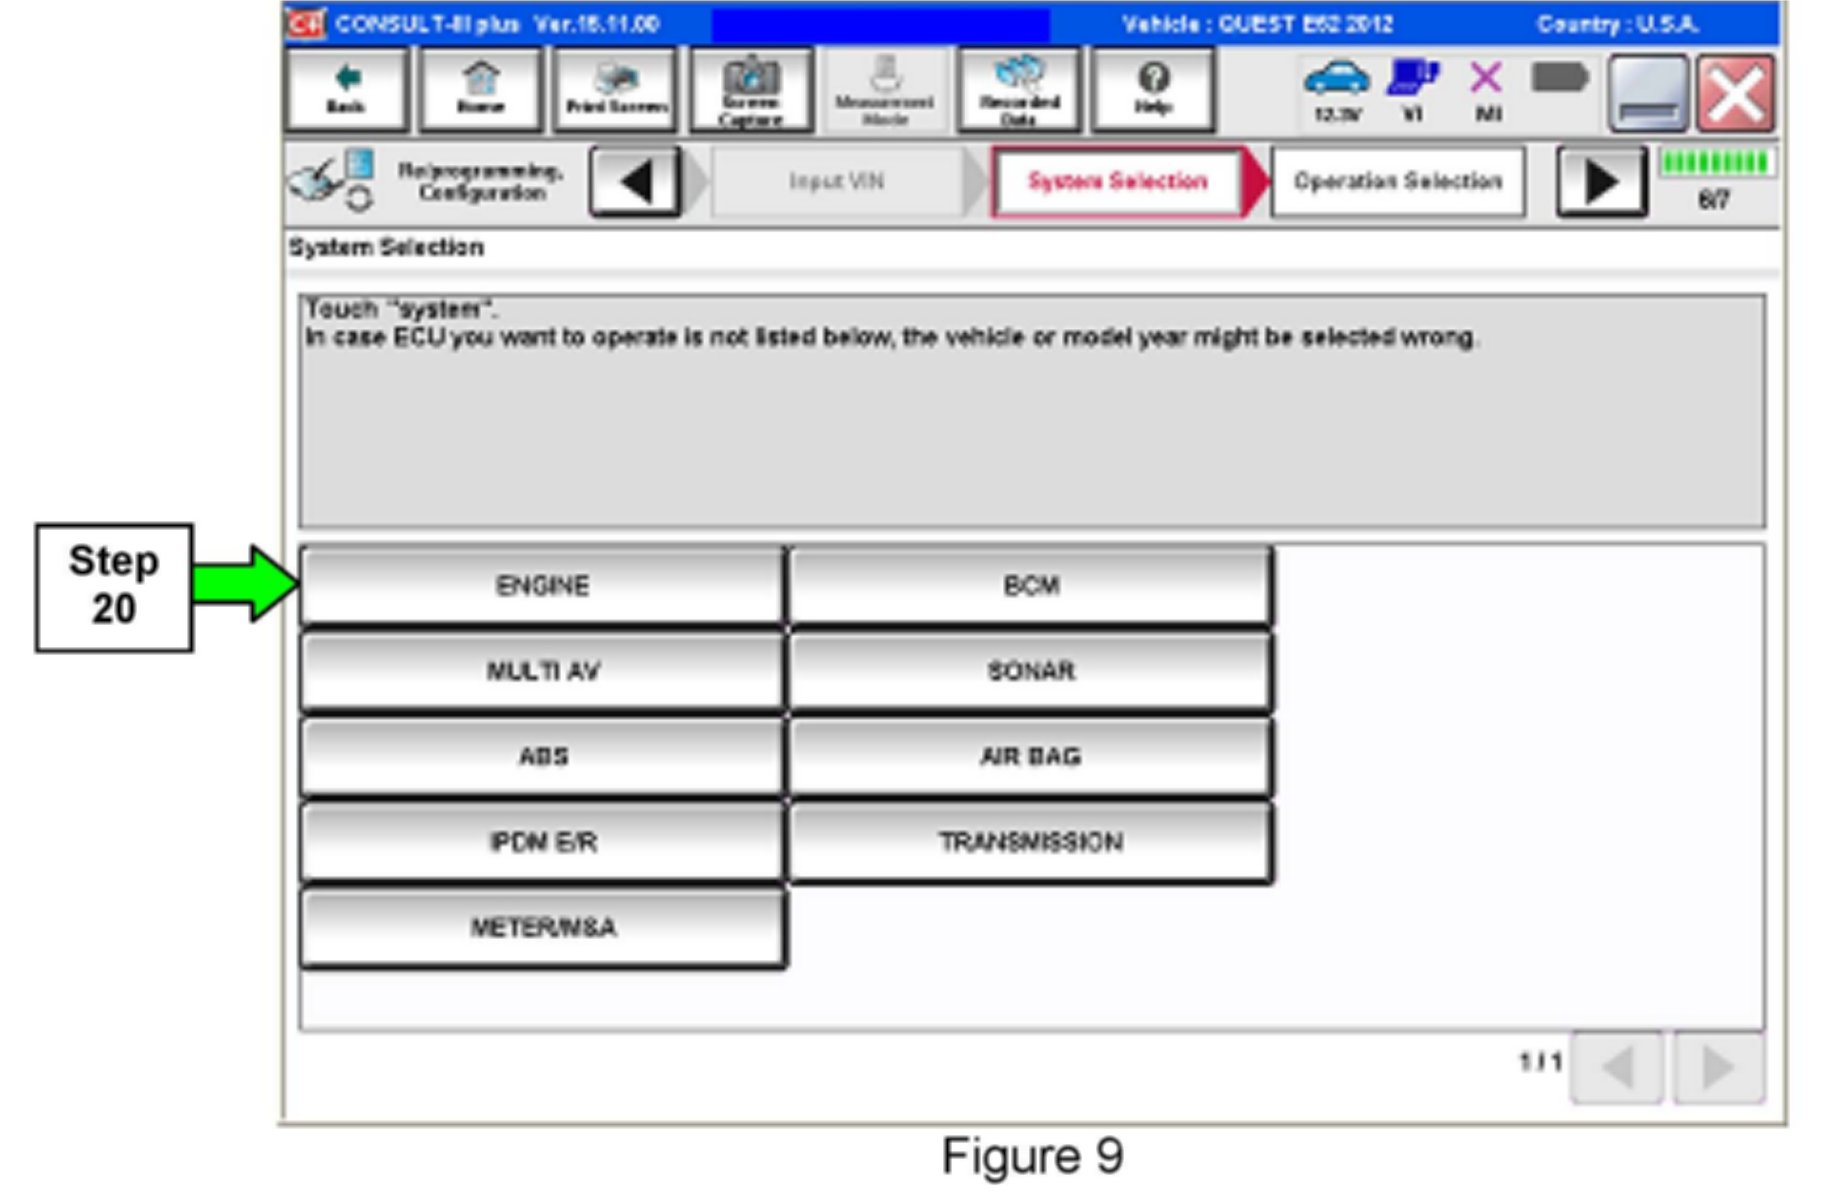
20. Select ENGINE.
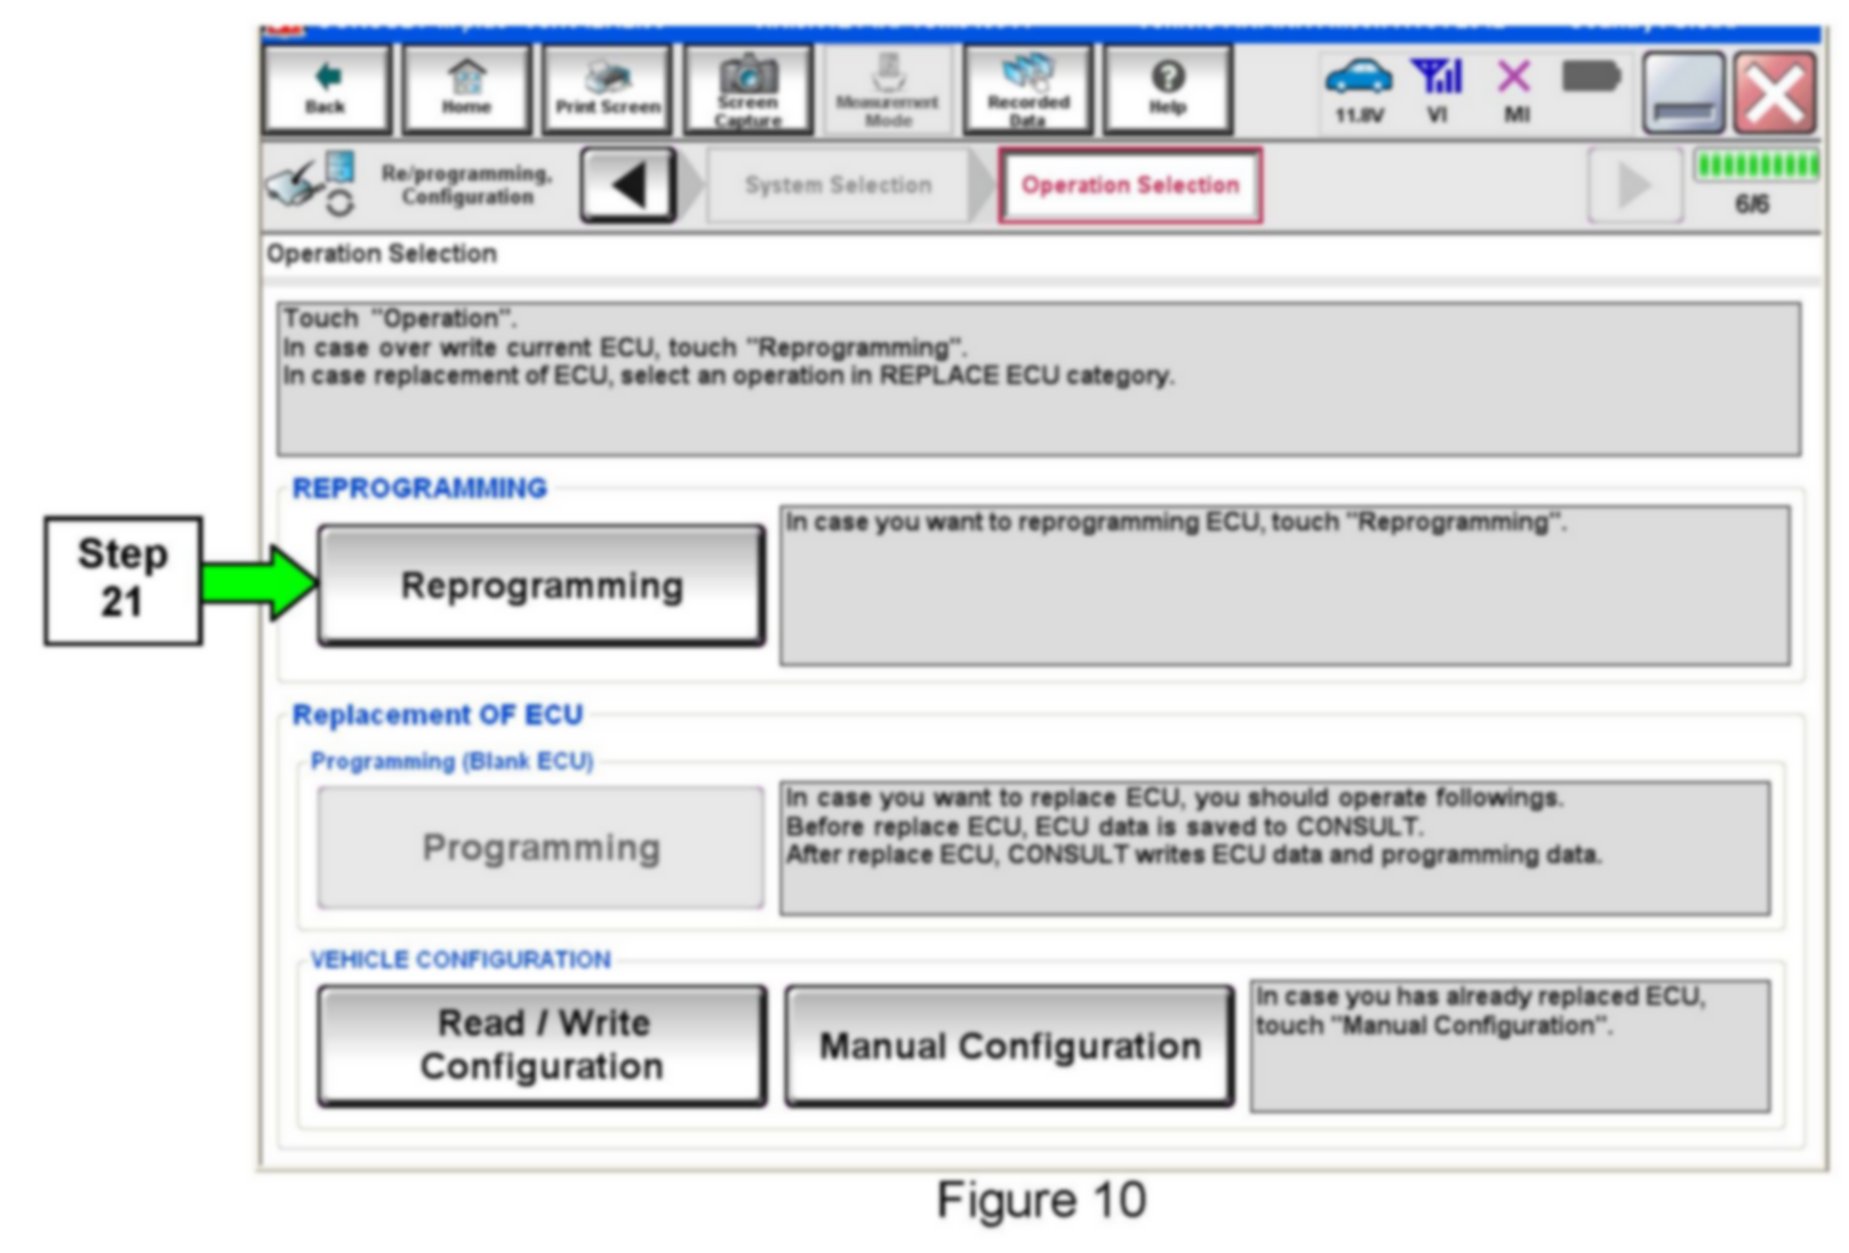
21. Select Reprogramming.
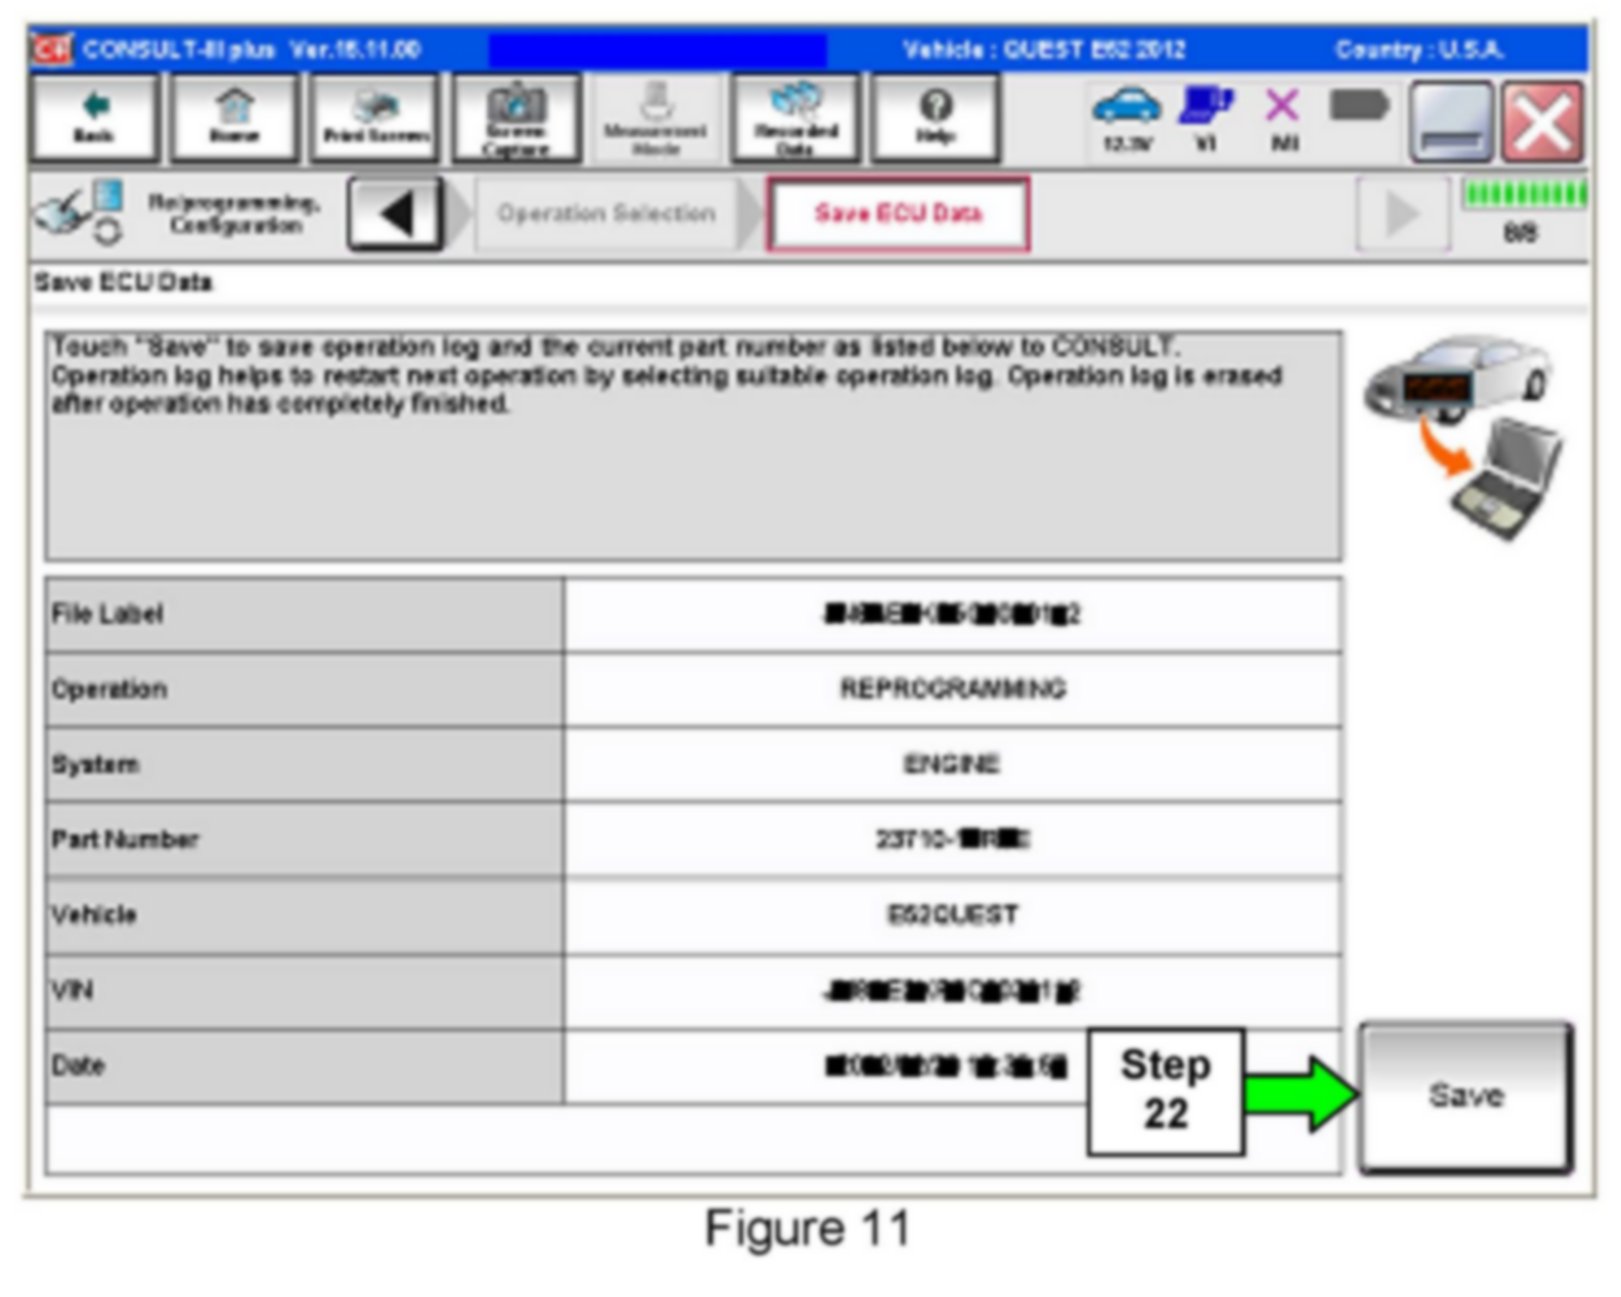
22. Select Save.
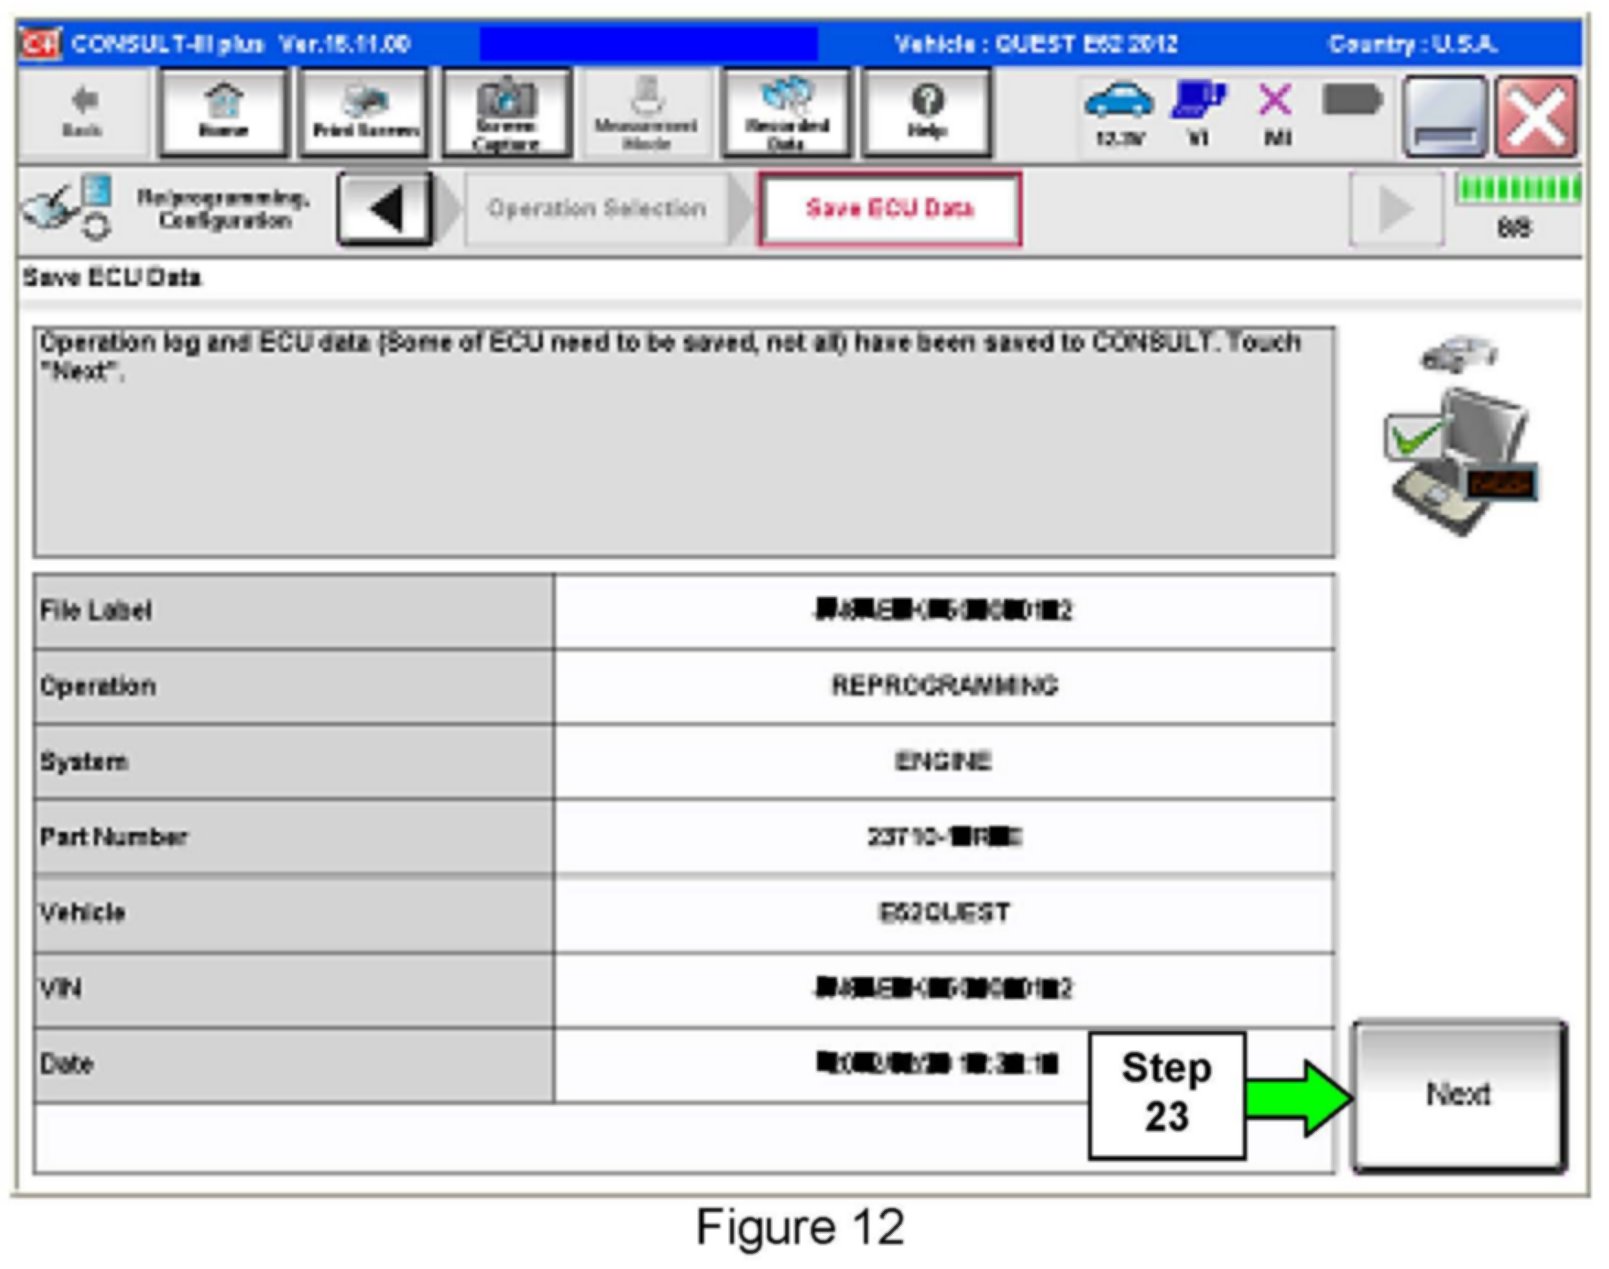
23. Select Next.
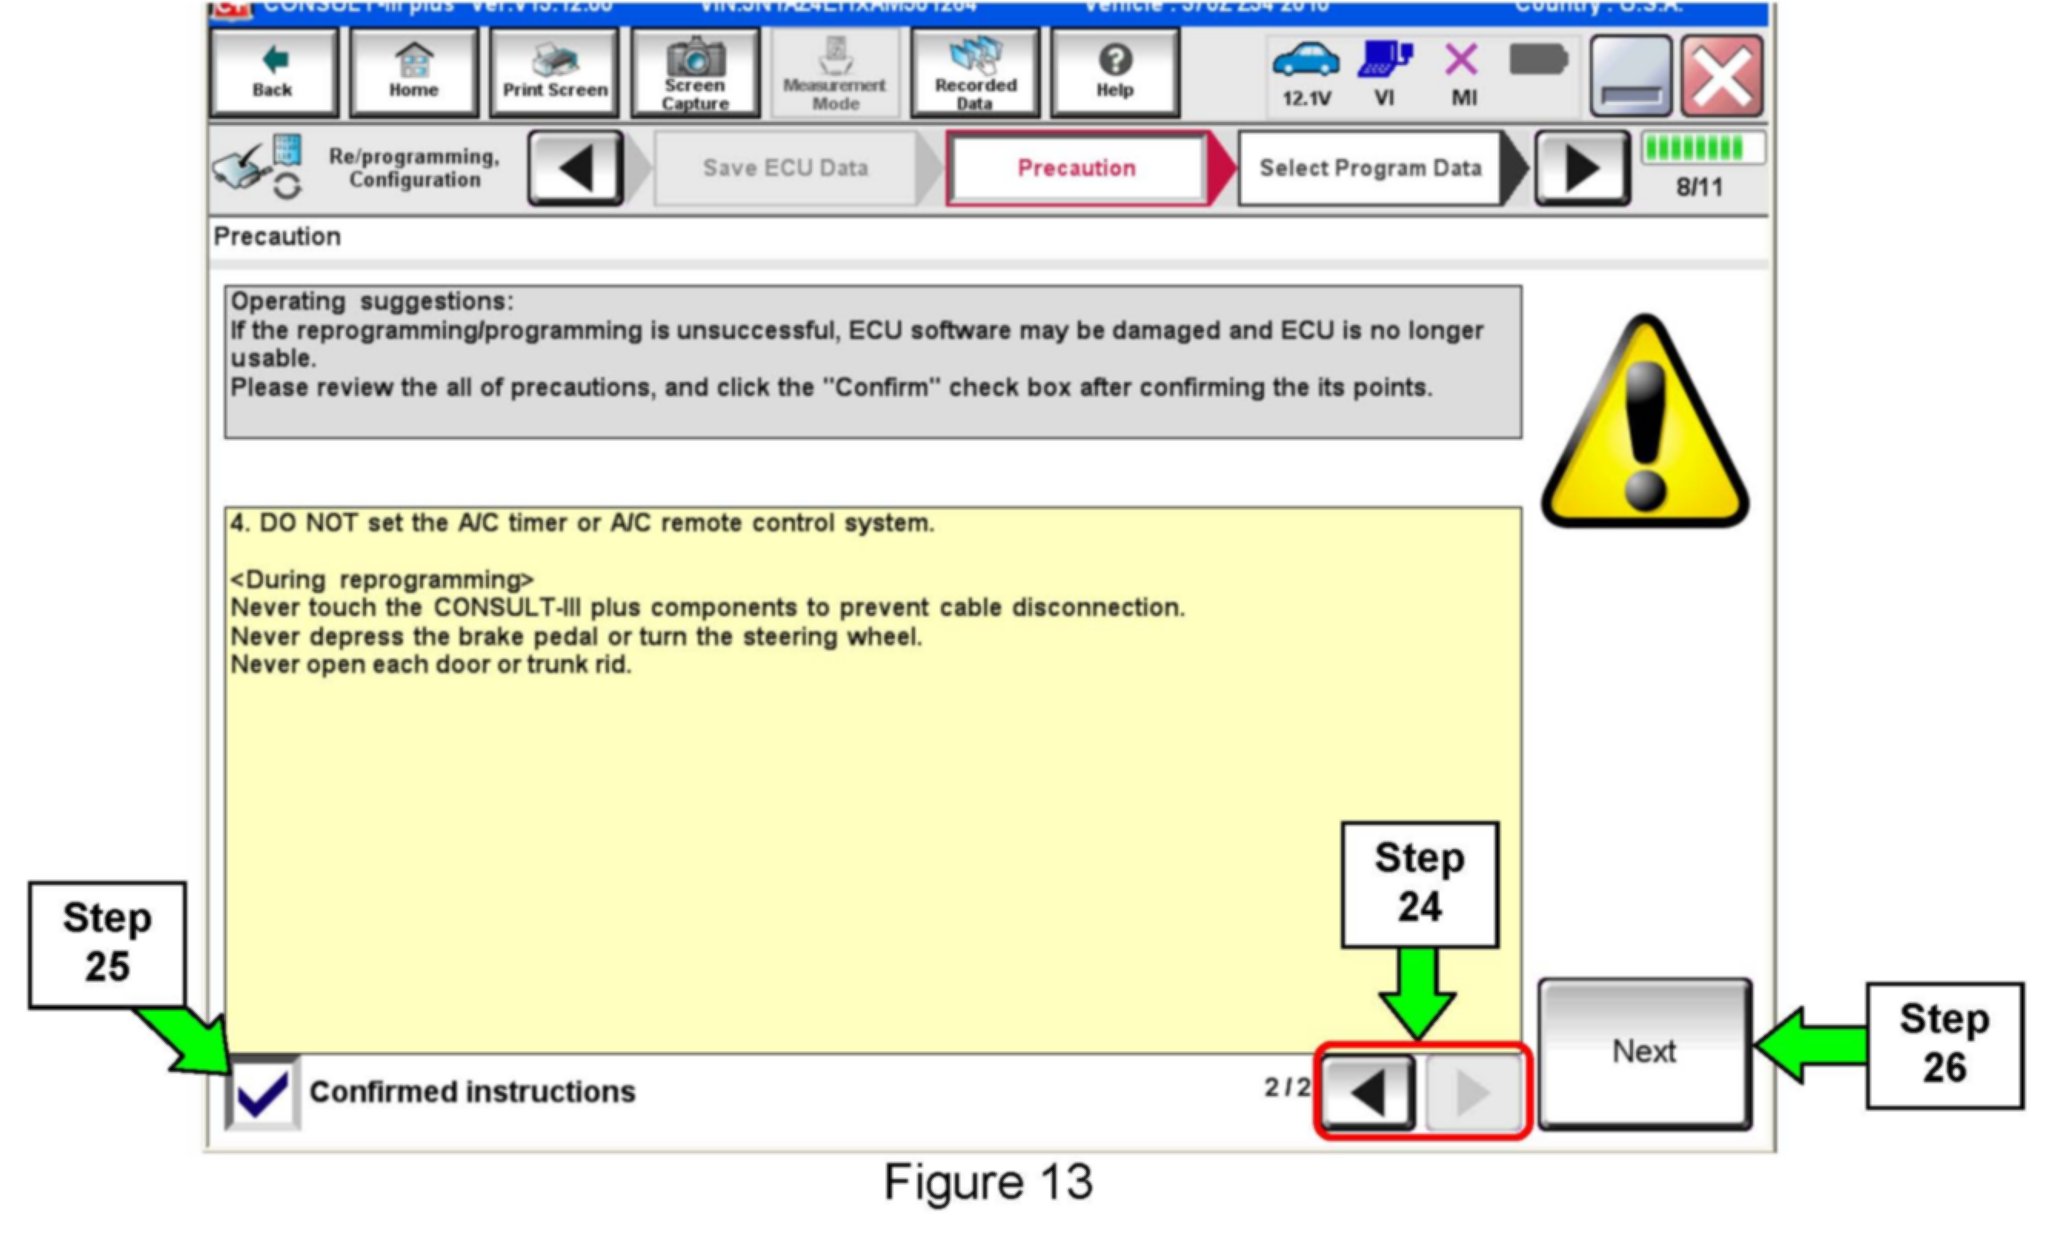
24. Use arrows (if needed) to view and read all precautions.
25. Check the box confirming the precautions have been read.
26. Select Next.
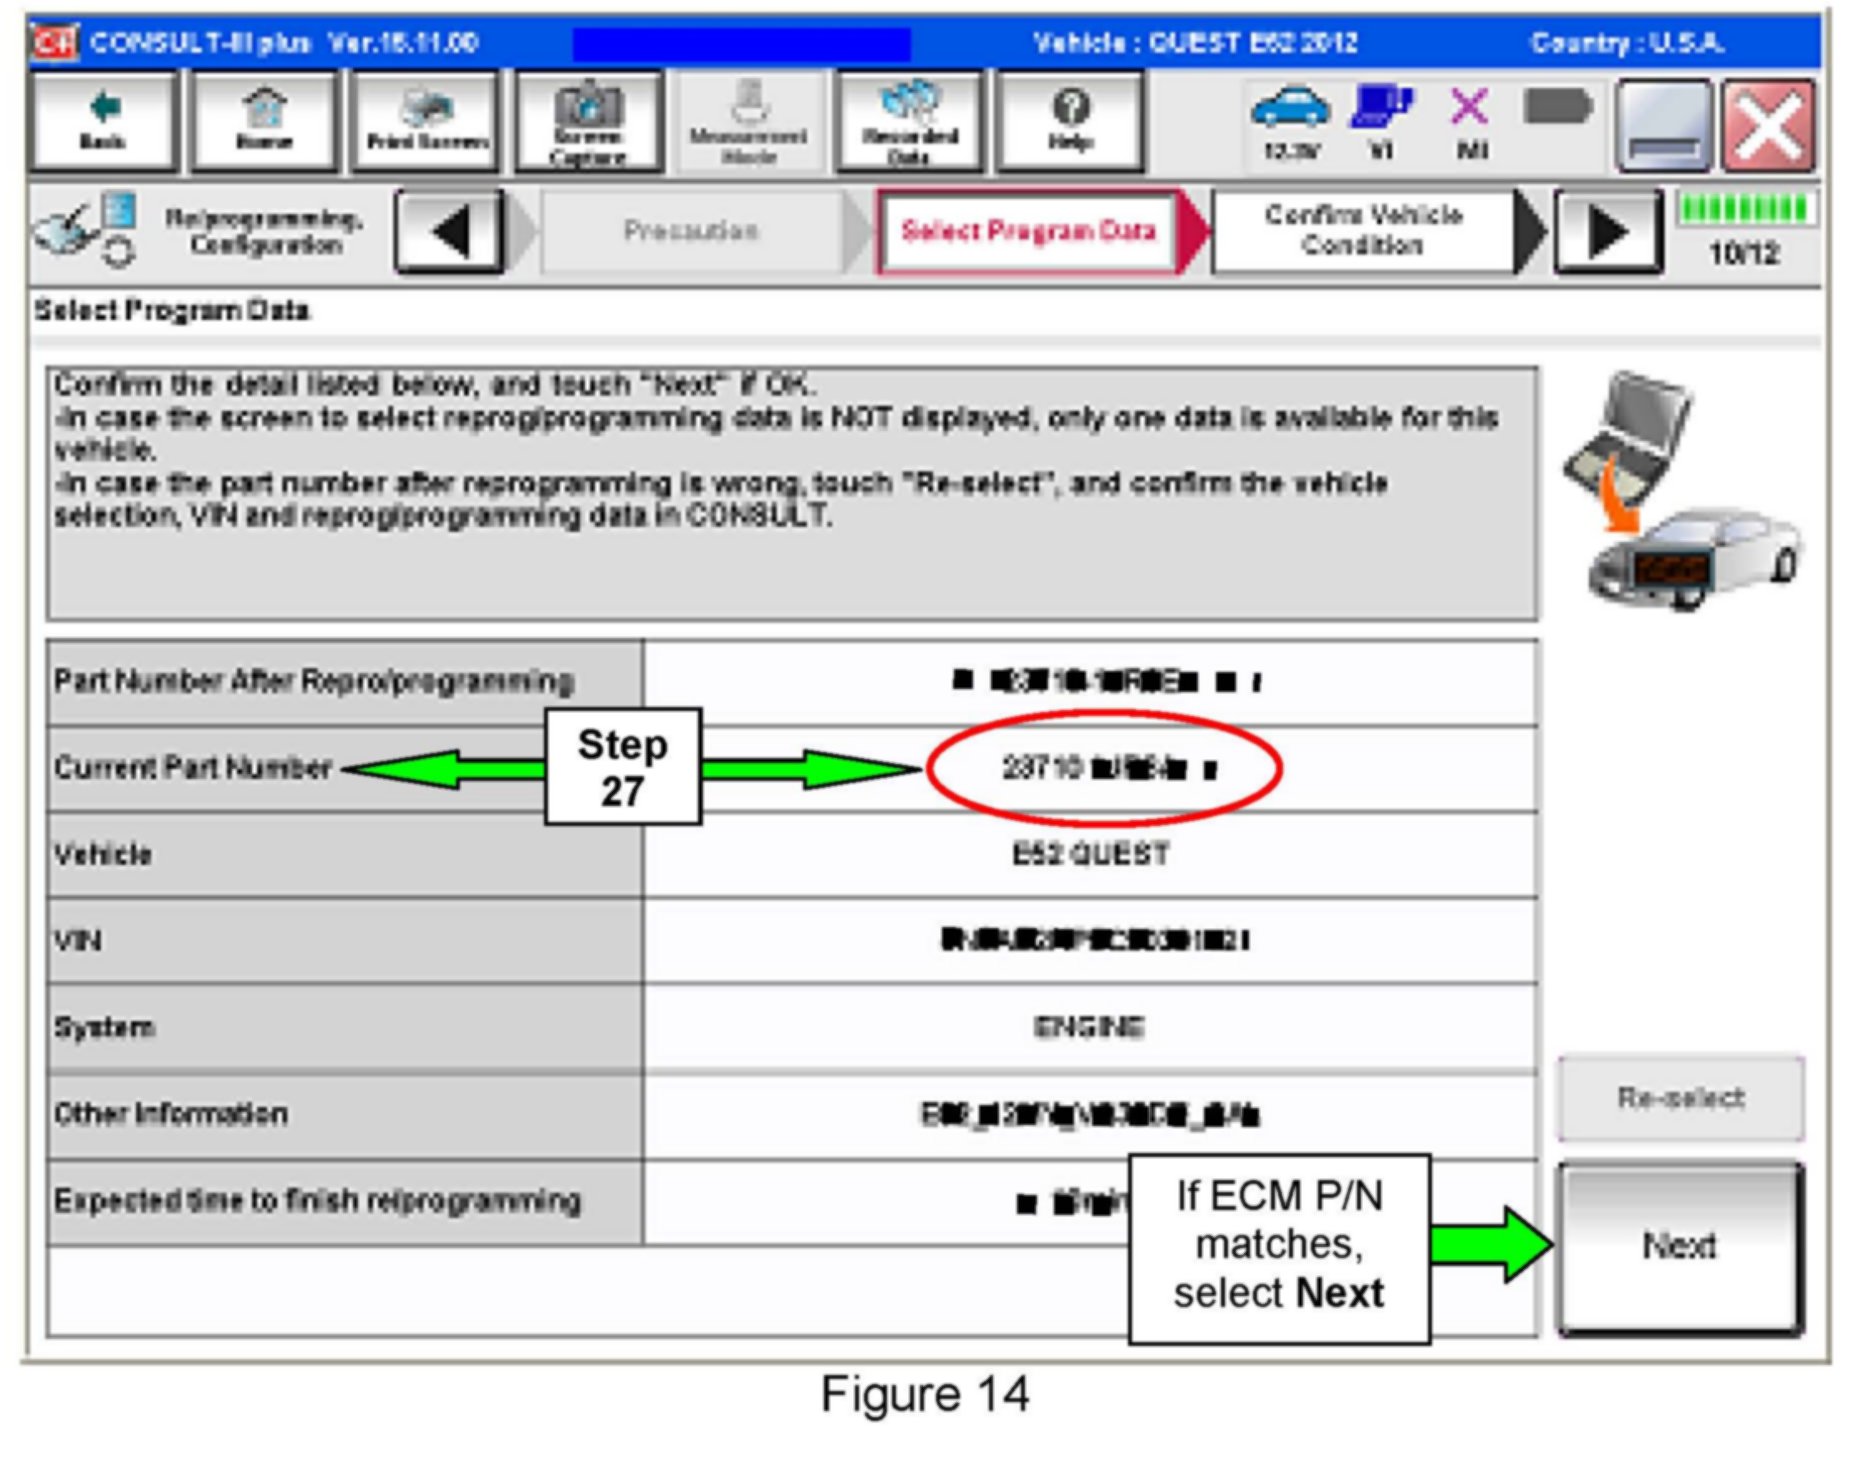
27. Find the ECMs Current Part Number (see Figure 14) and write it on the repair order.
NOTE:
This is the ECMs current Part Number (P/N).
a. Compare the P/N you wrote down to the P/N in the Current ECM Part Number list in Table A below.
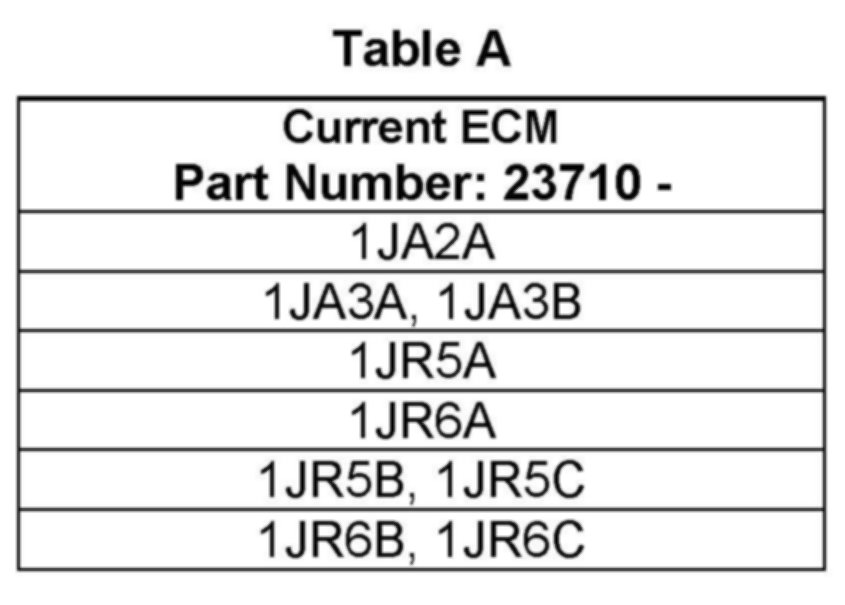
^ If there is a match, this bulletin applies. Continue with the reprogramming Procedure by selecting Next.
^ If there is not a match, this campaign does not apply or it has already been done. Close C-III plus and disconnect from the vehicle, and then recheck Service Comm for campaign eligibility.
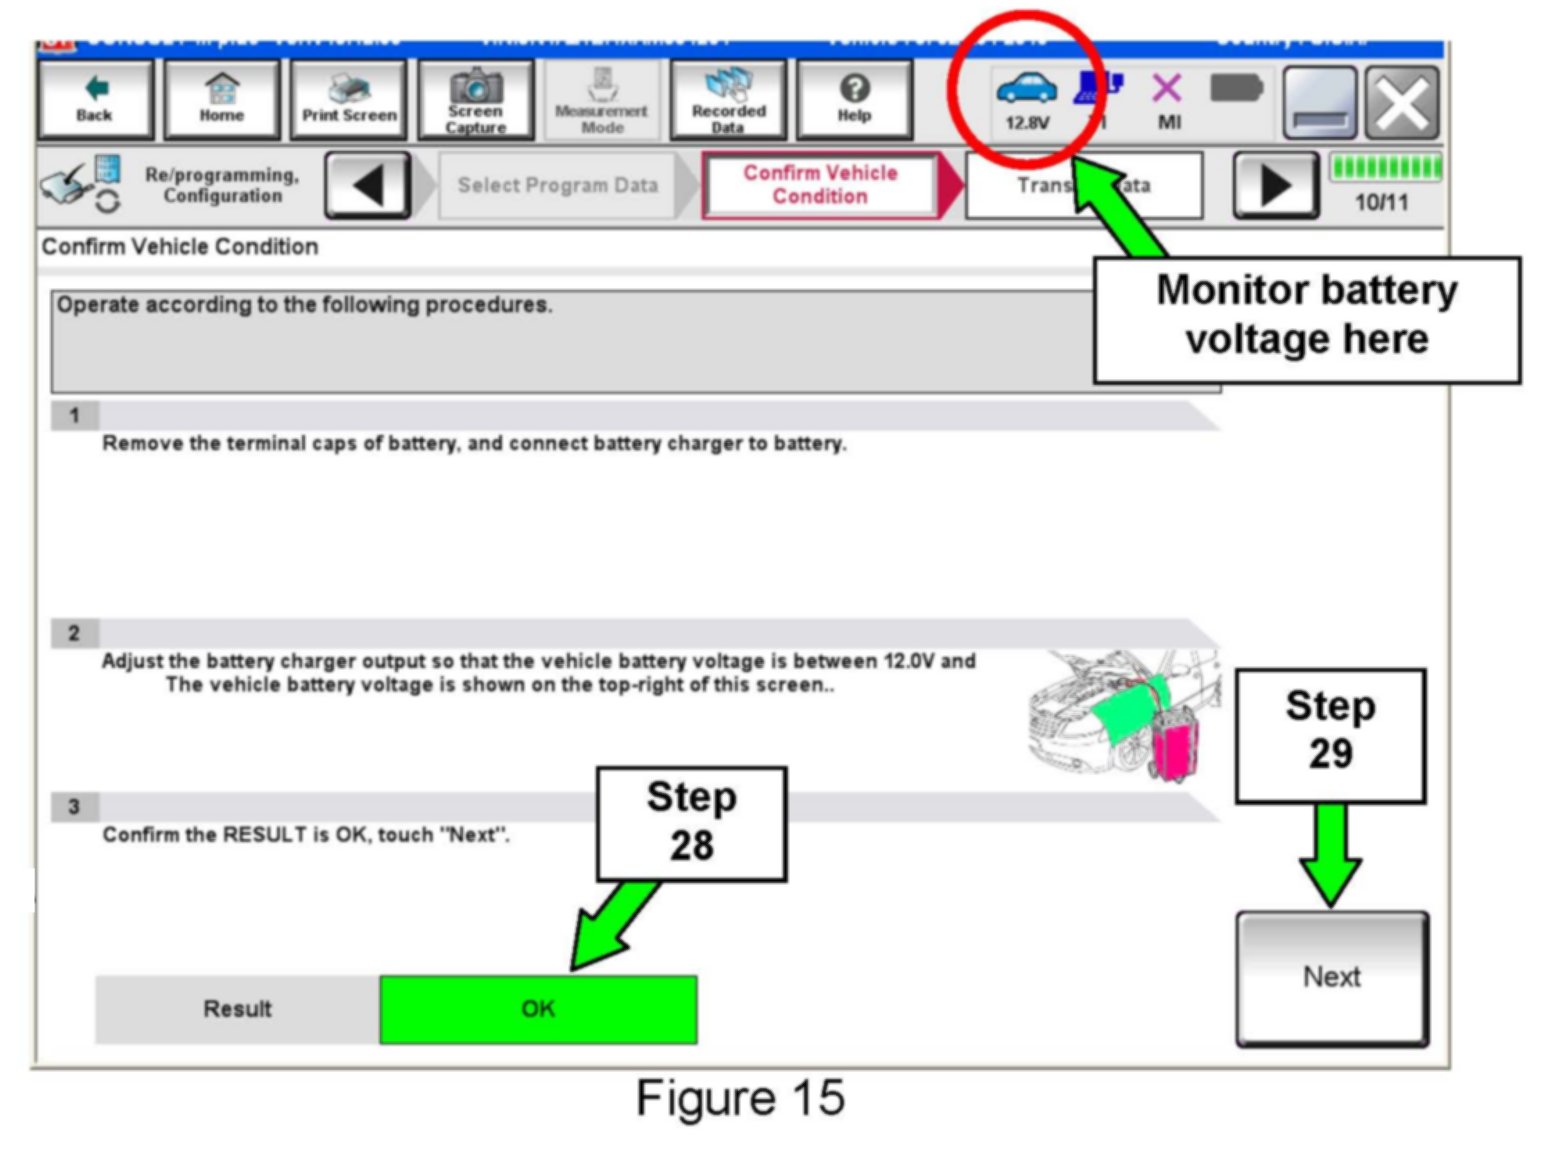
28. Make sure OK is highlighted green (battery voltage must be between 12.0 and 15.5 Volts).
29. Select Next.
IMPORTANT:
Battery voltage must stay between 12.0 and 15.5 Volts during reprogramming or ECM reprogramming may be interrupted and the ECM may be damaged.
NOTE:
In the next step, the reprogramming process will begin when Start is selected.
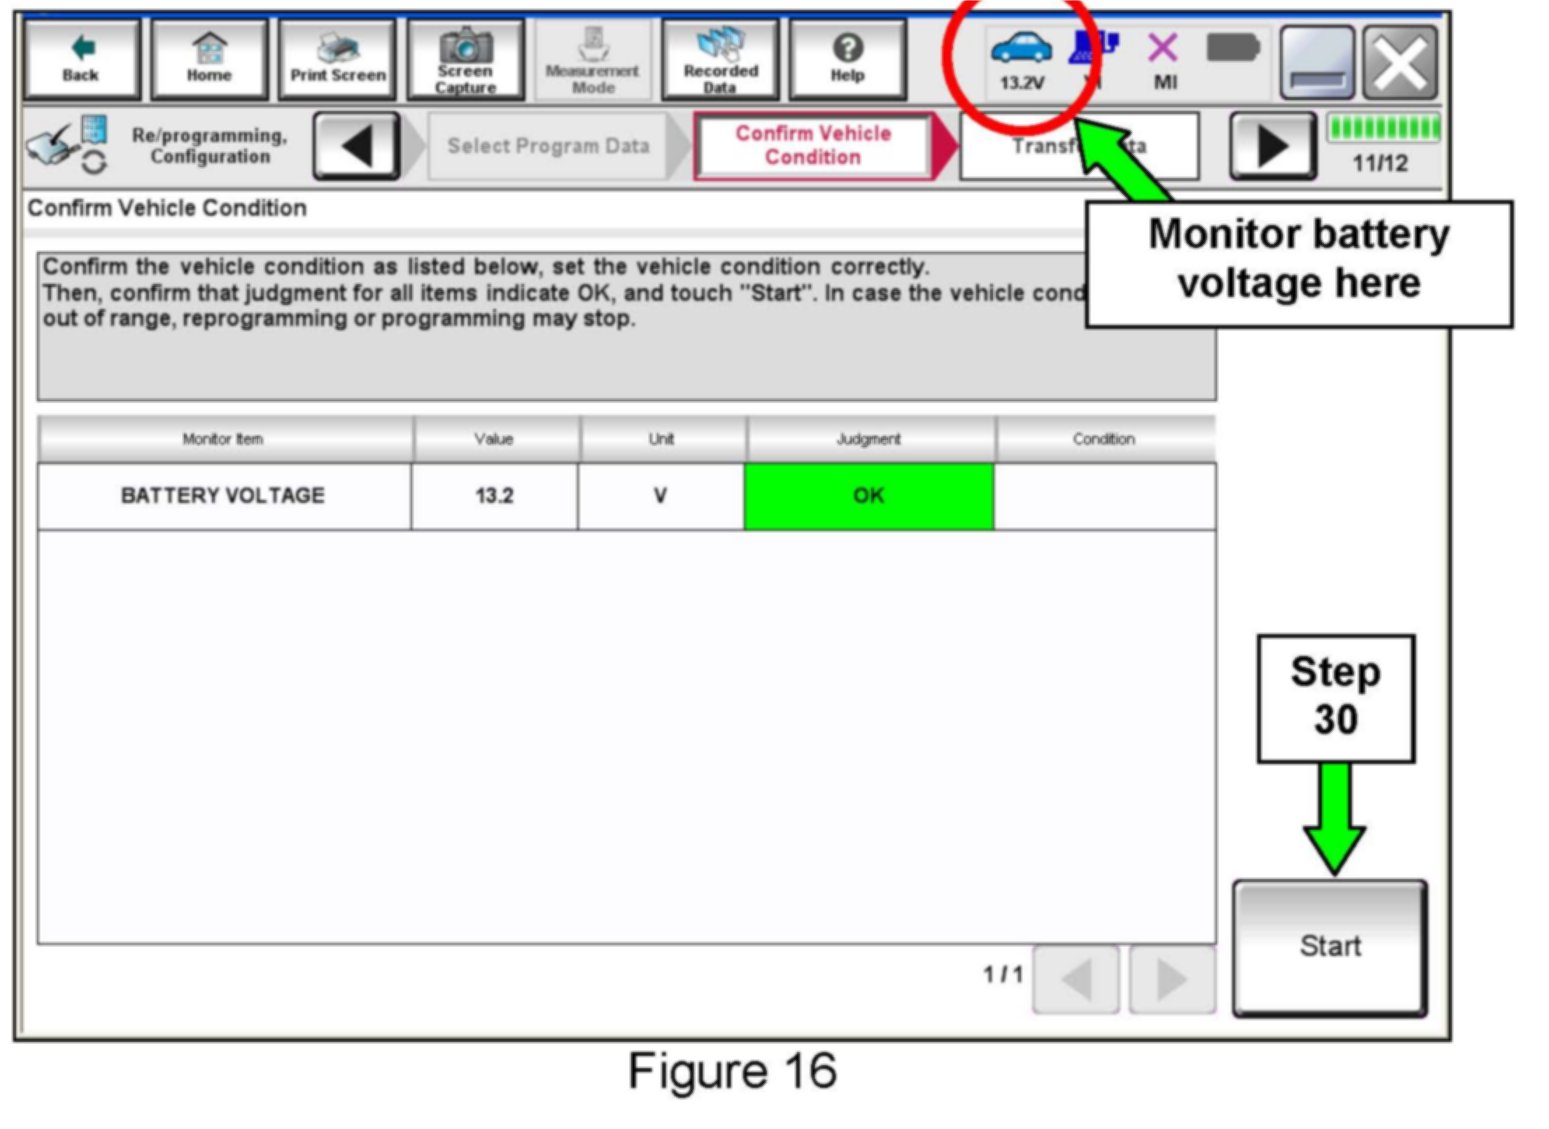
30. Select Start.
NOTE:
^ In some cases, more than one new part number for reprogramming is available.
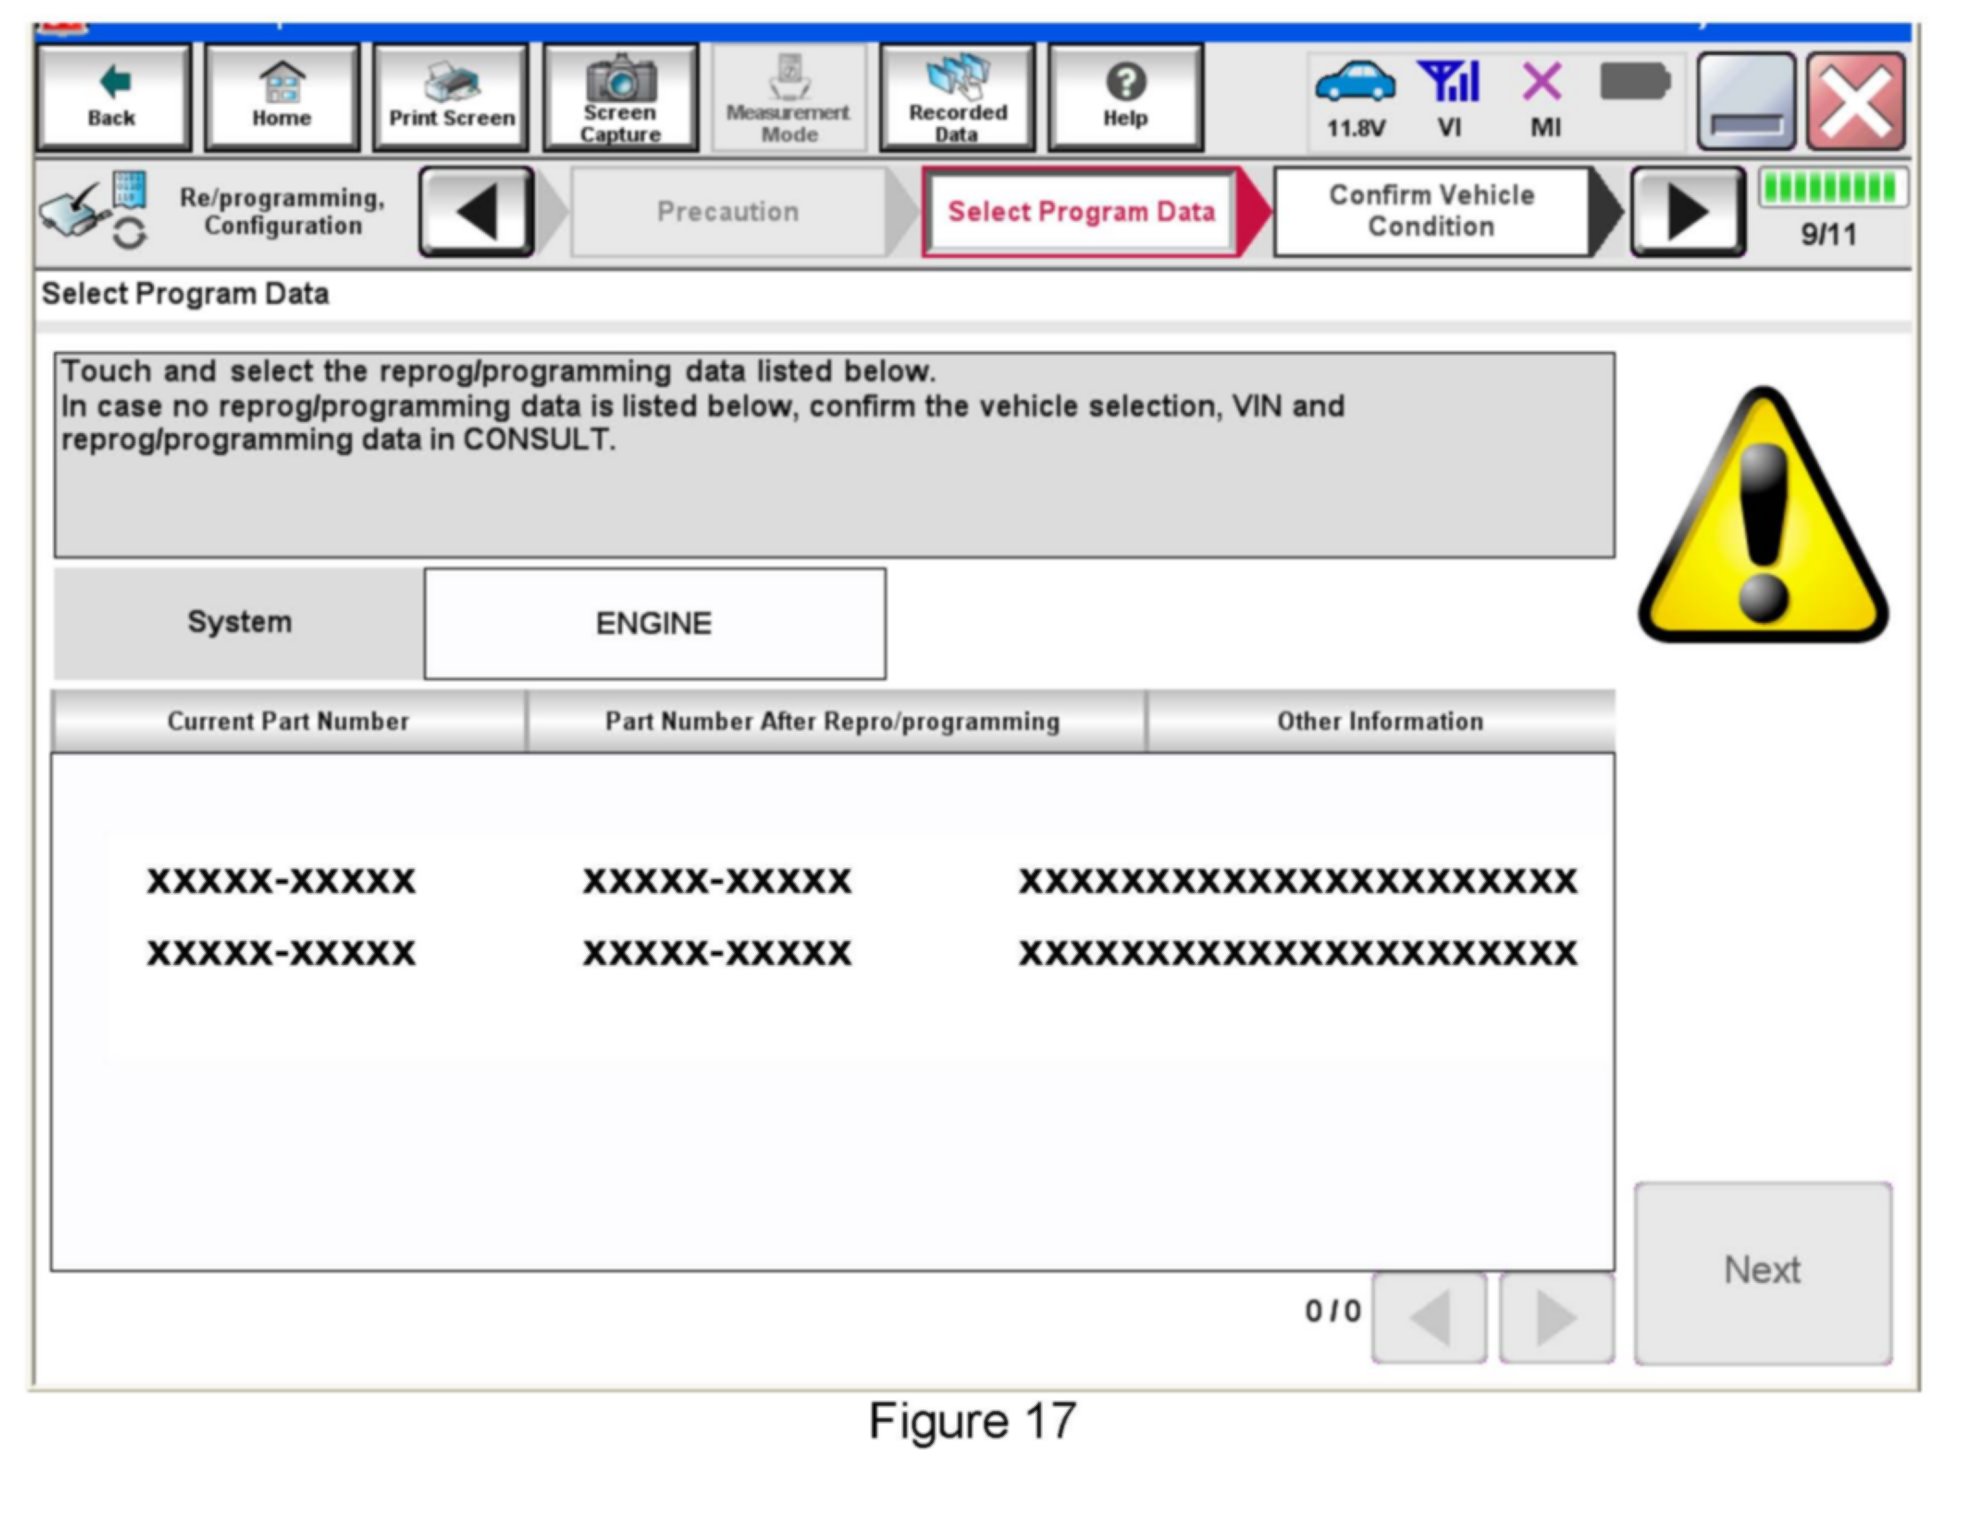
> In this case, the screen in Figure 17 displays.
> Select and use the reprogramming option that does not have the message "Caution! Use ONLY with NTBXX-XXX".
^ If you get the screen above and it is blank (no reprogramming listed), it means there is no ECM reprogramming available for this vehicle.
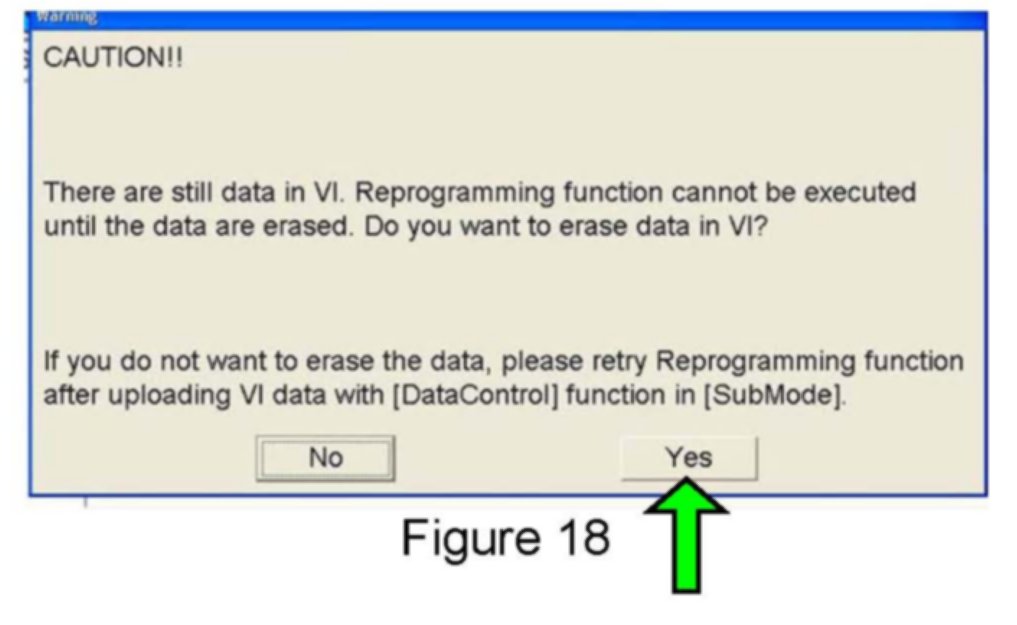
NOTE:
If the message shown in Figure 18 appears, there is data stored in the plus VI. Select Yes to proceed with reprogramming.
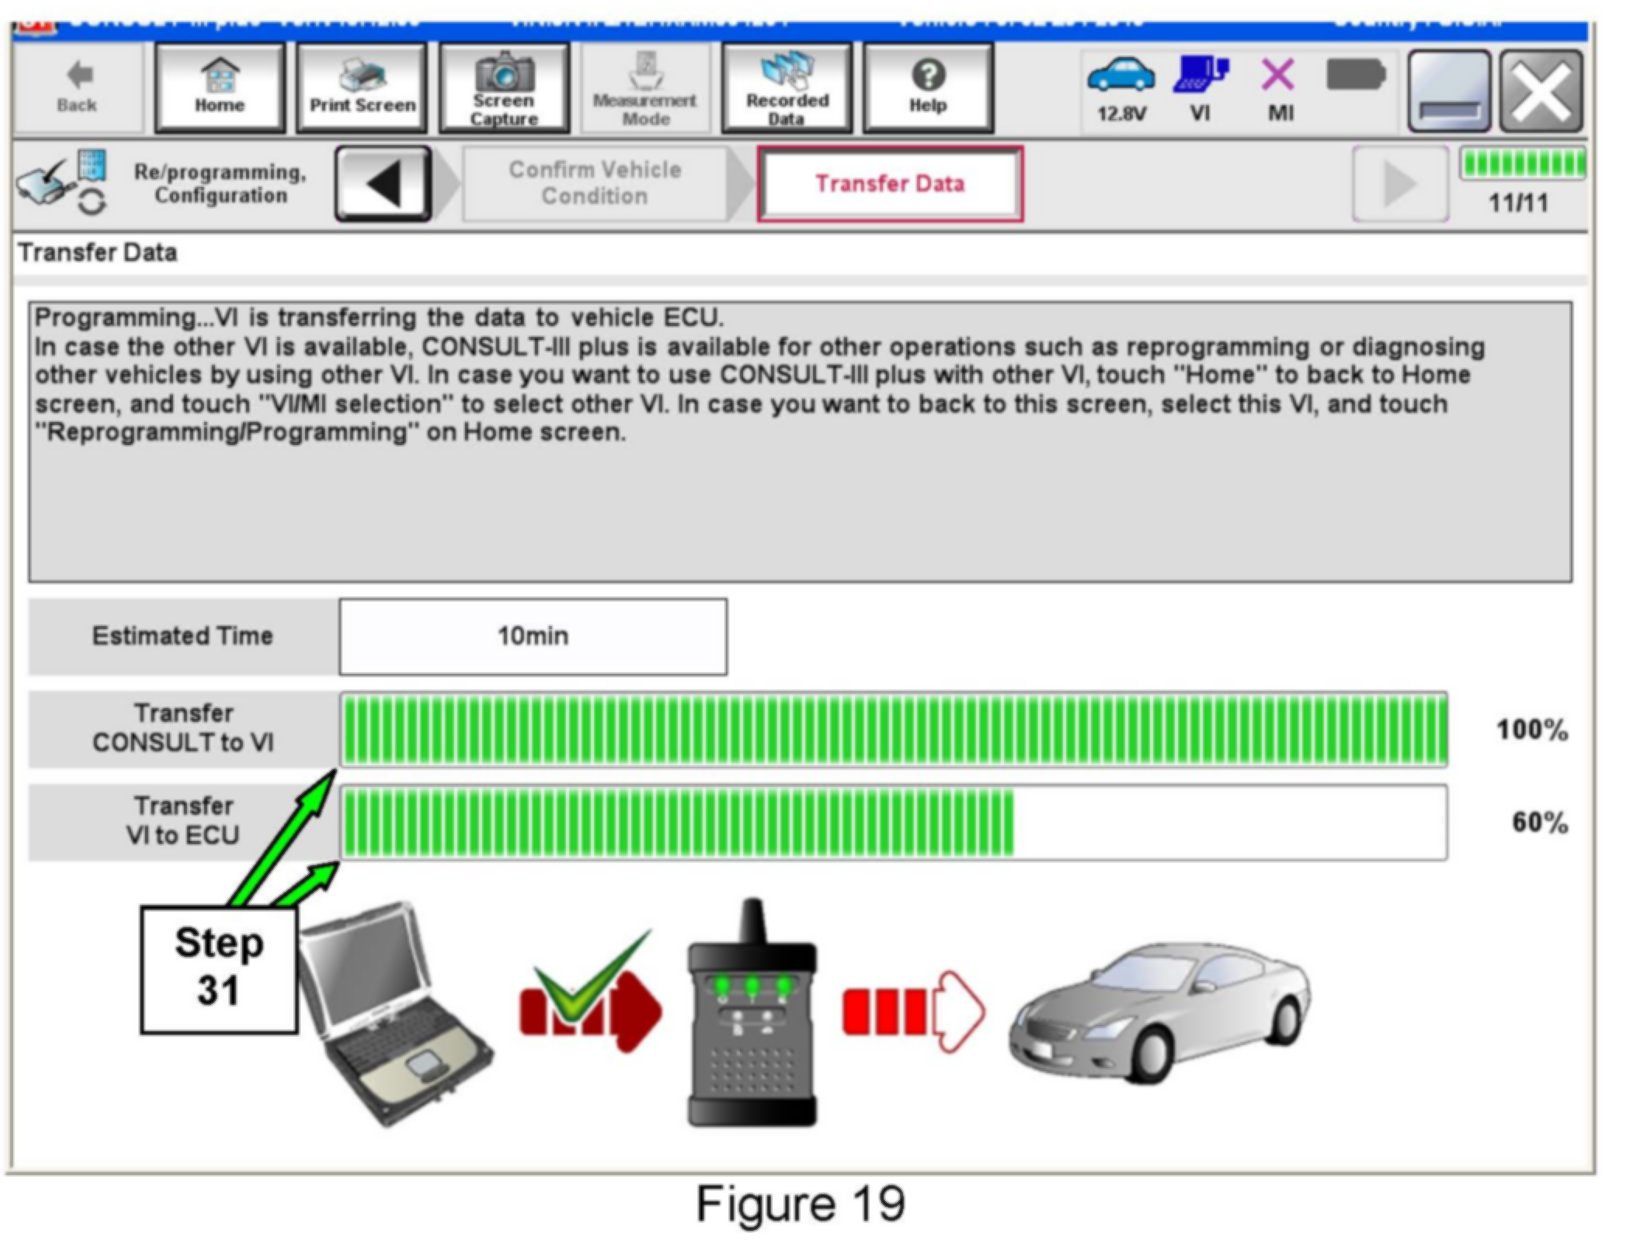
31. Wait for both progress bars to complete.
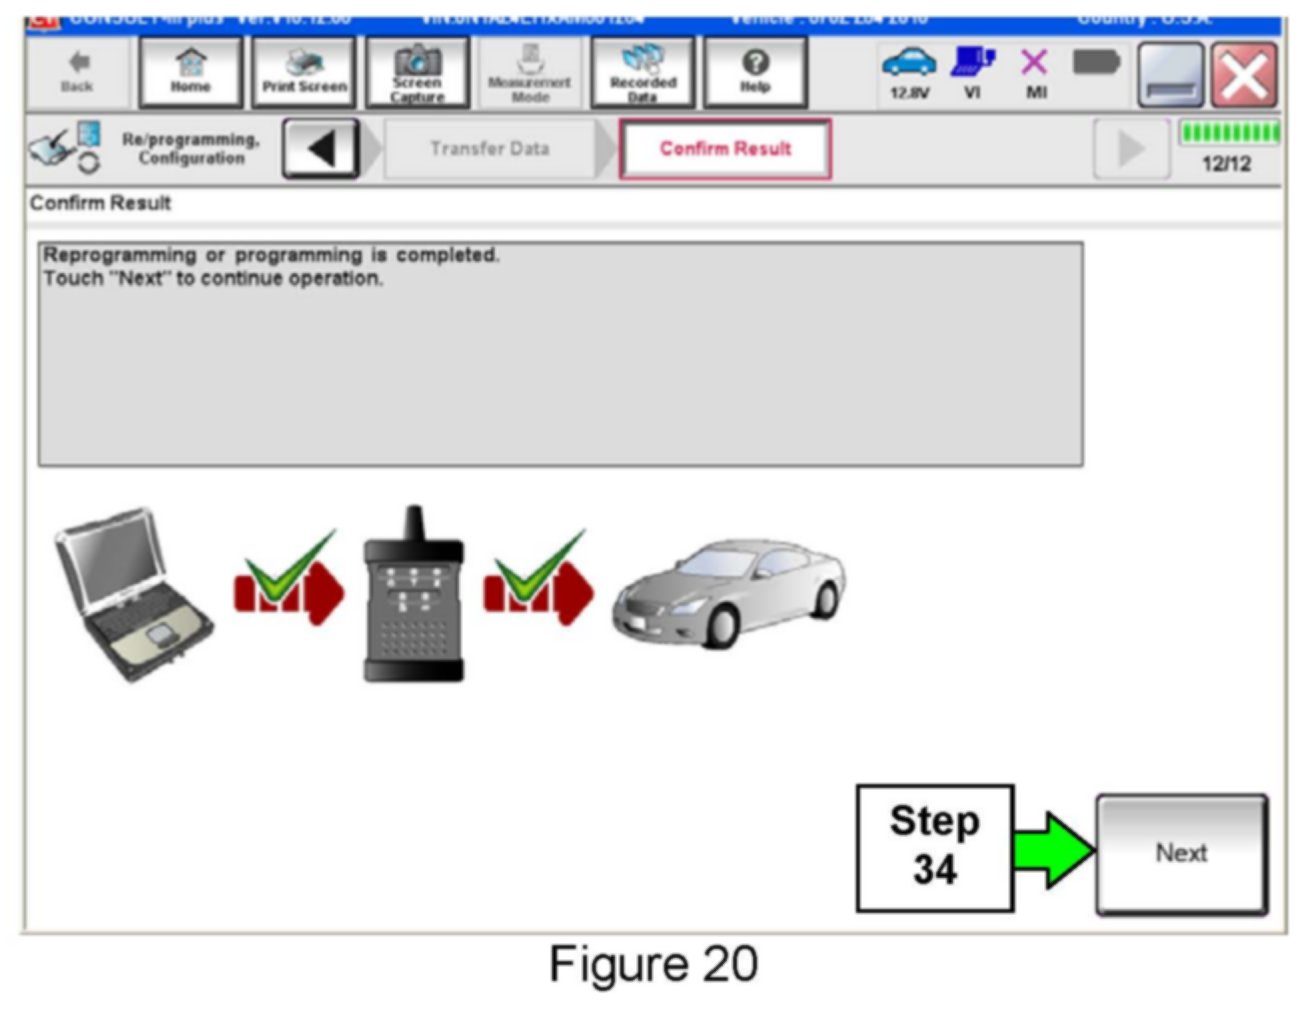
32. When the screen in Figure 20 displays, the reprogramming is complete.
NOTE:
If the screen in Figure 20 does not display (reprogramming does not complete), refer to the information shown below.
33. Disconnect the battery charger from the vehicle.
34. Select Next.
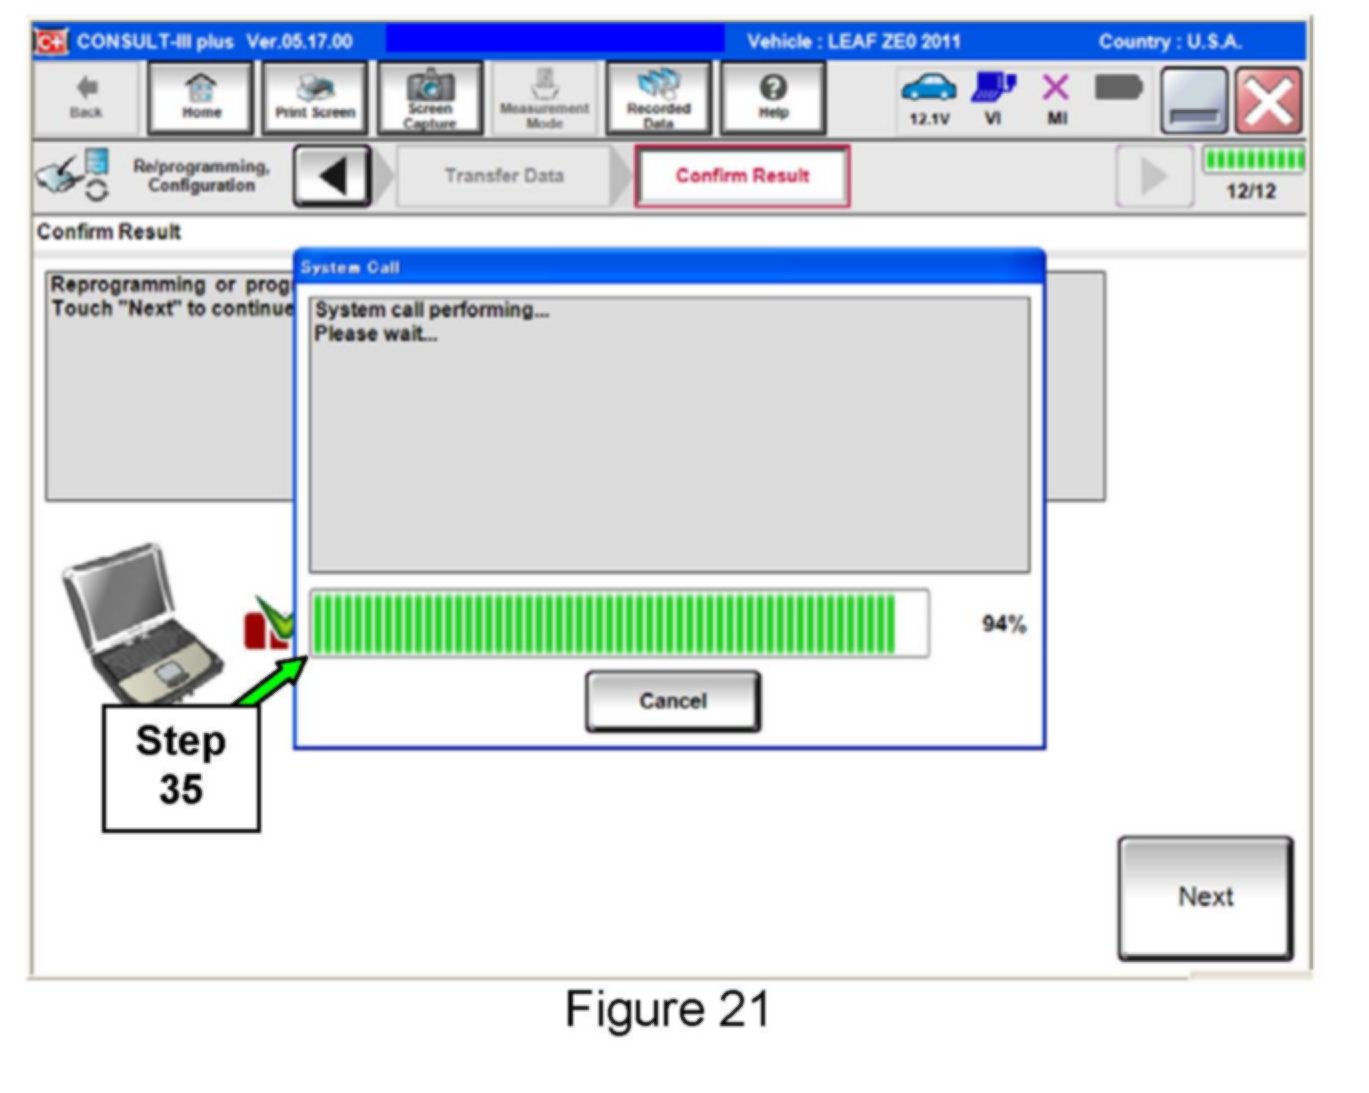
35. Wait for system call to complete.
NOTE:
Additional steps/operations are required before C-III plus will provide the final reprogramming confirmation report. Continue with the reprogramming procedure below.
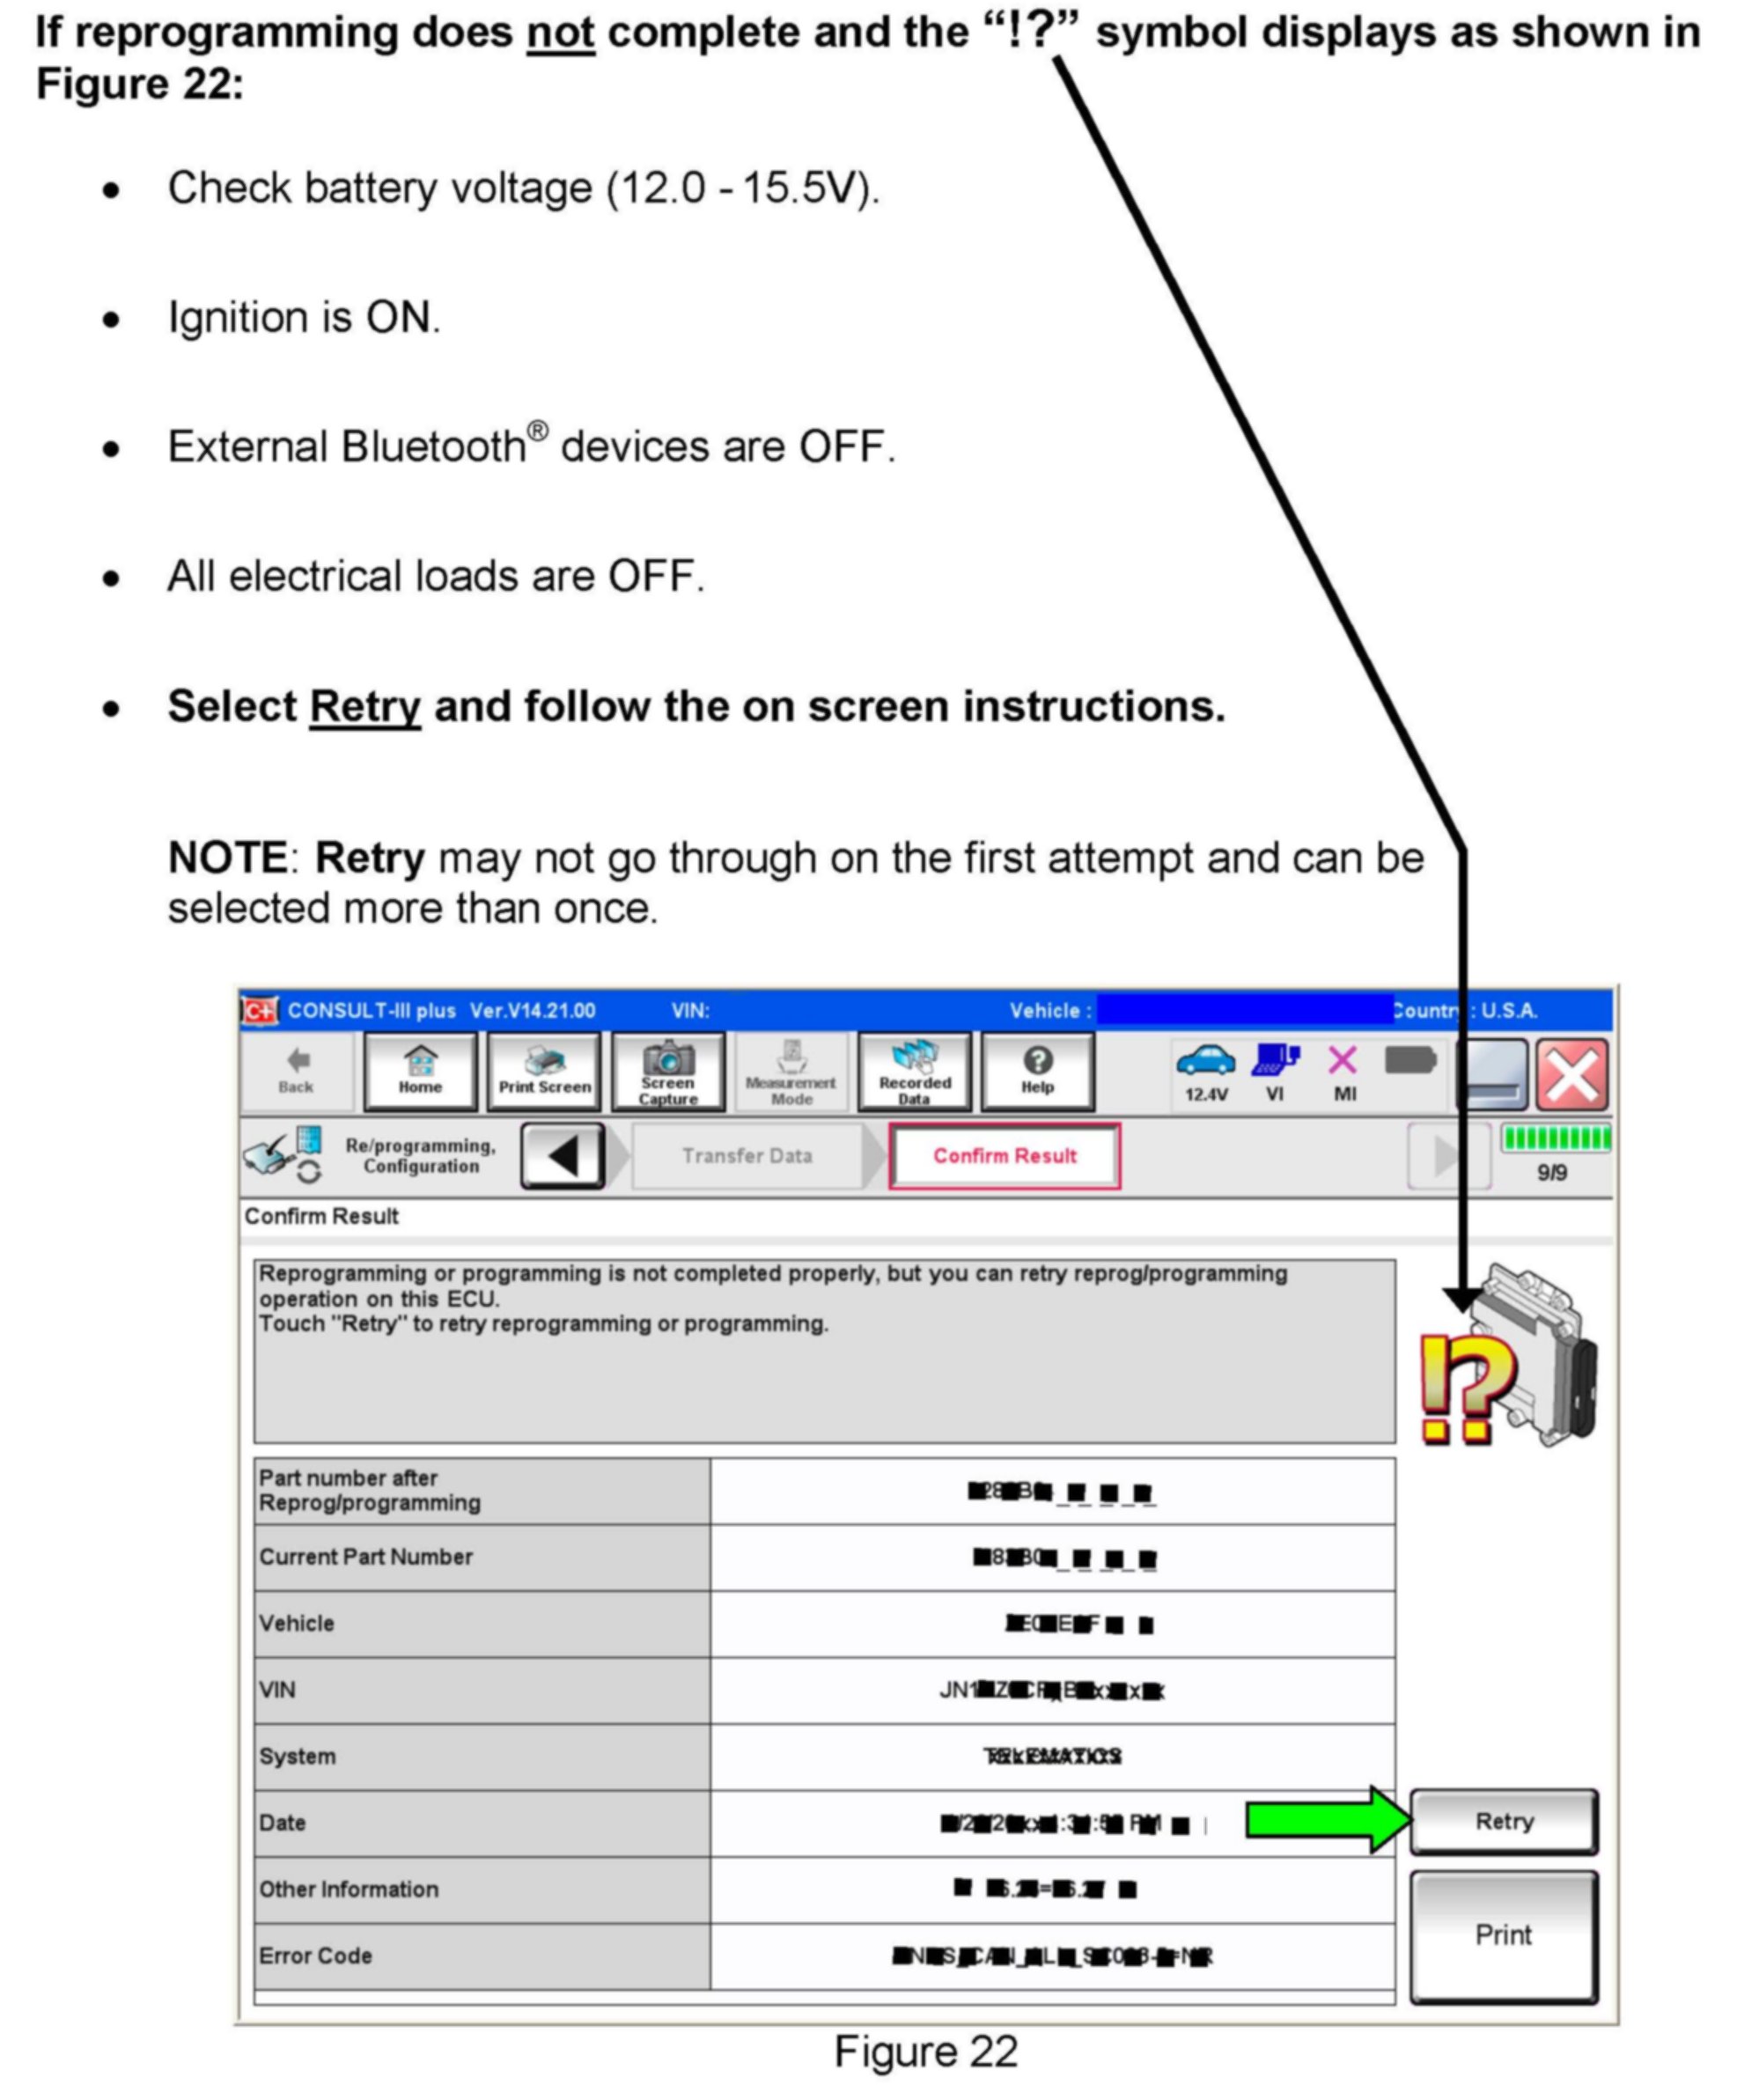
If reprogramming does not complete and the "!?" symbol displays as shown in Figure 22 above.
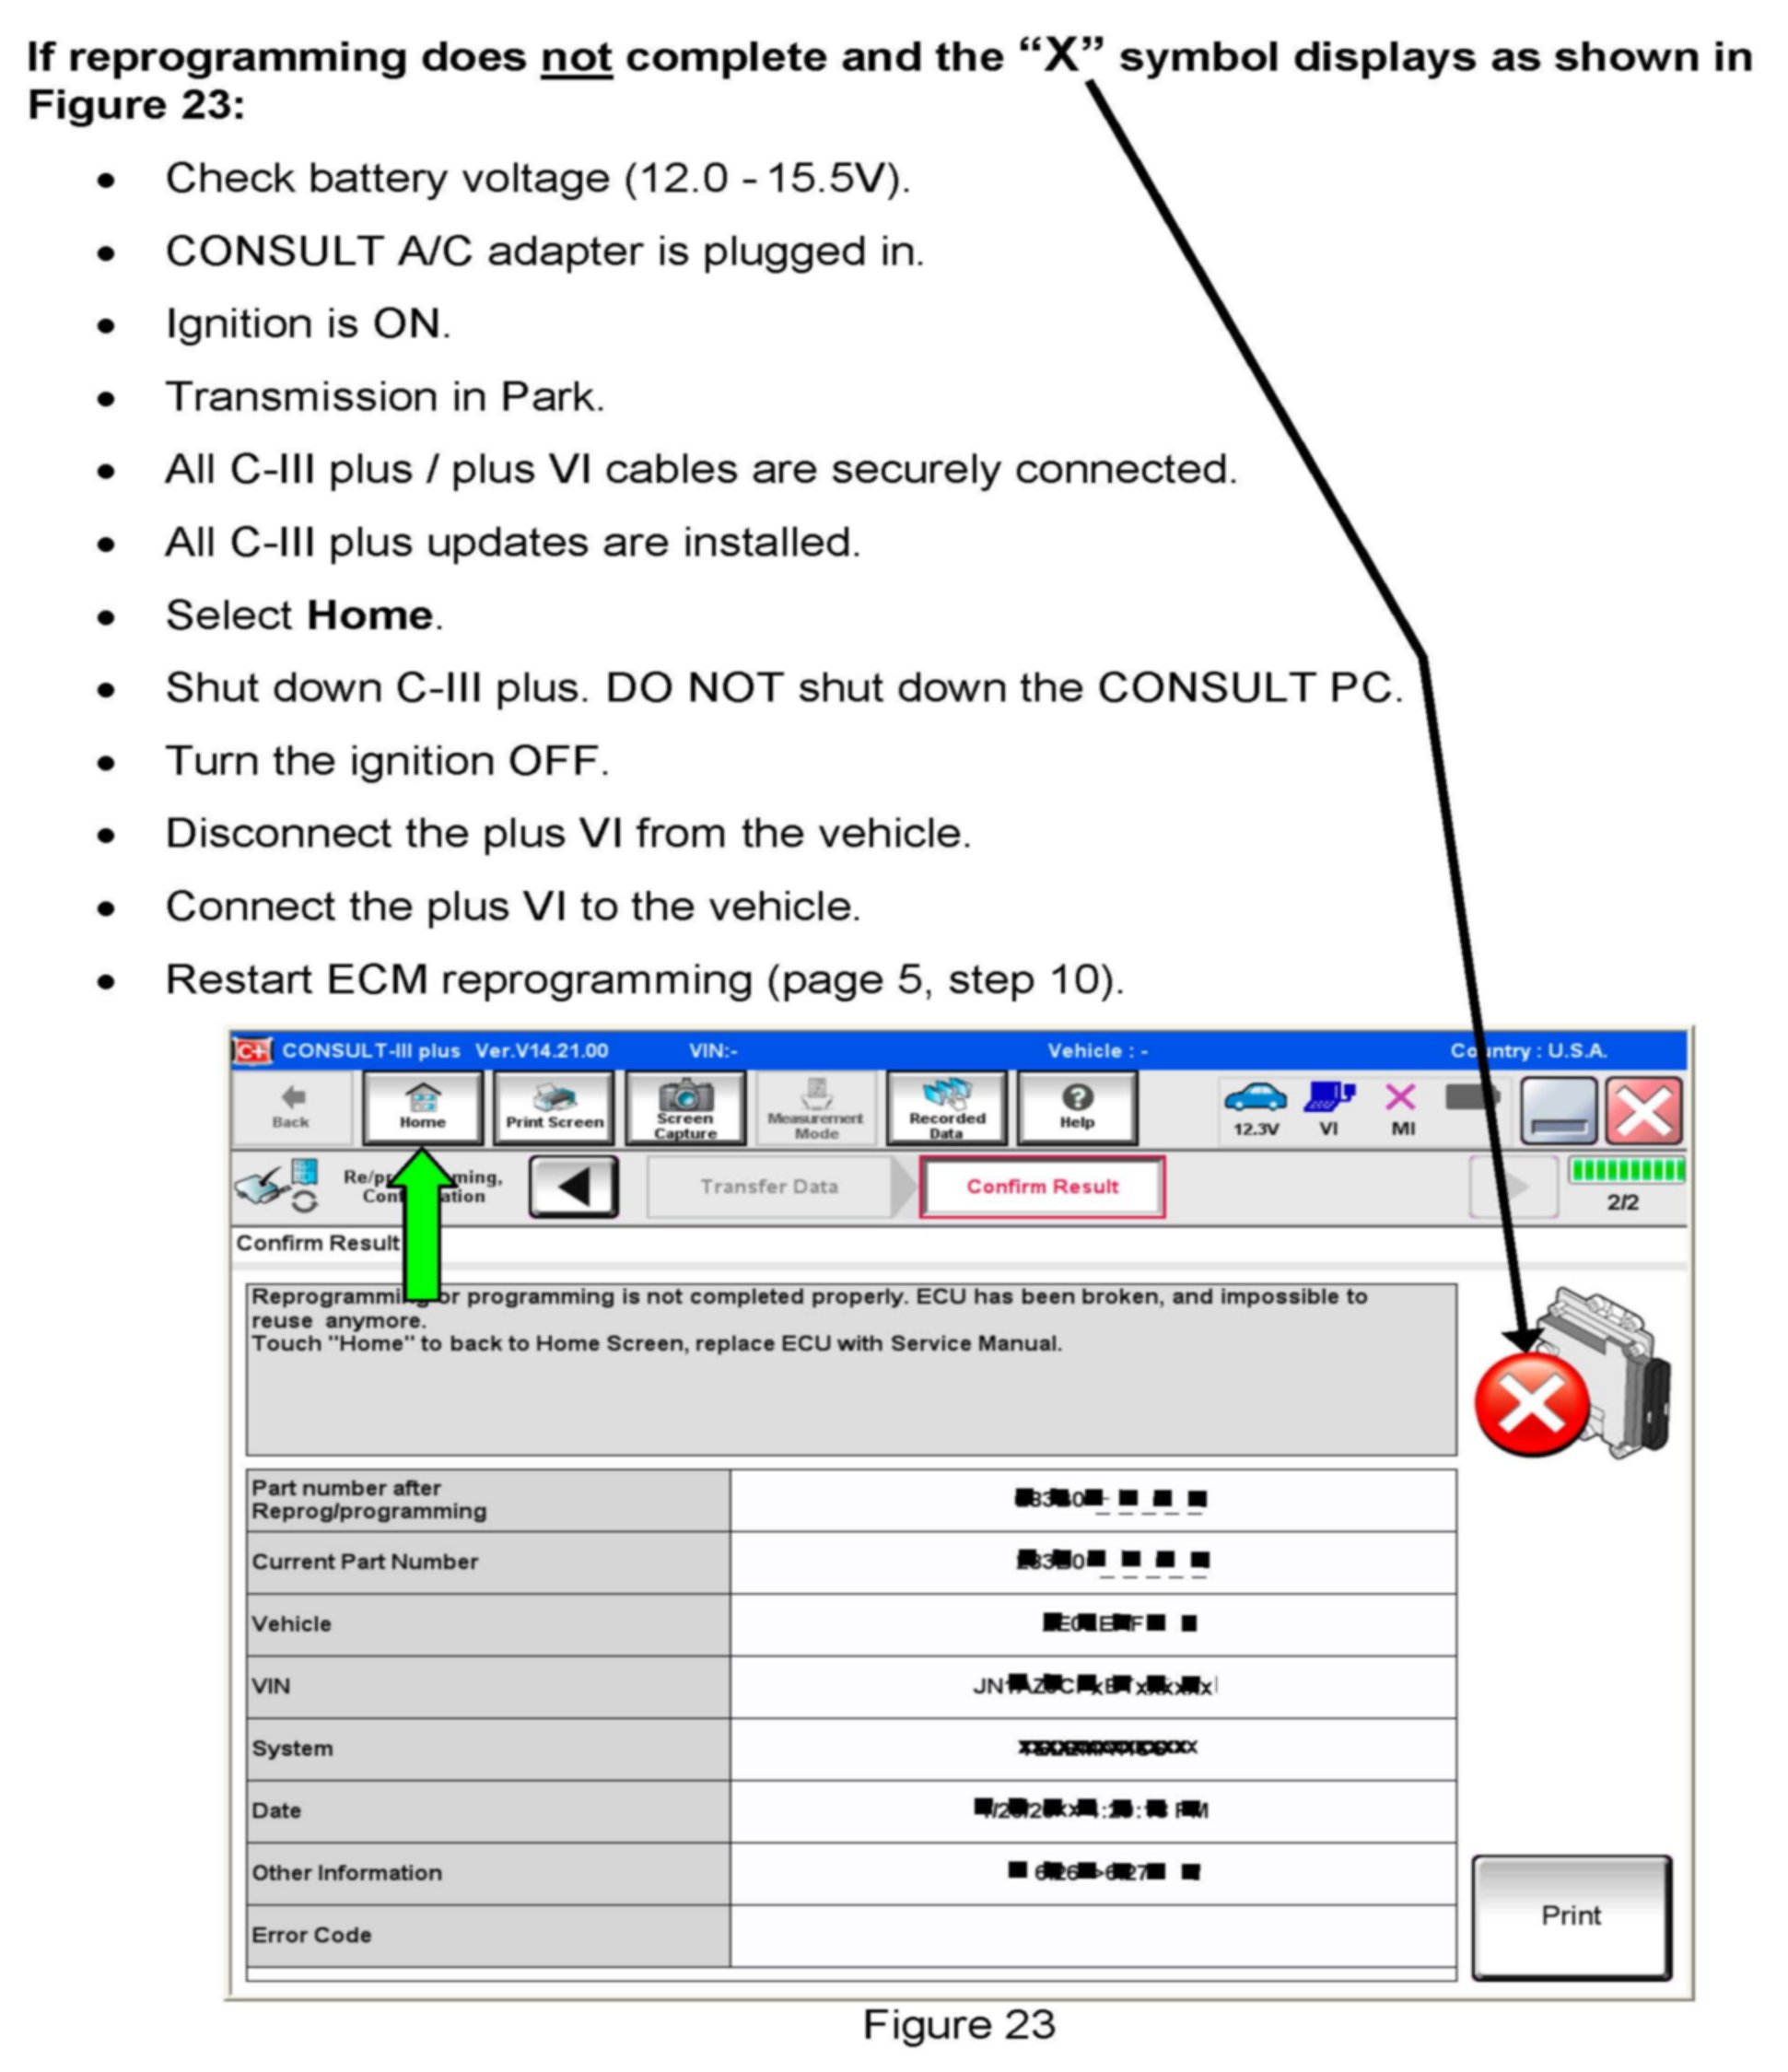
If reprogramming does not complete and the "X" symbol displays as shown in Figure 23 above.
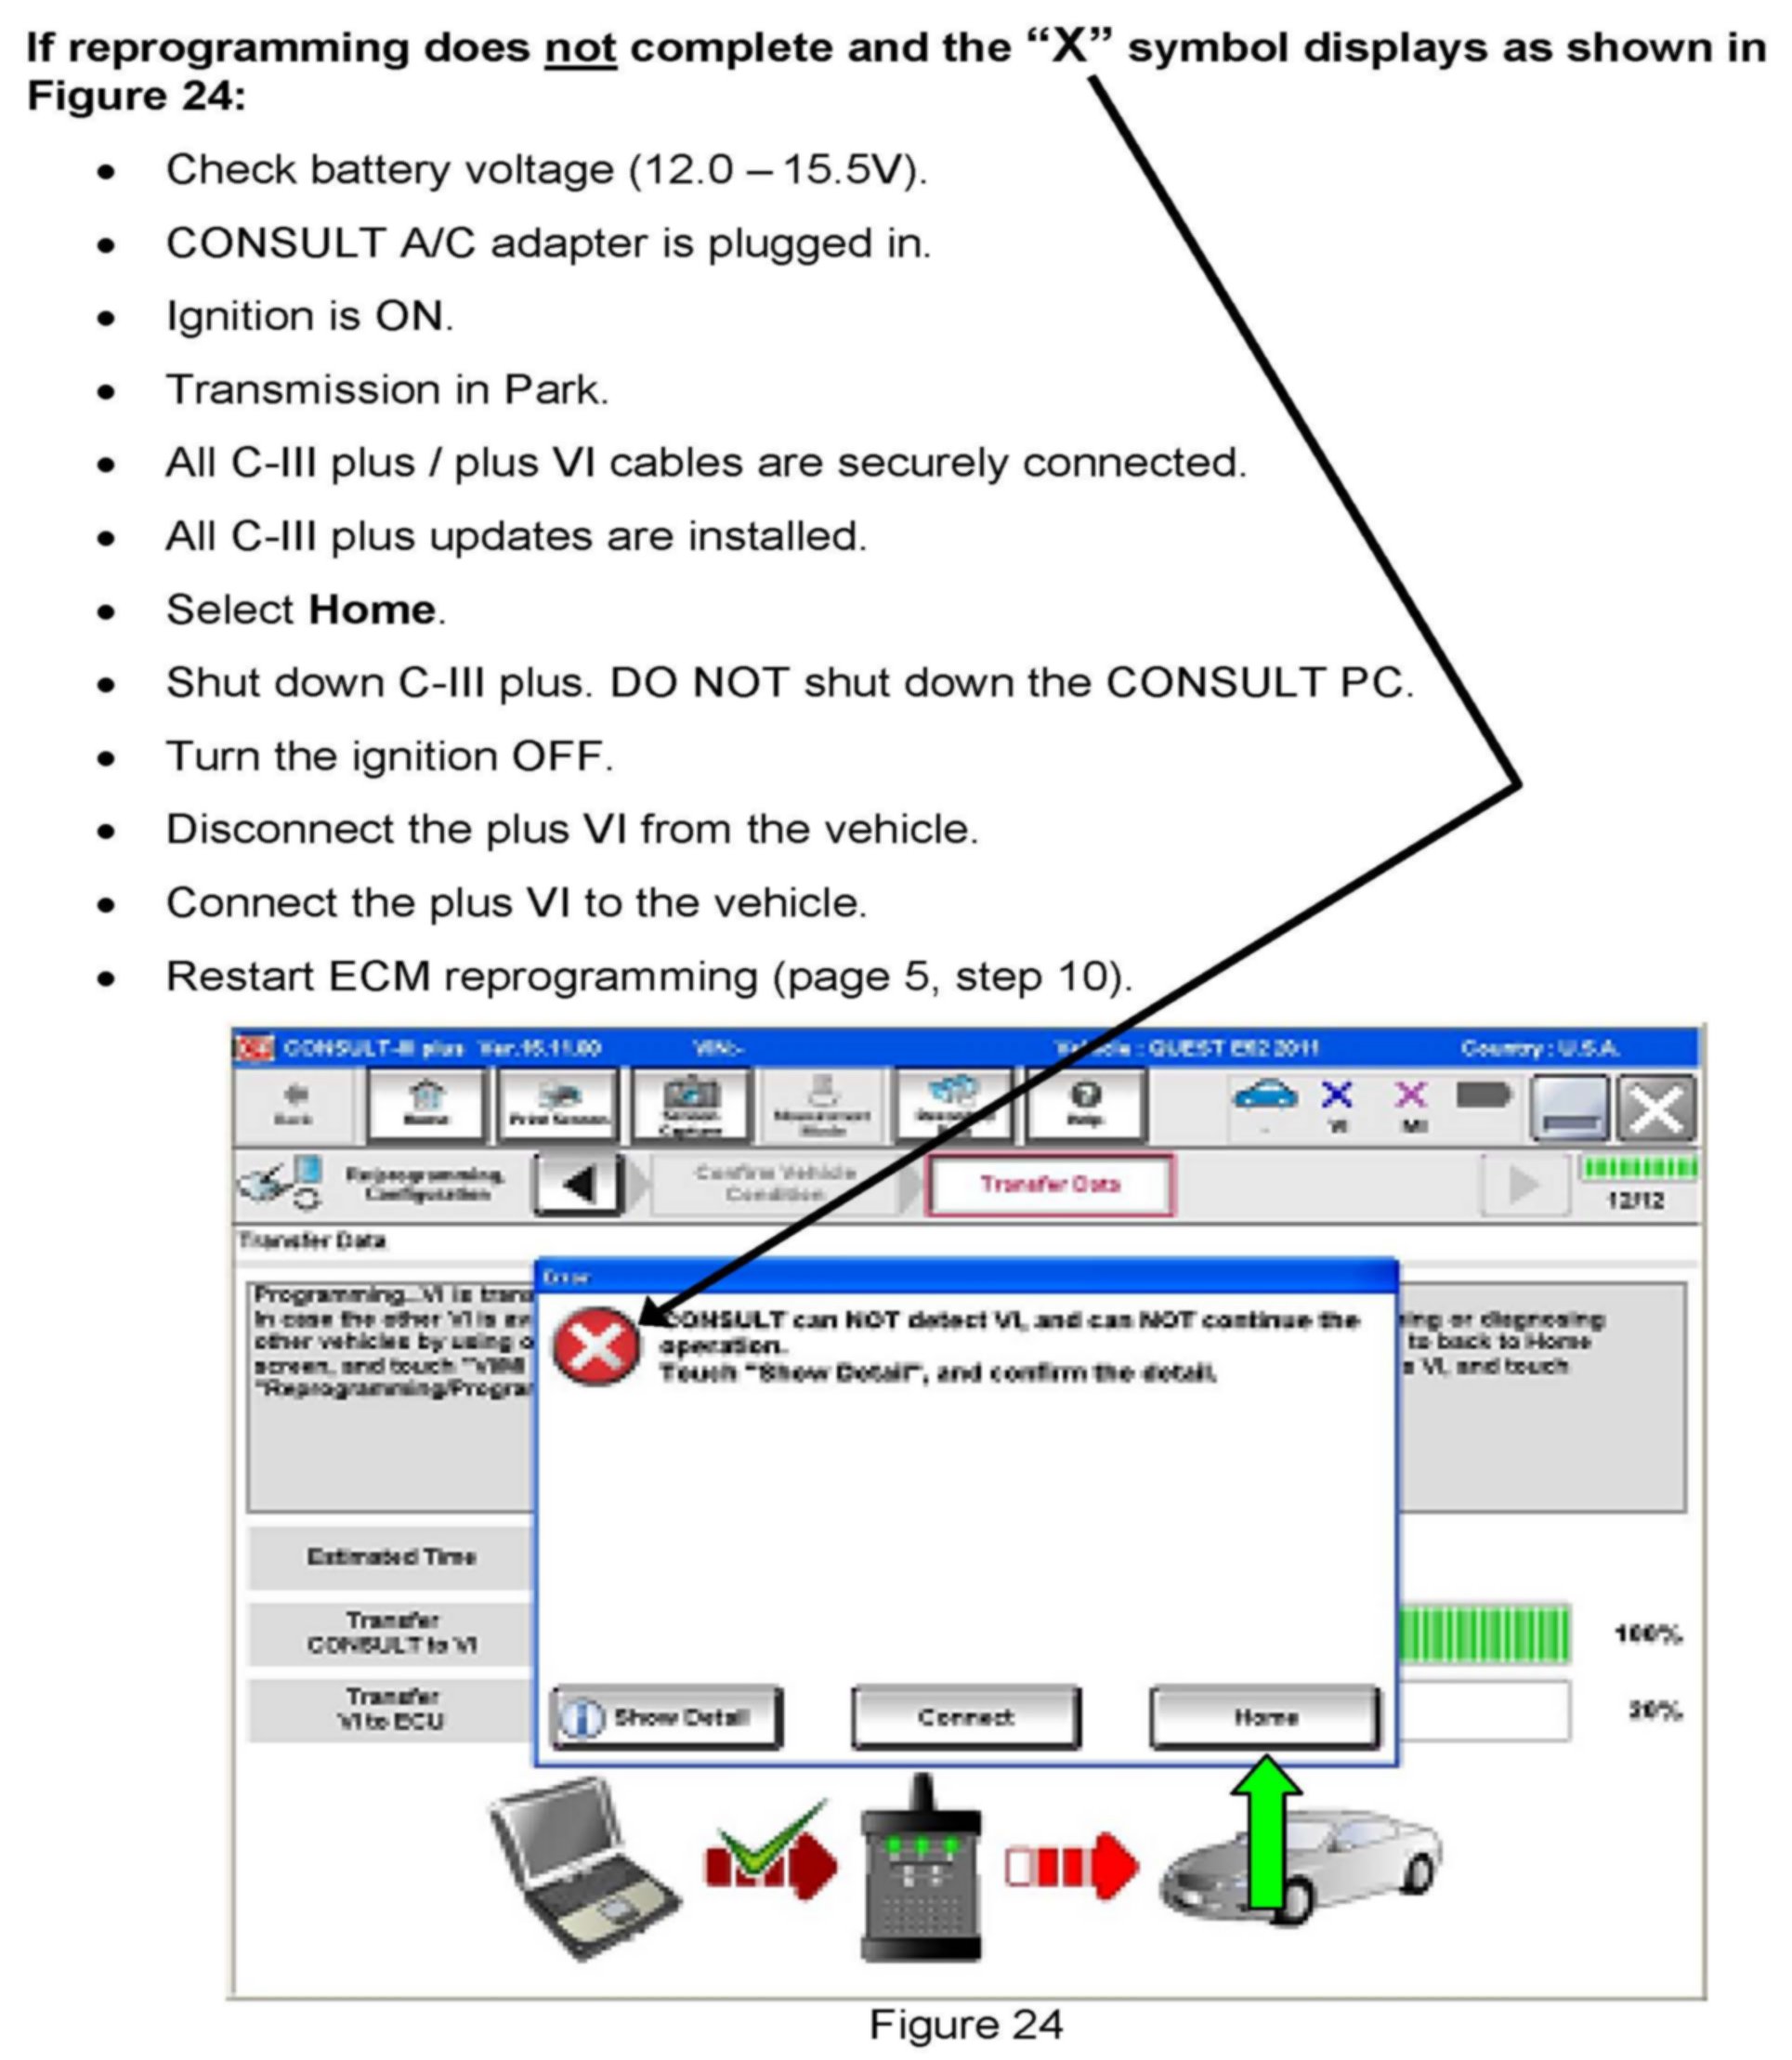
If reprogramming does not complete and the "X" symbol displays as shown in Figure 24 shown above.

36. Perform Throttle Valve Closed Position procedure.
a. Follow the on-screen instructions.
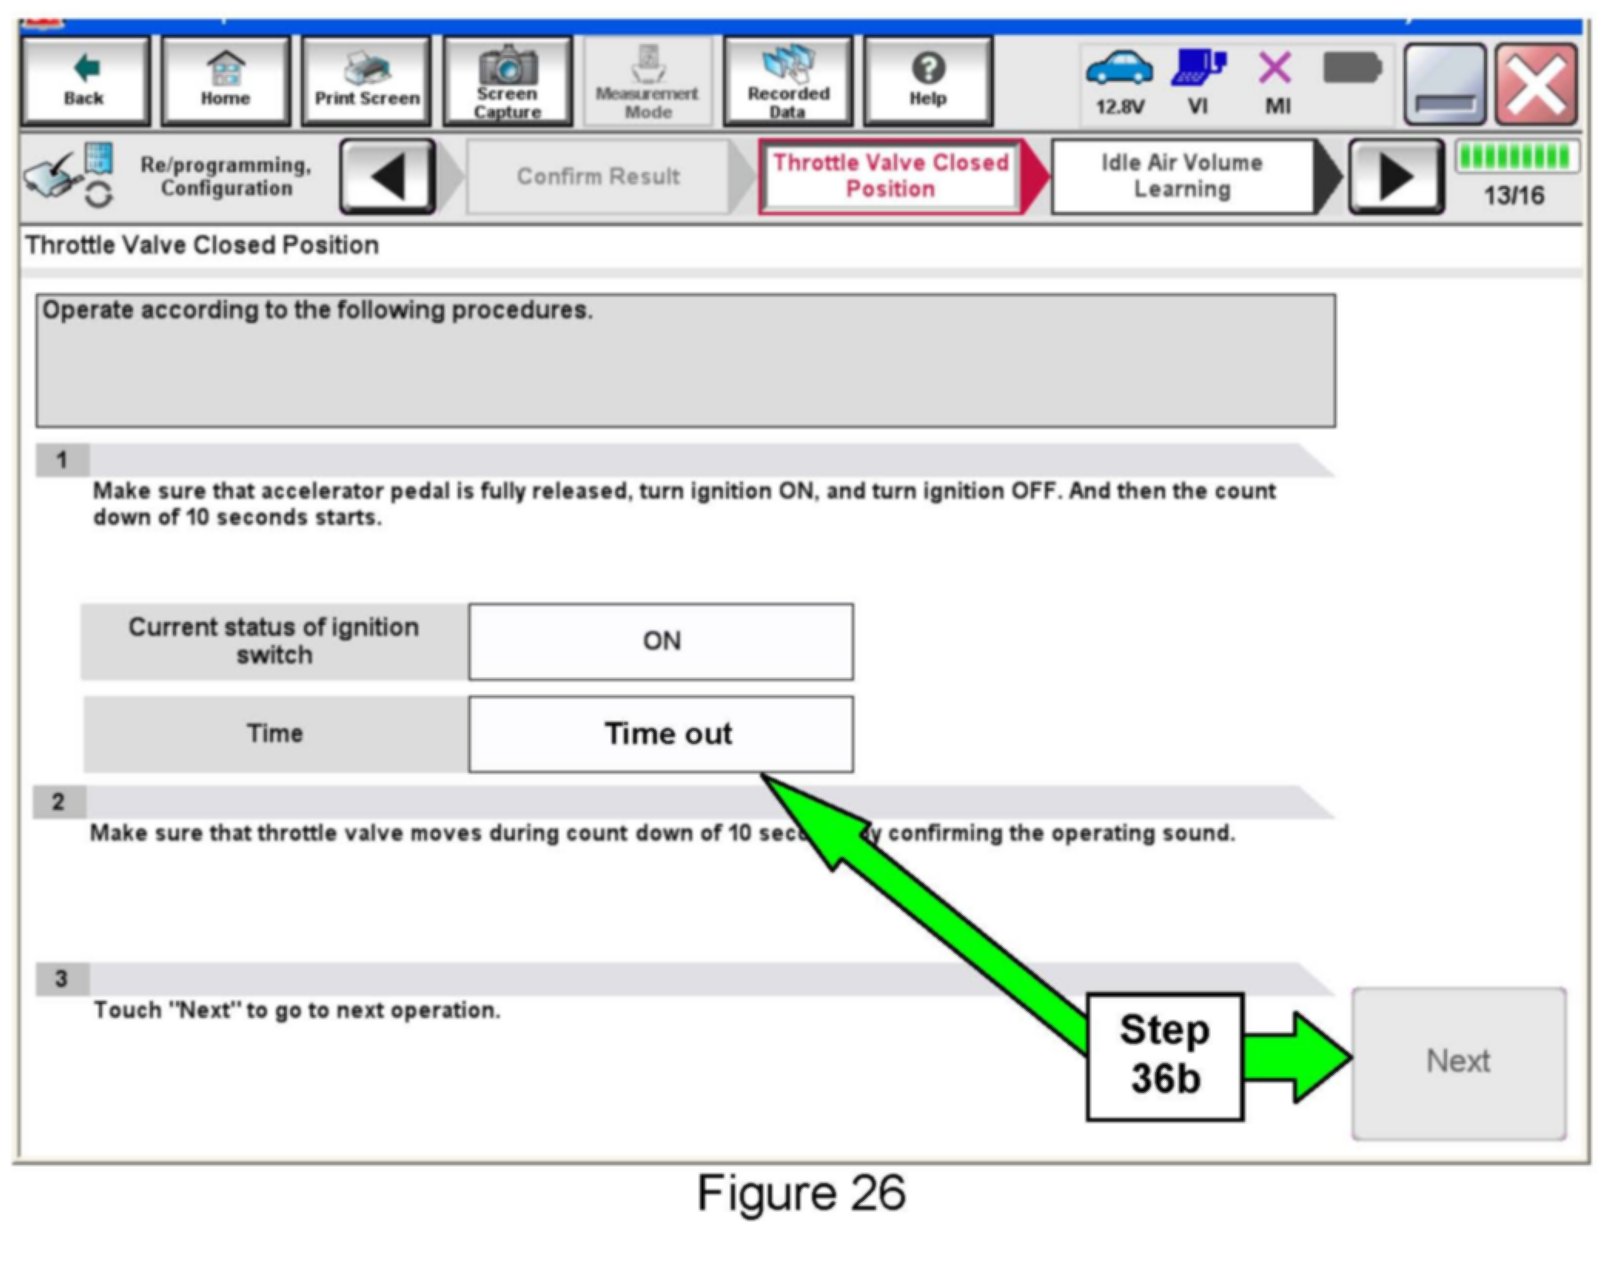
b. After Time out displays, select Next.
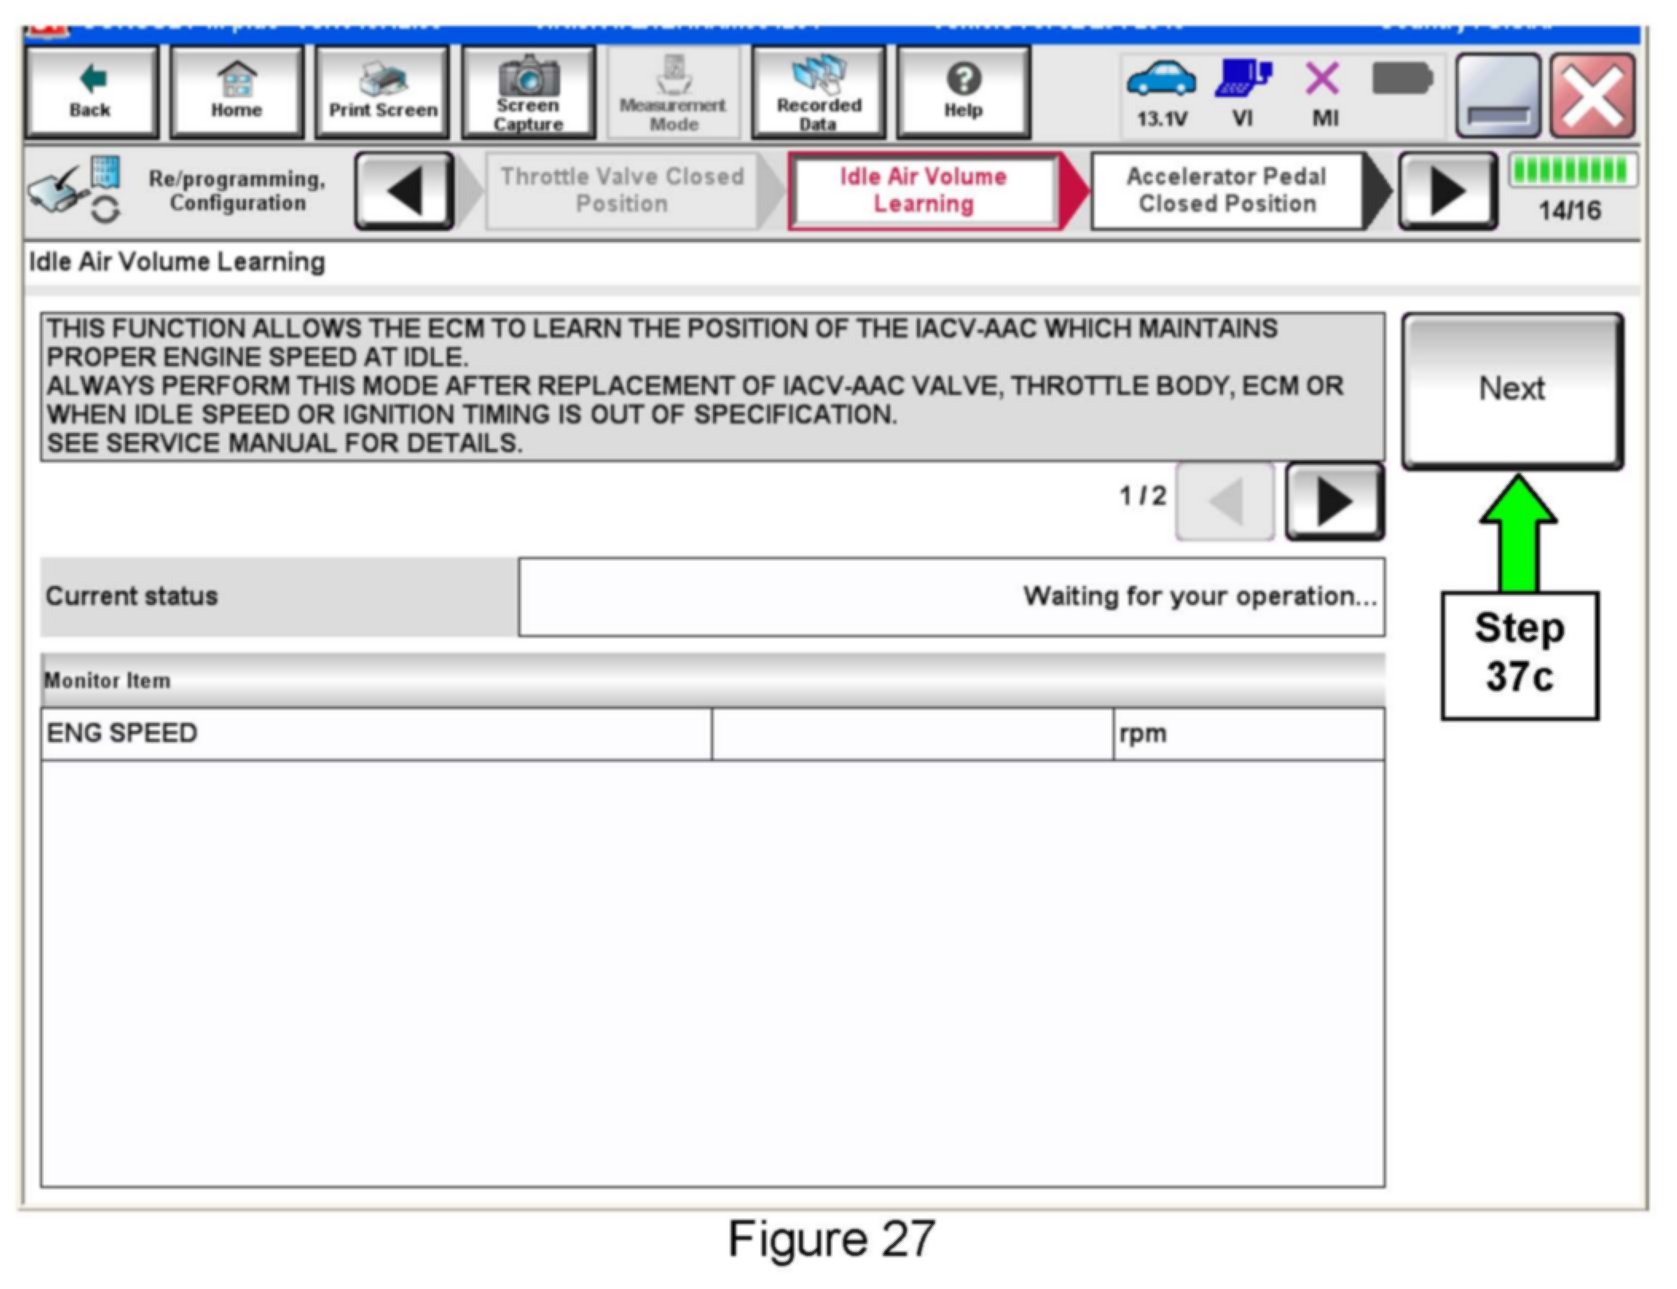
37. Perform Idle Air Volume Learn (IAVL).
a. The ignition should still be ON.
b. Start the engine and let it idle.
c. Select Next.
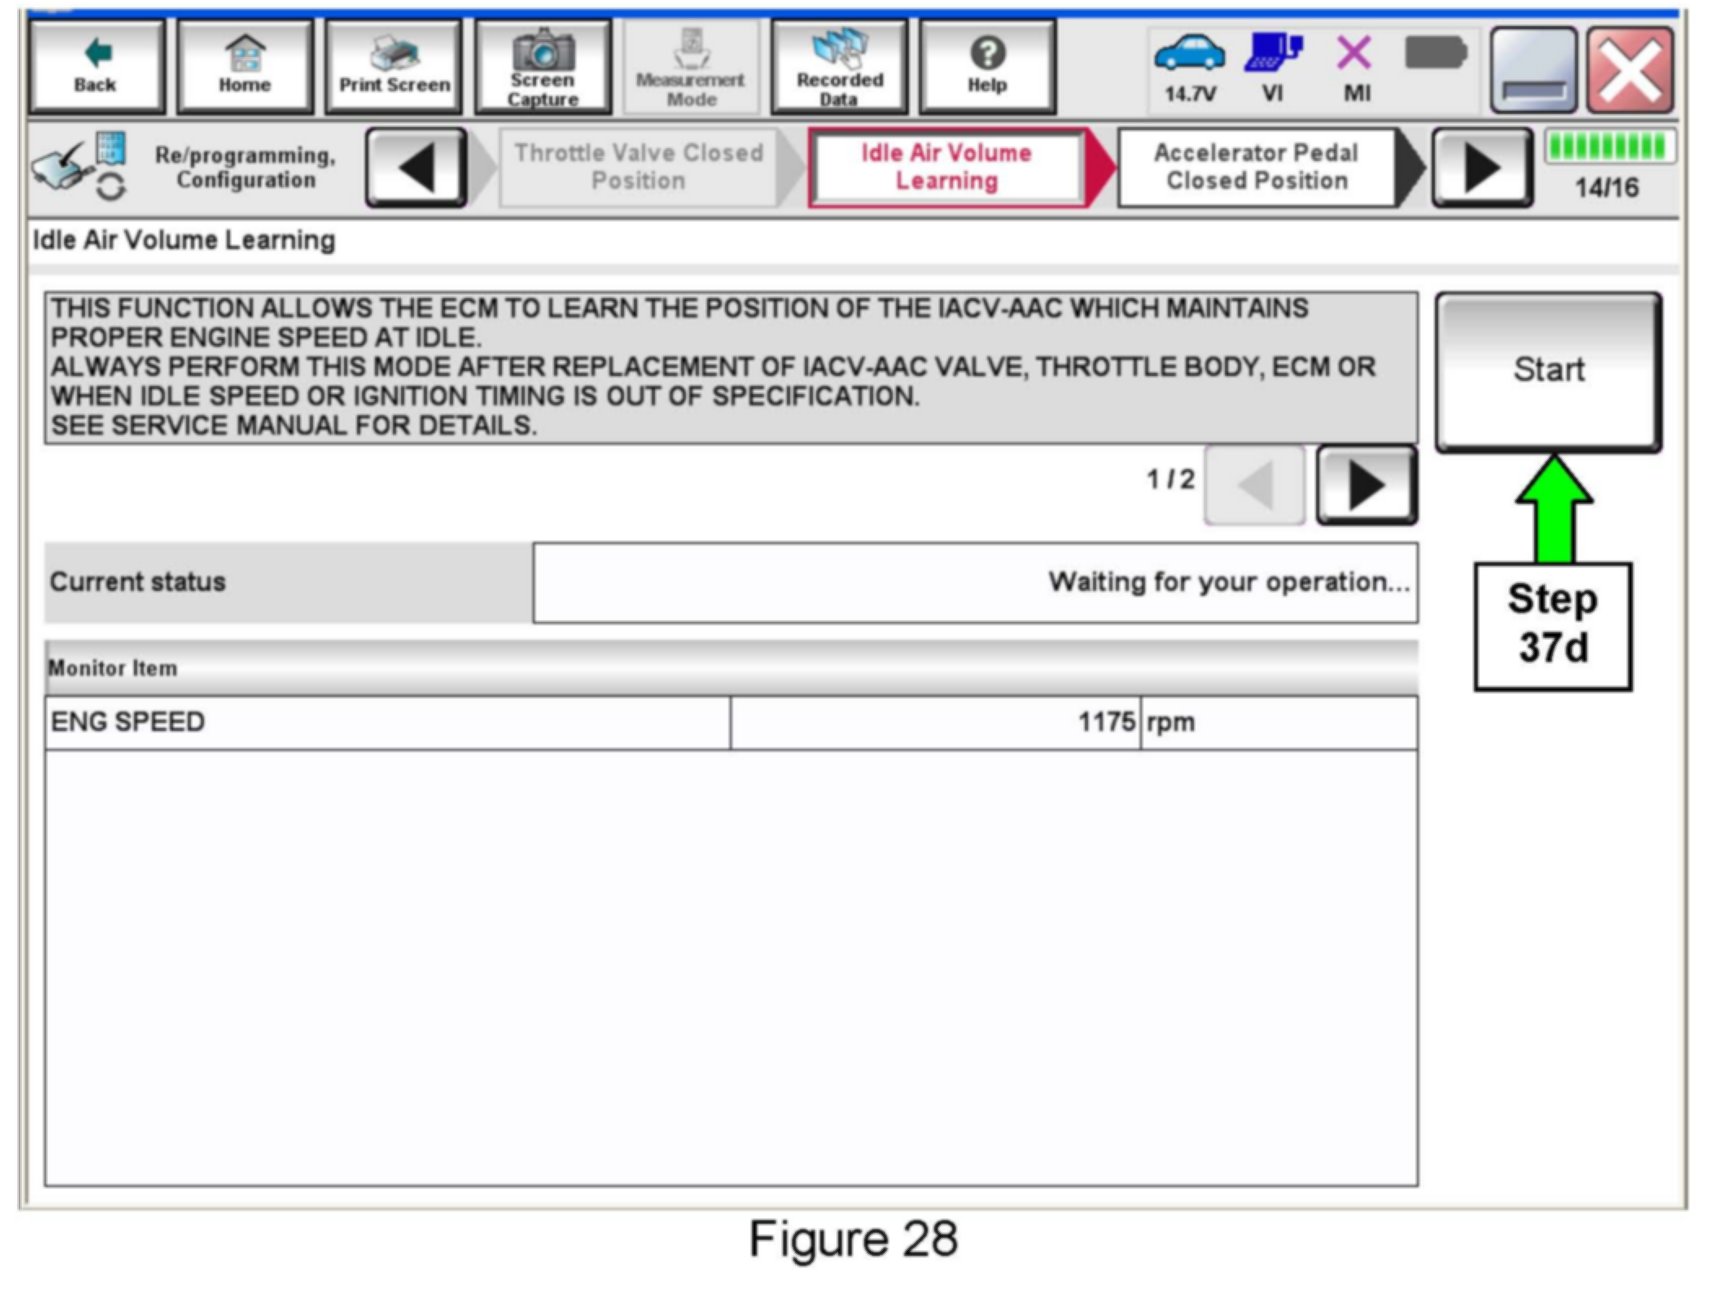
d. Select Start.
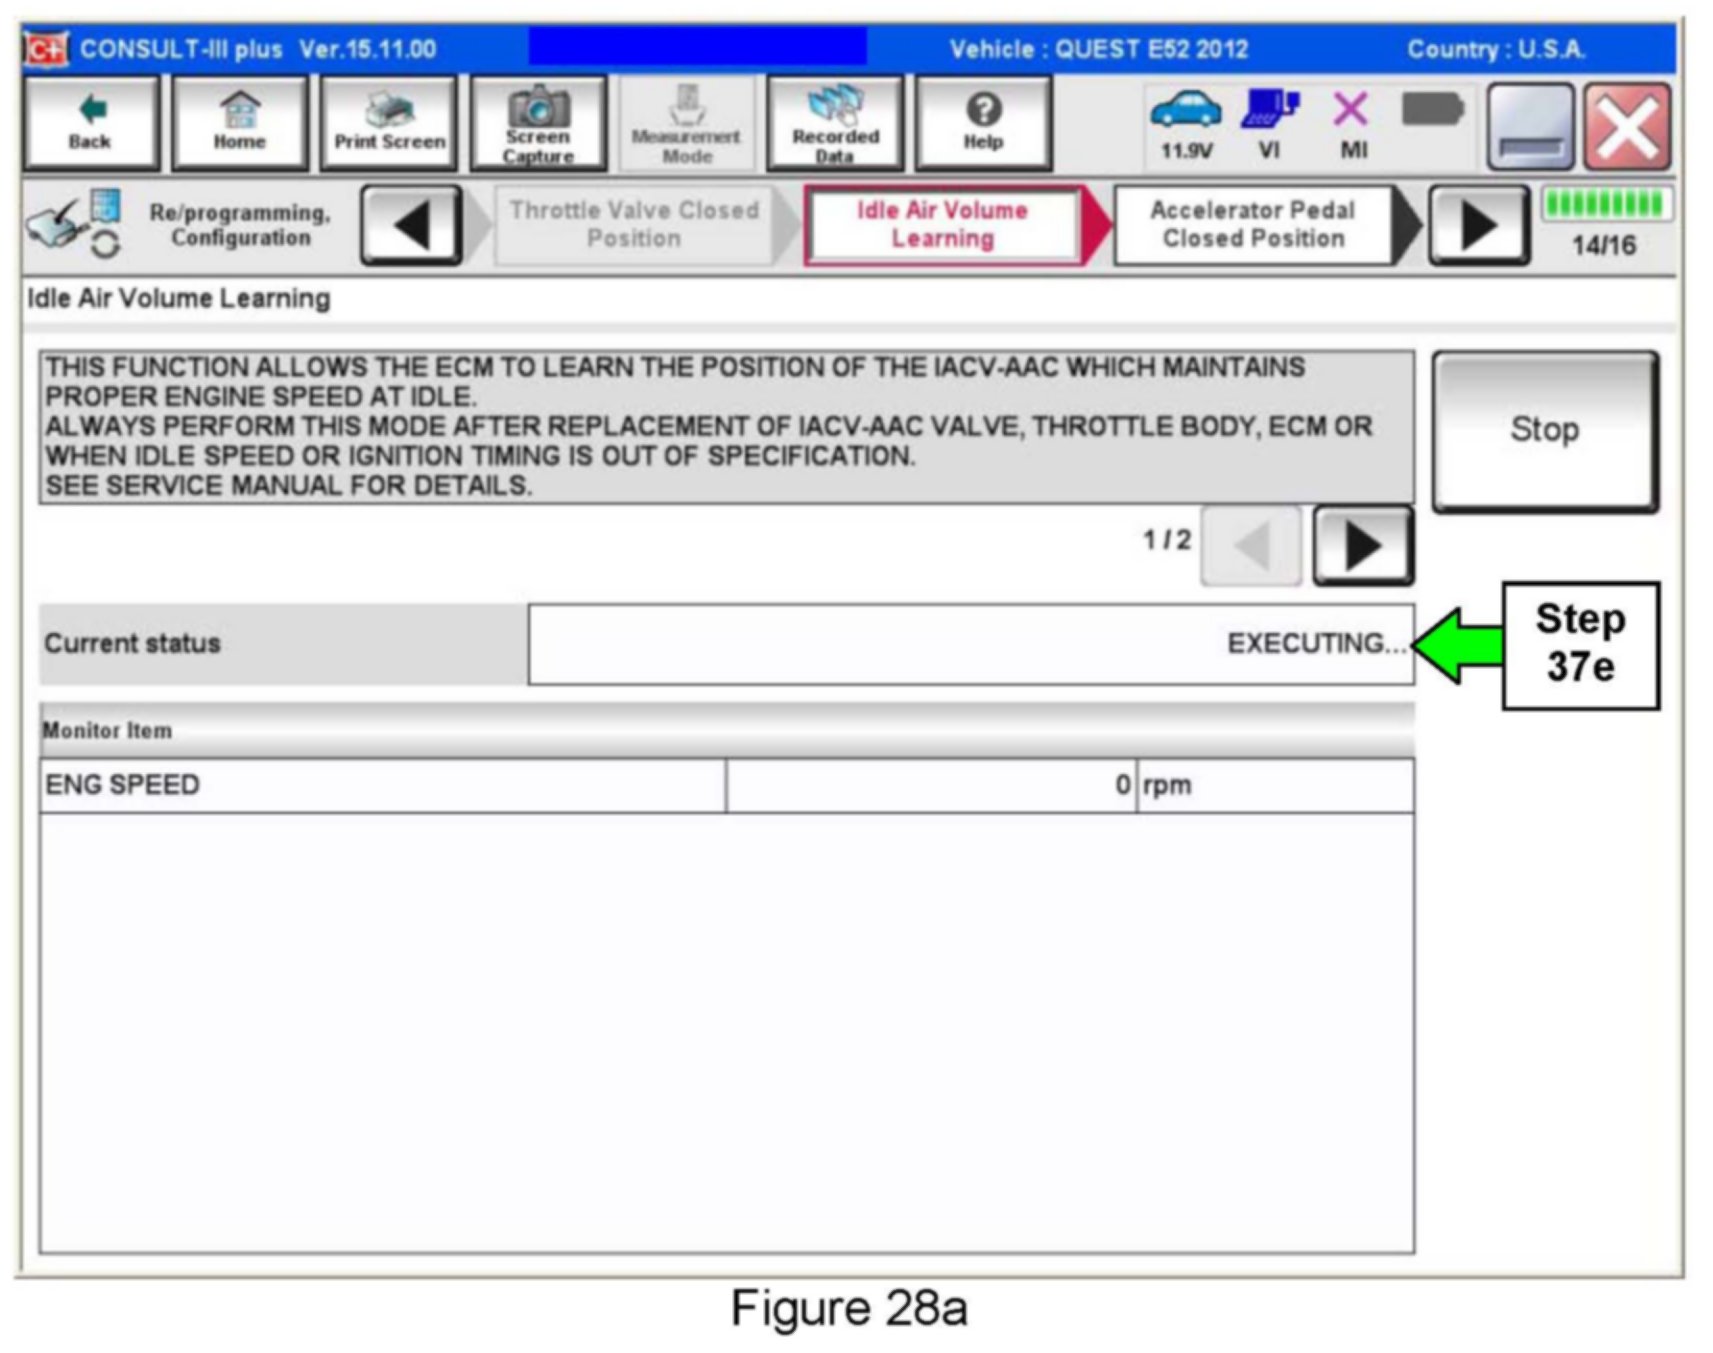
e. Wait for IAVL to complete.
^ If IAVL does not complete within two (2) minutes, one or more of the following common conditions may be out-of-range:
> Engine coolant temperature: 70 - 100°C (158 - 212°F)
> Battery voltage: More than 12.9V (At idle)
> Selector lever: P or N
> Electric load switch: OFF (Air conditioner, headlamp, rear window defogger)
> Steering wheel: Neutral (Straight-ahead position)
> Vehicle speed: Stopped
> Transmission: Warmed up
^ For specific conditions required, refer to the ENGINE>EC section of the appropriate Quest Electronic Service Manual (ESM).
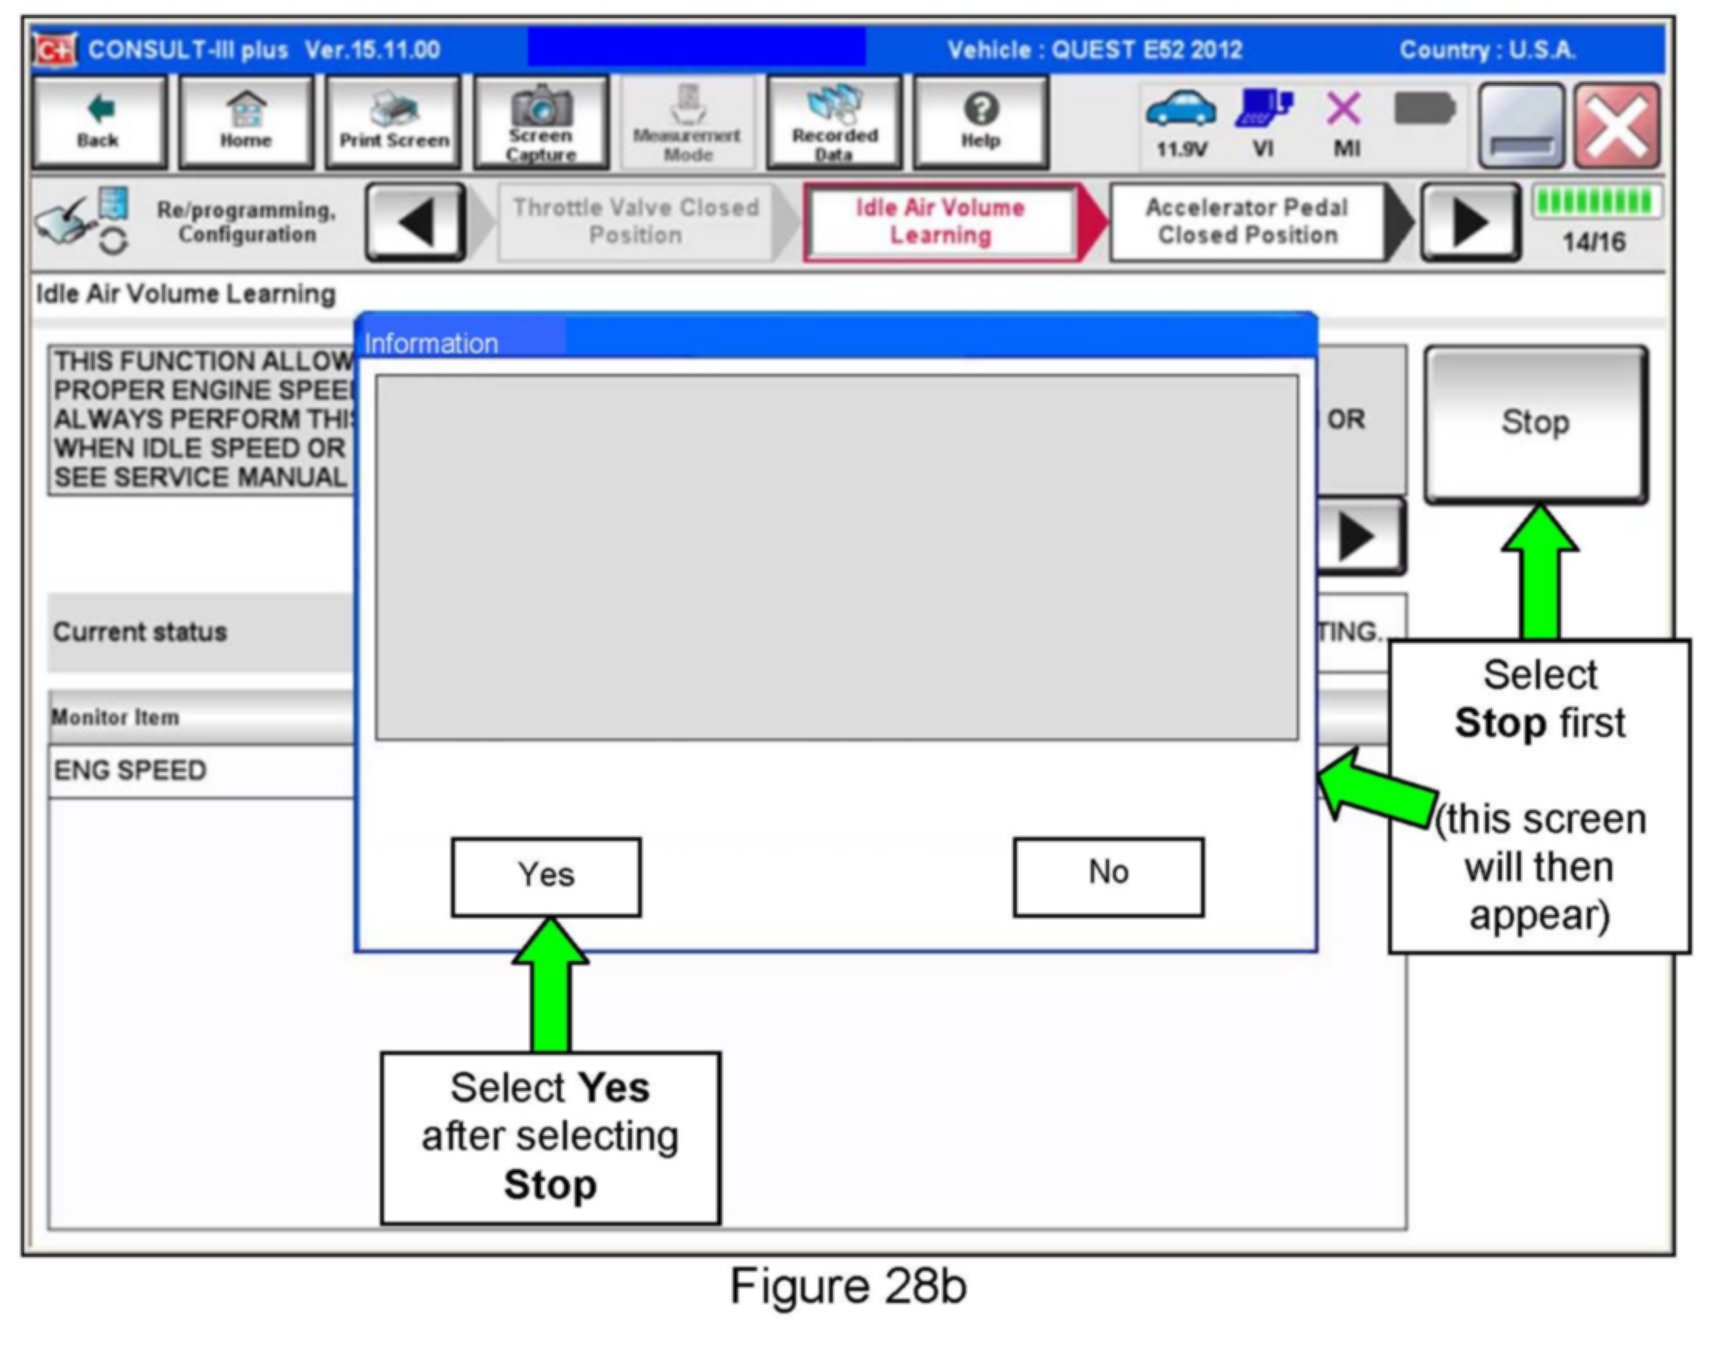
^ Select Stop.
^ When the Information screen (similar to the one below) appears, select Yes, and then make sure all conditions are met.
^ By selecting Yes, this will take you back to the screen in Figure 27. Restart the IAVL procedure (step 37c).
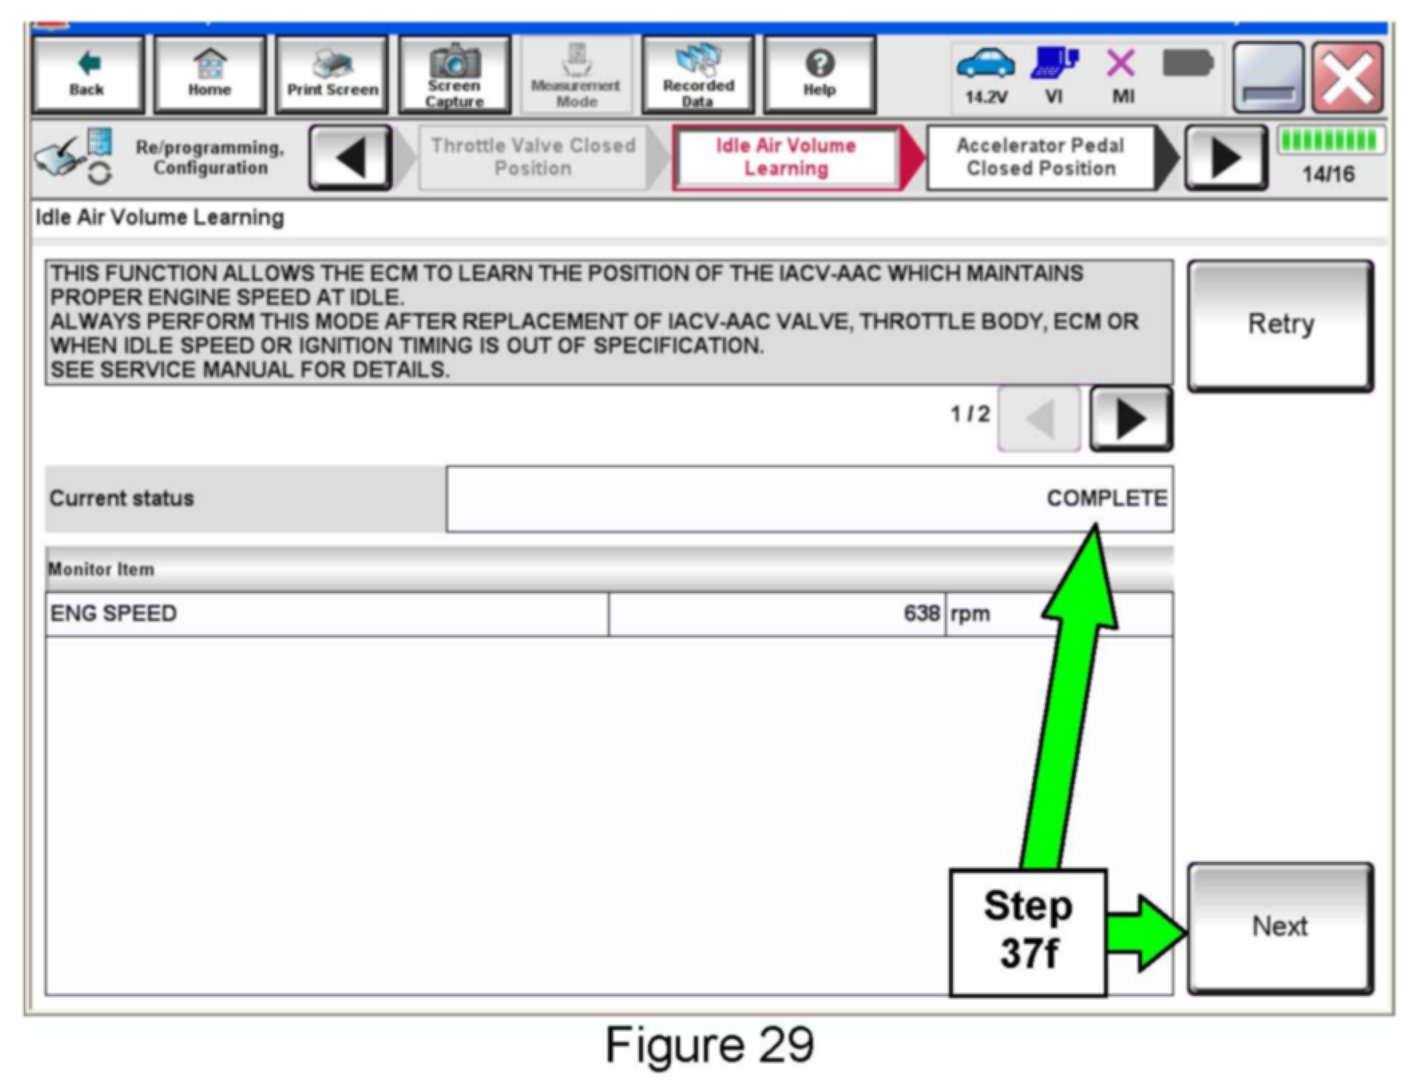
f. When IAVL completes, select Next.
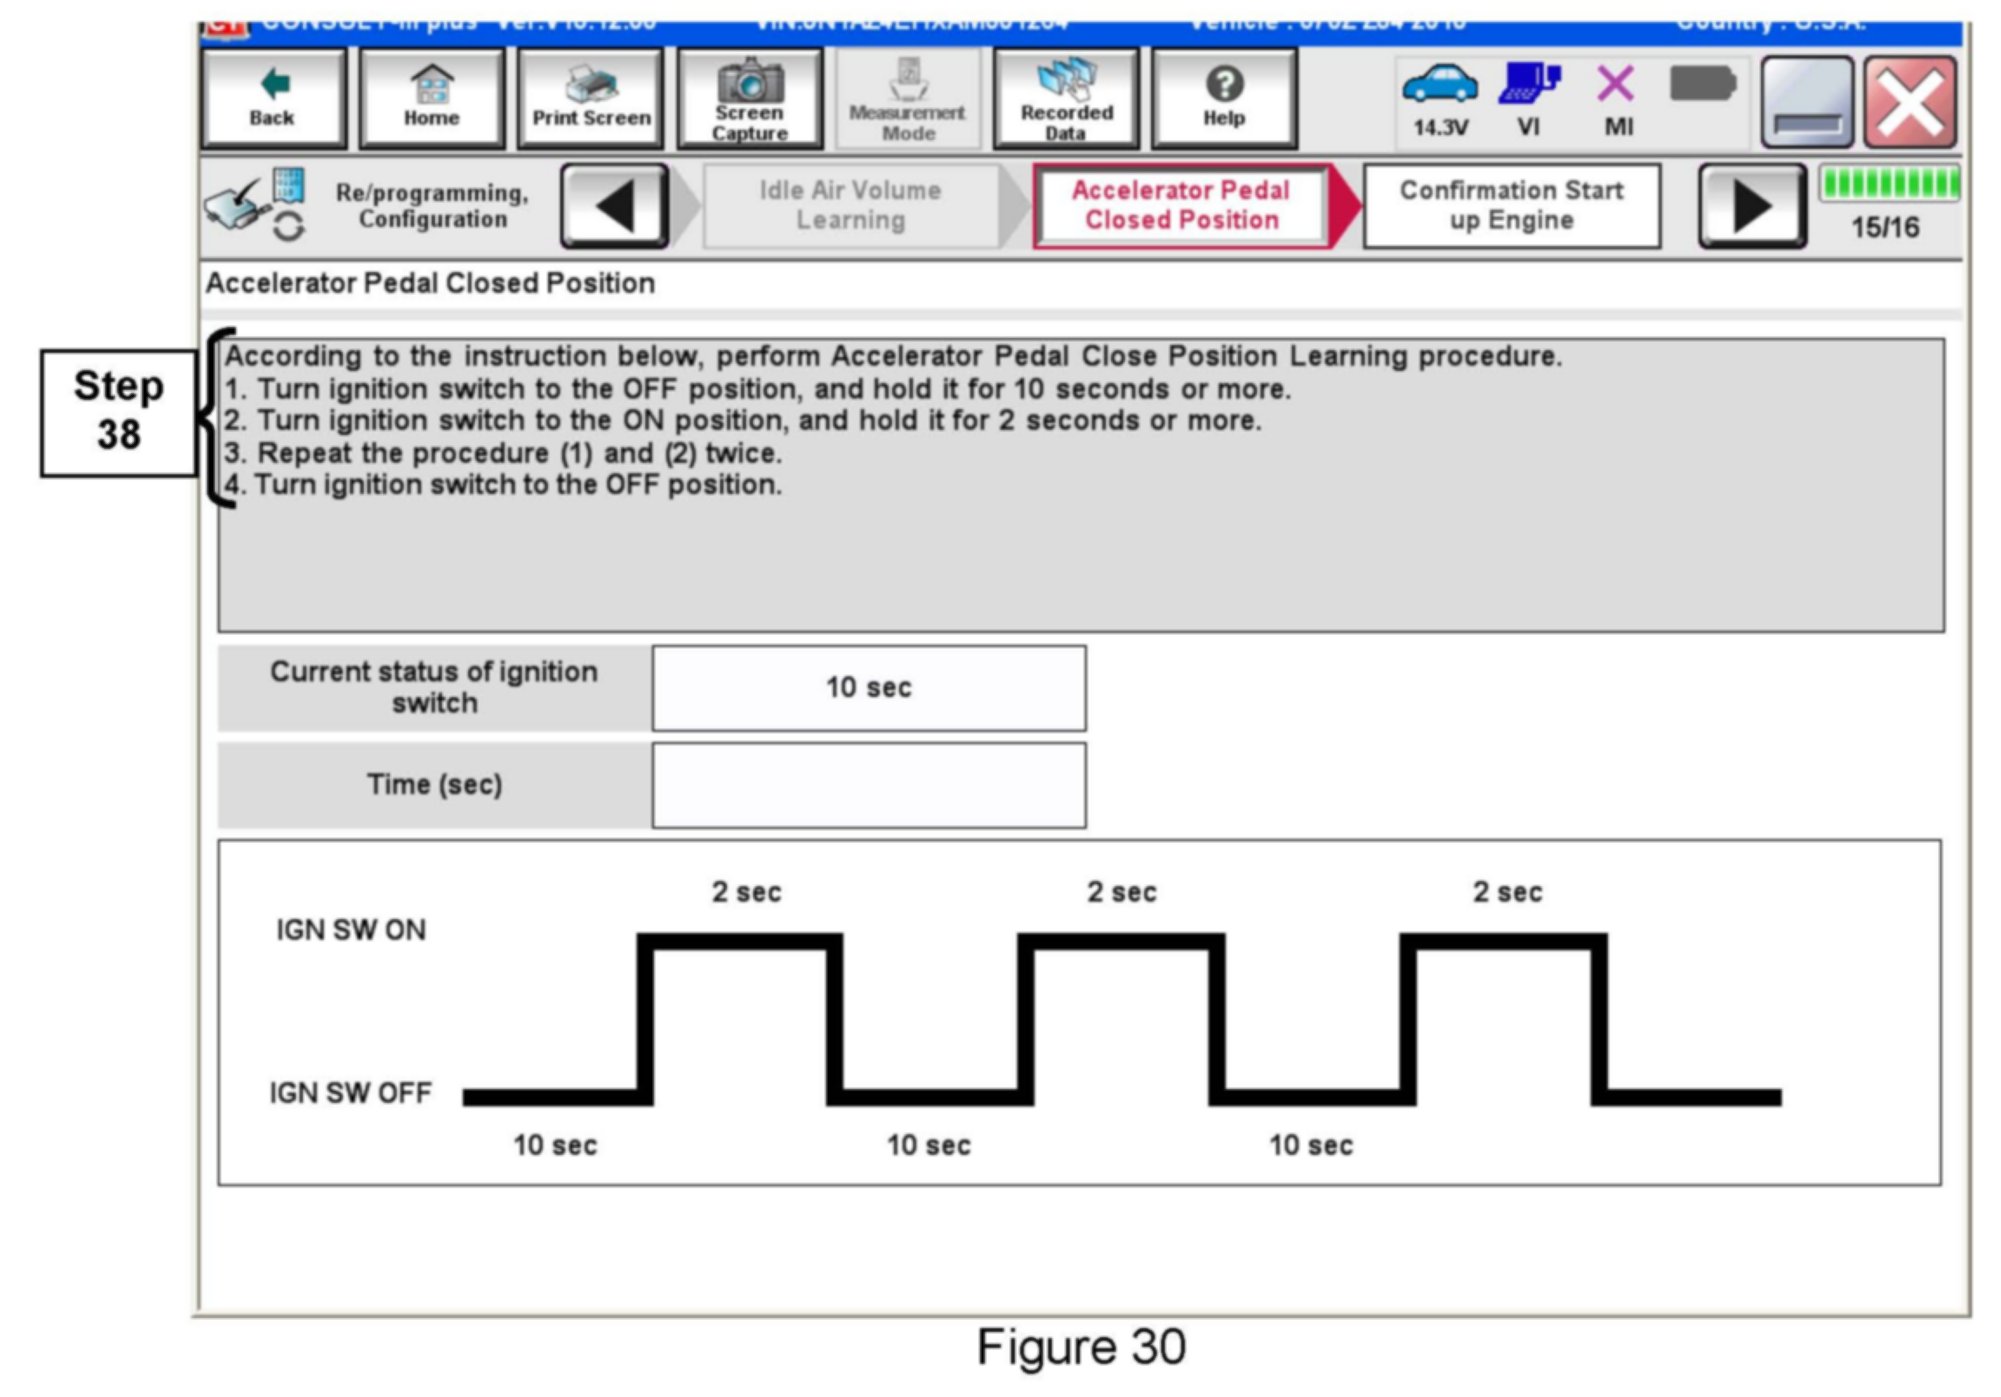
38. Follow the on-screen instructions to complete Accelerator Pedal Close Position Learning.
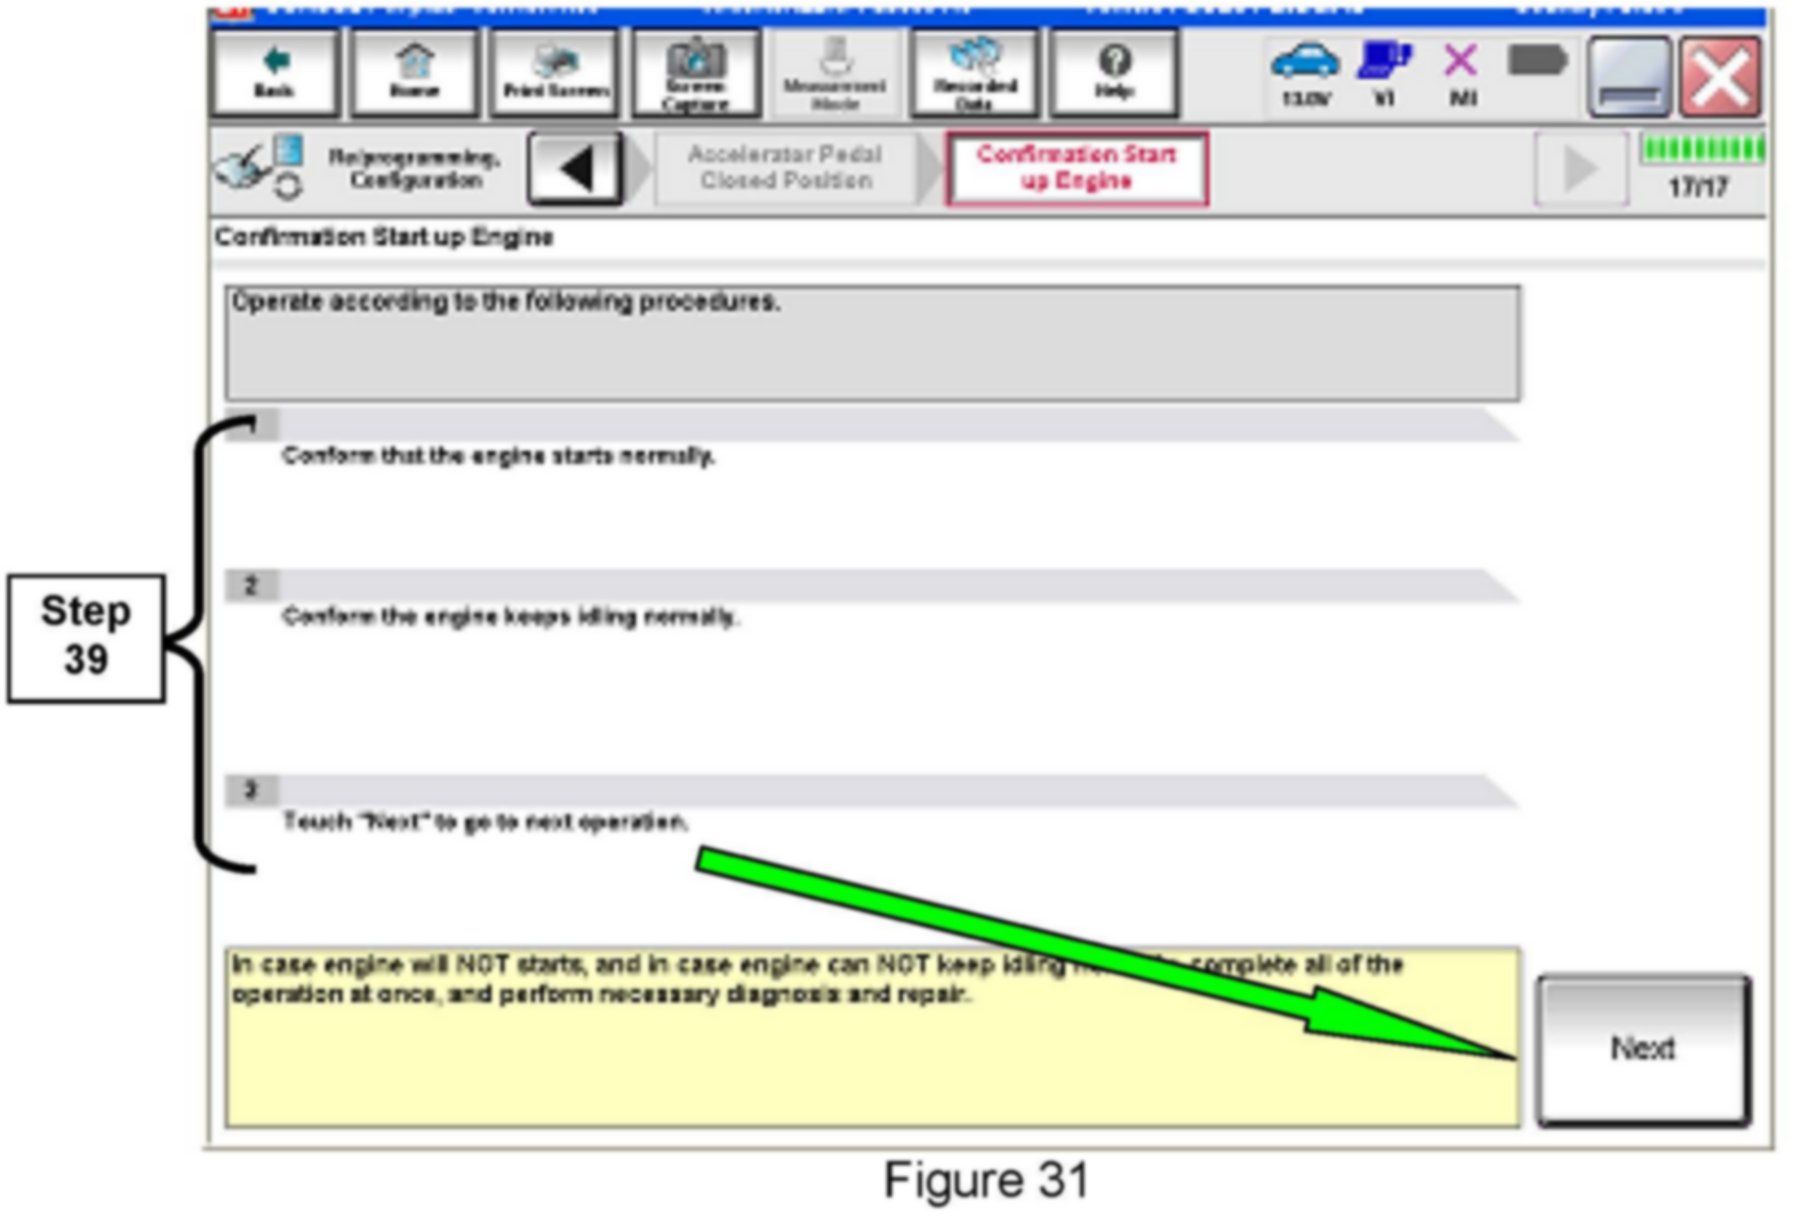
39. Follow the on-screen instructions.
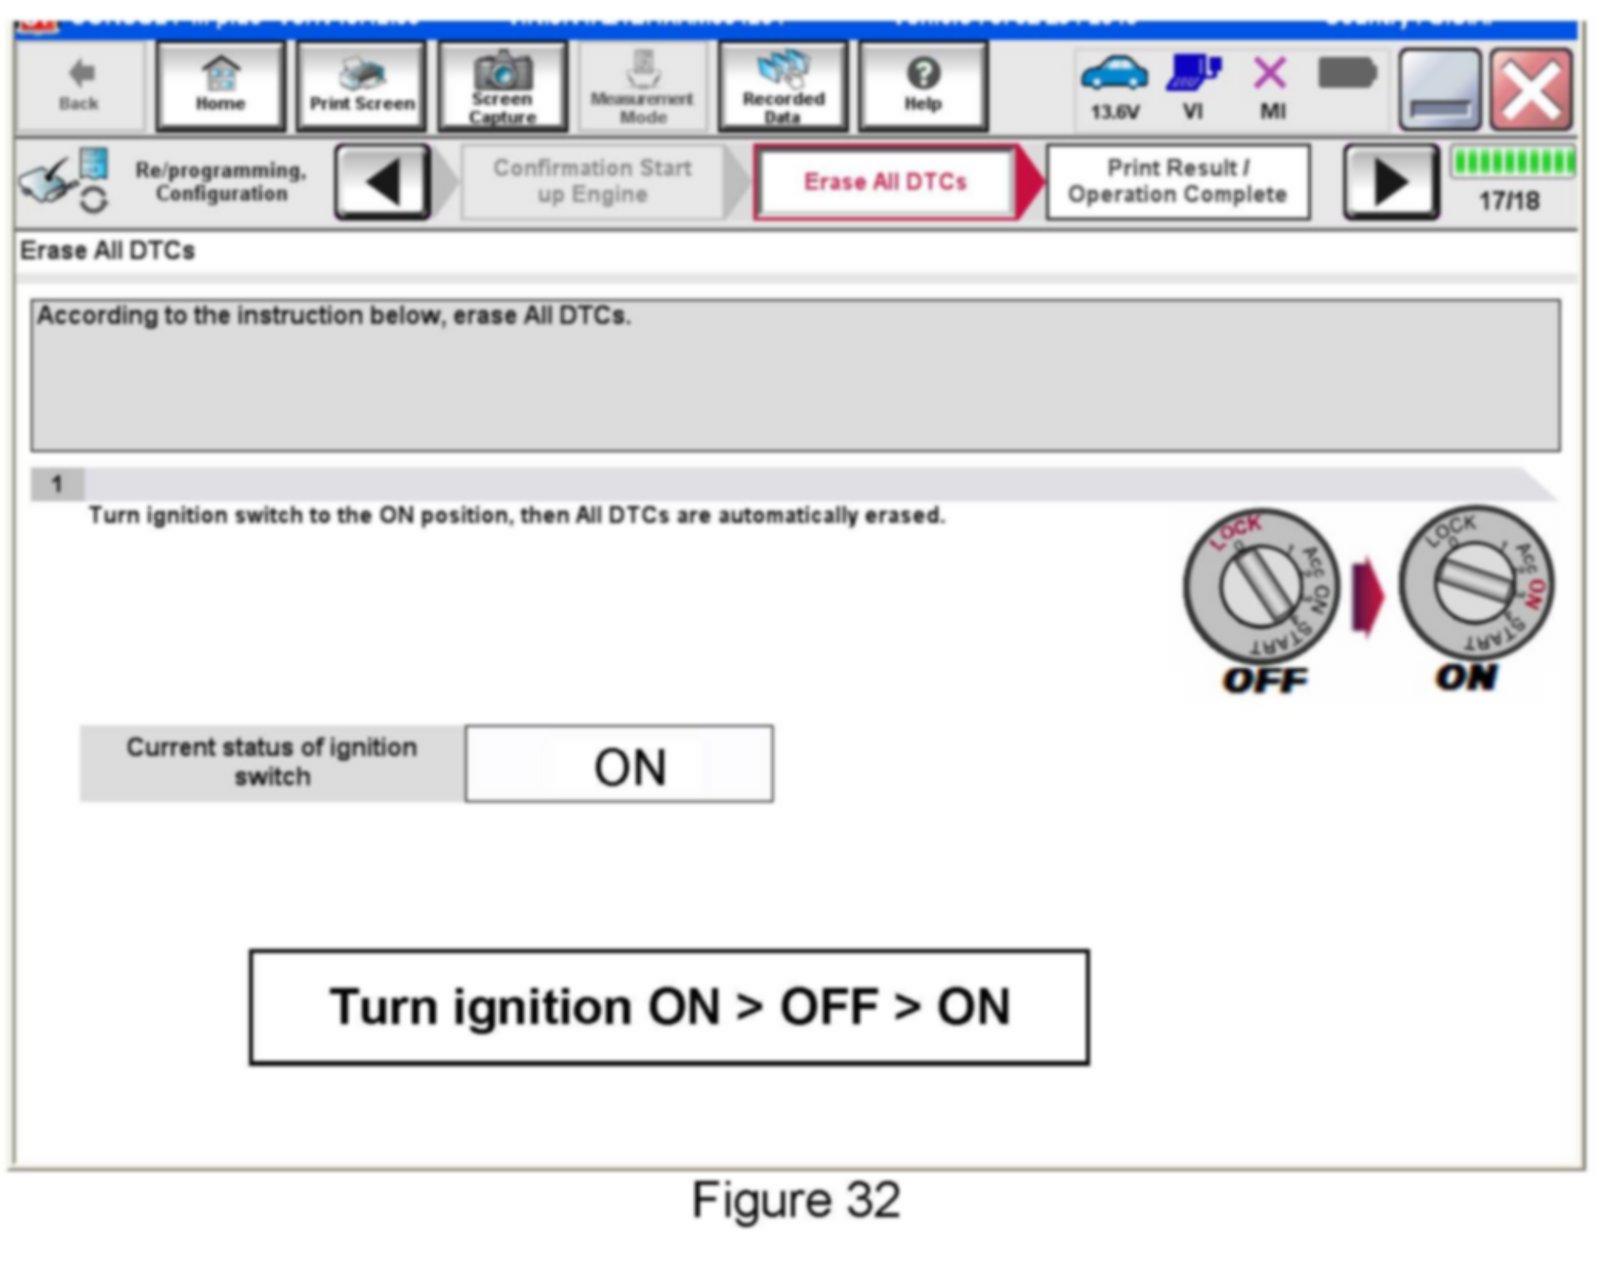
40. Erase all DTCs as follows:
a. Turn the ignition OFF
b. Turn the Ignition ON.
c. Wait for DTC erase to complete.
41. Verify the before and after part numbers are different.
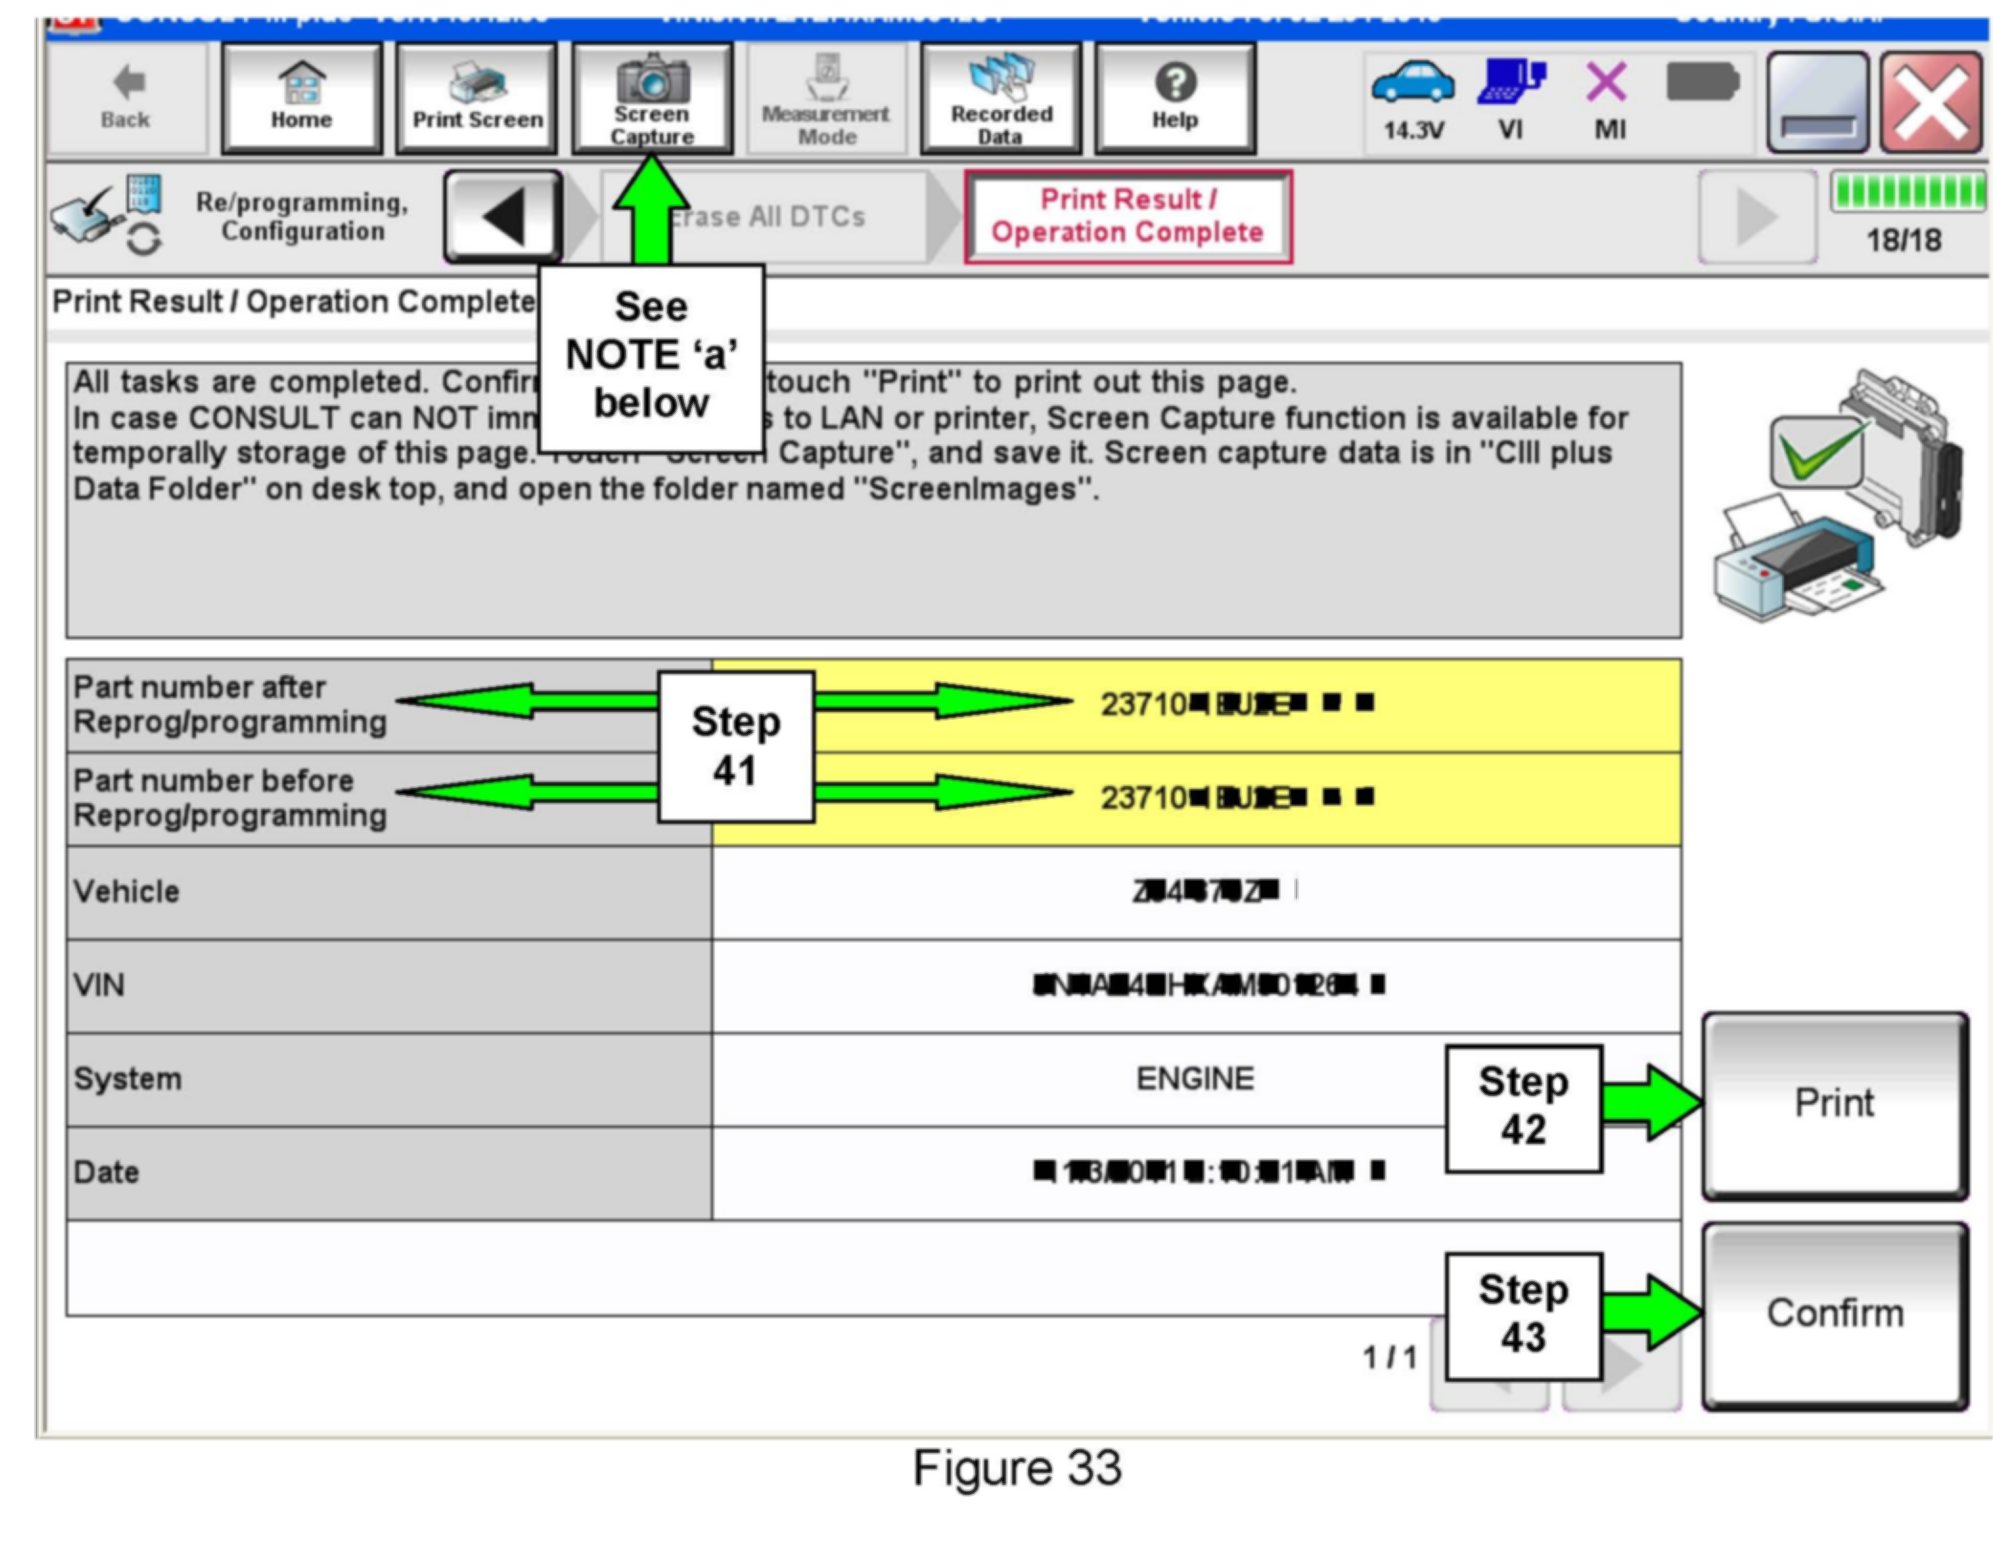
42. Print a copy of this screen (Figure 33) and attach it to the repair order.
43. Select Confirm.
NOTE:
If you can not print the above screen:
a. Select Screen Capture.
b. Name the file.
c. Save the file in My Documents.
^ A copy of the screen is now saved in the CONSULT PC. It can be retrieved and printed at a later time.
44. Close C-III plus.
45. Turn the ignition OFF.
46. Disconnect the plus VI from the vehicle.
47. In-stock vehicles only: Disengage (pull out) the Extended Storage Switch.