A/C - Temperature Control Levers Loose or Binds
NUMBER:92-T-123
CORP.REF.NO:
261106
DATE:
September 1992
SECTION:
1B
SUBJECT
TEMPERATURE CONTROL OR HEATER-A/C LEVERS LOOSE OR BINDING - REPLACE CONTROL HOUSING
MODELS/YEARS
1991-92 BRAVADA
Some 1991-92 Bravadas may exhibit loose or binding temperature control or Heater-A/C mode selection levers. These conditions may be caused by broken housing bosses at the plate mounting screws on the A/C control. The result may be inability to actuate certain Heater-A/C modes or obtain maximum heating or cooling.
Previously it was necessary to replace the complete A/C control assembly to correct this condition. The control assembly included the valves, switches, bezel and lighting.
The housing, P/N 16074394, is now available allowing this condition to be corrected when other parts of the control are operating properly. Partial disassembly of the A/C control is required.
SERVICE PROCEDURE:
1. Remove the A/C control assembly from the instrument panel.
2. Place the Temperature and Mode controls in the upper position.
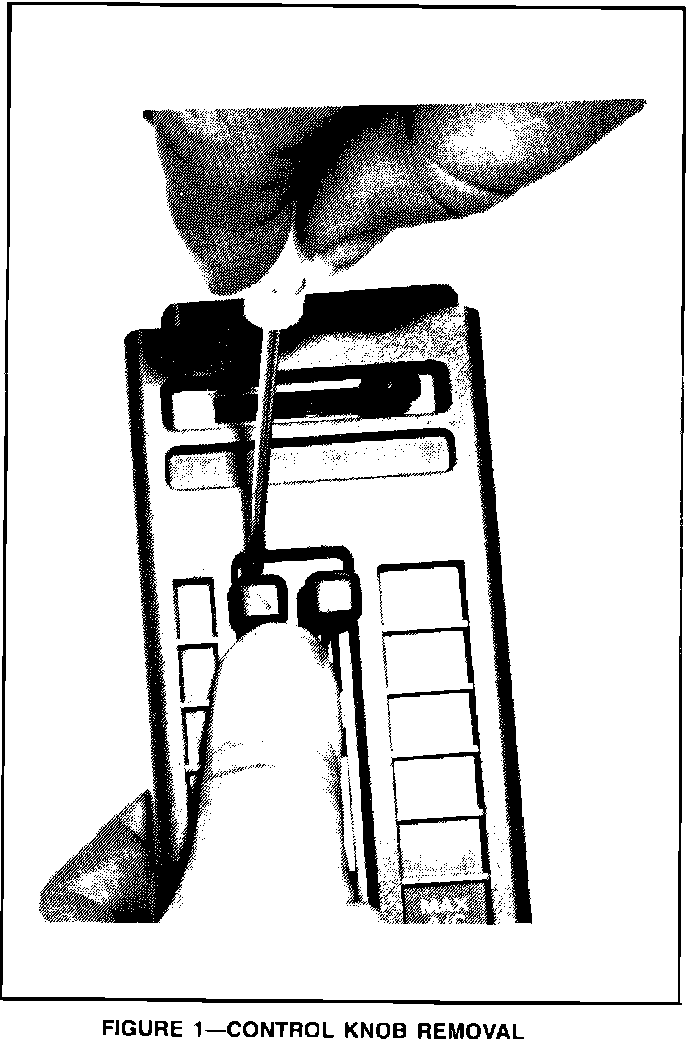
3. Apply thumb pressure to each of these control knobs to hold them in the upper position while using a small screw driver to pry off the knobs (Figure 1).
4. Use the same procedure to remove the blower switch knob.
5. Disconnect the 2 light sockets from the housing by twisting the sockets counterclockwise.
6. Remove blower motor switch.
7. Remove the 2 control base plate mounting screws.
8. Remove the control baseplate.
9. Remove the 4 housing to bezel mounting screws.
10. Discard the broken housing.
11. Apply a small amount of GM silicone grease, P/N 12345579, or its equivalent to areas of the new housing where the mode and temperature levers protrude through the housing slots.
Note:
Do not use petroleum based lubricants. Petroleum based lubricant causes the housing material to become brittle and generate a repeat failure.
12. Reassemble using the reverse procedure. Use care when assembling the base plate to the housing and bezel. The mode control lever must be inserted through the mode indicator.
13. Torque the housing, baseplate and blower switch mounting screws to .68-1.1 N-m (6-10 lbs.in).
14. If necessary, install new knobs on mode, temperature, and blower controls to ensure proper retention.

SERVICE PARTS INFORMATION
Parts are currently available from GMSPO.
WARRANTY INFORMATION:
Use the current Labor Time Guide.