Fluid Pump: Service and Repair
Fig. 7 Fluid Pump Assembly & Control Valve:
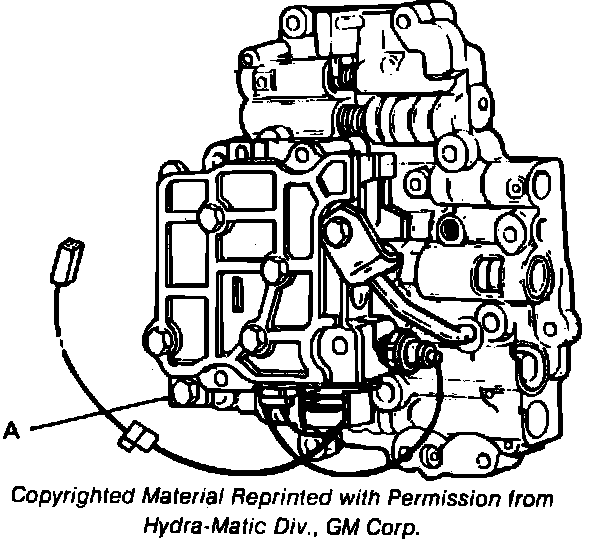
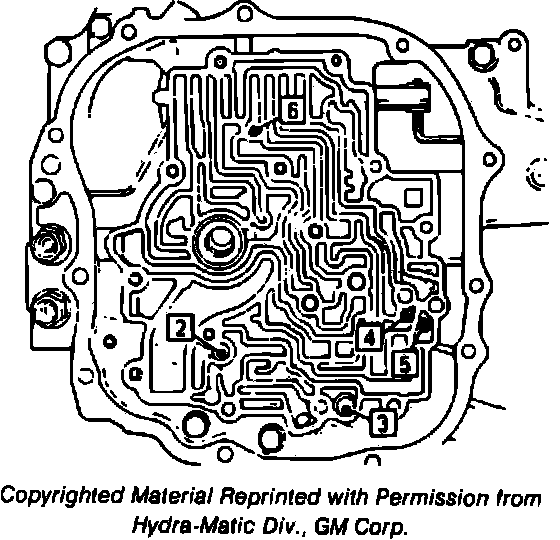
Fig. 9 Check Ball Locations:
1. Disconnect battery ground cable.
2. Disconnect T.V. cable.
3. Raise and support vehicle, then remove LH side front wheel.
4. Remove valve body cover and gasket.
5. Remove TCC solenoid to auxiliary valve body retaining bolt.
6. Disconnect TCC solenoid wiring connector from case connector.
7. Disconnect TCC wires from third gear pressure switch.
8. Remove remaining bolts securing valve body to case cover and valve body except bolt A, Fig. 7. Ensure care is taken not to lose the six check balls.
9. Remove bolt A, then separate auxiliary valve body from main valve body.
10. Reverse procedure to install. Use ``Transjel'' to hold check balls in place. Refer to Fig. 8. for proper placement of check balls.