Evaporator Core: Service and Repair
Evaporator/Heater Module Assembly:
Brazed fittings are used on the condenser and evaporator. These fittings cannot be turned. It is important that the service technician recognize which fitting is to be turned and use back-up wrenches. The brazed fitting that should not be turned is always the same color as the pipe it is brazed to.
1. Disconnect battery ground cable.
2. Discharge A/C system, then remove engine rear sight shield. Refer to Engine Cover Replacement Service and Repair.
3. Disconnect electrical connector from pressure cycling switch.
4. Remove accumulator clamp screw.
5. Disconnect accumulator inlet and outlet connections, then remove accumulator from vehicle.
6. Remove blower motor resistor, then the vacuum tank.
7. Remove engine coolant reservoir, then the evaporator tube from condenser outlet.
8. Disconnect A/C lines from clamp near shock tower, then remove evaporator tube from vehicle.
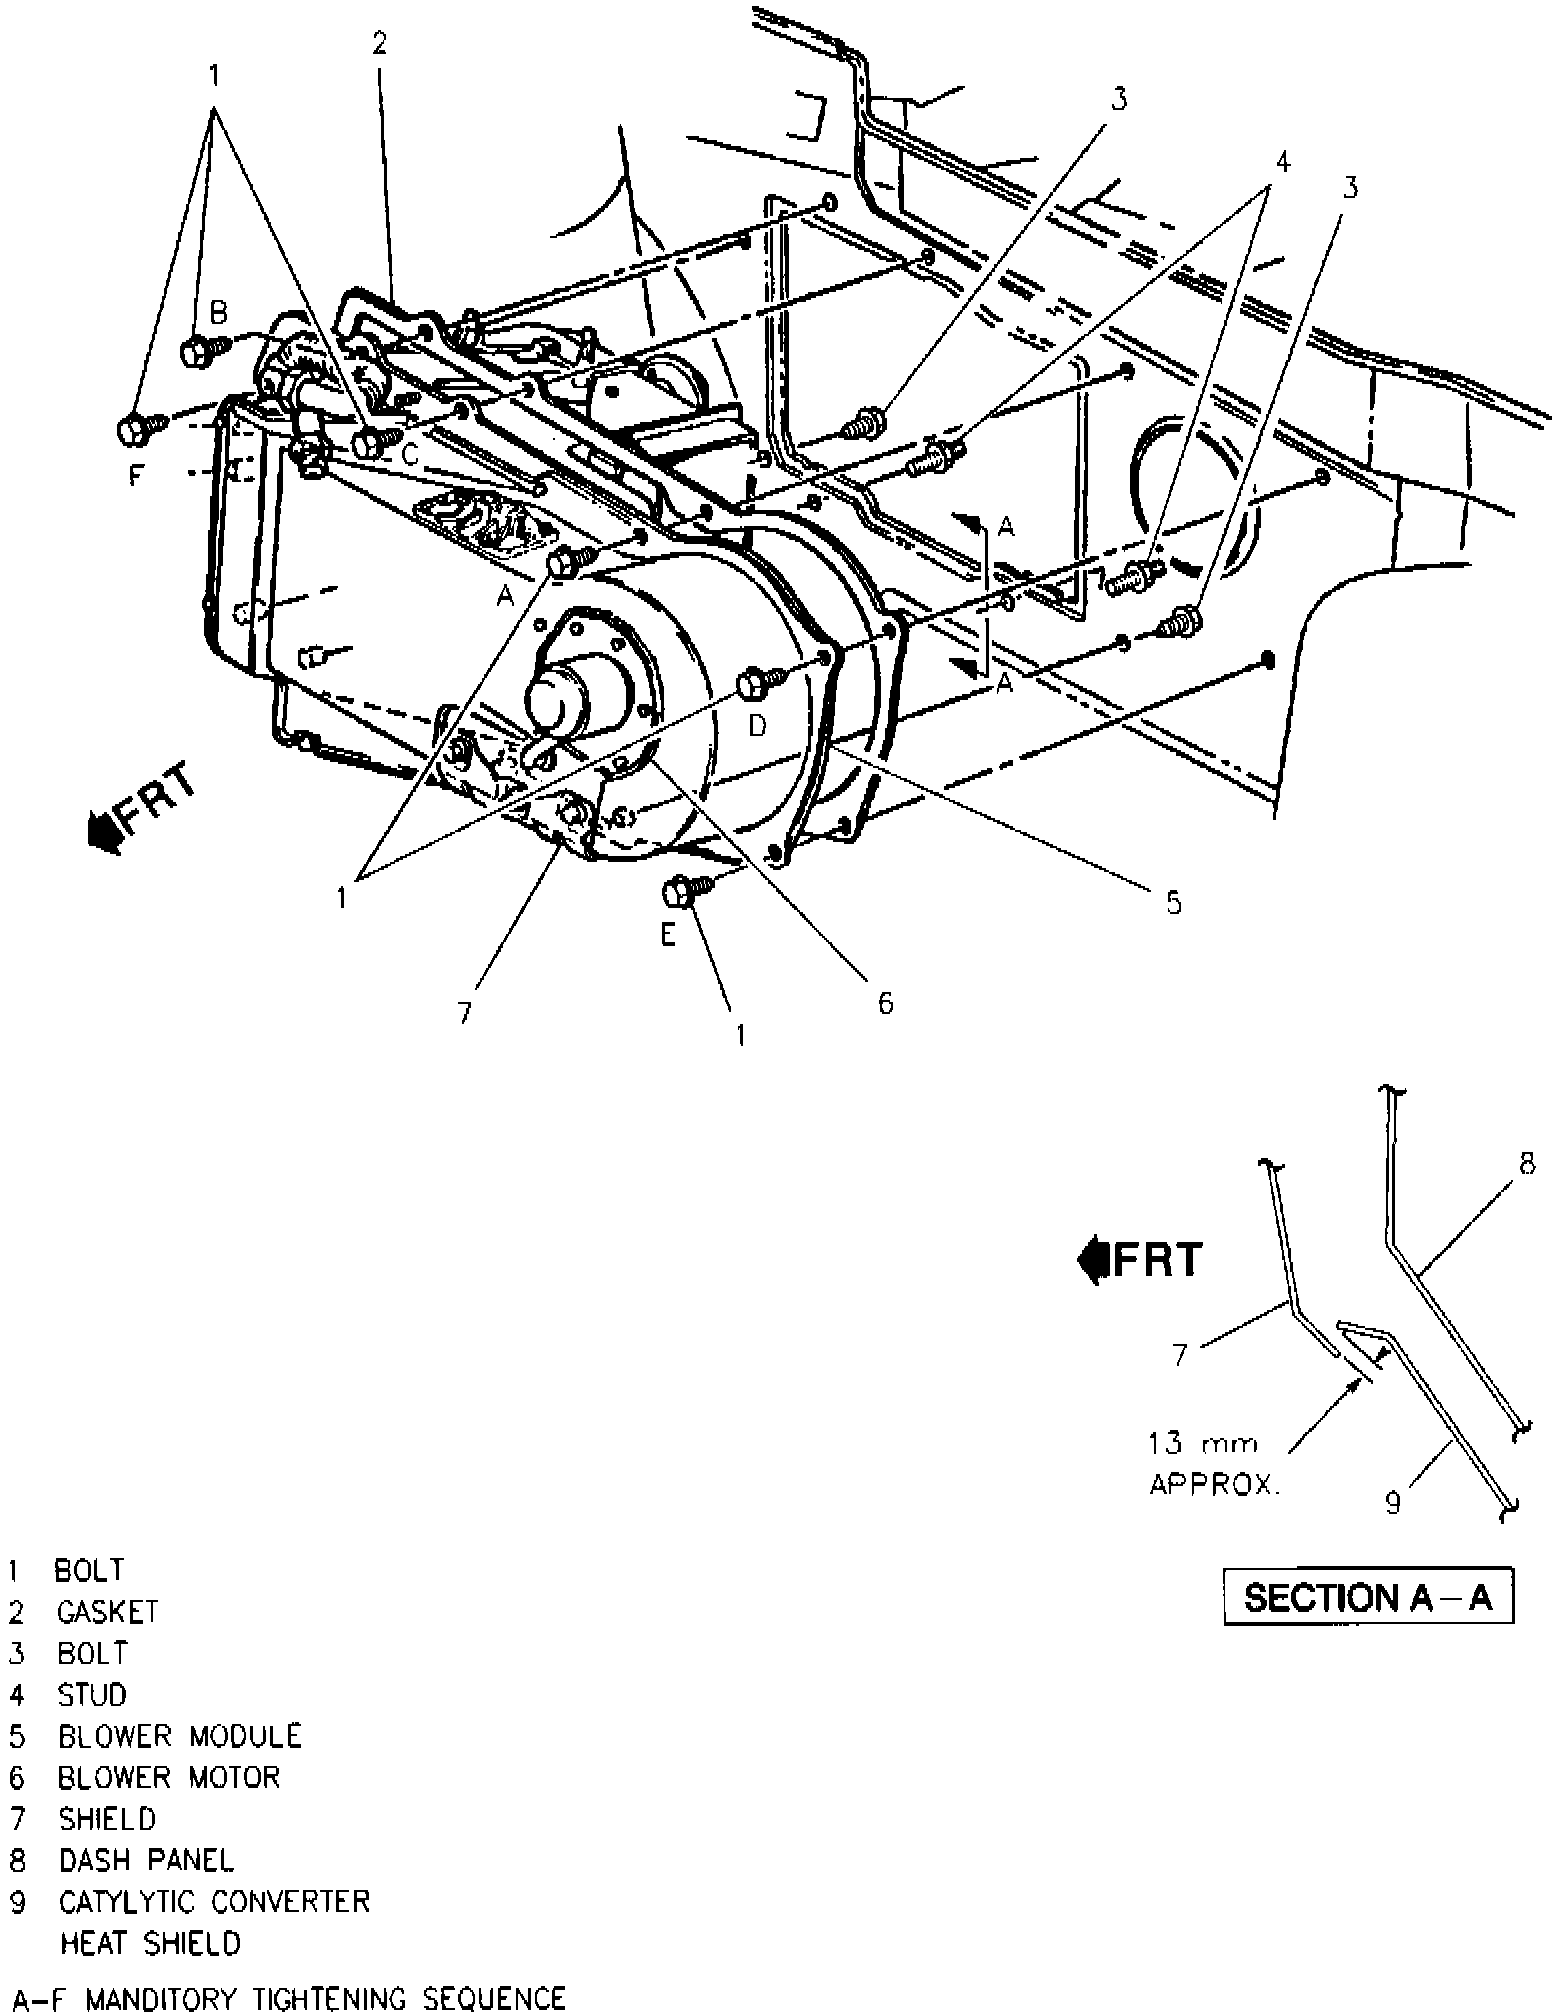
9. Remove blower motor, then the brackets and heat shield from blower module assembly, Fig. 27
10. Cut blower module assembly along indicated line, then remove bolts attaching blower module assembly to front of dash (driver's side only).
11. Remove large piece of blower module assembly insulation.
12. Remove screws from evaporator cover, then the evaporator.
13. Reverse procedure to install.