Automatic A/C
AIR CONDITIONING EVAPORATOR CORE REPLACEMENT
Tools Required
J 39400-A Halogen Leak Detector
REMOVAL PROCEDURE
1. Disconnect the underhood lamp electrical connector, if equipped.
2. Remove the hood.
3. Remove the PCM/VCM.
4. Remove the coolant recovery tank.
5. Disconnect the electrical connectors from the grille mounted lamps, if equipped.
6. Remove the right front headlamp assembly.
7. Remove the front bumper.
8. Remove the right wheelhouse panel.
9. Disconnect the radio antenna cable.
10. Disconnect the electrical connector for the horn.
11. Remove the right fender.
12. Remove the blower motor resistor.
13. Remove the accumulator.
14. Remove the evaporator tube.
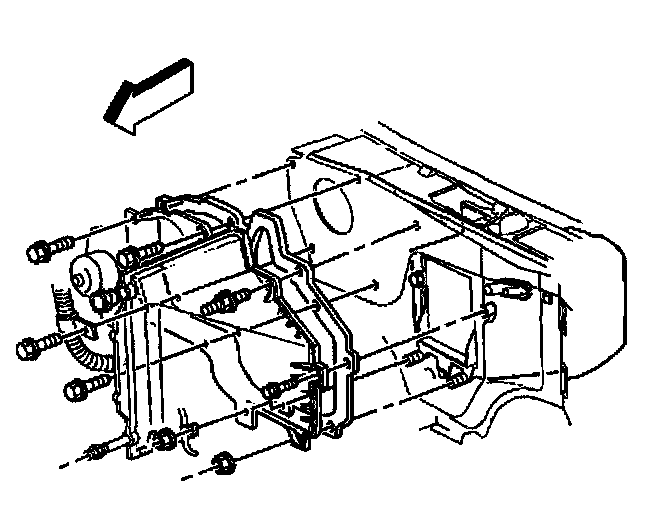
15. Remove the evaporator and blower module heat shield mounting screws.
16. Remove the evaporator and blower module heat shield.
Important: Retain the evaporator and blower module heat shield mounting brackets for installation.
17. Remove the evaporator and blower module mounting bolts and nuts.
18. Remove the evaporator and blower module from the vehicle.
19. Remove the 6 retaining screws holding the evaporator case section to the blower section.
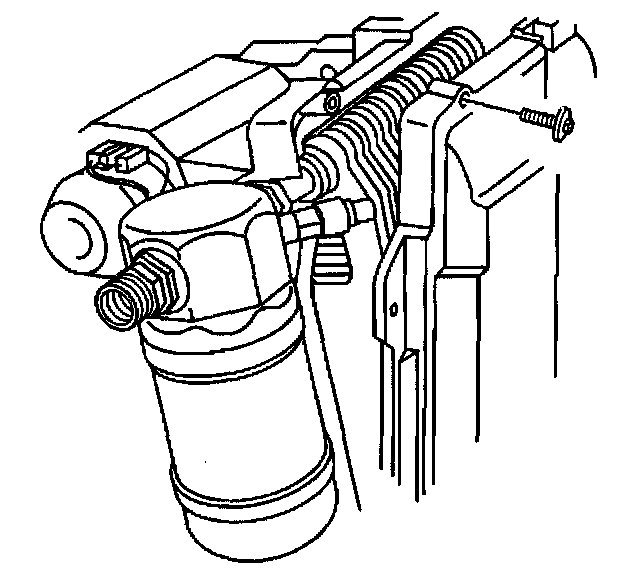
20. Separate the evaporator case section from the blower case section.
21. Remove the evaporator core from the blower case section.
22. Inspect the seals and replace as necessary.
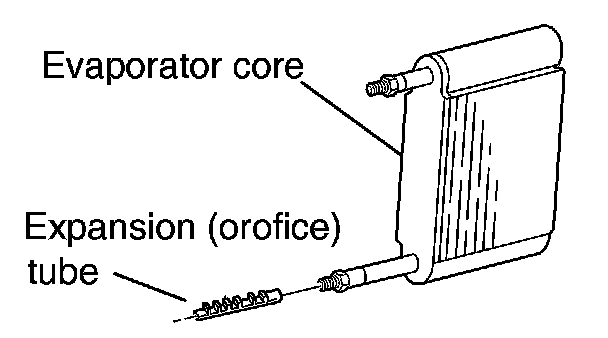
23. Remove the expansion (orifice) tube from the evaporator.
INSTALLATION PROCEDURE
1. Install the expansion (orifice) tube from the evaporator.
2. Install the evaporator core to the blower case sections.
Important: Ensure that the seal is in place between the 2 case sections.
3. Assemble the evaporator case section to the blower case sections.
4. Install the 6 retaining screws.
Tighten
- Screws to 1.9 N.m (17 lb in).
Important: Ensure that the evaporator and blower module to the cowl seal is in place.
5. Install the evaporator and blower module to the vehicle.
6. Install the evaporator and blower module mounting fasteners.
Tighten
- Bolts to 4.5 N.m (40 lb in).
7. Install the evaporator and blower module heat shield.
8. Install the evaporator and blower module heat shield mounting screws.
Tighten
- Screws to 2.2 N.m (19 lb in).
9. Install the evaporator tube.
10. Install the accumulator.
11. Install the blower motor resistor.
12. Install the right fender.
13. Connect the electrical connector for the horn.
14. Install the radio antenna cable.
15. Install the right front wheelhouse panel.
16. Install the front bumper.
17. Install the right front headlamp assembly.
18. Connect the electrical connectors to the grille mounted lamps.
19. Install the coolant recovery tank.
20. Install the PCM/VCM.
21. Install the hood.
22. Connect the underhood lamp electrical connector.
23. Evacuate and recharge the A/C system.
24. Leak test the fittings components using the J 39400-A.