A/T Range Selector Cable Replacement
REMOVAL PROCEDURECAUTION: The automatic transaxle range selector cable is made out of two cable sections. After initial connection never separate the two metal couplings from one another. Integrity of the connection of the two metal couplings will be lost if separation of the two metal couplings occurs. When servicing the transaxle remove the cable at the automatic transaxle range selector lever and at the automatic transaxle range selector cable bracket. If either section of the cable needs to be replaced, replace both of the cable sections. Loss of connection integrity of the two metal couplings can cause loss of transaxle shift control which could result in personal injury.
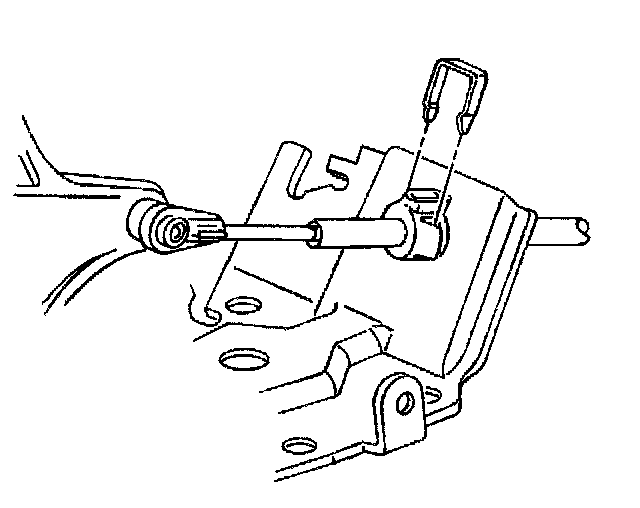
1. Turn the ignition OFF.
2. Set the parking brake.
3. Block the wheels.
4. Shift the transaxle into Neutral.
5. Remove the automatic transaxle range selector cable from the retainers in the engine compartment.
6. Remove the console.
7. Pull the carpet back in order to access the automatic transaxle range selector cable.
8. Remove the automatic transaxle range selector cable from the retainers in the passenger compartment.
9. Remove the automatic transaxle range selector cable end retainer.
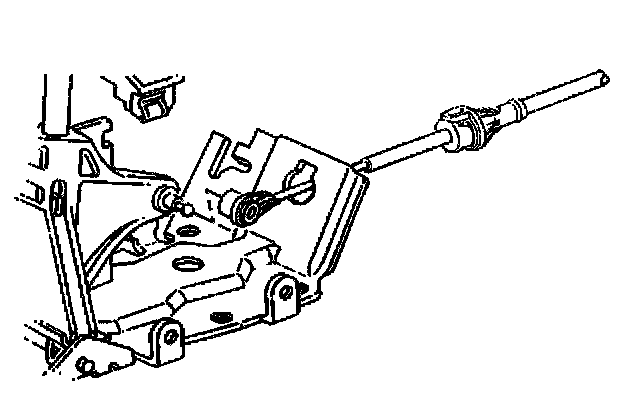
10. Remove the automatic transaxle range selector cable from the shift control.
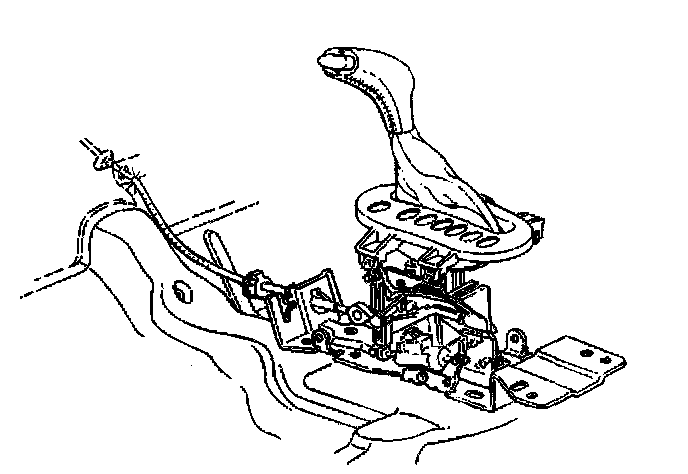
11. Remove the automatic transaxle range selector cable through the cowl and into the engine compartment.
12. Remove the throttle body air inlet duct.
13. Remove the automatic transaxle range selector cable from the wiring harness retainer.
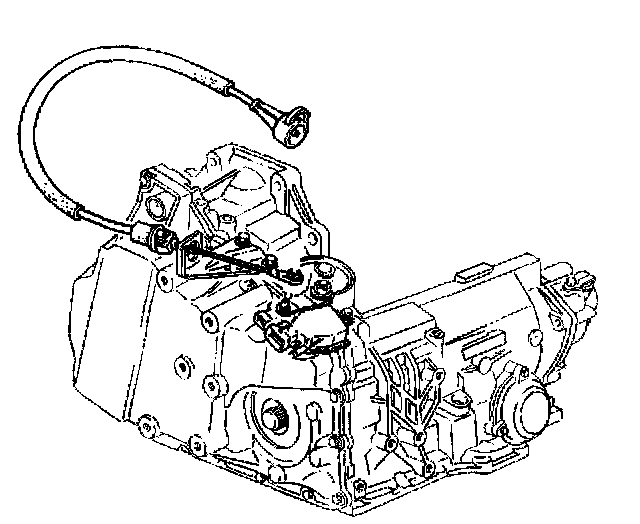
14. Remove the automatic transaxle range selector cable from the automatic transaxle range selector lever.
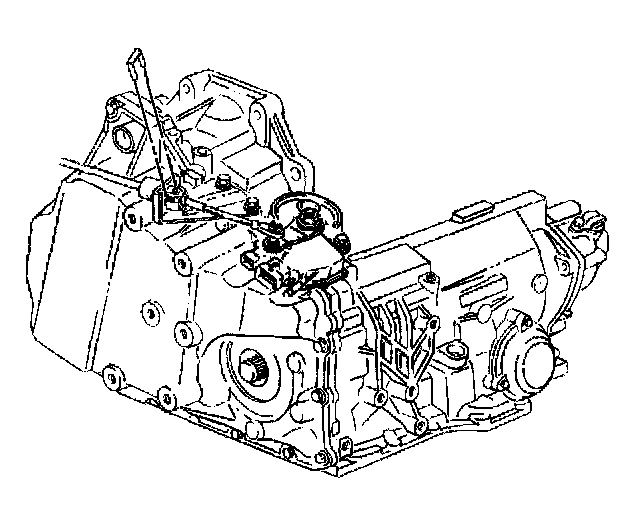
15. Remove the retainer from the automatic transaxle range selector cable end.
16. Depress the cable end retainers in order to remove the automatic transaxle range selector cable from the automatic transaxle range selector cable bracket.
17. Remove the automatic transaxle range selector cable from the engine compartment.
INSTALLATION PROCEDURE
CAUTION: The automatic transaxle range selector cable is made out of two cable sections. After initial connection never separate the two metal couplings from one another. Integrity of the connection of the two metal couplings will be lost if separation of the two metal couplings occurs. When servicing the transaxle remove the cable at the automatic transaxle range selector lever and at the automatic transaxle range selector cable bracket. If either section of the cable needs to be replaced, replace both of the cable sections. Loss of connection integrity of the two metal couplings can cause loss of transaxle shift control which could result in personal injury.
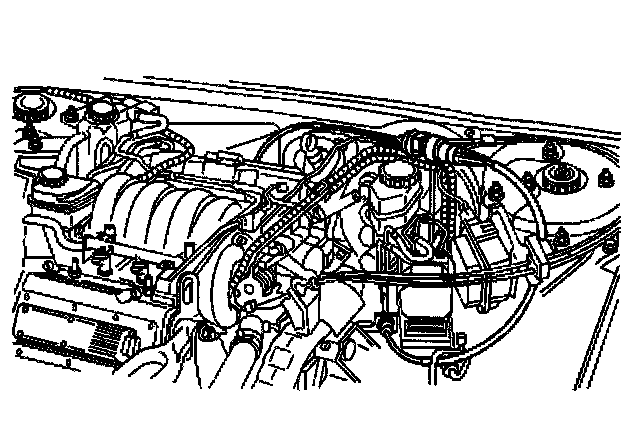
1. Properly route and position the automatic transaxle range selector cable (transmission end) into the engine compartment.
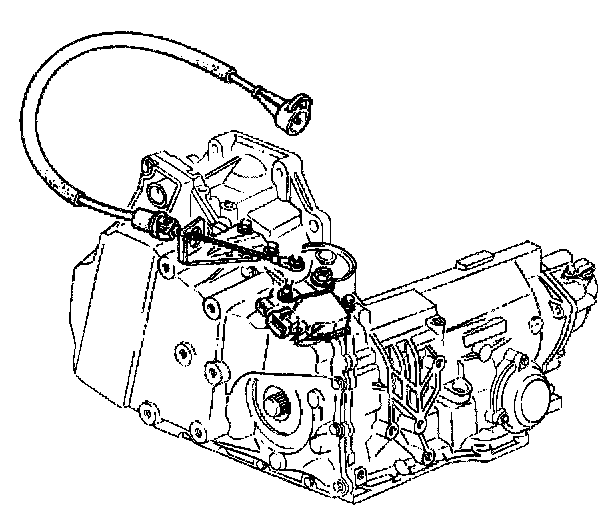
2. Install the automatic transaxle range selector cable to the automatic transaxle range selector cable bracket and the automatic transaxle range selector lever.
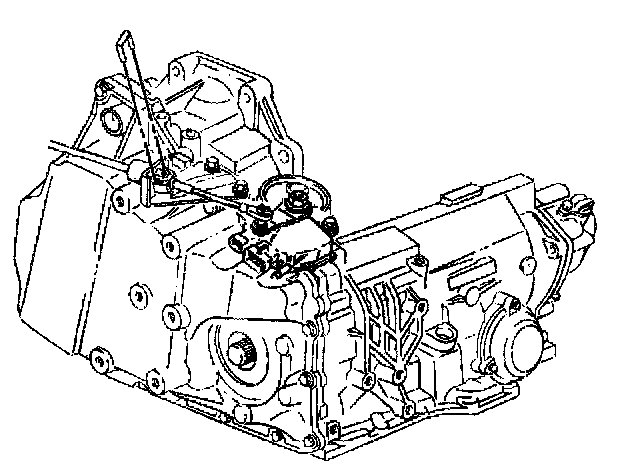
3. Install the retainer to the automatic transaxle range selector cable end.
4. Install the automatic transaxle range selector cable to the engine compartment wiring harness retainers.
5. Install the automatic transaxle range selector cable (shift control end) through the cowl.
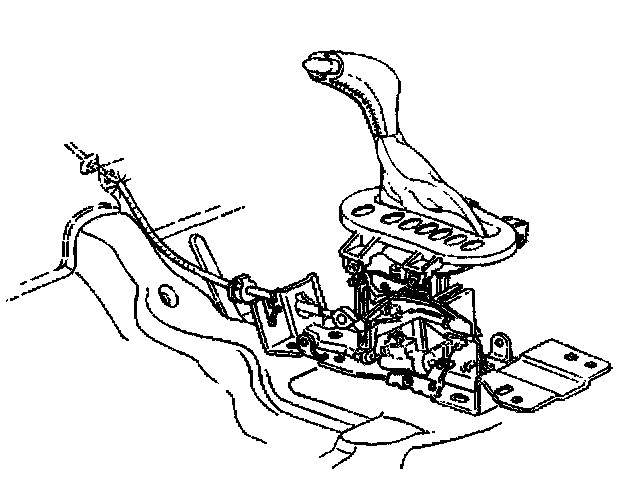
6. Install the automatic transaxle range selector cable through the console shift control bracket.
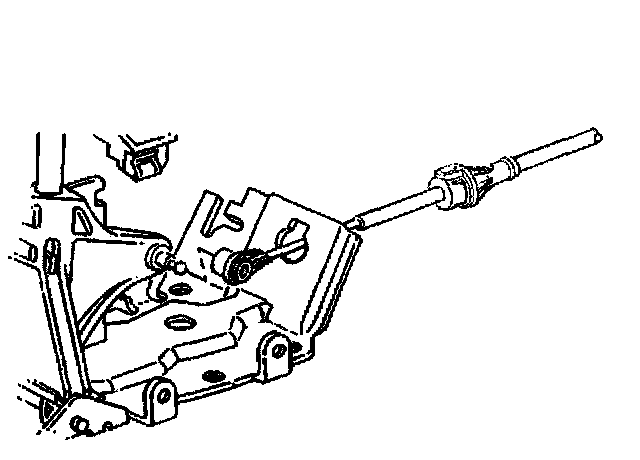
7. Install the automatic transaxle range selector cable to the shift control.
8. Install the automatic transaxle range selector cable end retainer.
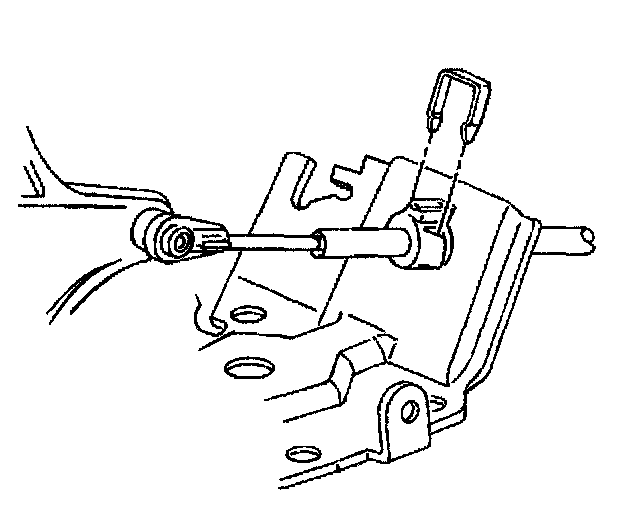
9. Install the automatic transaxle range selector cable to the retainers in the passenger compartment.
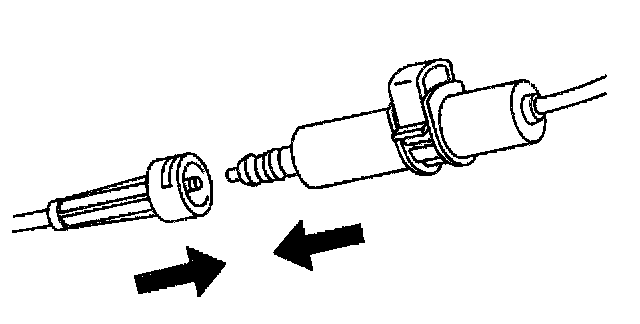
10. Use the cable molded ends in order push the cable core ends together until the cable cores lock together within the cable core connector.
NOTICE: Adjust the automatic transaxle range selector cable while the transaxle and while the gear selector are in the Neutral position only. Failure to do so may cause mis-adjustment.
IMPORTANT: Ensure that the transaxle AND the shift control are in Neutral.
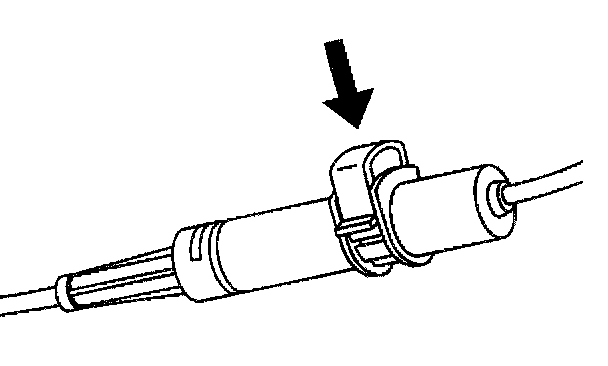
11. Press the adjuster clip down to the first detent. This will allow the adjuster spring to move the cable halves together.
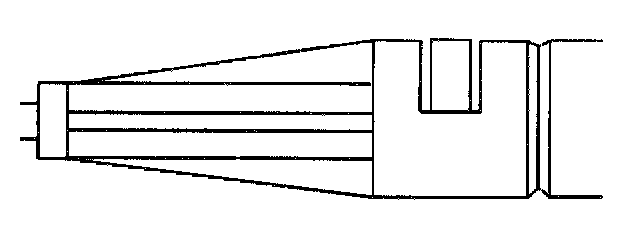
12. Ensure that the cable halves are engaged completely and engage the cable conduit lock clip.
IMPORTANT: The cable conduit lock clip MUST be COMPLETELY engaged.
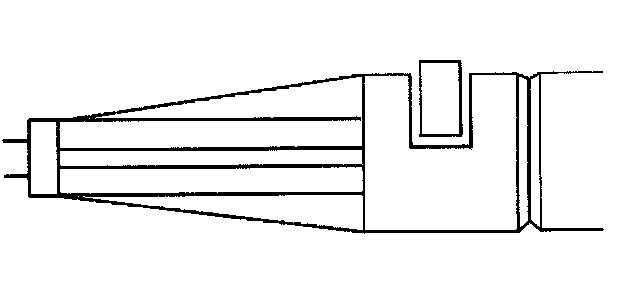
13. In this example, the cable lock clip is NOT completely engaged because the clip is not flush with the cable casing.
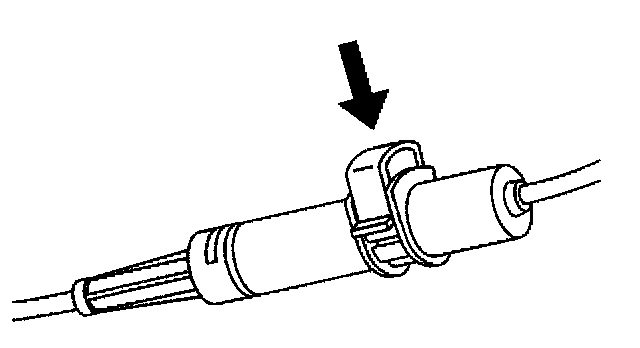
14. Press the adjuster clip down completely.
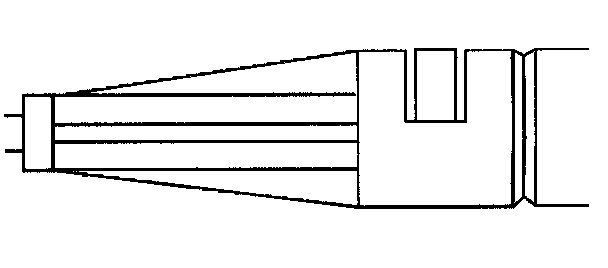
15. Pull the shift cable adjuster toward the shift control in order to ensure that the cable halves are locked together.
16. Install the shift cable adjuster retainer.
17. Install the carpet back into position.
18. Install the console.
19. Install the throttle body air inlet duct.