Endgate Trim Panel Replacement
Endgate Trim Panel Replacement
Removal Procedure
1. Open the endgate.
2. Remove the screws that retain the inside handle to the endgate.
3. Remove the endgate inside handle from the endgate.
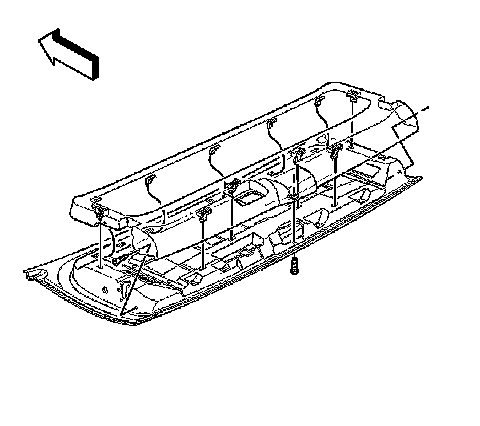
4. Remove the screw that retains the endgate trim panel to the endgate window latch support.
5. Remove the screws that retain the endgate trim panel to the endgate.
6. Remove the endgate trim panel from the endgate:
1. Release the retaining clips from the upper edge and the sides of the trim panel.
2. Lift the panel up in order to release the tabs along the bottom edge.
Installation Procedure
1. Install the endgate trim panel to the endgate.
Notice: Refer to Fastener Notice in Service Precautions.
2. Install the screws that retain the endgate trim panel to the endgate.
Tighten the screws to 1.9 N.m (17 lb in).
3. Install the screw that retains the endgate trim panel to the endgate window latch support.
Tighten the screw to 1.9 N.m (17 lb in).
4. Install the endgate inside handle to the endgate.
Tighten the handle to 2.8 N.m (25 lb in).