Control Arm Bushing: Service and Repair
DISASSEMBLY1. Remove the upper control arm from the vehicle.
CAUTION: The upper control arm used on this vehicle has an anodized finish applied to it. For this reason, the control arm should not be clamped in a vise when replacing the isolator bushings.
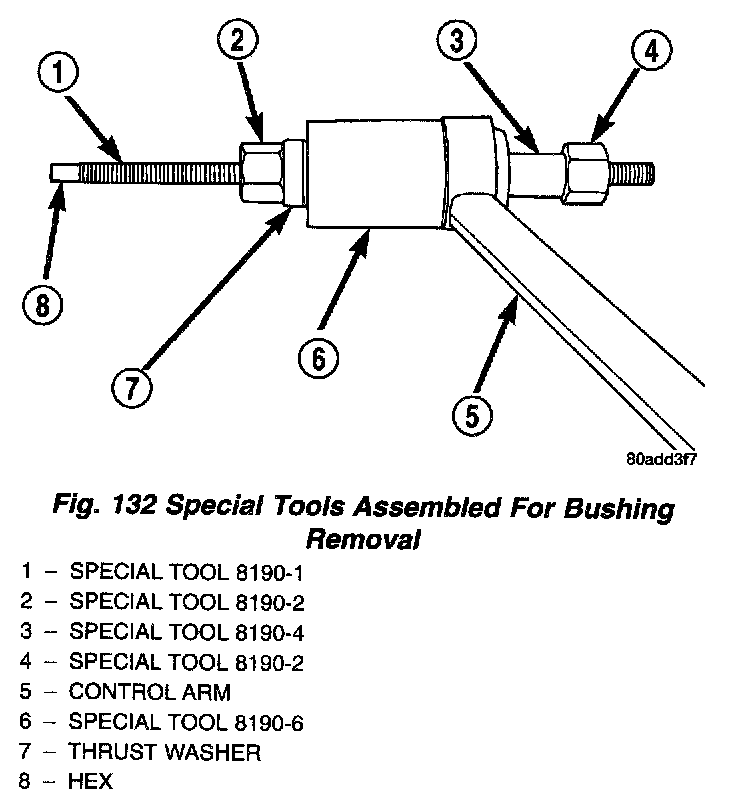
2. Assemble pieces of Bushing Remover/Installer, Special Tool 8190, as shown in for removal of the upper control arm isolator bushing.
3. Isolator bushing is removed from control arm using the following procedure. Keep Bolt, Special Tool 8190-1 from turning by holding it with a box end wrench on the hex. Turn Nut Special Tool 8190-2 that is against the thrust bearing. This will pull Special Tool 8190-4 and the isolator bushing into Special Tool 8190-6 removing the isolator bushing from the control arm.
ASSEMBLY
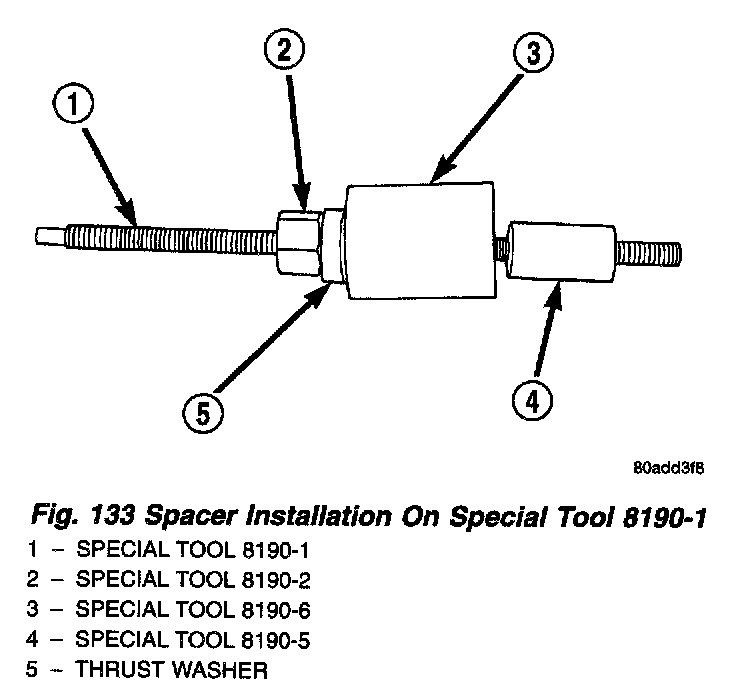
1. Assemble pieces of Bushing, Remover/Installer, Special Tool 8190
CAUTION: Do not attempt to install the isolator bushing into the control arm without using a lubricant on the bushing and tool.
NOTE: Prior to assembling Bushing Remover/Installer, Special Tool 8190 and the isolator bushing on the control arm, thoroughly coat the isolator bushing and inside of special tool 8190-3 with Mopar Silicone Spray Lube or an equivalent.
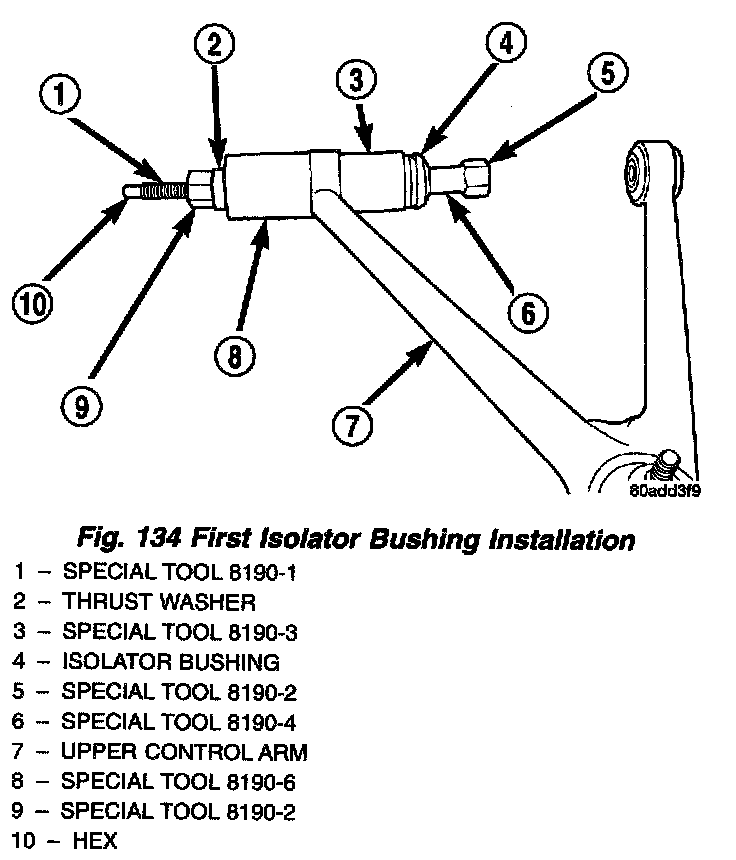
2. Assemble pieces of Bushing Remover/Installer, Special Wool 8190 and the isolator bushing.
3. Isolator bushing is installed in upper control arm using following procedure. Keep Bolt, Special Tool 8190-1 from turning by holding it with a box end wrench on the hex. Turn Nut Special Tool 8190-2 that is against the thrust bearing. This will pull Special Tool 8190-4 and the isolator bushing into Special Tool 8190-3. This will size the isolator bushing allowing it to be installed in the control arm.
4. Continue turning Nut Special Tool, 8190-2 until it can no longer be turned. When the nut can no longer be turned, the isolator bushing is seated against Spacer Special Tool, 8190-5. At this point the isolator bushing in fully installed in the upper control arm.
NOTE: When removing special tools from control arm, Special Tool 8190-3 may be caught on the lip of the isolator bushing. Carefully rock Special Tool 8190-3 back and forth to work the lip of the Isolator bushing out of the tool.
5. Disassemble the special tools and remove them from the isolator bushing and control arm.
6. Check the lips on the isolator bushings to ensure they are evenly seated on the control arm.