Removing and Installing Condenser-Condenser Line
Removing And Installing Condenser-condenser Line
Technical values

Preliminary work
Preliminary work for line condenser-condenser
Removing front apron.
Draining refrigerant.
Removing the condenser-condenser line
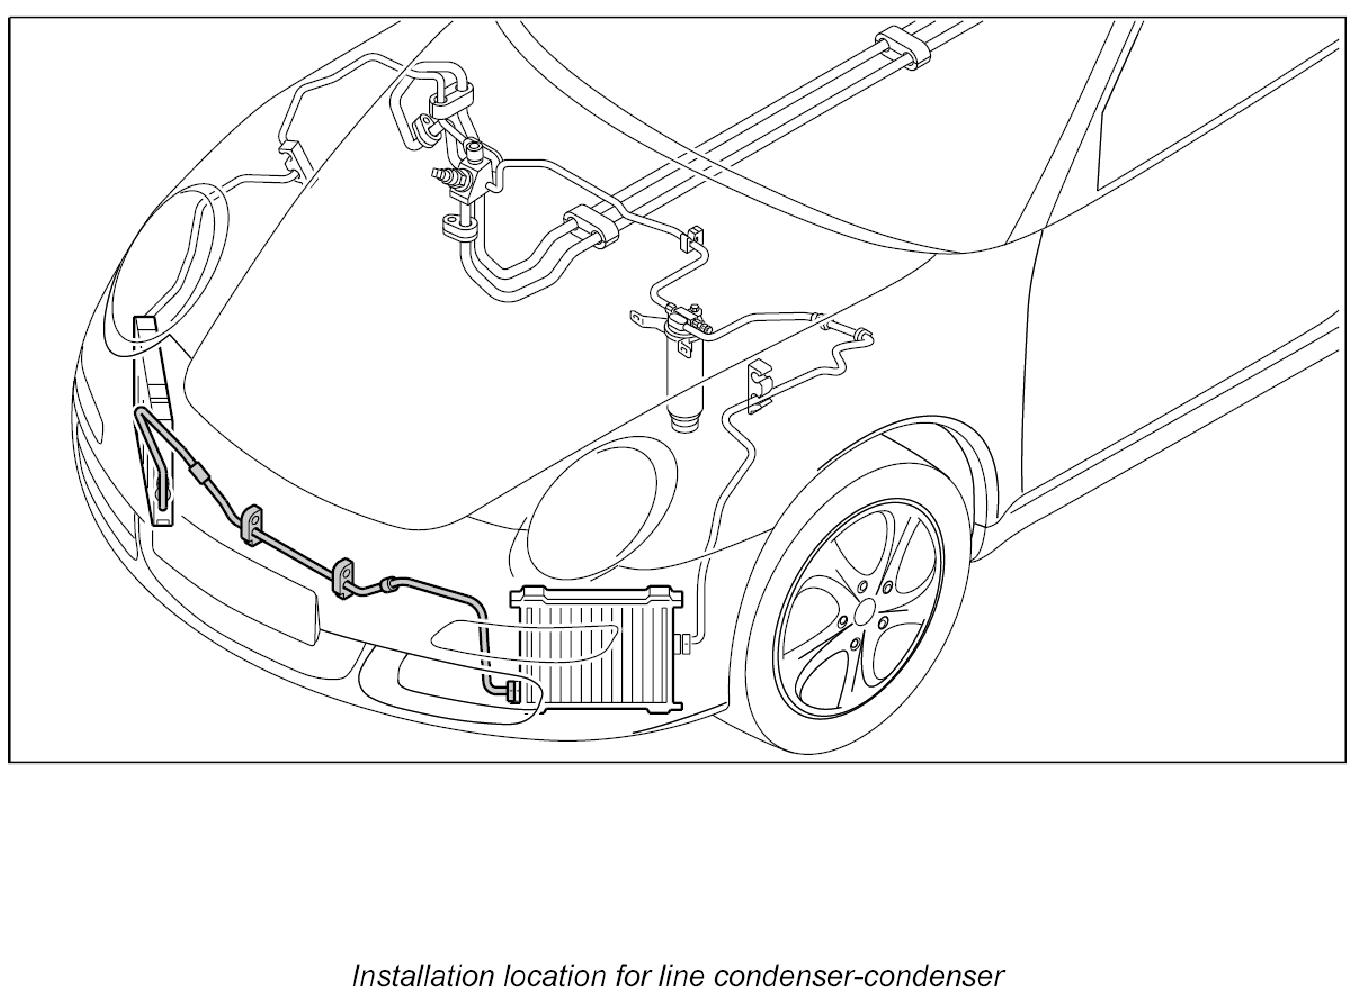
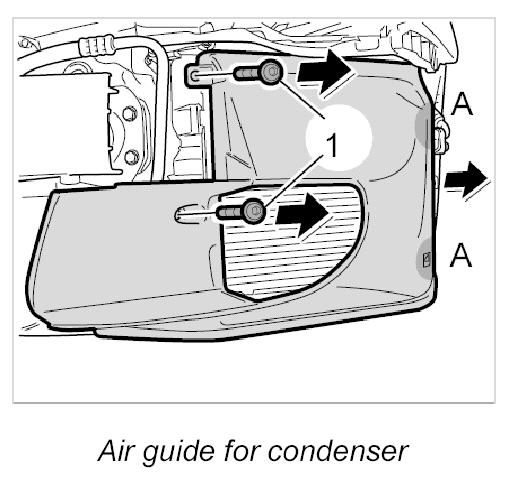
1. Unscrew the two fastening screws -1- holding the air guide for the condenser.
2. Pull the air guide forward and disengage it at the condenser -A-.
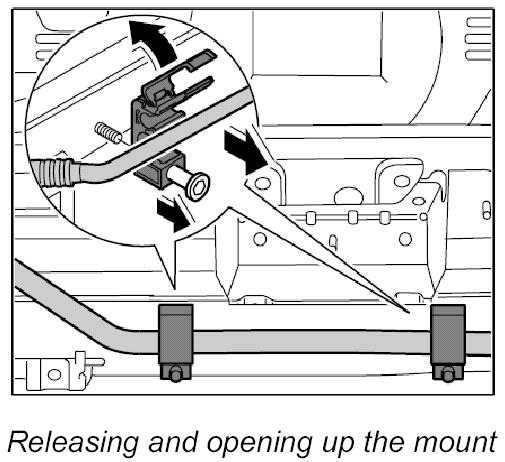
3. Unscrew the fastening nuts for both holders line, open the holder and take out the line.
INFORMATION:
- When loosening or tightening the M8 refrigerant lines on the condenser, always counter with a 21-mm open-ended wrench.
- Before re-installing the component, check the O-rings of the refrigerant lines for damage and replaced them if necessary.
Wet the O-rings of the refrigerant lines with refrigerant oil.
- Do not open the plugs for the lines and connections until shortly before installation.
- Close off all lines and connections using suitable plugs during removal.
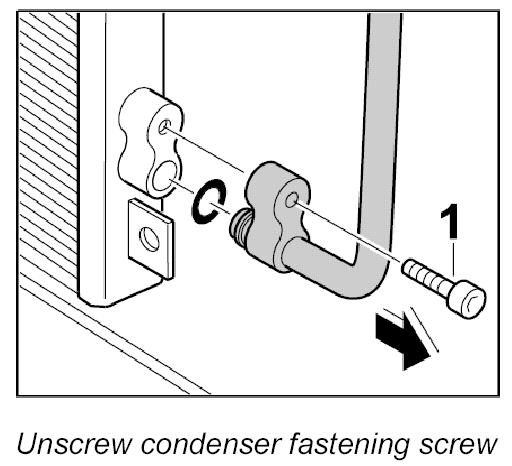
4. Unscrew the fastening screws -1- of the line condenser-condenser and pull the line out of both condensers.
Installing the condenser-condenser line
INFORMATION:
- When loosening or tightening the M8 refrigerant lines on the condenser, always counter with a 21-mm open-ended wrench.
- Before re-installing the component, check the O-rings of the refrigerant lines for damage and replaced them if necessary.
- Wet the O-rings of the refrigerant lines with refrigerant oil.
- Do not open the plugs for the lines and connections until shortly before installation.
- Close off all lines and connections using suitable plugs during removal.
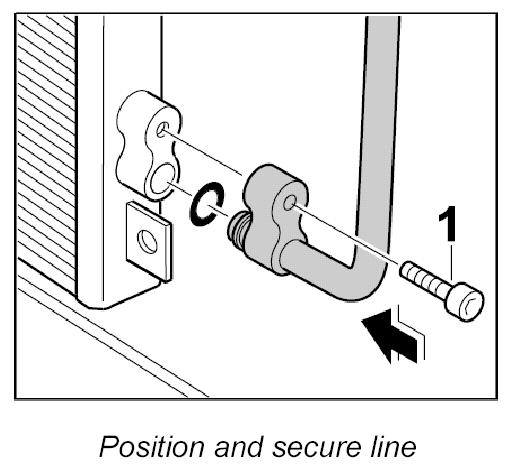
1. Carefully push the lines into the condensers and screw tight with the fastening screws.
Tightening torque: 14 Nm (10.5 ftlb.)
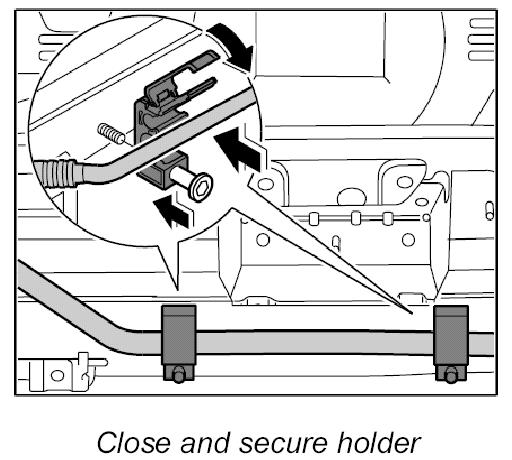
2. Attach line to both holders, close holders and secure with fastening screws.
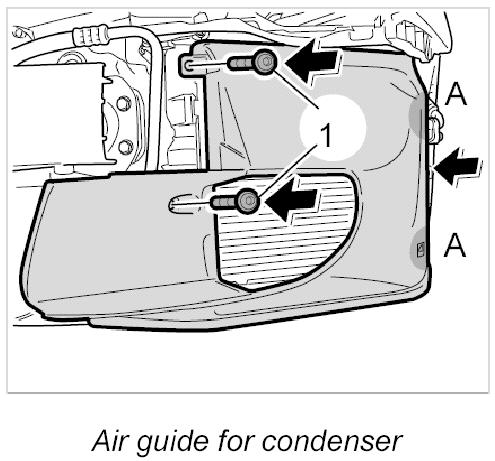
3. Engage air guide on condenser -A- and screw down using the two fastening screws -1-.
Tightening torque: 4 Nm (3 ftlb.)
Subsequent work
Subsequent work for line condenser-condenser
Filling in refrigerant.
Install front apron.