Timing Chain Guide: Service and Repair
Removing and installing guide and tensioning railsTools
Preliminary work
1. Remove top and bottom chain case lid.
2. Remove timing chains.
Information
Component information
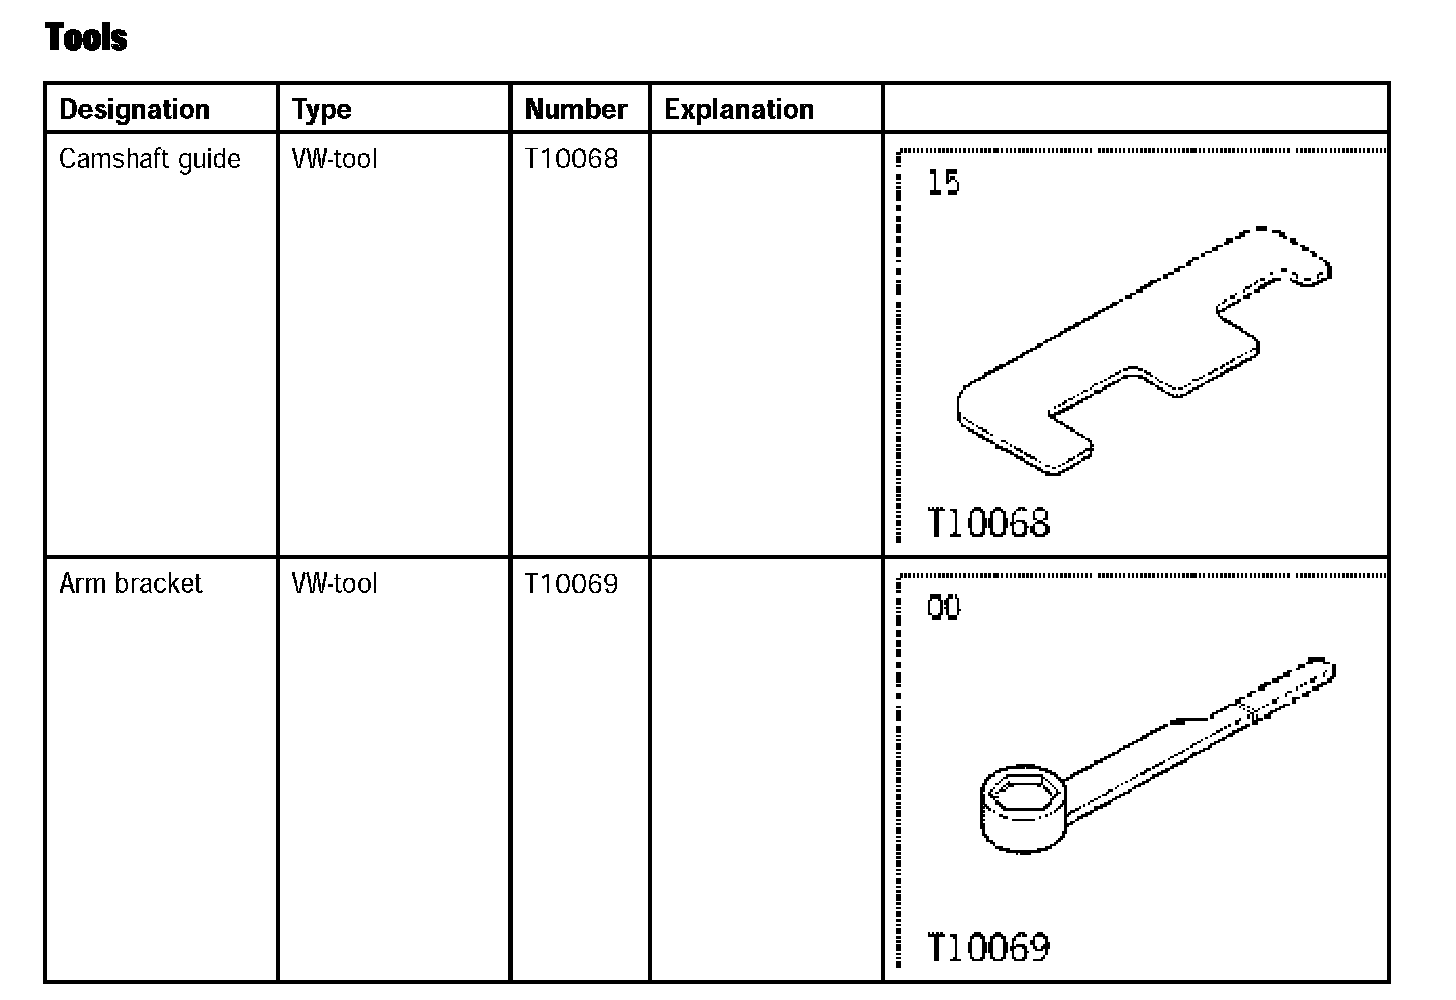
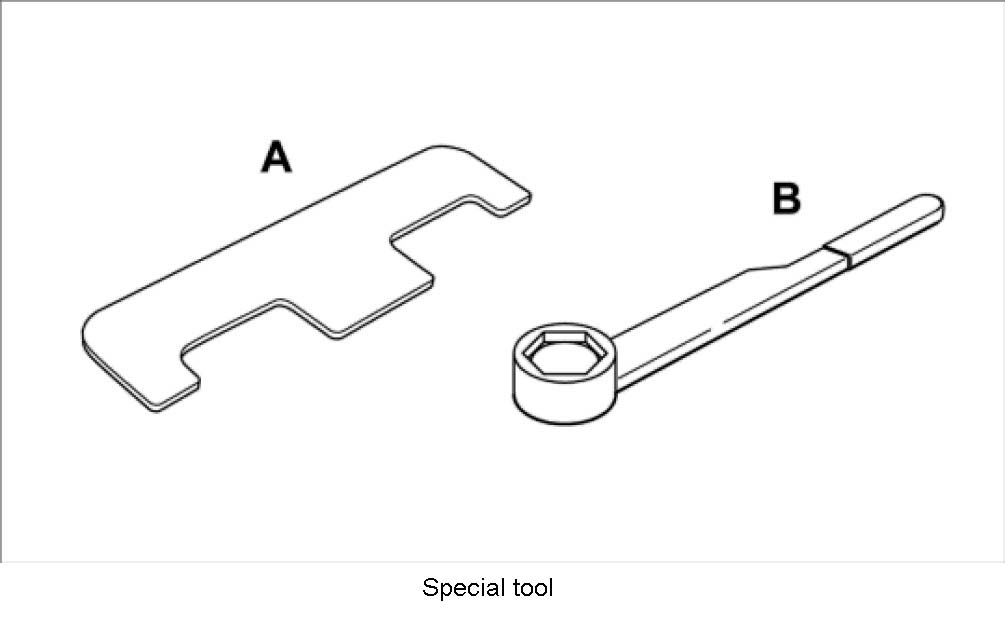
Tools and materials
Note: The tools can be purchased from the VW Parts Service.
Note: Observe the most important working regulations and warning notes.
Replacing guide and tensioning rails
Removing guide and tensioning rails
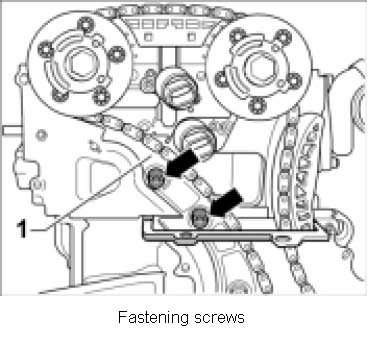
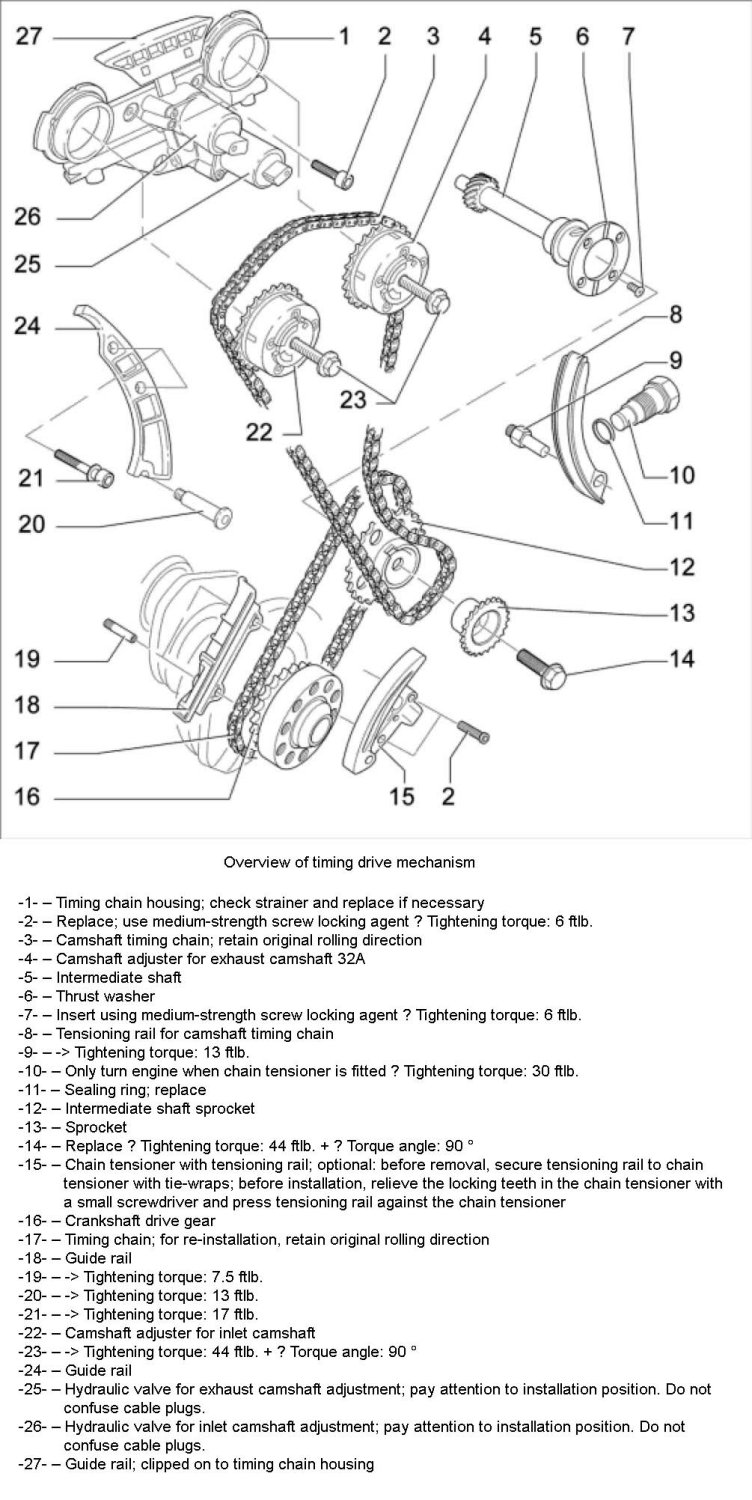
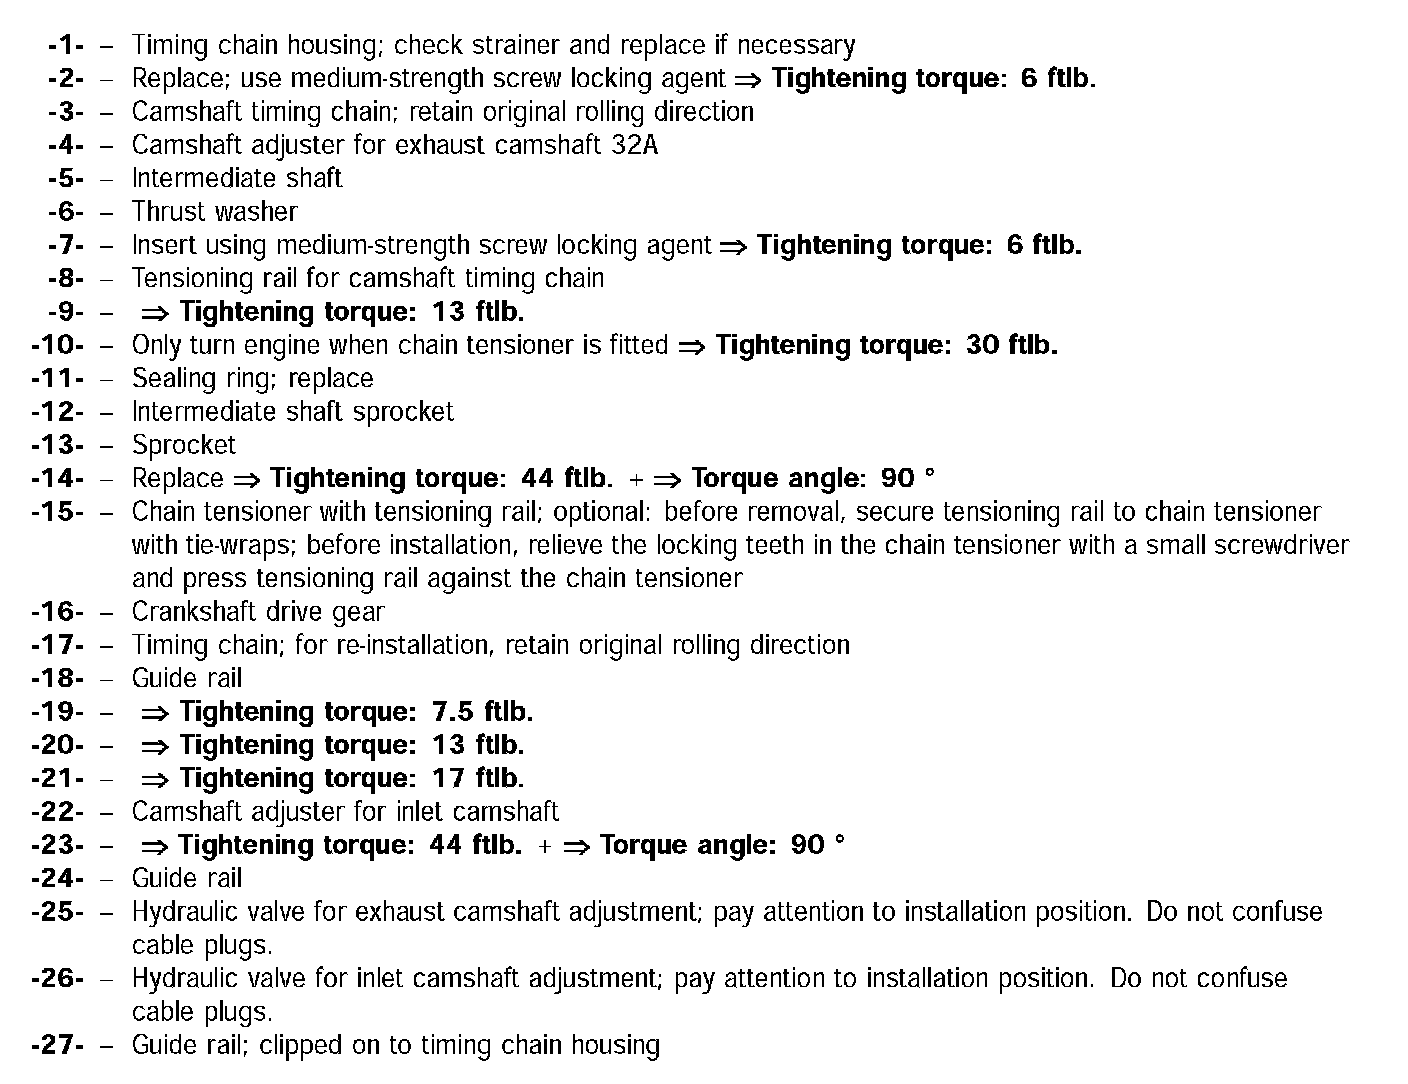
1. Remove black guide rail -1- by loosening the two fastening screws (M8 x 43). To do this, pull guide rail off bolt.
2. Fold tensioning rail down between the cylinder-head gasket -8- and pull off bolt -9-.
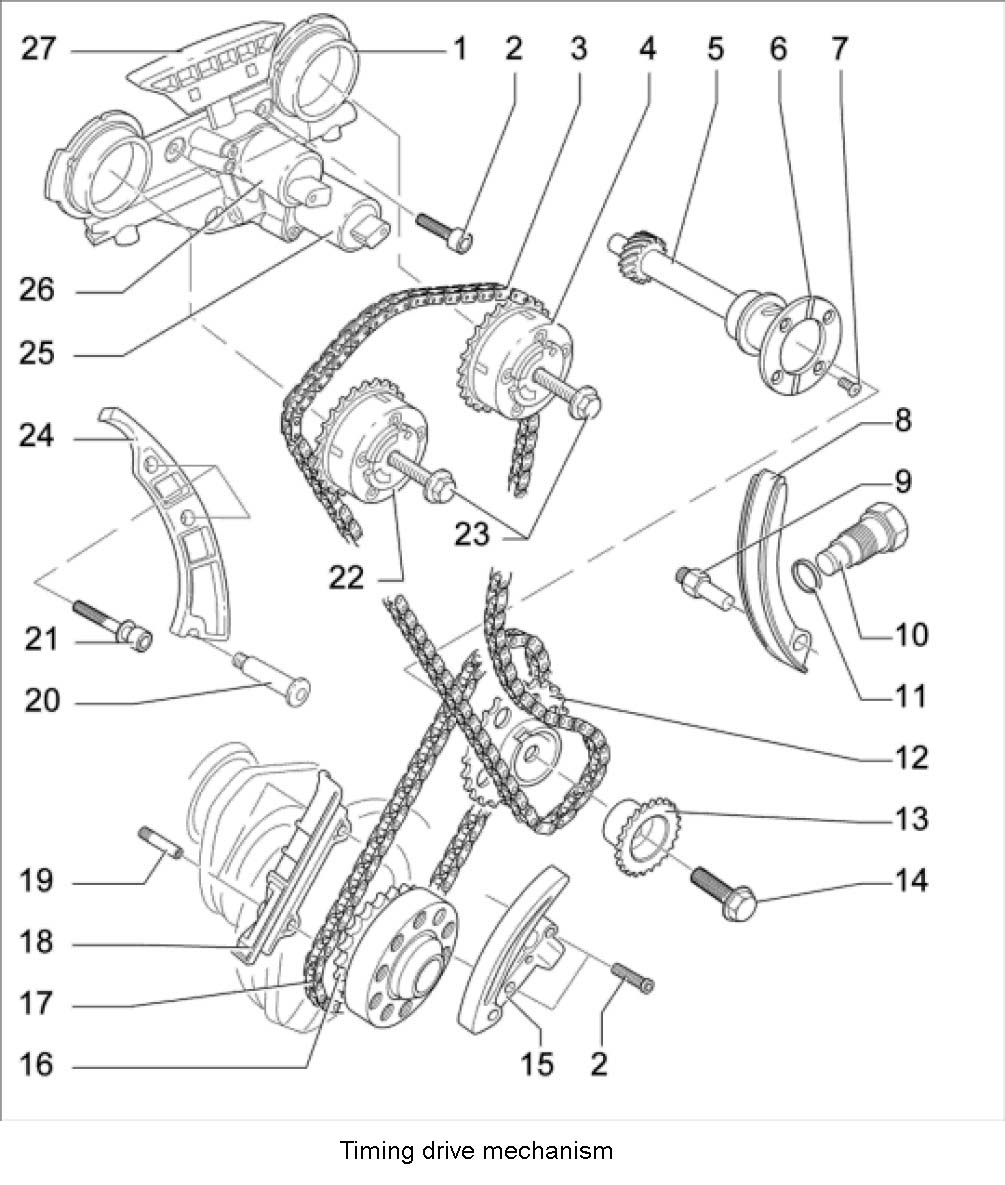
3. Pull guide rail for bottom timing chain -18- off the bolts -19-.
Installing guide and tensioning rails
1. Push guide rail for bottom timing chain -18- on to the bolts -19-.
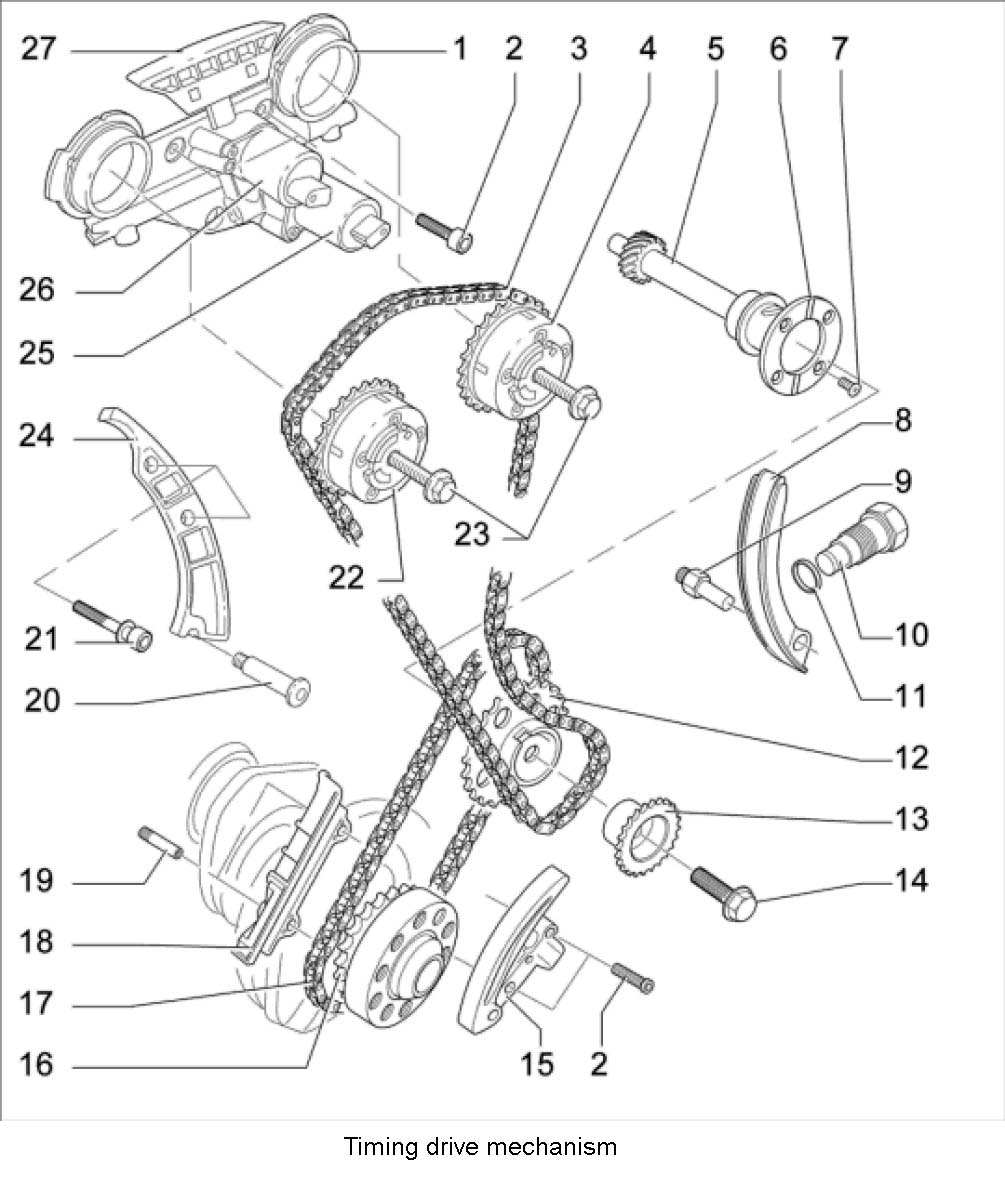
2. Install bottom timing chain, and fit bottom chain tensioner -15- at the same time. Tightening torque: 6 ft-lb.
3. Slide tensioning rail for top timing chain -8- underneath the cylinder-head gasket on to the fastening bolt -9- and fold tensioning rail up.
4. Install top timing chain. To do this, slide the black guide rail -24- on to the fastening bolts -20- and tighten both fastening screws -21-. Tightening torque: 17 ft-lb.
Subsequent work
Reworking
1. Set the timing.
2. Install both chain case lids.