Marker Lamp: Service and Repair
WM 942719 Removing and installing light bulb for marker light
Preliminary work
1. Remove the front apron. -> 631519 Removing and installing front apron - section on "Removing"
Removing light bulb for marker light
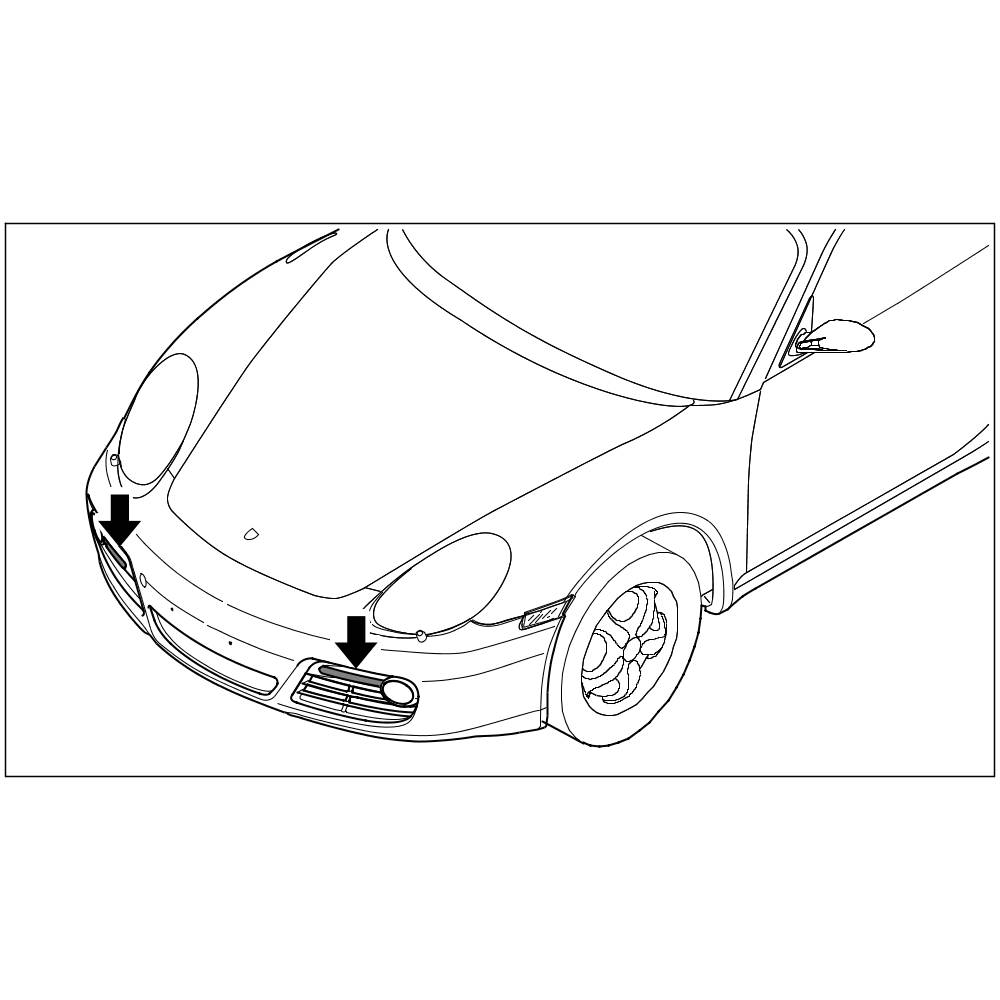
Installation position of light bulb for marker light
1. Loosen light bulb for marker light.
1.1. Release -arrow A- and pull off -arrow B- connector.
1.2. Unscrew the two fastening screws -1-.
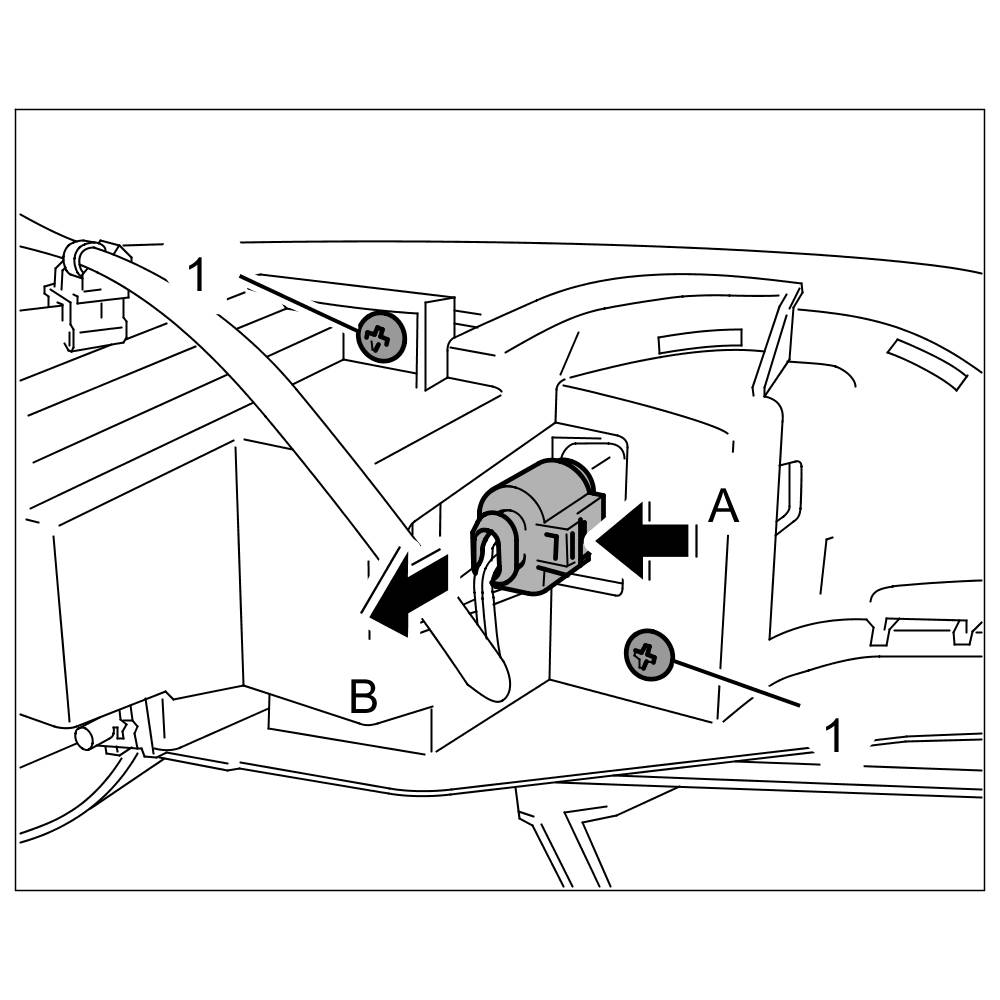
Loosening light bulb for marker light
2. Remove light bulb for marker light.
2.1. Remove light bulb for marker light with the lower guide out of the front apron -arrow A-. Turn the light bulb anti-clockwise to do this.
2.2. Remove light bulb for marker light with the upper guide out of the front apron -arrow B-.
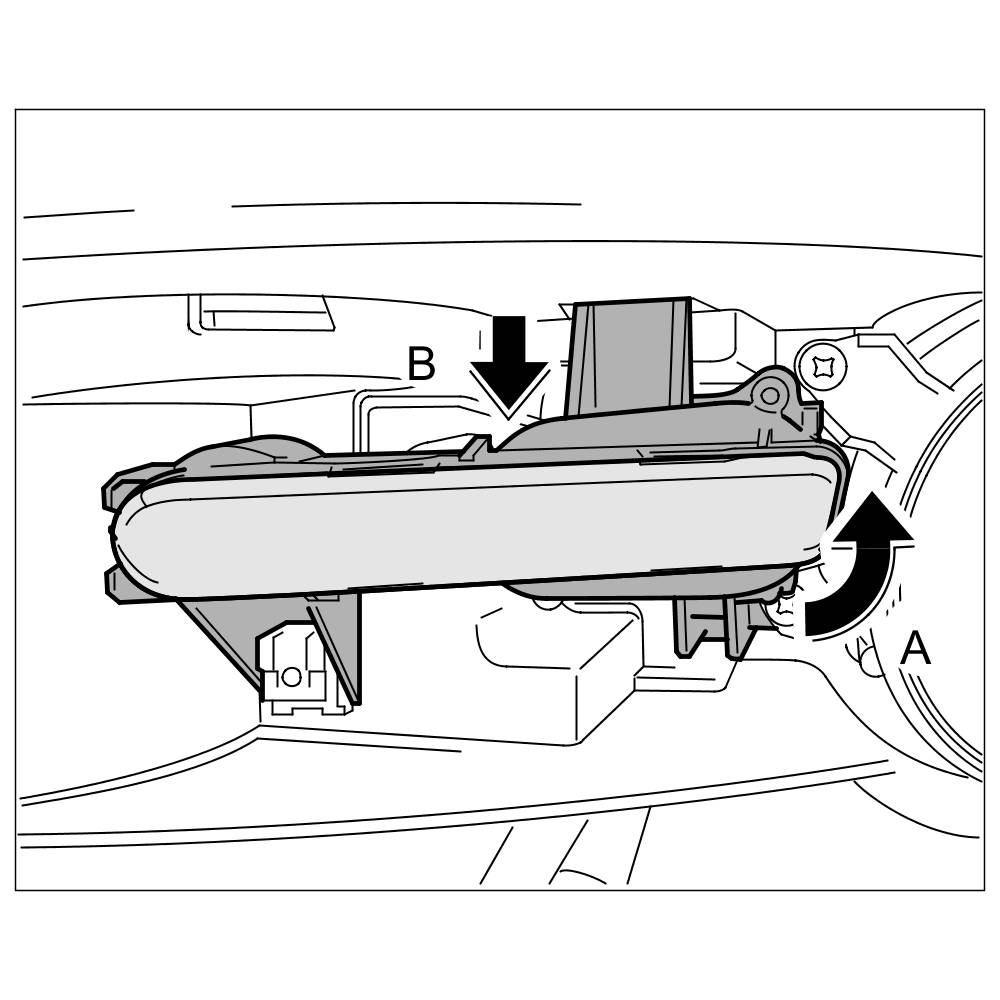
Removing light bulb for marker light
Installing light bulb for marker light
1. Install light bulb for marker light.
1.1. Fit light bulb for marker light with the upper guide into the front apron -arrow A-.
1.2. Fit light bulb for marker light with the lower guide into the front apron -arrow B-. Turn the light bulb clockwise to do this.
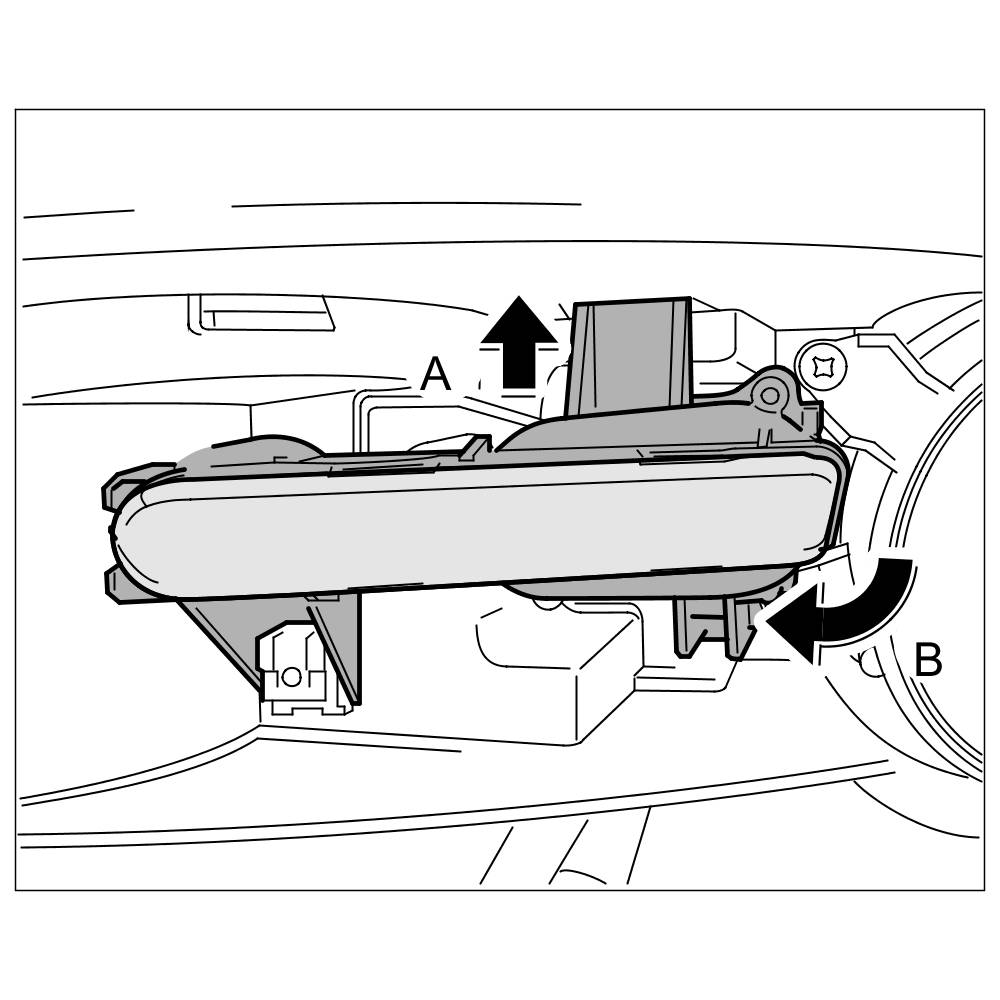
Installing light bulb for marker light
2. Secure light bulb for marker light.
2.1. Secure light bulb for marker light with the two fastening screws -1-.
2.2. Plug in the connector -arrow- until it engages securely.
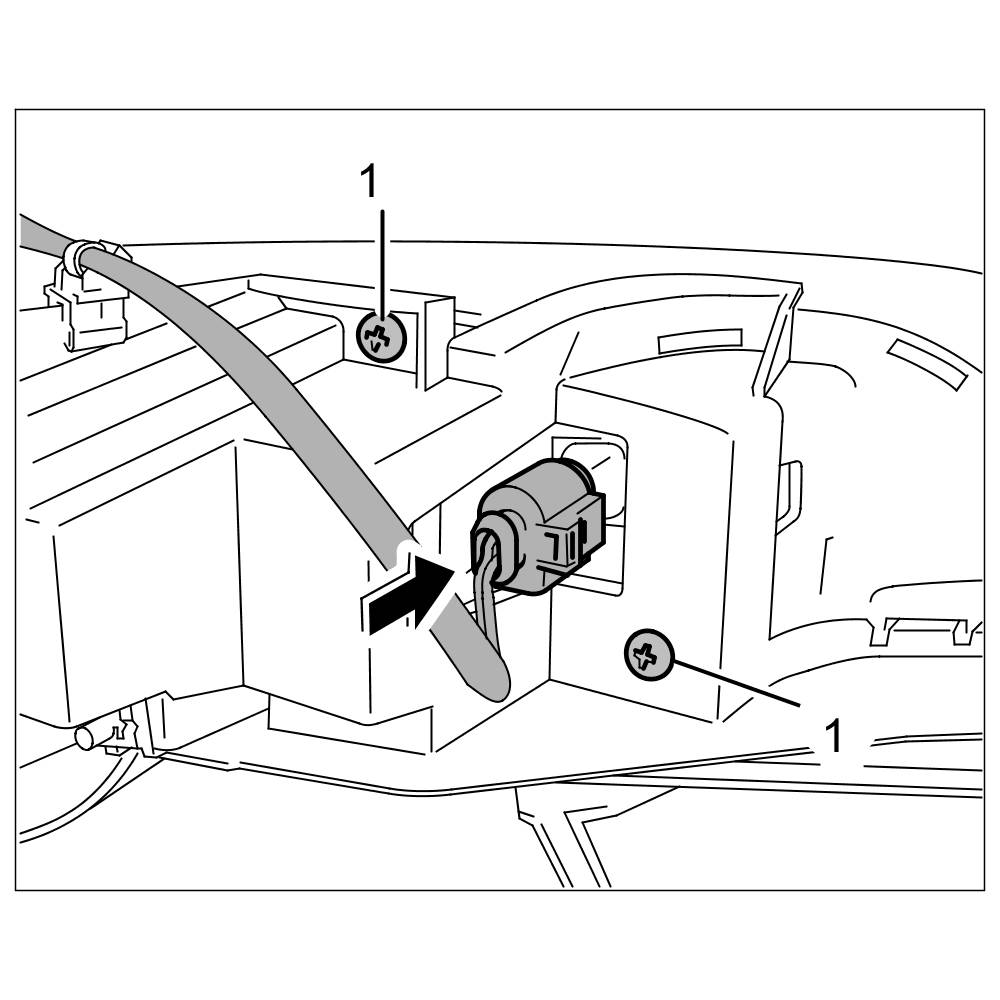
Securing light bulb for marker light
Subsequent work
1. Install the front apron. -> 631519 Removing and installing front apron - section on "Installing"