Lower Control Arm Replace
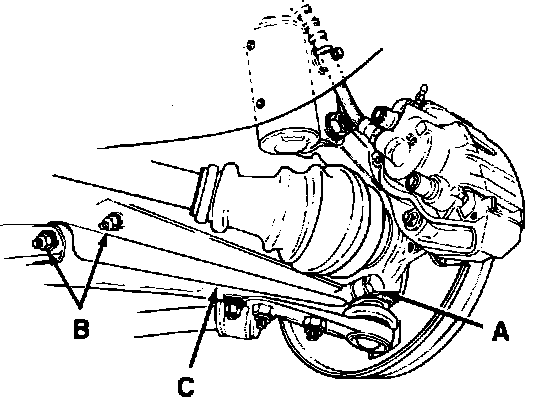
Fig. 1 Lower control arm installation.:
1. Remove sway bar.
2. Raise and support side of vehicle to be serviced.
3. Remove wheel.
4. Remove lower ball joint pinch bolt and nut (A), then the pivot bolts (B), Fig. 1.
5. Disengage ball joint stem from steering knuckle and remove control arm assembly.
6. Position control arm on frame brackets, then install but do not tighten pivot bolts.
7. Position washer over ball joint stud, insert stud into steering knuckle, then install pinch bolt and nut.
8. Install sway bar, but do not fully tighten mountings.
9. Install wheel and lower vehicle.
10. Move vehicle back and forth several times to seat suspension components, then torque control arm pivot bolts to 59 ft.lbs., pinch to 40 ft.lbs., sway bar to sill bolts to 21 ft.lbs., and sway bar mount nuts to 55 ft.lbs.