Installation
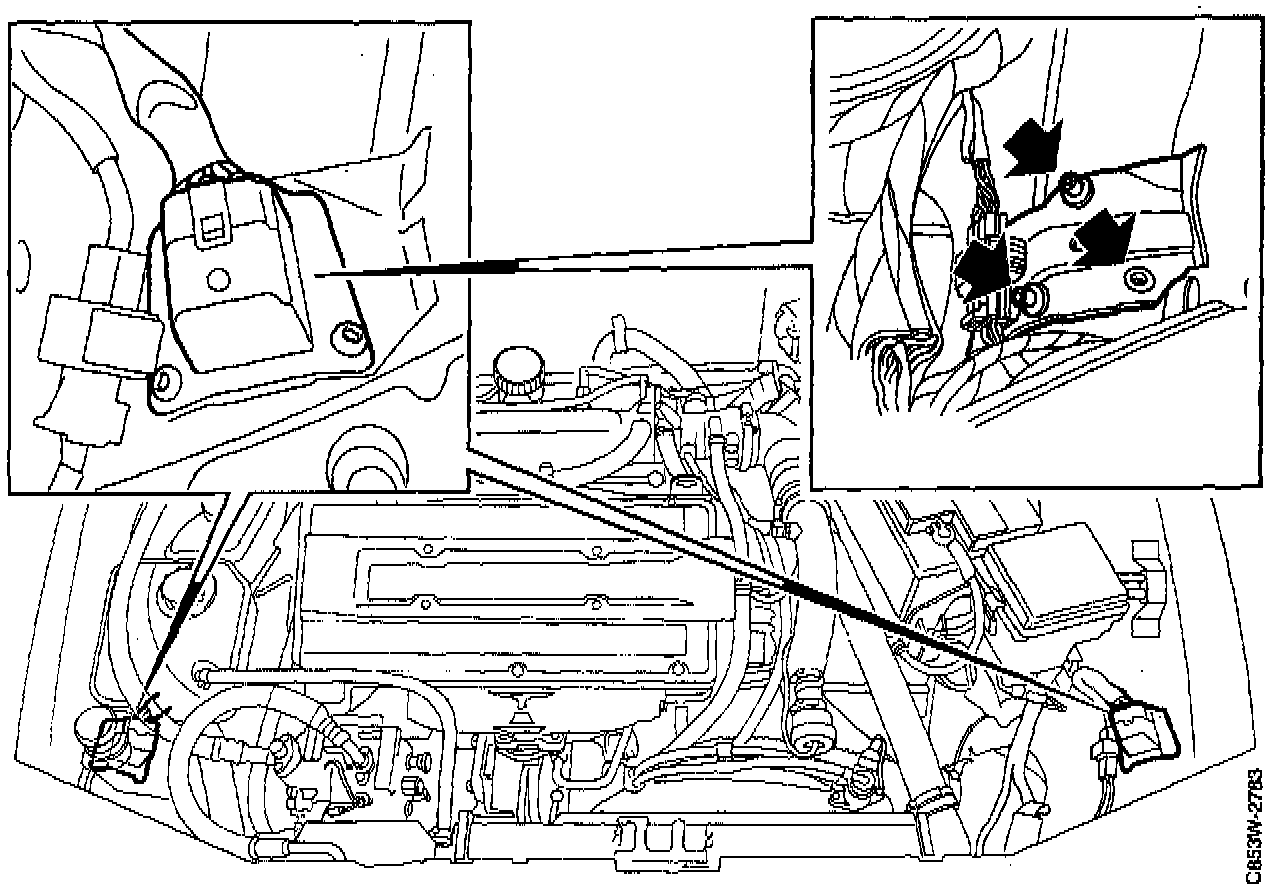
WARNING: If the ground connection is not a good one, the system might not function properly. When fitting the sensor, make sure that the arrows on it point to the front. Make sure that the contact surfaces between the sensor and the body metal are clean so that a good ground connection is obtained, as system performance might otherwise be unsatisfactory.
1. Clean the contact surfaces between the front sensor and body metal so that a good ground connection is obtained.
2. Lubricate the threads of the retaining screws. Use Gleitmo 750, part No. (45) 30 07 309, Ford Motorcraft Silicone Dielectric Compound or any equivalent product with good conductivity and high viscosity.
3. Fit the front sensor by means of the retaining screws.
4. Tighten screws using the special torx bit (part No. 84 71 120). Torque to 8 Nm (6 lb ft)
5. Plug the connector into the front sensor and fit the cable tie.
6. Left-hand side: Refit the front main fuse box.
7. Connect the battery cable
8. Plug an ISAT Scan Tool into the data link connector and clear any diagnostic trouble codes.
9. Start the engine. Check whether the SRS lamp lights up for about six seconds and then goes out. Then check whether the SRS lamp indicates a fault (by flashing).
10. Unplug the ISAT Scan Tool.