Radio - 1
REMOVAL
1. Loosen upper trim panel, but do not remove.
1.1 Remove screws located under upper trim panel on passenger's side of vehicle.
NOTE: Be careful not to damage VIN plate when removing or replacing upper trim panel.
1.2 Disengage clips at locations by grasping edges of upper trim panel and lifting up.
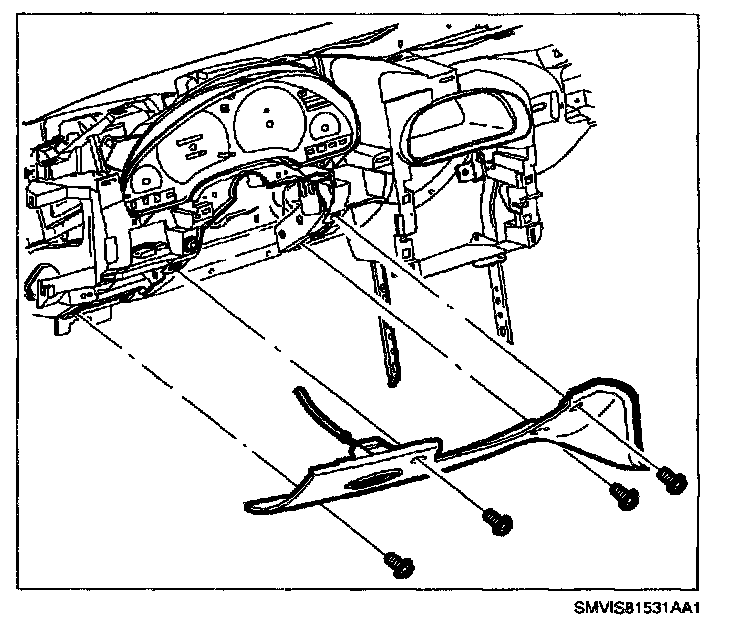
2. Remove steering column filler panel.
NOTE: Do not remove weatherstrips. Adhesion will be lost if removed.

3. Remove left endcap assembly.
3.1 Remove screws.
3.2 Carefully disengage clips at I/P retainer assembly locations. Use of a blunt tool will aid in disengaging clips.
3.3 Maneuver the assemblies past inner I/P retainer assembly and weatherstrips.

4. Gently pry edges of ignition lock bezel with a blunt tool and separate from lower shroud.

5. Remove screws and lower steering column shroud.
6. Lower steering column by pushing down on steering column adjusting handle.
7. Lift and remove upper shroud from steering column.
IMPORTANT: It is not necessary to disconnect the I/P switch (dimmer/traction/fog) connector.

8. Move I/P bezel out of way.
8.1 Disengage clips from retainer assembly by grasping edges of bezel near clip location and pulling outward.
8.2 Move UP bezel to gain access to radio fasteners.

9. Remove radio:
9.1 Remove radio fasteners.
9.2 Pull radio out slightly to access rear of radio.
9.3 Disconnect electrical connector(s), antenna, and ground strap spade terminal from rear of radio.
INSTALLATION

1. Install radio:
1.1 Connect radio ground strap spade terminal, electrical connector(s), and antenna to rear of radio.
1.2 Install radio by sliding it into guides on the instrument panel.
1.3 Install fasteners and tighten.
Torque:
Radio-to-I/P Fasteners: 2.5 N.m (22 in-lbs)

2. Install I/P cluster bezel:
2.1 Position I/P cluster bezel by lining up clip location.
2.2 Snap I/P cluster bezel in place by pushing at clip locations.

3. Position upper steering column shroud.
4. Position lower steering column shroud and install screws.
Torque:
Steering Column Shroud Fasteners: 1.5 N.m (13 in-lbs)

5. Install ignition bezel.
5.1 Align peg of ignition bezel with the cut-out in lower shroud.
5.2 Snap into place.
IMPORTANT: Ensure that endcap bottom portion is inside of filler panel assembly.

6. Install left endcap assembly:
6.1 Maneuver the assembly past inner I/P retainer assembly and weatherstrips.
6.2 Snap clips into I/P retainer assembly locations.
6.3 Install fasteners.
Torque:
I/P Endcap-to-I/P Fasteners: 2.2 N.m (19 in-lbs)

7. Install steering column filler and fasteners.
Torque:
Steering Column Filler Panel Fasteners: 2.2 N.m (19 in-lbs)

8. Install I/P upper trim panel.
8.1 Position upper trim panel on retainer assembly.
8.2 Align tabs on sides of upper trim panel with openings in windshield garnish molding.
8.3 Align clips and clip location.
8.4 Firmly snap in clips at clip locations.
8.5 Install fasteners on underside of upper trim panel on passenger's side of vehicle.
Torque:
I/P Upper Trim Panel Fasteners: 6 N.m (53 in-lbs)