Cylinder Head Installation
CYLINDER HEAD INSTALLATION (DOHC)
TOOLS REQUIRED:
- SA91101NE Feeler Gage Set
- SA9140E Torque Angle Gage
- SA9177NE Straight Edge 24"
- SA9179NE Dial Indicator

1. Remove the gasket material:
a. Using a plastic or wood gasket scraper, remove all the gasket material from the cylinder block surface.
b. Clean the cylinder block bolt holes of any residual sealer, oil, or foreign material. Remove any oil with solvent.
c. Clean the cylinder head bolt threads with a wire brush.
d. Coat the bolt threads with engine oil.
e. Inspect cylinder block orifice for any debris.

NOTICE: Be careful not to scratch or score the cylinder block and head aluminum surfaces when cleaning.
2. Inspect the top of the cylinder block for flatness. Using a SA9177NE or equivalent and a SA91101NE or equivalent, measure the surfaces contacting the cylinder head gasket for warpage.
MAXIMUM WARPAGE
TRANSVERSE
Standard: 0.03 mm (0.0012 in.)
Service Limit: 0.05 mm (0.002 in.) max.
LONGITUDINAL
Standard: 0.07 mm (0.0028 in.)
Service Limit: 0.1 mm (0.004 in.)
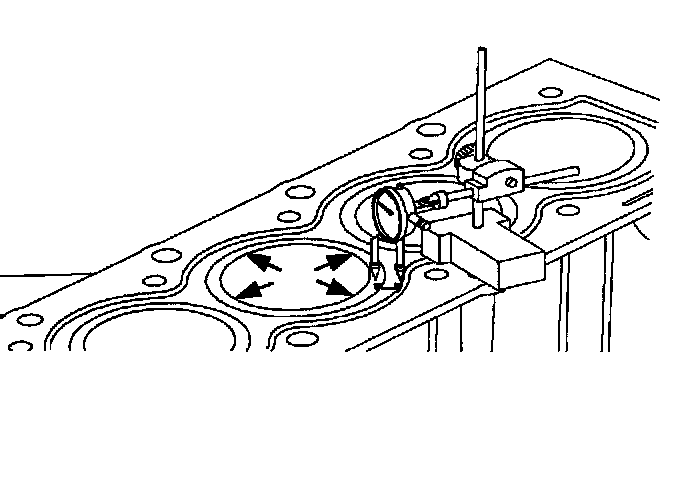
3. Inspect the liner height at 4 locations around the cylinder bore using a SA9179NE or equivalent.
LINER HEIGHT
STANDARD: FLUSH
Service Limit: 0.013 mm (0.0005 in.) max.

4. Inspect the cylinder bore and the tops of pistons for debris, deep scratches, excessive carbon built up, etc.
NOTICE: The crankshaft must be correctly positioned to prevent valve and piston damage. Dowel pins in each camshaft must be located at the 12 o'clock position.
5. Position the number one cylinder, clockwise as viewed from the accessory drive end 90 degrees past top dead center (TDC). The crankshaft is correctly positioned when the crankshaft keyway and sprocket timing mark are aligned with the cylinder block main bearing cap split line.
IMPORTANT: Whenever a cylinder block or head bolts are replaced, install the cylinder head and torque the bolts to 65 Nm (48 lbs ft). Next, remove the bolts, coat the threads with engine oil and follow the torque angle procedure steps. Torquing the bolts one time prior to following the torque angle steps insures proper clamp load is achieved.

6. Install a new cylinder head gasket.
7. Install the cylinder head, aligning it on the dowels.
a. Carefully guide the head into place.
b. Thread the bolts, threads coated with engine oil in by hand until finger tight.

IMPORTANT: The following steps must be completed in sequence. This will ensure uniform bolt tension.
8. Cylinder head bolt tightening procedure:
9. In sequence, torque the cylinder head bolts.
TIGHTEN
Cylinder head bolts - first pass to 30 Nm (22 lb. ft.).

10. In sequence, torque all bolts, second pass.
TIGHTEN
Cylinder head bolts - second pass (DOHC to ) 45 Nm (33 lb. ft.) + 90 degrees.
11. Install the SA9140E or equivalent, Snap-on Tool 360.
12. Calibrate the gage to zero.
13. In sequence, turn each bolt an additional 90 degrees - final pass.