Fuel Rail: Service and Repair
FUEL RAIL TRANSFER LINE REPLACEMENTTOOLS REQUIRED
^ SA9127E Gauge Ear Set
^ SA9805E Line Disconnect Set
REMOVAL
CAUTION: DO NOT ALLOW SMOKING OR THE USE OF OPEN FLAMES IN THE AREA WHERE WORK ON THE FUEL SYSTEM IS TAKING PLACE. ANYTIME THE FUEL SYSTEM IS BEING WORKED ON, DISCONNECT THE NEGATIVE BATTERY CABLE, EXCEPT FOR THOSE TESTS WHERE BATTERY VOLTAGE IS REQUIRED.
1. Disconnect negative battery cable.
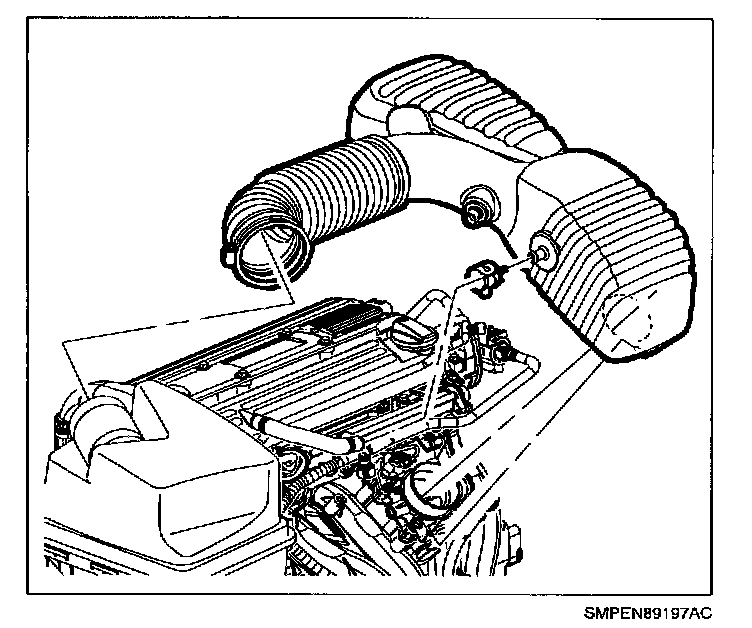
2. Disconnect intake air temperature (IAT) sensor connector.
3. Loosen clamp at air cleaner assembly.
4. Remove push pin attachment from outlet resonator/duct assembly to support bracket.
5. Loosen clamp at throttle body assembly.
6. Disconnect PVC fresh air vent hose at cam cover.
7. Remove outlet resonator/duct assembly.
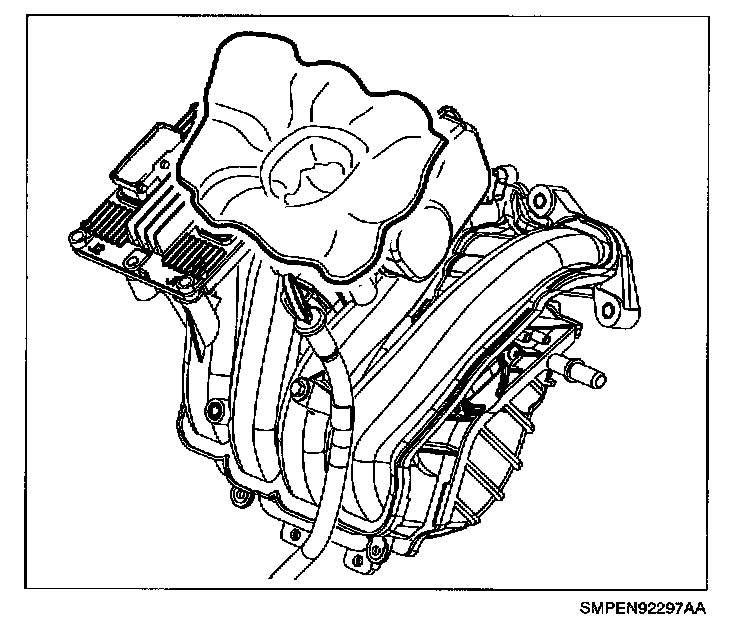
8. Cover throttle body opening with a shop towel, use shop air to remove any dirt near transfer line connection.
9. Remove any electrical harness or hoses that may be attached to transfer line.
CAUTION: WHENEVER FUEL LINE FITTINGS ARE LOOSENED OR DISCONNECTED, WRAP A SHOP CLOTH AROUND FITTING WHILE CONNECTING GAUGE, TO COLLECT FUEL. PLACE THE CLOTH IN AN APPROVED CONTAINER.
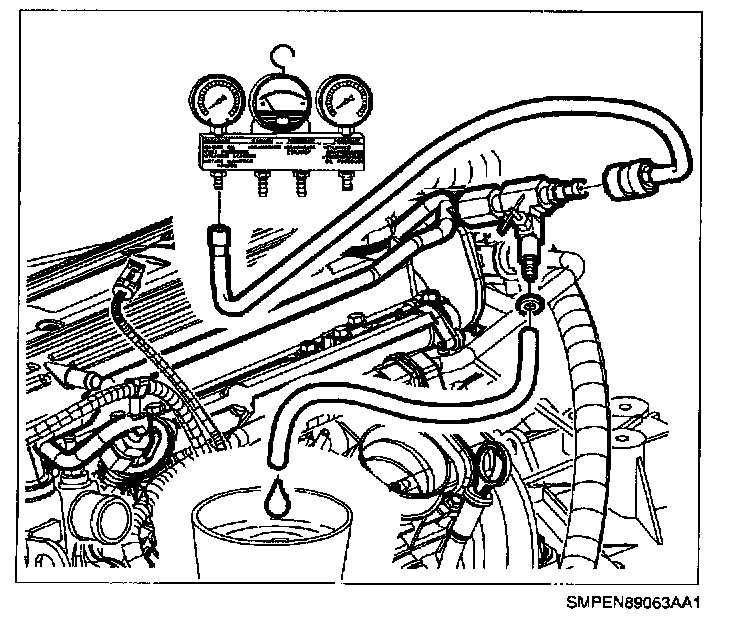
10. Relieve fuel system pressure (Refer to "Fuel System Pressure Relief".)
11. Disconnect Gauge Bar Set SA9127E after pressure has been relieved.
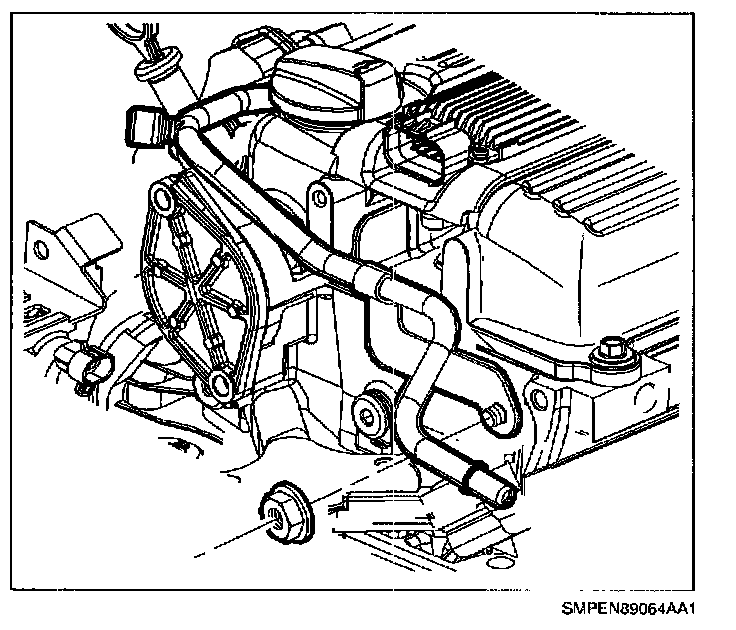
12. Disconnect fuel rail bracket and bolt at rear of camshaft cover.
13. Disconnect fuel transfer at quick connect from fuel line using Line Disconnect Set SA9805E.
NOTE: An open-end wrench must be used to support the fuel line to rail connection during loosening/tightening to avoid damaging the fuel rail assembly.
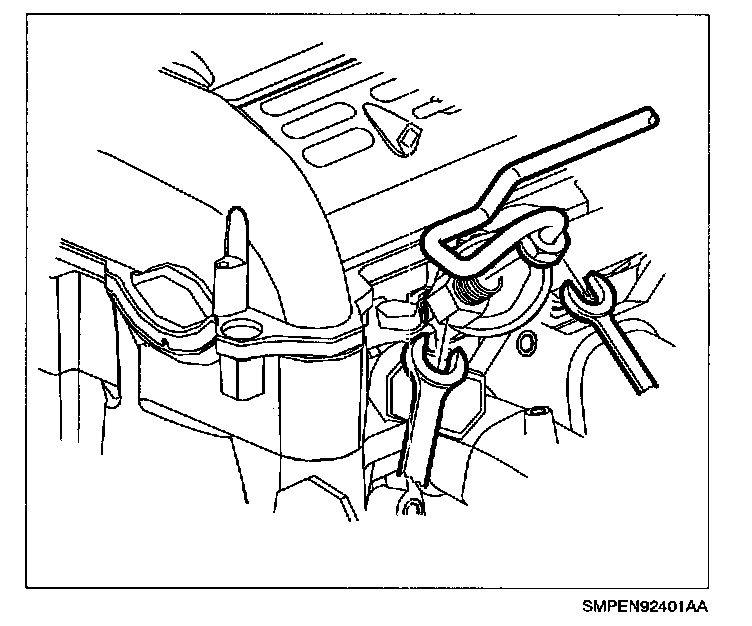
14. While supporting the fuel rail assembly with an open-end wrench, loosen transfer line fitting at fuel rail.
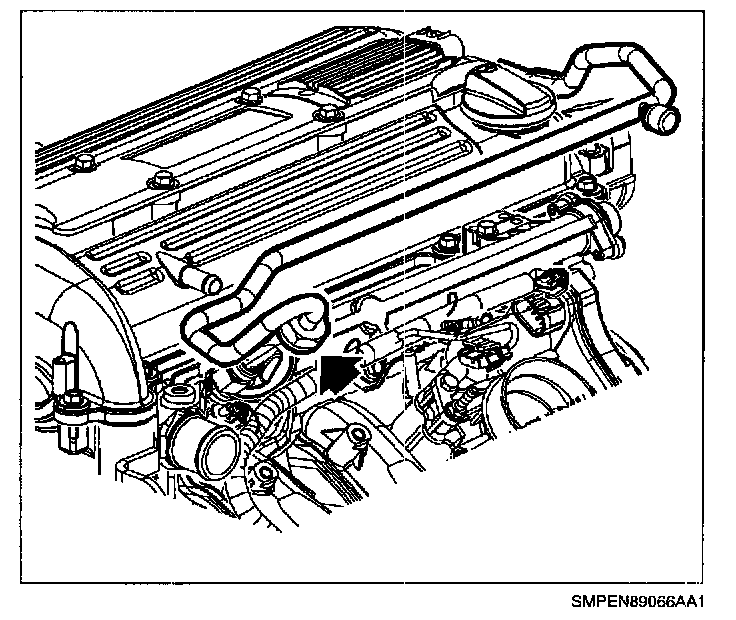
15. Remove fuel transfer line.
16. Visually inspect the O-ring seals cuts, nicks or flatness. Replace as necessary.
INSTALLATION
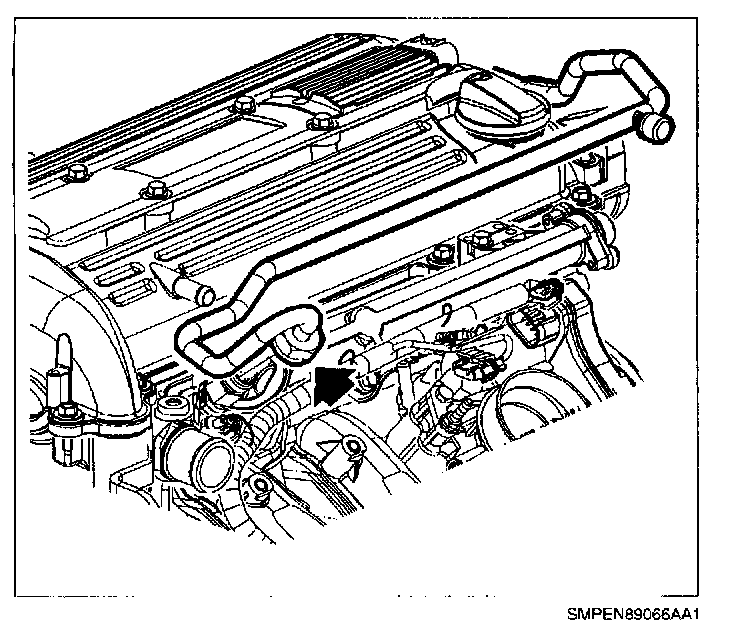
1. Properly position fuel transfer line assembly.
2. Install transfer line assembly with O-seal to fuel rail assembly and hand tighten.
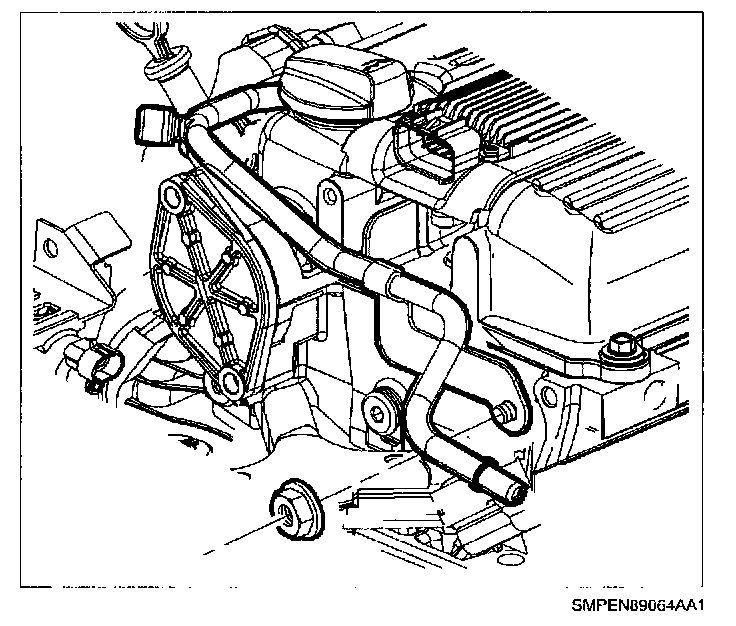
3. Connect fuel rail bracket and nut to cylinder head.
Torque:
Fuel Line Bracket-to-Cylinder Head Bolt: 10 N.m (89 in-lbs)
NOTE: An open-end wrench must be used to support the fuel line to rail connection during loosening/tightening to avoid damaging the fuel rail assembly.
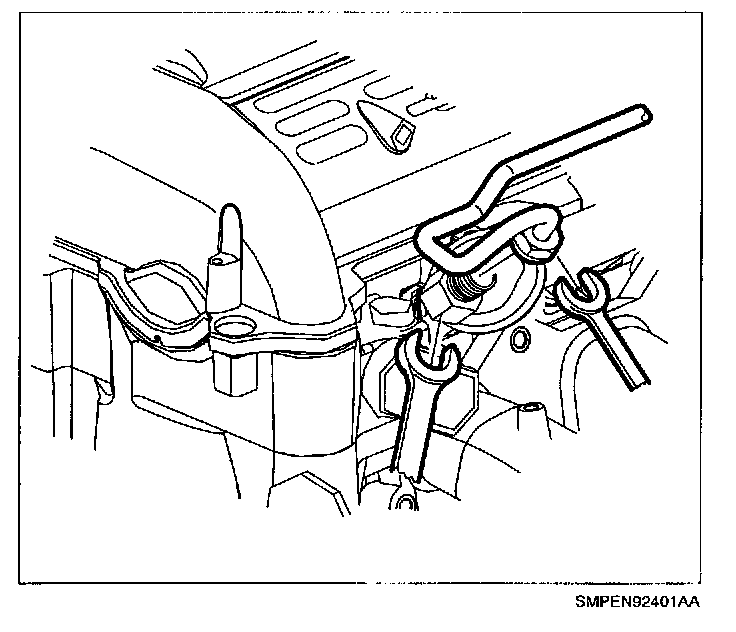
4. Tighten transfer line fitting at fuel rail.
Torque:
Fuel Transfer Line Fitting-to-Fuel Rail - 4-Cyl: 10 N.m (89 in-lbs)
NOTE: To assure proper connection and to fully seat the retaining tabs, lightly pull apart the connection.
5. Insert fuel transfer line into fuel line connection. An audible "click" noise should be heard. Pull rearward to fully seat connection.
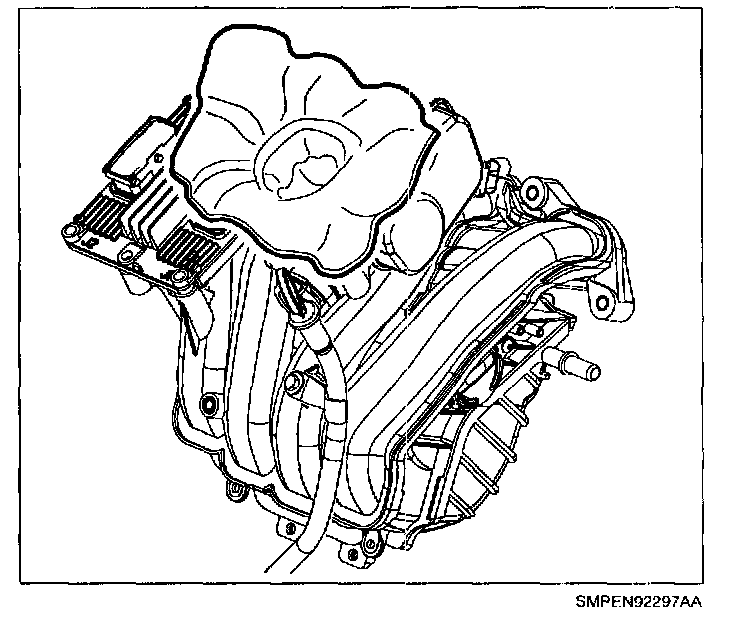
6. Remove shop towel from throttle body.
7. Attach any electrical harness or hoses that has been disconnected from transfer line.
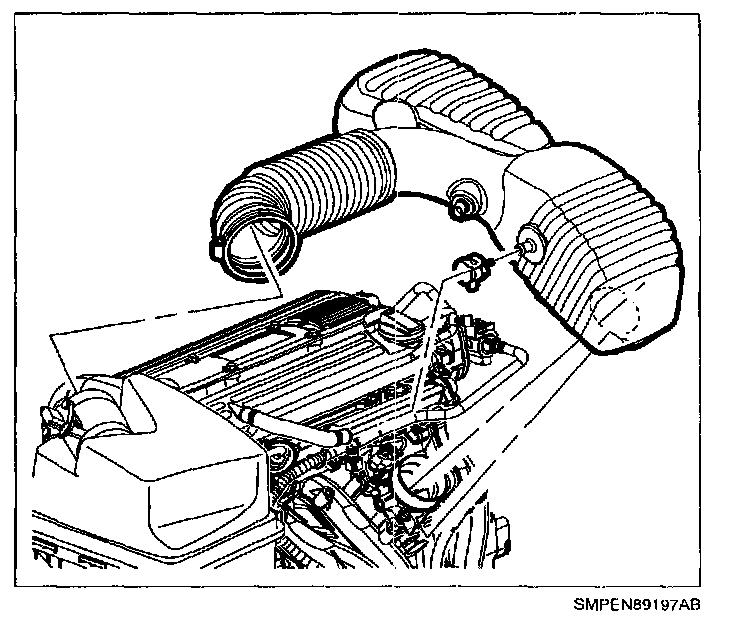
8. Install outlet resonator/duct assembly into position.
9. Connect PCV fresh air bent hose assembly.
10. Tighten clamp at throttle body assembly.
11. Position outlet resonator/duct assembly up with support bracket and install push pin.
12. Tighten clamp at air cleaner assembly.
13. Connect intake air temperature (IAT) sensor connector.
14. Connect negative battery cable.
Torque:
Battery Terminal Bolts: 17 N.m (13 ft-lbs)