Torque Rod: Service and Repair
The content of this article reflects the changes identified in TSB - 05-03-09-004TOE LINK
REMOVAL
CAUTION: MAKE SURE VEHICLE IS PROPERLY SUPPORTED AND SQUARELY POSITIONED ON THE HOIST. TO HELP AVOID PERSONAL INJURY WHEN A VEHICLE IS ON A HOIST, PROVIDE ADDITIONAL SUPPORT FOR THE VEHICLE OPPOSITE FROM WHICH COMPONENTS ARE BEING REMOVED.
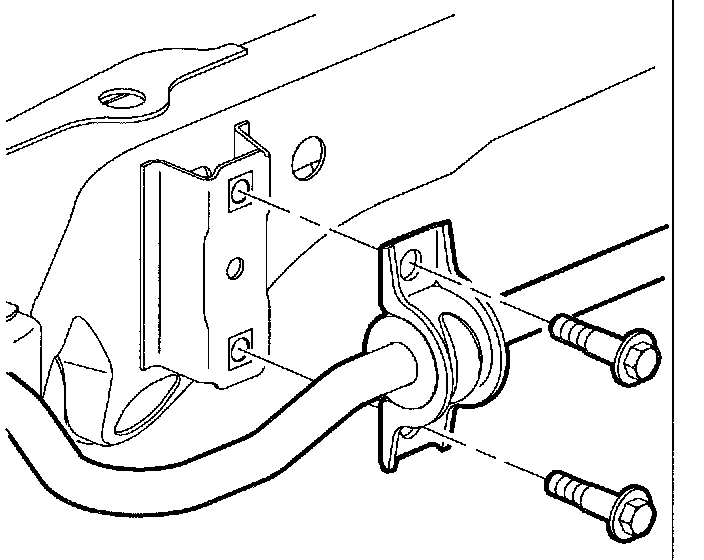
1. Raise vehicle on hoist.
2. Remove toe link to knuckle fasteners.

3. Remove toe link to support frame fasteners.
4. Remove toe link.
INSTALLATION
IMPORTANT: Toe link flange should face rearward and toe link tabs toward center of vehicle.
1. Position toe link to vehicle.
IMPORTANT: Install bolt with head towards front of vehicle.
IMPORTANT: Install cam nut same as upper control arm if required for additional alignment.
2. Install toe link to support bolt and nut.
IMPORTANT: Install bolt with large washer head. Head should face towards front of vehicle.

3. Install toe link to knuckle bolt and nut, tighten bolt.
Torque:
Toe Link-to-Knuckle Bolt: 160 N.m (118 ft. lbs.)
IMPORTANT: There are two different toe links and toe link bolts bolts used on this vehicle. You must identify which is on the vehicle and use the corresponding torque value.
4. Tighten toe link support bolt.
Torque:
Toe Link-to-Support Bolt:
If the bolt is black with a 15 mm head, tighten the bolt to 145 N.m (107 ft. lbs.)
If the bolt is silver with a 21 mm head, tighten the bolt to 160 N.m (118 ft. lbs.)
5. Lower vehicle.
6. Check alignment, align as necessary.