Defroster Door Replacement
Defroster Door Replacement
Removal Procedure
Important: The defroster door must be closed to allow clearance during defroster duct removal.
1. Set the HVAC controls in the vent setting to close the defroster door.
2. Remove the instrument panel (I/P) carrier.
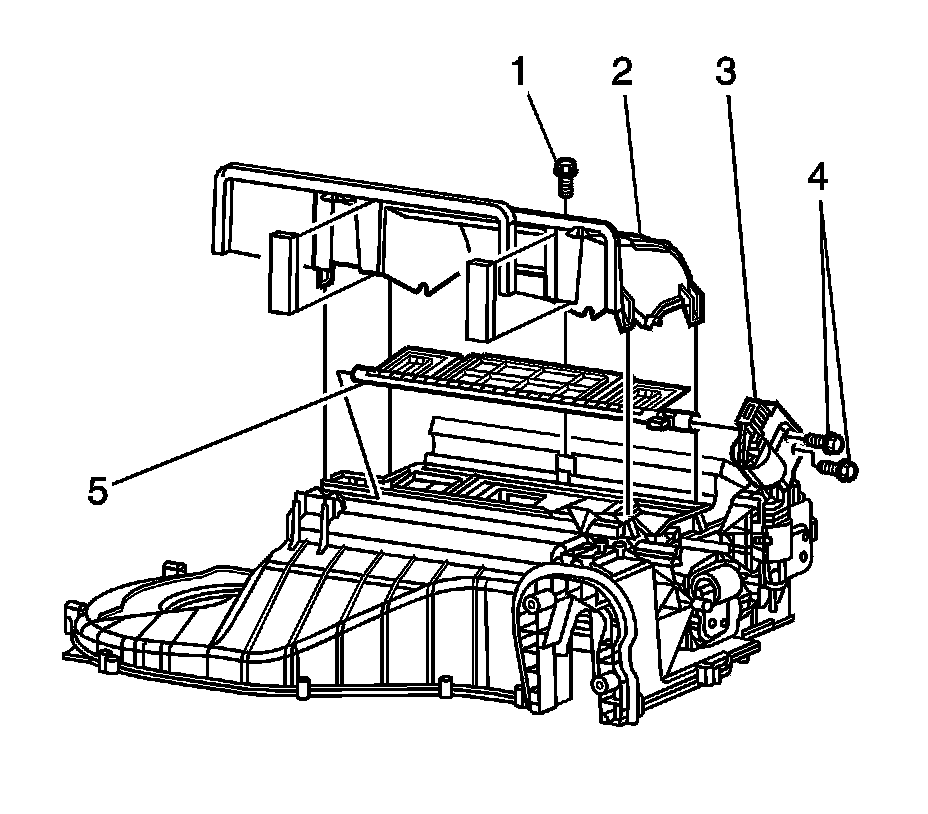
3. Remove the defroster cover bolts/screws (1).
4. Remove the defroster cover (2).
5. Remove the defrost actuator bolts/screws (4).
6. Remove the defrost actuator (3).
7. Remove the defrost actuator door (5).
Installation Procedure
1. Install the defrost actuator door (5).
2. Install the defrost actuator (3).
Notice: Refer to Fastener Notice.
3. Install the defrost actuator bolts/screws (4).
Tighten the bolts/screws to 1.2 N.m (11 lb in).
4. Install the defroster cover (2).
5. Install the defroster cover bolts/screws (1).
Tighten the bolts/screws to 1.2 N.m (11 lb in).
6. Install the I/P carrier.
7. Re-calibrate the actuators. Refer to Actuators Recalibration. Programming and Relearning