Part 1
TX6A AUTOMATIC TRANSMISSION / TRANSAXLE: AUTOMATIC TRANSMISSION UNIT: DISASSEMBLY; 2013 MY FR-S [03/2012 -]
1. REMOVE REFILL PLUG
(a) Remove the refill plug.
(b) Remove the O-ring from the refill plug.
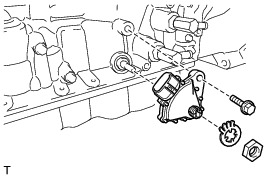
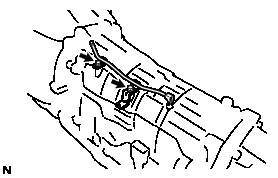
2. REMOVE TRANSMISSION CONTROL SHAFT LEVER RH
(a) Remove the nut, spring washer and the transmission control shaft lever RH from the park/neutral position switch assembly.
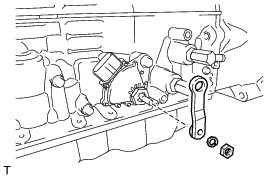
3. REMOVE PARK/NEUTRAL POSITION SWITCH ASSEMBLY
(a) Using a screwdriver, bend the tabs of the lock washer.
(b) Remove the nut and the lock washer.
(c) Remove the bolt and the park/neutral position switch assembly from the automatic transmission case sub-assembly.
HINT
Make sure that the manual valve lever shaft has not been rotated prior to installing the park/neutral position switch assembly as the detent spring may become detached from the manual valve lever shaft.
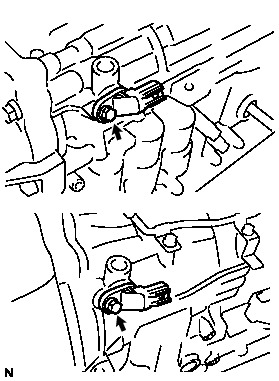
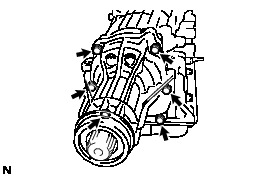
4. REMOVE OIL COOLER TUBE ELBOW
(a) Remove the 2 oil cooler tube elbow from the automatic transmission case sub-assembly.
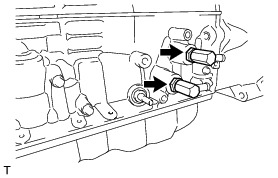
5. REMOVE TRANSMISSION REVOLUTION SENSOR
(a) Remove the 2 bolts and the 2 transmission revolution sensors from the automatic transmission case sub-assembly.
(b) Remove the 2 O-rings from the 2 transmission revolution sensors.
6. REMOVE AUTOMATIC TRANSMISSION BREATHER TUBE
(a) Remove the 2 bolts and the automatic transmission breather tube from the automatic transmission case sub-assembly.
7. REMOVE AUTOMATIC TRANSMISSION CASE PLUG
(a) Remove the 5 automatic transmission case plugs from the automatic transmission case sub-assembly.
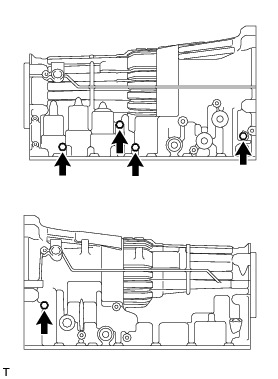
(b) Remove the 5 O-rings from the 5 automatic transmission case plugs.
(c) Using "TORX" socket wrench T55, remove the automatic transmission case plug from the automatic transmission case sub-assembly.

(d) Remove the O-ring from the automatic transmission case plug.
8. REMOVE AUTOMATIC TRANSMISSION HOUSING
(a) Remove the 10 bolts and the automatic transmission housing from the automatic transmission case sub-assembly.
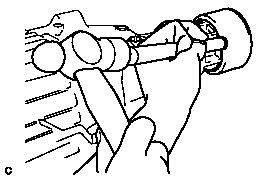
9. REMOVE EXTENSION HOUSING DUST DEFLECTOR
(a) Using a brass bar and a hammer, tap out the extension housing dust deflector from the extension housing sub-assembly.
NOTICE:
Be careful not to damage the extension housing sub-assembly.
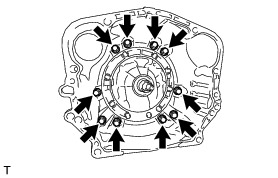
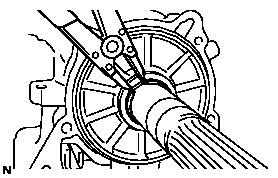
10. REMOVE EXTENSION HOUSING SUB-ASSEMBLY
(a) Remove the 6 bolts.
(b) Using a screwdriver, remove the extension housing sub-assembly from the automatic transmission case sub-assembly.
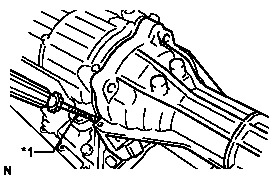

NOTICE:
Do not pry the surface where the extension housing sub-assembly contacts the automatic transmission case sub-assembly.
HINT
Tape the screwdriver tip before use.
11. REMOVE TRANSMISSION CASE ADAPTER RADIAL BALL BEARING
(a) Using snap ring pliers, remove the snap ring from the extension housing sub-assembly.
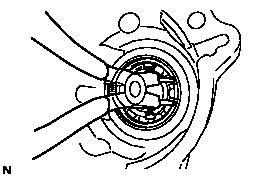
(b) Remove the transmission case adapter radial ball bearing from the extension housing sub-assembly.
12. REMOVE AUTOMATIC TRANSMISSION EXTENSION HOUSING OIL SEAL
(a) Using a screwdriver, pry out the automatic transmission extension housing oil seal from the extension housing sub-assembly.
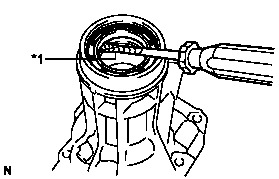

NOTICE:
Be careful not to damage the extension housing sub-assembly.
HINT
Tape the screwdriver tip before use.
13. REMOVE OUTPUT SHAFT THRUST BEARING
(a) Using a snap ring expander, remove the snap ring from the output shaft of the rear planetary gear assembly.
(b) Remove the rear output shaft thrust bearing race, output shaft thrust bearing and the output shaft thrust bearing race.
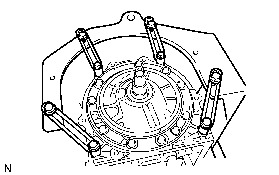
14. SECURE AUTOMATIC TRANSMISSION CASE SUB-ASSEMBLY
(a) Install the automatic transmission case sub-assembly to an overhaul attachment.
15. REMOVE AUTOMATIC TRANSMISSION OIL PAN SUB-ASSEMBLY
NOTICE:
Do not turn the transmission over as this will contaminate the valve body with foreign matter located at the bottom of the oil pan.
(a) Using a socket hexagon wrench 5 mm, remove the overflow plug and gasket.
(b) Remove the drain plug and gasket.
(c) Remove the 20 bolts, automatic transmission oil pan sub-assembly and the automatic transmission oil pan gasket.

(d) Remove the 3 transmission oil cleaner magnets from the automatic transmission oil pan sub-assembly.


(e) Examine the particles in the automatic transmission oil pan sub-assembly.
(1) Collect any steel chips with the removed transmission oil cleaner magnets. Carefully inspect the foreign matter and particles in the automatic transmission oil pan sub-assembly and on the transmission oil cleaner magnets to anticipate the type of wear you will find in the automatic transmission assembly.
Steel (magnetic): bearing, gear and clutch plate wear
Brass (non-magnetic): bush wear