Part 4
TX6A AUTOMATIC TRANSMISSION / TRANSAXLE: AUTOMATIC TRANSMISSION UNIT: REASSEMBLY; 2013 MY FR-S [03/2012 -] (Continued)
52. INSTALL REVERSE CLUTCH HUB SUB-ASSEMBLY
(a) Install the reverse clutch hub sub-assembly to the reverse clutch drum sub-assembly.
(b) Using a screwdriver, install the snap ring to the reverse clutch piston sub-assembly.
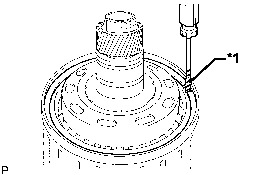

NOTICE:
Be careful not to damage the reverse clutch piston sub-assembly.
HINT
Tape the screwdriver tip before use.
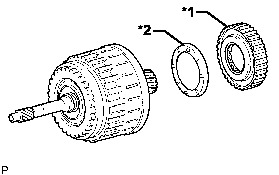
53. INSTALL NO. 2 ONE-WAY CLUTCH ASSEMBLY
(a) Install the input shaft clutch drum thrust washer and the No. 2 one-way clutch assembly to the clutch drum and input shaft assembly.

54. INSTALL CLUTCH DRUM AND INPUT SHAFT ASSEMBLY
(a) Install the input shaft front thrust needle roller bearing and the thrust needle roller bearing to the clutch drum and input shaft assembly.
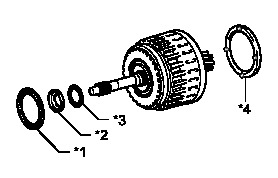
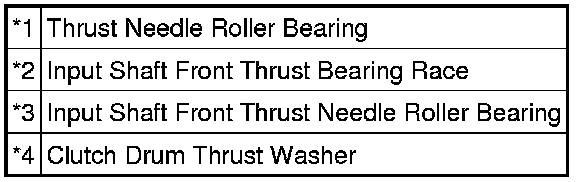
Bearing and Race Diameter

(b) Coat the input shaft front thrust bearing race and the clutch drum thrust washer with petroleum jelly, and install them onto the clutch drum and input shaft assembly.
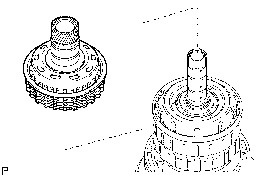
(c) Install the clutch drum and input shaft assembly to the automatic transmission case sub-assembly.

55. INSTALL OIL PUMP ASSEMBLY
(a) Install the No. 1 thrust bearing race to the oil pump assembly.
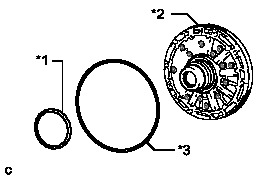
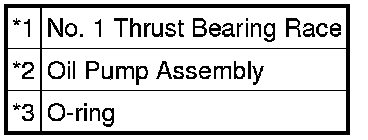
Race Diameter

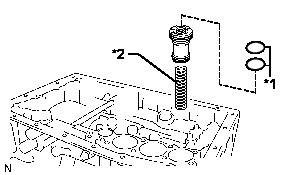
(b) Coat a new O-ring with ATF, and install it to the oil pump assembly.
(c) Place the oil pump assembly through the input shaft, and align the bolt holes of the oil pump assembly with the automatic transmission case sub-assembly.
NOTICE:
Be careful not to damage the O-ring.
(d) Hold the input shaft, and lightly press the oil pump assembly to slide the clutch drum oil seal rings into the clutch drum and input shaft assembly.
(e) Install the 9 bolts.
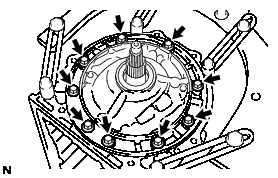
Torque : 21 Nm (215 kgf-cm, 16 ft-lbf)
56. INSPECT INDIVIDUAL PISTON OPERATION Transaxle Unit
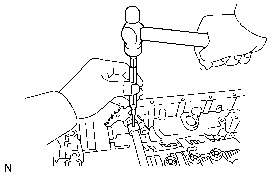
57. INSTALL MANUAL VALVE LEVER SHAFT OIL SEAL
(a) Using SST and a hammer, drive in 2 new manual valve lever shaft oil seals to the automatic transmission case sub-assembly.
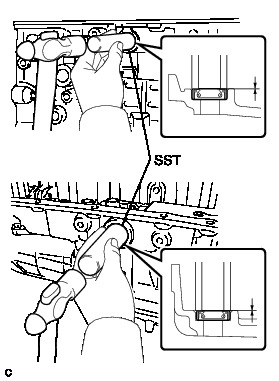
SST : 09350-30020
09350-07110
(b) Coat the manual valve lever shaft oil seal lips with MP grease.
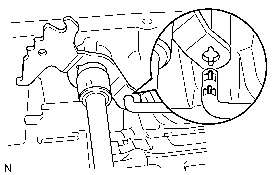
58. INSTALL MANUAL VALVE LEVER SUB-ASSEMBLY
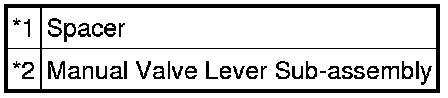
(a) Install a new spacer to the manual valve lever sub-assembly.
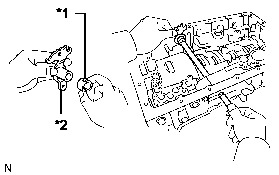
(b) Install the manual valve lever shaft to the automatic transmission case sub-assembly through the manual valve lever sub-assembly.
(c) Using a hammer, drive in a new spring pin.
(d) Align the manual valve lever indentation with the spacer hole, and stake them together with a punch.
(e) Make sure that the shaft rotates smoothly.
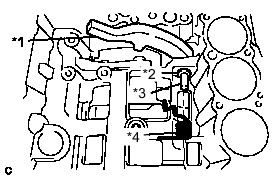
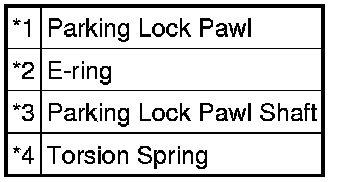
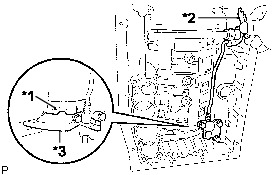
59. INSTALL PARKING LOCK PAWL SHAFT
(a) Install a new E-ring to the parking lock pawl shaft.
(b) Install the parking lock pawl, parking lock pawl shaft and the torsion spring to the automatic transmission case sub-assembly.
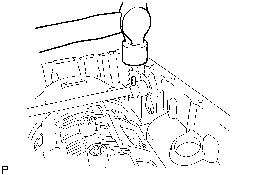
60. INSTALL PARKING LOCK ROD SUB-ASSEMBLY
(a) Install the parking lock rod sub-assembly to the manual valve lever sub-assembly.
61. INSTALL PARKING LOCK PAWL BRACKET
(a) Install the parking lock pawl bracket to the automatic transmission case sub-assembly with the 3 bolts.

Torque : 7.3 Nm (74 kgf-cm, 65 in-lbf)
(b) Shift the manual valve lever sub-assembly to the P position, and confirm that the rear planetary gear is correctly locked by the parking lock pawl.

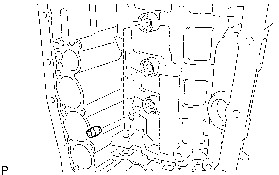
62. INSTALL B-1 ACCUMULATOR VALVE
(a) Install the spring and the B-1 accumulator valve to the hole.
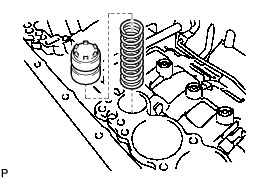
B-1 Accumulator Spring

63. INSTALL C-3 ACCUMULATOR PISTON
(a) Coat 2 new O-rings with ATF, and install them to the C-3 accumulator piston.
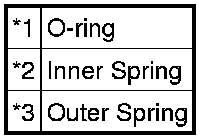
(b) Install the 2 springs and the C-3 accumulator piston to the hole.
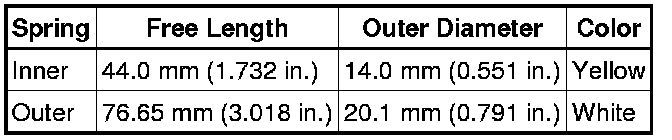
C-3 Accumulator Spring
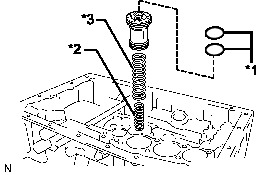
64. INSTALL B-3 ACCUMULATOR PISTON
(a) Using a screwdriver, install the spring sub-assembly to the B-3 accumulator piston with the snap ring.
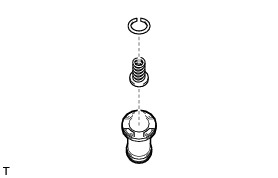
B-3 Accumulator Spring Sub-assembly

NOTICE:
Be careful not to damage the B-3 accumulator piston.
HINT
Tape the screwdriver tip before use.
(b) Coat 2 new O-rings with ATF, and install them to the B-3 accumulator piston.
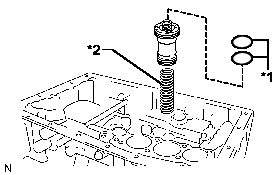
(c) Install the spring and the B-3 accumulator piston to the hole.
B-3 Accumulator Spring

65. INSTALL C-2 ACCUMULATOR PISTON
(a) Using a screwdriver, install the spring sub-assembly to the C-2 accumulator piston with the snap ring.
C-2 Accumulator Spring Sub-assembly

NOTICE:
Be careful not to damage the C-2 accumulator piston.
HINT
Tape the screwdriver tip before use.
(b) Coat 2 new O-rings with ATF, and install them to the C-2 accumulator piston.

(c) Install the spring and the C-2 accumulator piston to the hole.
C-2 Accumulator Spring

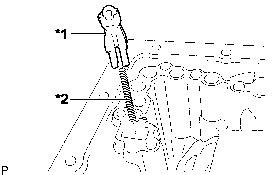
66. INSTALL CHECK BALL BODY
(a) Install the check ball body and the compression spring to the automatic transmission case sub-assembly.
67. INSTALL BRAKE DRUM GASKET
(a) Install 3 new brake drum gaskets to the automatic transmission case sub-assembly.
68. INSTALL TRANSMISSION CASE GASKET
(a) Install 3 new transmission case gaskets to the automatic transmission case sub-assembly.