Fuel Pump: Service and Repair
Fuel Tank (Part 1):
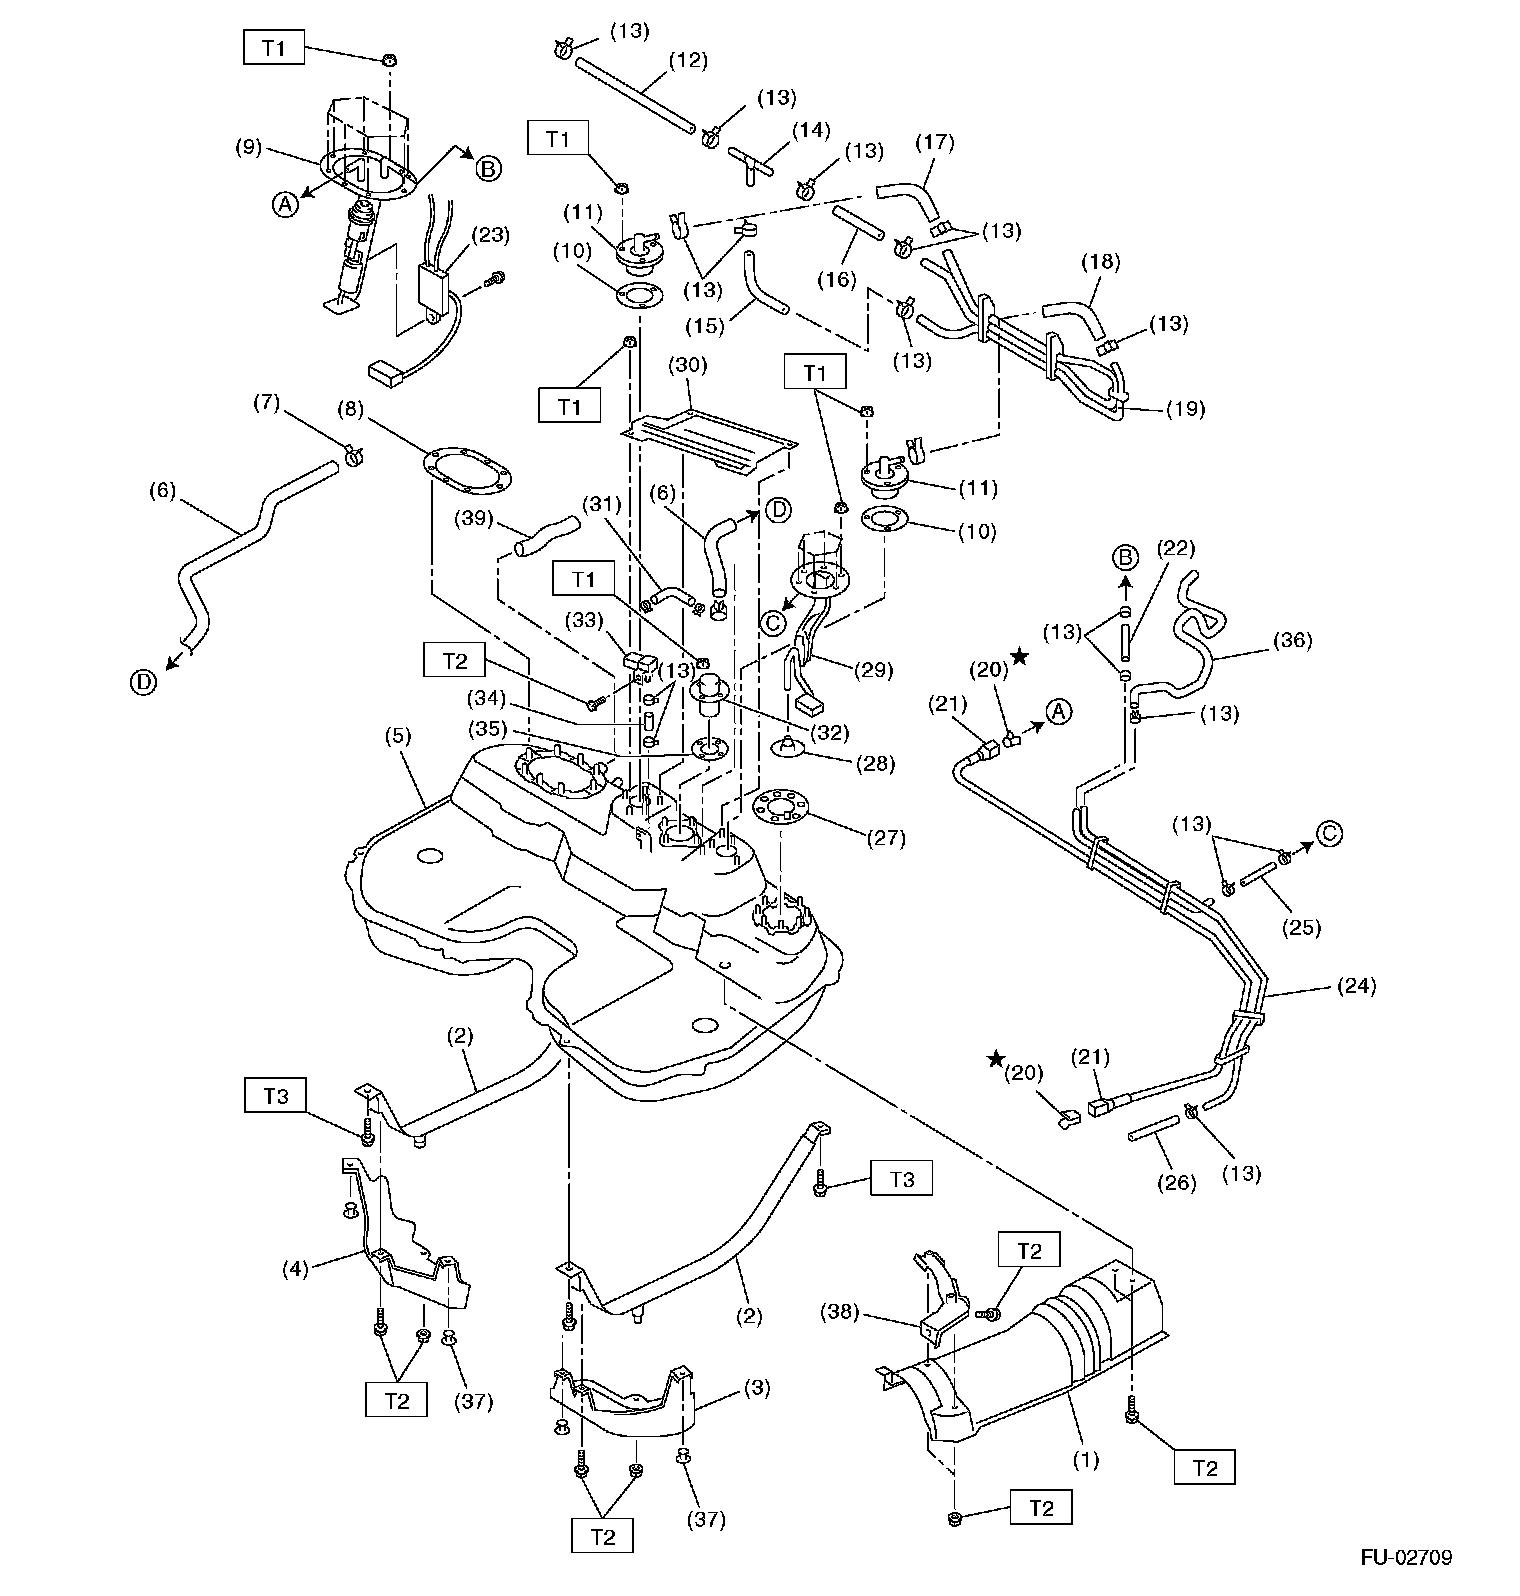
Fuel Tank (Part 2):
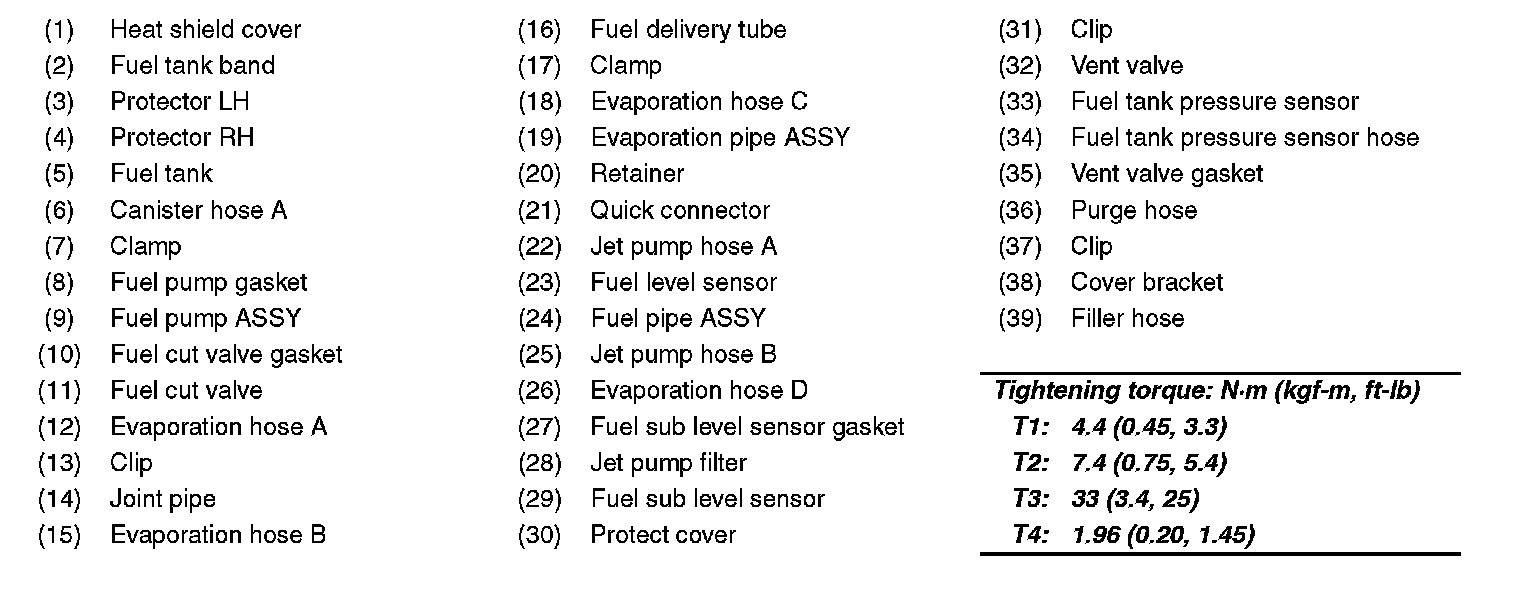
FUEL PUMP
REMOVAL
The contents of this article reflects 18-117-07 manual update
dated 03/16/07.
WARNING:
- Place "NO FIRE" signs near the working area.
- Be careful not to spill fuel.
NOTE: Fuel pump assembly consists of fuel pump and fuel level sensor.
1. Release the fuel pressure.
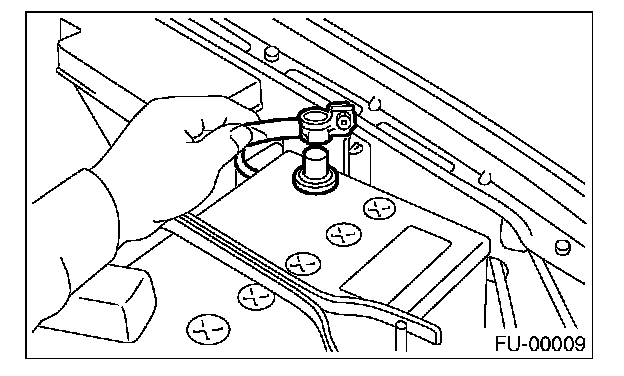
2. Disconnect the ground cable from battery.
3. Open the fuel filler flap lid, and remove the fuel filler cap.
4. Lift- up the vehicle.
5. Drain fuel from fuel tank.
6. Remove the luggage floor mat.
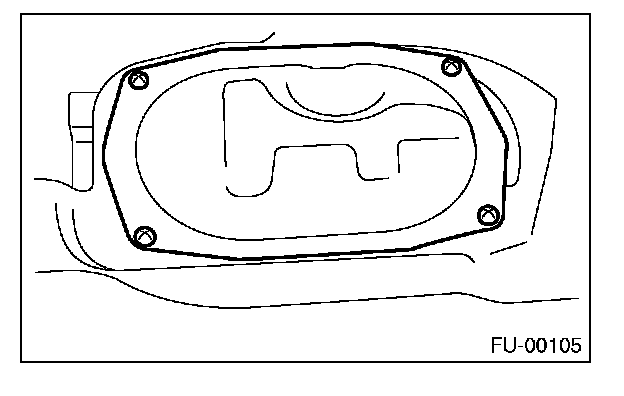
7. Remove the service hole cover.
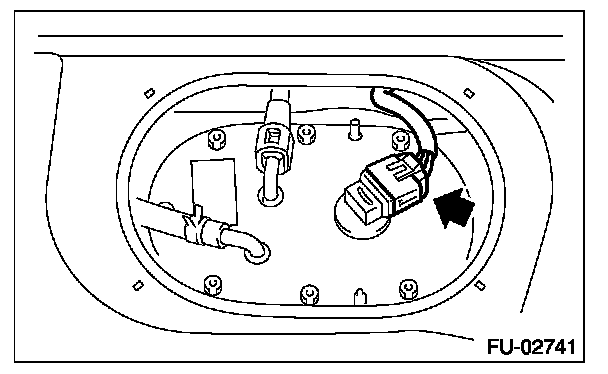
8. Disconnect the connector from fuel pump.
9. Disconnect the quick connector and then disconnect the fuel delivery hose.
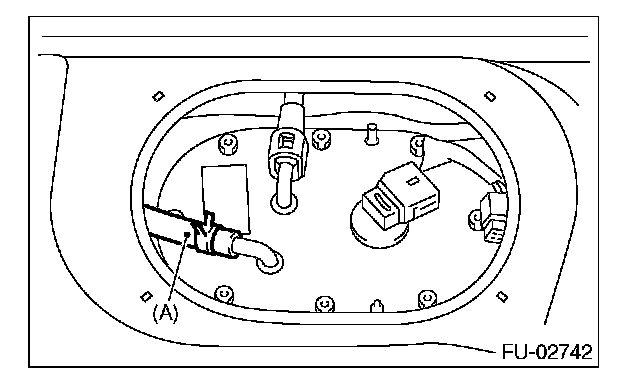
10. Move the clips, and disconnect the jet pump hose (A).
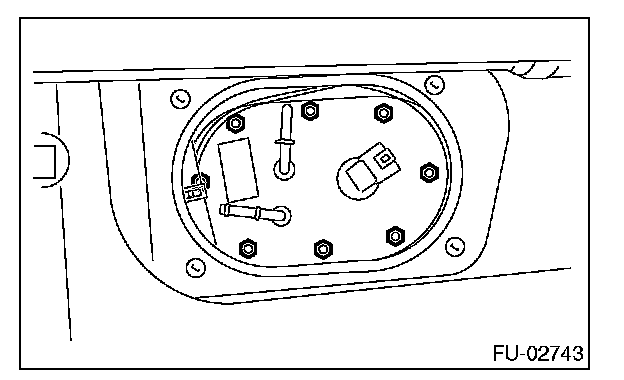
11. Remove the nuts which install fuel pump assembly onto fuel tank.
12. Pull out the evaporation assembly from the fuel tank.
INSTALLATION
Install in the reverse order of removal. Perform the following.
NOTE: Use a new gasket or retainer.
1. Make sure the sealing portion is free from fuel or foreign matter before installation.
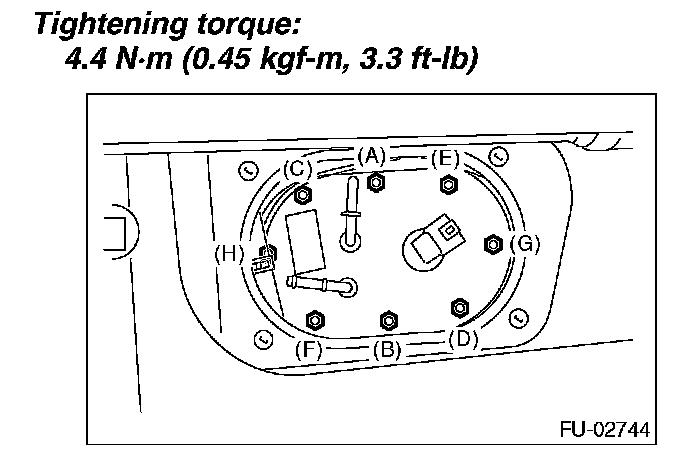
2. Tighten the nuts in alphabetical sequence as shown in the figure to the specified torque.