Removal and Replacement
Front BumperFront Bumper:
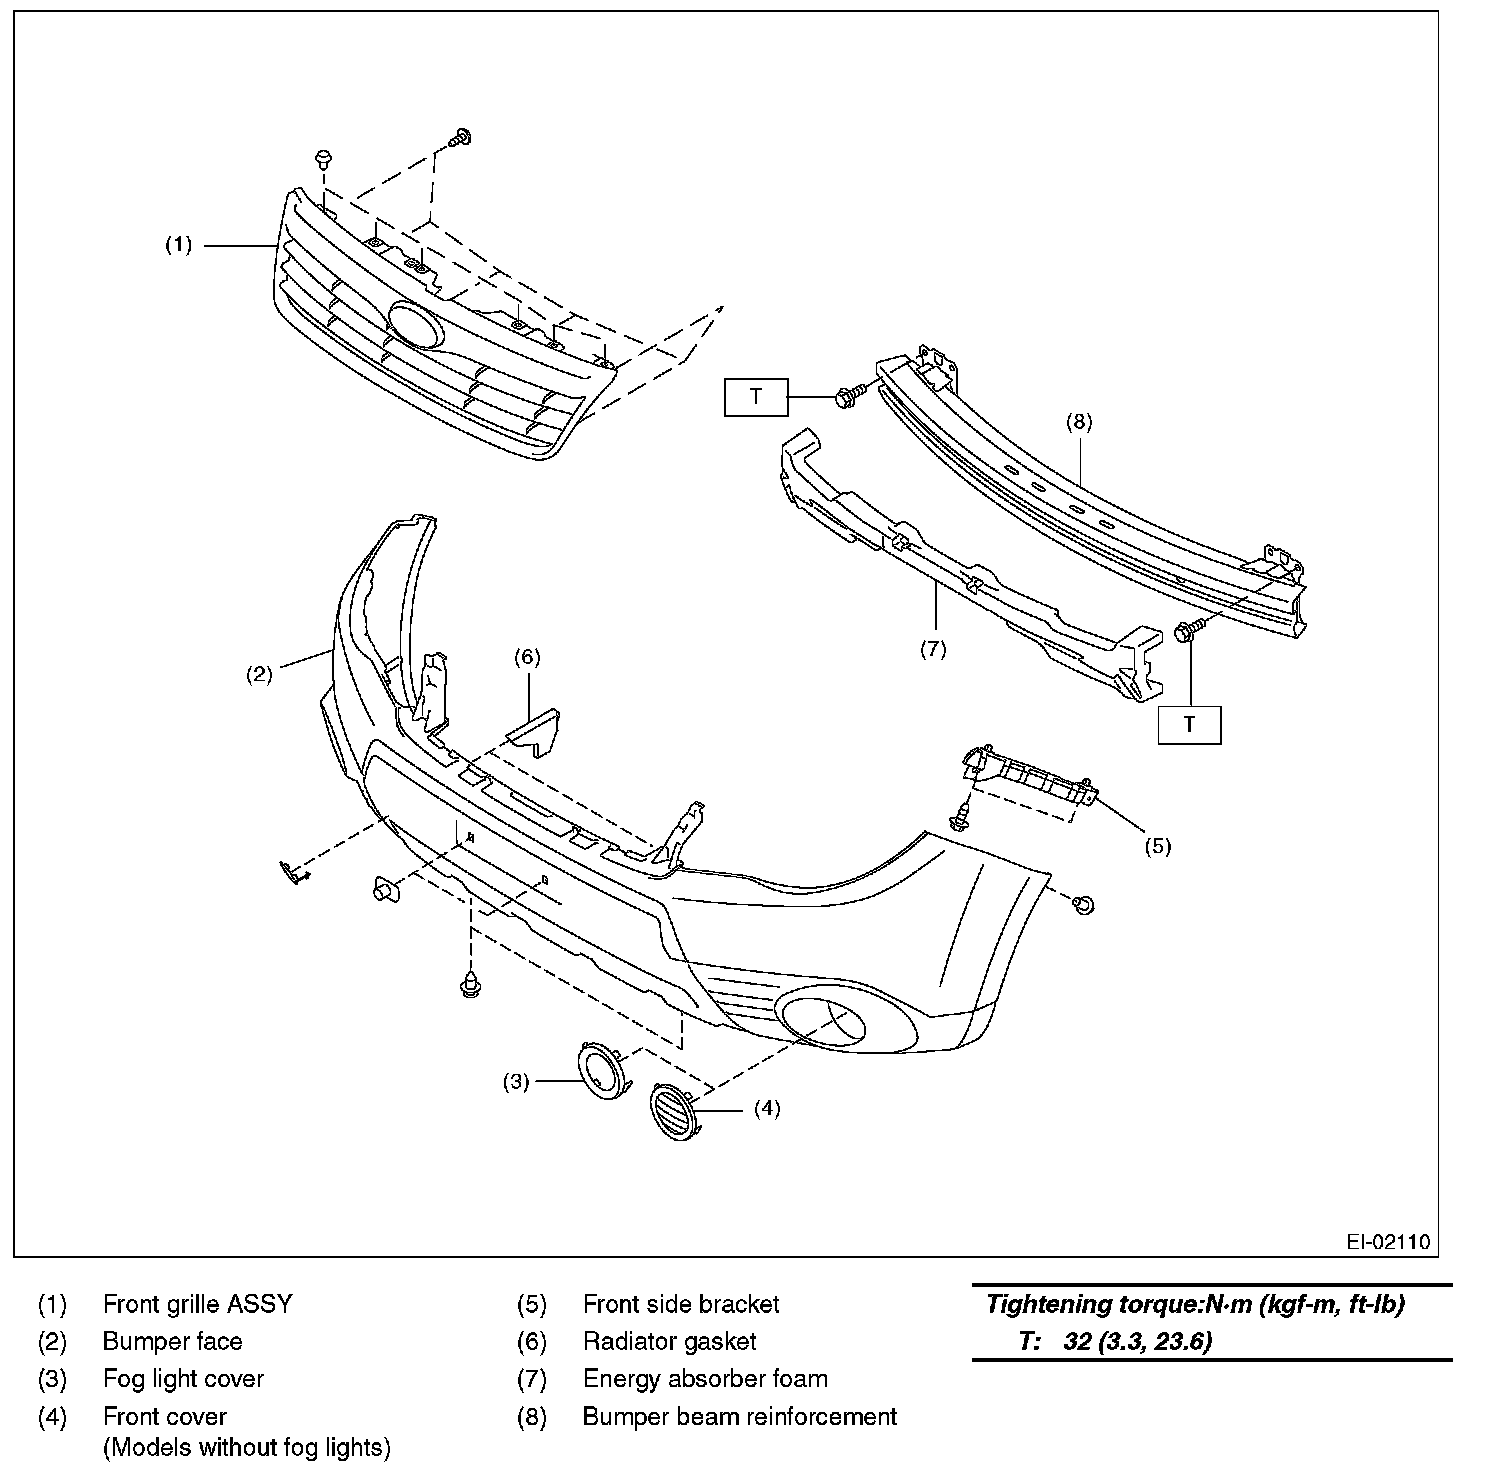
REMOVAL
1. FRONT BUMPER FACE
1. Disconnect the ground cable from the battery.
2. Remove the clips at the upper side of the bumper.
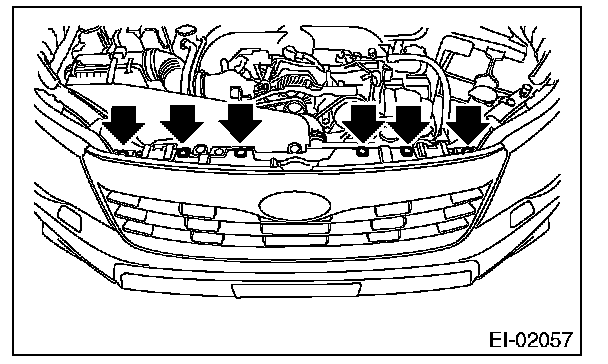
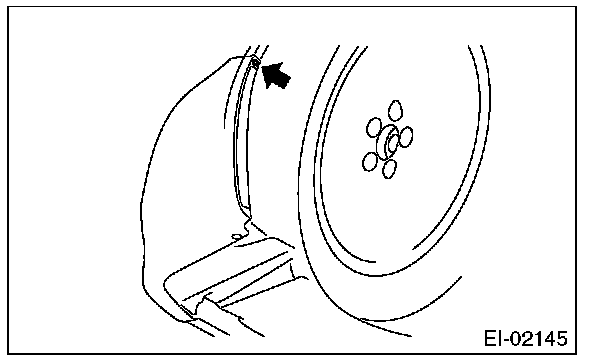
3. Remove the clips from the fender.
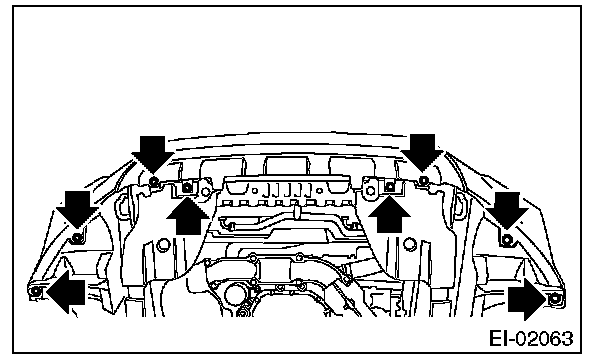
4. Remove the clips at the lower side of bumper.
5. Disconnect the fog light connectors. (Model with fog light)
6. Detach the flange section on the bumper face side from the front side bracket.
CAUTION: Do not pull forcibly. Doing so may damage the flange sections on the bumper face side.
NOTE: It is easier to detach them from the fender side in the order from (1) to (3), while pulling up the bumper face to the direction of arrow (B) (upward).
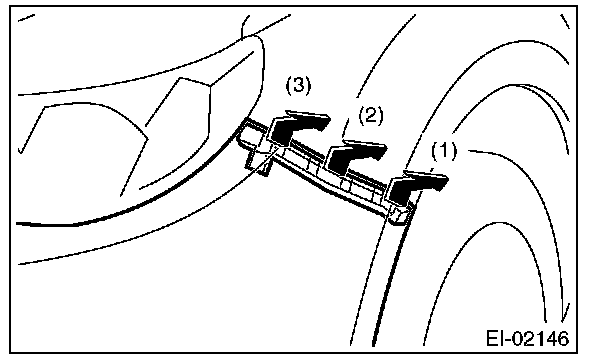
7. Remove the bumper face from vehicle body.
8. Remove the front grille from the bumper face.
9. Remove the fog light from bumper face.
2. FRONT BUMPER BEAM ASSEMBLY
1. Disconnect the ground cable from the battery.
2. Remove the front bumper face.
3. Remove the energy absorber foam from the bumper beam assembly.
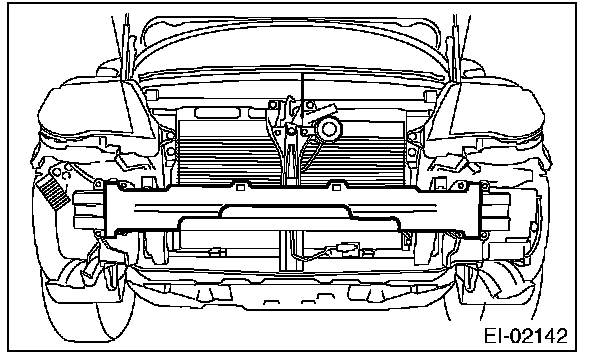
4. Remove the bolts, and remove the bumper beam assembly from vehicle body.
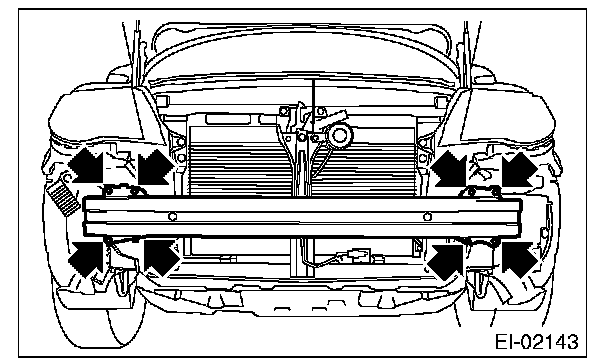
NOTE: After all bolts are removed, raise the whole bumper beam a little to remove it from vehicle body.
INSTALLATION
1. FRONT BUMPER FACE
1. Install in the reverse order of removal.
2. Securely attach the bumper tabs (A) to the plastic bracket (B).
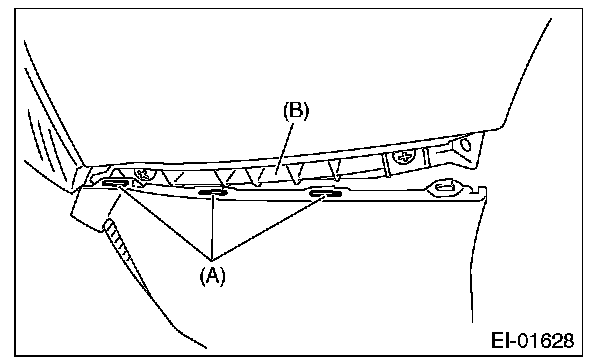
2. FRONT BUMPER BEAM ASSEMBLY
Install in the reverse order of removal.
Tightening torque: Refer to "COMPONENT" of "General Description".