Removal and Replacement
Engine AssemblyREMOVAL
1) Set the vehicle on a lift.
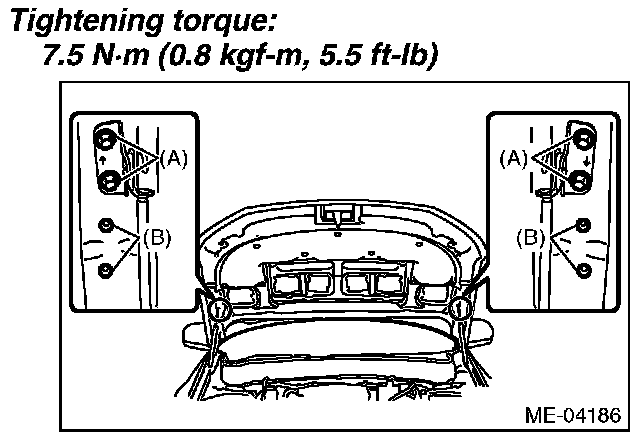
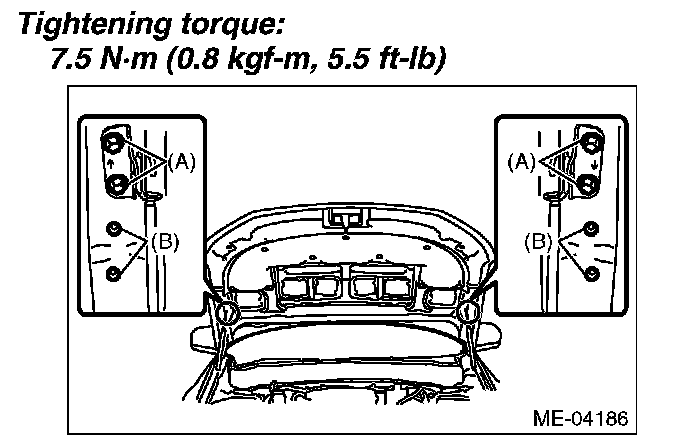
2) Change the bolt installation position from (A) to (B), then open the front hood completely.
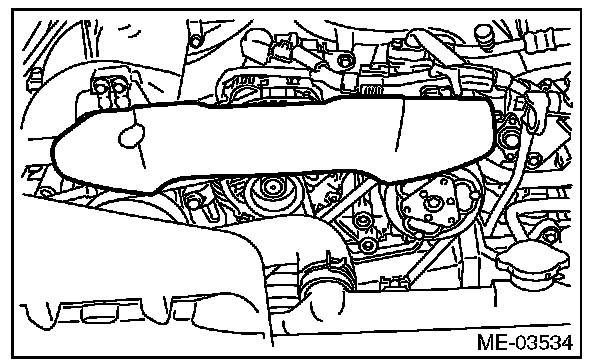
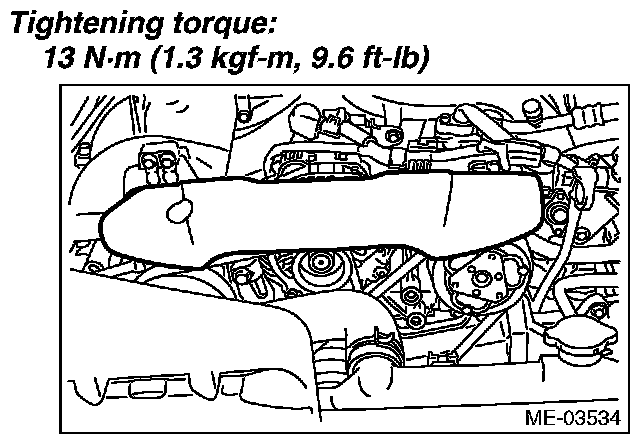
3) Remove the V-belt covers.
4) Collect the refrigerant from A/C system.
5) Release the fuel pressure.
6) Remove the battery.
7) Remove the air intake duct (rear), air cleaner case and air intake chamber.
8) Remove the radiator.
9) Disconnect the A/C pressure hoses from A/C compressor.
10) Remove the air intake chamber stay.
11) Disconnect the following connectors and cables.
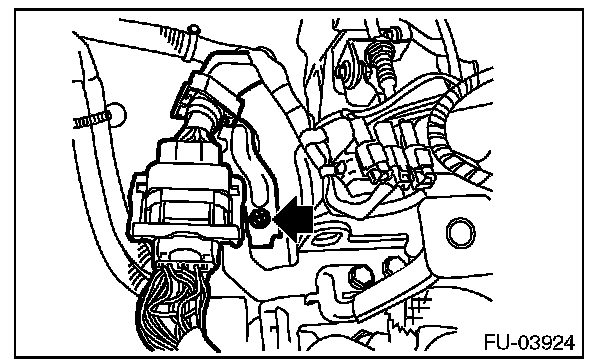
1) Remove the bolt, and disconnect the engine harness connector from the bulkhead harness connector and rear engine hanger.
2) Generator connector and terminal
3) A/C compressor connector
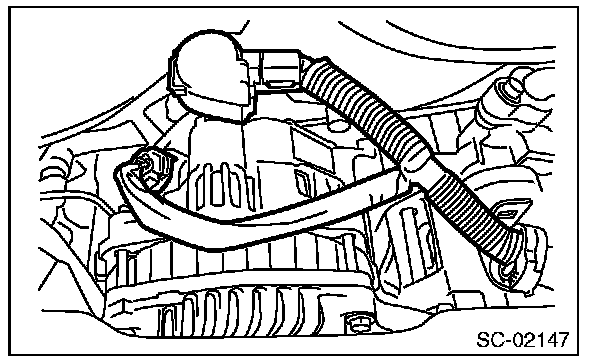
12) Disconnect the following hoses.
1) Brake booster vacuum hose
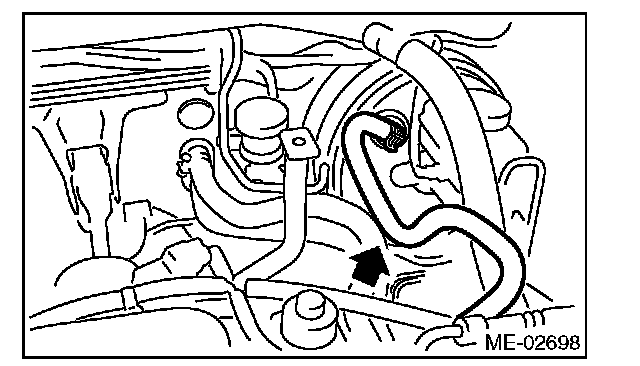
2) Heater inlet hose and heater outlet hose
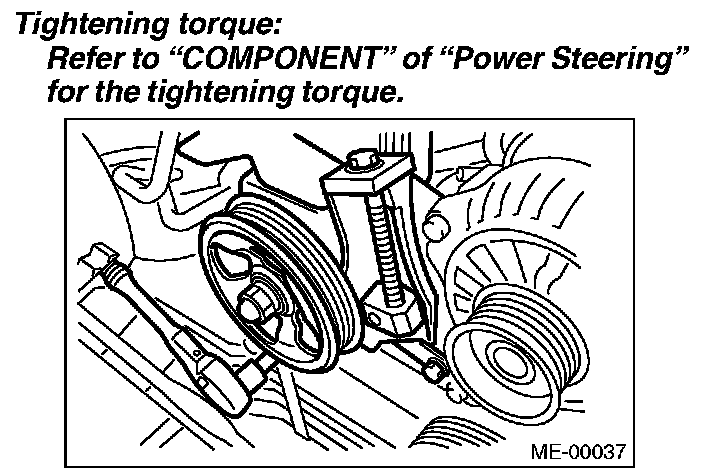
13) Remove the power steering pump.
1) Remove the front side belts.
2) Power steering pump switch connector
3) Remove the power steering pump from the engine.
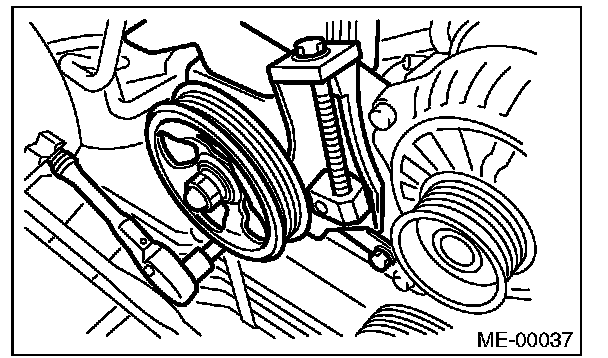
4) Place the power steering pump on the right side wheel apron.
14) Lift up the vehicle.
15) Remove the front and center exhaust pipes.
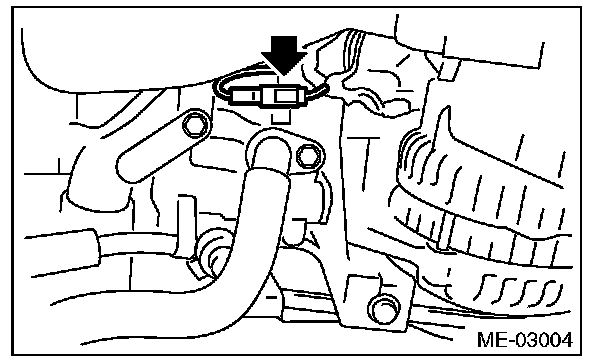
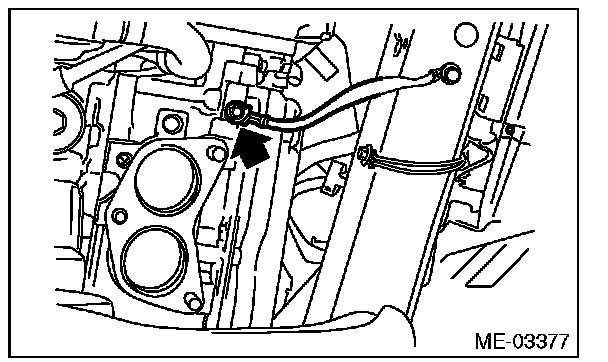
16) Disconnect the ground cable on the engine side.

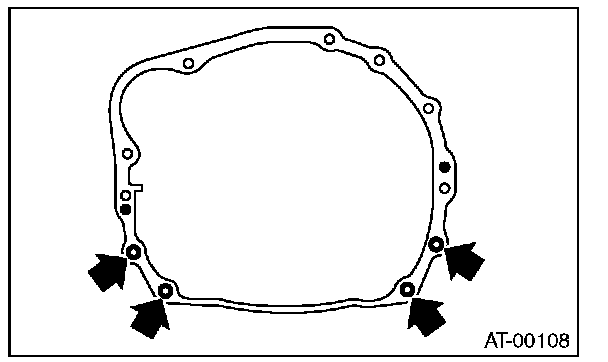
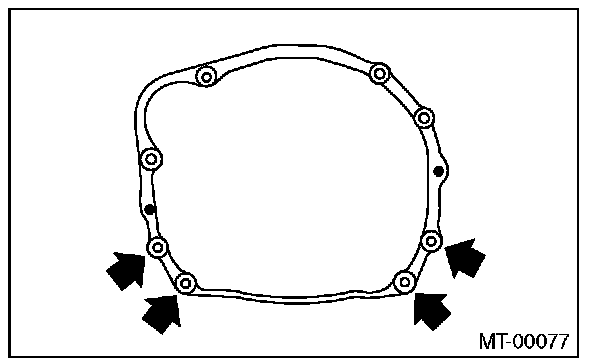
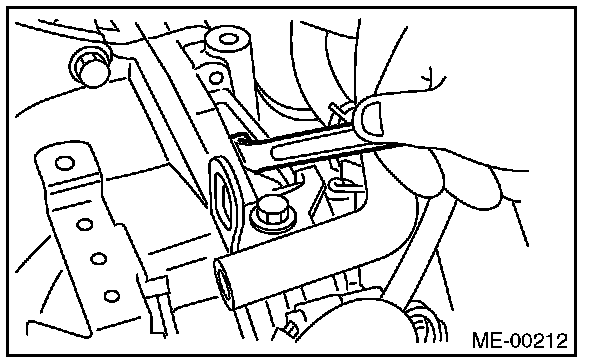
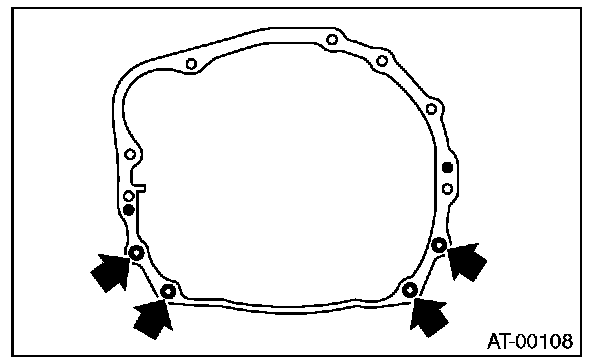
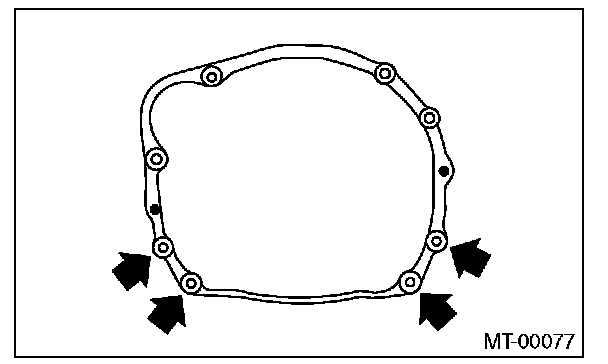
17) Remove the bolts and nuts which hold the lower side of transmission to the engine.
^ AT model
^ MT model
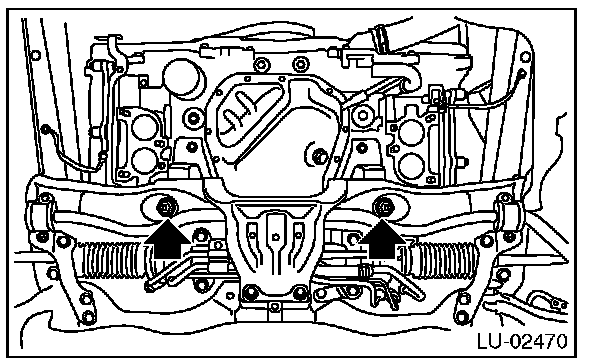
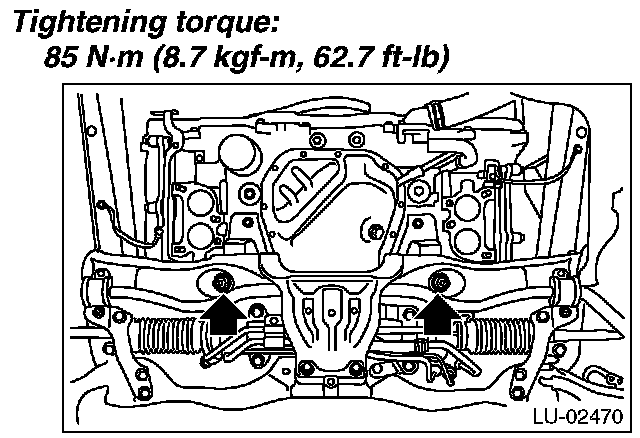
18) Remove the nuts securing the engine mount to the front crossmember.
19) Lower the vehicle.
20) Separate the torque converter clutch from the drive plate. (AT model)
1) Remove the service hole plug.
2) Insert the wrench into the crank pulley bolt and rotate the crank pulley to remove the bolts which hold torque converter clutch to drive plate.
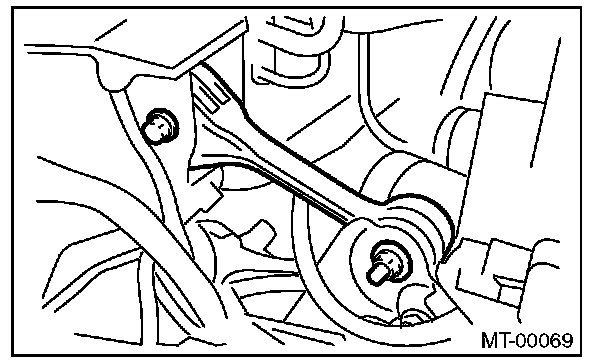
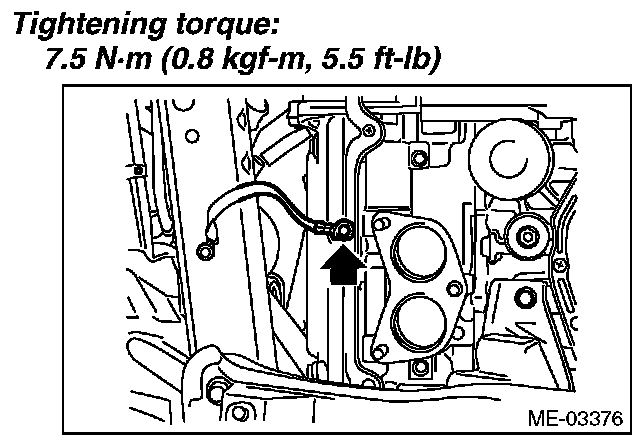
21) Remove the pitching stopper.
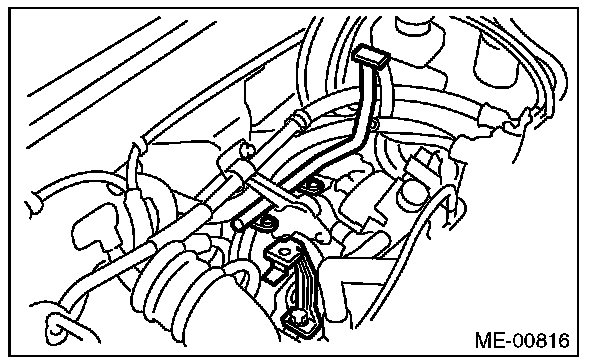
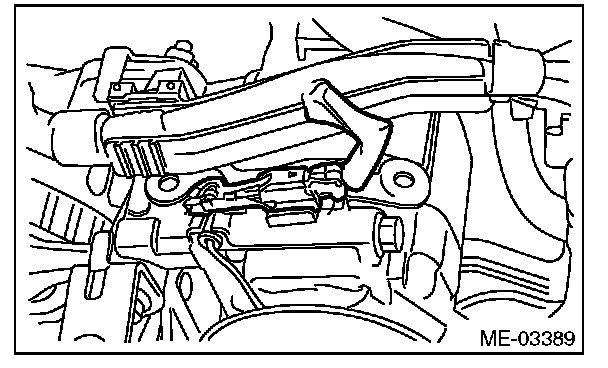
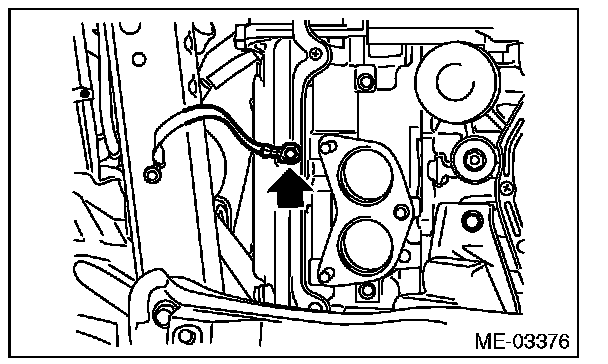
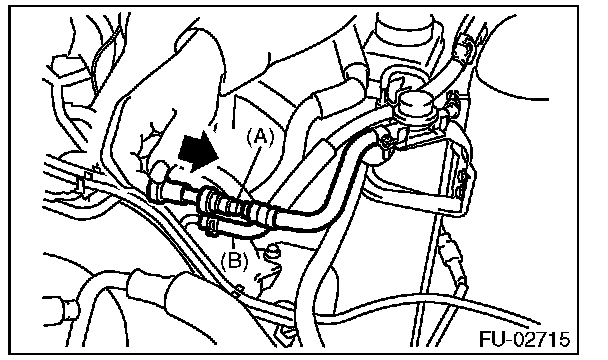
22) Disconnect the fuel delivery hose (A) and evaporation hose (B).
CAUTION:
^ Be careful not to spill fuel.
^ Catch the fuel from hoses using a container or cloth.
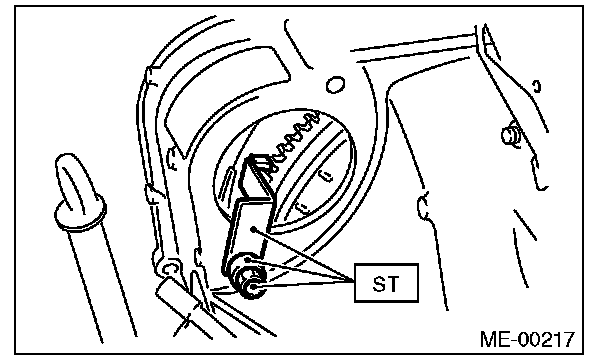
1) Attach ST to the fuel delivery pipe and push ST in the direction of arrow mark to disconnect the quick connector of the fuel delivery hose (A).
ST 42099AEOOO QUICK CONNECTOR RELEASE
2) Remove the clip and disconnect the evaporation hose (B) from the pipe.
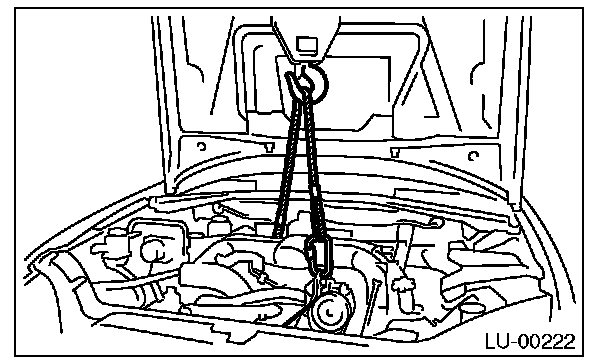
23) Support the engine with a lifting device and wire ropes.
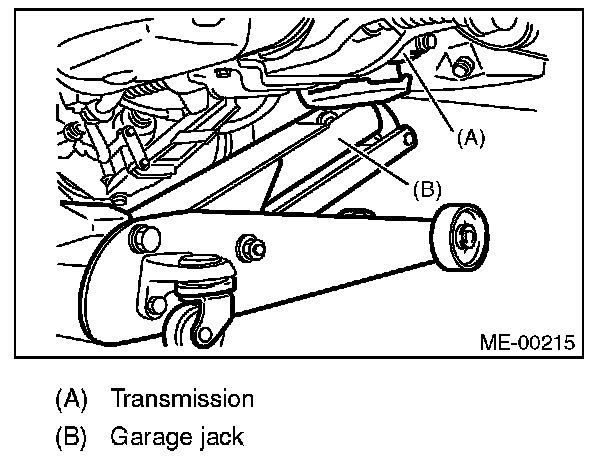
24) Support the transmission with a garage jack.
CAUTION:
Be sure to always perform this work, in order to prevent the transmission from lowering for its own weight.
25) Separation of engine and transmission
CAUTION:
Before removing the engine away from transmission, check to be sure no work has been overlooked.
1) Remove the starter.
2) Attach the ST to the torque converter clutch case. (AT model)
ST 498277200 STOPPER SET

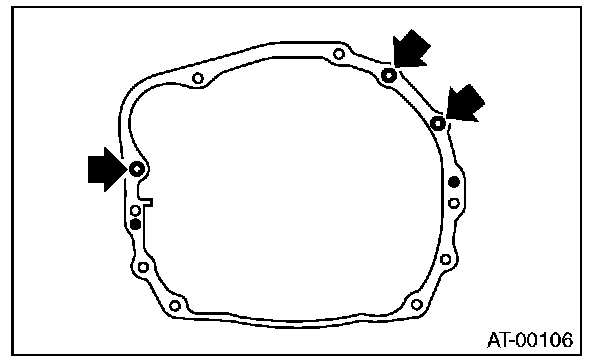
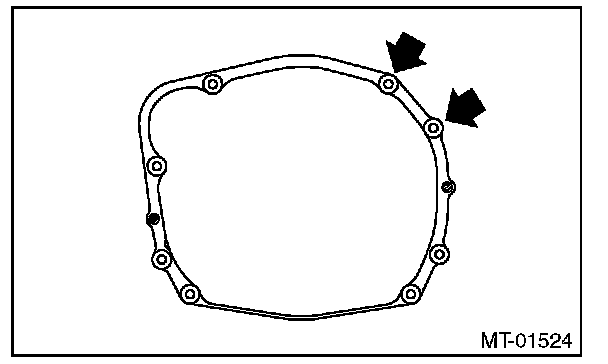
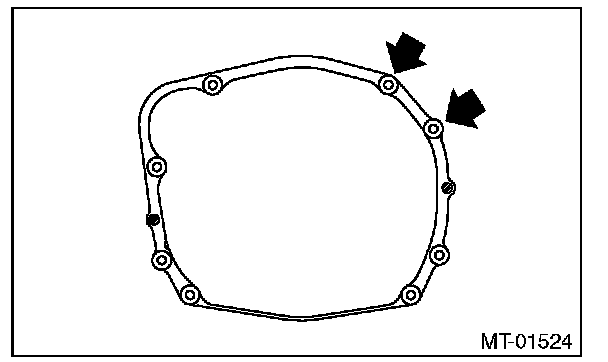
3) Remove the bolts which hold the upper side of the transmission to the engine.
^ AT model
^ MT model
26) Remove the engine from vehicle.
1) Slightly raise the engine.
2) Raise the transmission with garage jack.
3) Move the engine horizontally until main shaft is withdrawn from clutch cover. (MT model)
4) Move the engine from engine compartment slowly.
NOTE:
Be careful not to damage adjacent parts or body panels with crank pulley, oil level gauge, etc.
27) Remove the engine mounting from the engine.
INSTALLATION
1) Install the engine mounting onto the engine.
Tightening torque:
35 Nm (3.6 kgf-m, 25.8 ft-lb)
2) Apply a small amount of grease to splines of main shaft. (MT model)
Grease:
NICHIMOLY N-130 or equivalent
3) Position the engine in engine compartment and align it with transmission.
NOTE:
Be careful not to damage adjacent parts or body panels with crank pulley, oil level gauge, etc.
4) Tighten the bolts which hold upper side of transmission to engine.
Tightening torque:
50 Nm (5.1 kgf-m, 36.9 ft-lb)
^ AT model

^ MT model
5) Remove the lifting device and wire ropes.

6) Remove the garage jack.
7) Install the pitching stopper.
8) Remove the ST from torque converter clutch case. (AT model)
NOTE:
Be careful not to drop the ST into the torque converter clutch case when removing the ST.
ST 498277200 STOPPER SET
9) Install the starter.
10) Install the torque converter clutch to drive plate. (AT model)
1) Insert the wrench into the crank pulley bolt and rotate the crank pulley to attach the bolts which hold torque converter clutch to drive plate.
NOTE:
Be careful not to drop bolts into the torque converter clutch case.
2) Install the service hole plug.
11) Install the power steering pump.
1) Install the power steering pump.
2) Connect the power steering pump switch connector.

3) Install and adjust the front side belt.
12) Lift up the vehicle.
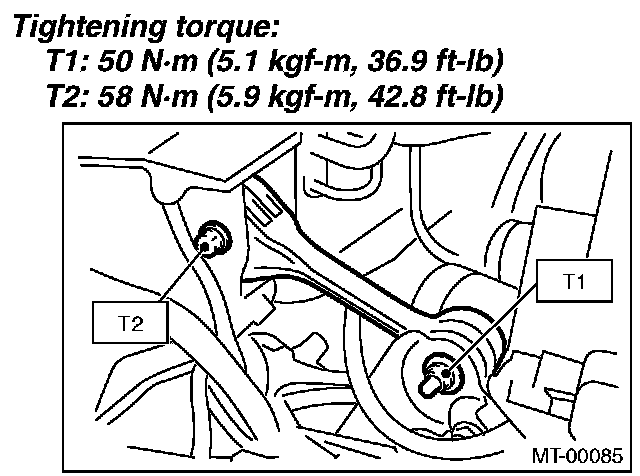
13) Attach the bolts and nuts which hold lower side of the transmission to engine.
Tightening torque:
50 Nm (5.1 kgf-m, 36.9 ft-lb)
^ AT model
^ MT model
14) Attach the nuts which secure the engine mount to the crossmember.
15) Connect the ground cable.
16) Install the front and center exhaust pipe.
17) Lower the vehicle.
18) Connect the following hoses.
1) Fuel delivery hose and evaporation hose
2) Heater inlet hose and heater outlet hose
3) Brake booster vacuum hose
19) Connect the following connectors and terminals.
1) Engine harness connectors
Tightening torque:
6.4 Nm (0. 7 kgf-m, 4.7 ft-lb)
2) Generator connector and terminal
Tightening torque:
15 Nm (1.5 kgf-m, 11.1 ft-lb)
3) A/C compressor connector
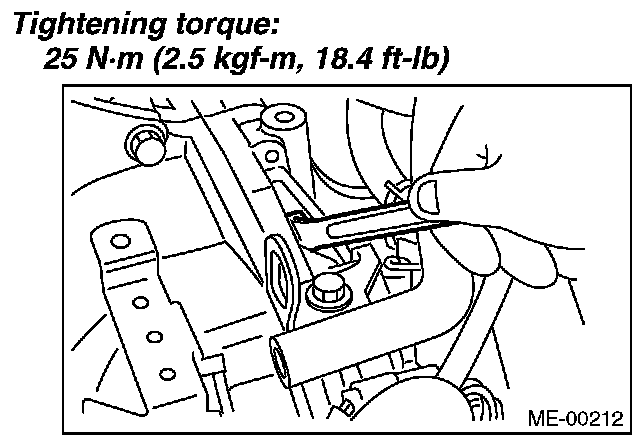
20) Install the air intake chamber stay.
Tightening torque:
16 Nm (1.6 kgf-m, 11.8 ft-lb)
21) Install the A/C pressure hoses.
22) Install the radiator.
23) Install the air intake duct (rear), air cleaner case and air intake chamber.
24) Install the battery.
25) Fill engine coolant.
26) Check the ATF level and replenish it if necessary. (AT model)
27) Charge the A/C system with refrigerant.
28) Install the V-belt cover.
29) Change the bolt installation position from (B) to (A), then close the front hood.
INSPECTION
1) Check that pipes, hoses, connectors and clamps are installed firmly.
2) Check the engine coolant is at specified level.
3) Check that the ATF is at specified level. (AT model)
4) Start the engine and check for exhaust gas leakage, engine coolant leakage, fuel leakage, noise or vibration.